• Welcome, Guest! We hope you enjoy the excellent technical knowledge, event information and discussions that the BMW MOA forum provides. Some forum content will be hidden from you if you remain logged out. If you want to view all content, please click the 'Log in' button above and enter your BMW MOA username and password.

    If you are not an MOA member, why not take the time to join the club, so you can enjoy posting on the forum, the BMW Owners News magazine, and all of the discounts and benefits the BMW MOA offers?

Collision repairs

glenfiddich

TravelsWithBarley.com
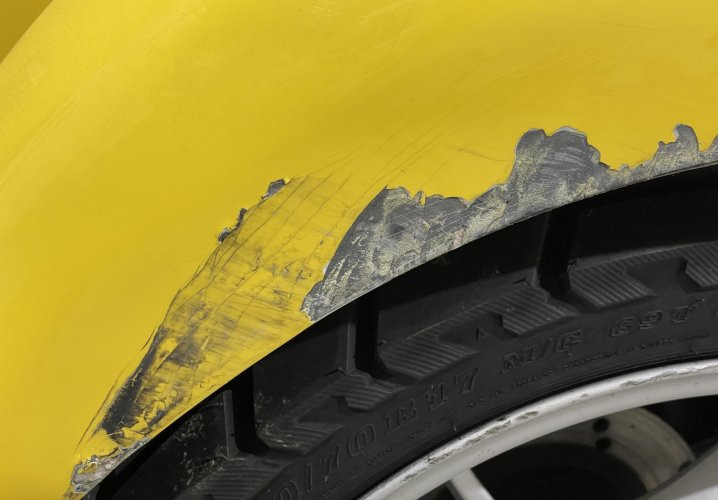
Last June, in West Virginia on our way to the BMW rally, a young woman pulling out of a hospital parking lot looked right at us, laughed as she pointed my dog out to her passenger, then looked the other way, gunned it and hit us broadside. Nobody was hurt, though she burst into tears when Glenlivet refused to allow her to hug him. Damage to the sidecar was minimized as I saw her in time to swerve so we took a glancing blow: the fender was gouged and cracked, the fiberglass tub itself had a three inch crack, the tire was torn but held air, the rim was gouged, and the camber control went to the full down position every time we hit a moderate bump. The front of her Chevy was completely torn off; her grill, license plate, bumper cover, passenger side headlight and turn signal were lying in the road.

When the police showed up my heart sank as she had grown up with him and they were on a first name basis. I hoped for professionalism and he was, in fact, very thorough and courteous, but the crash was listed as “no fault.”

I'm insured by Progressive and wasn’t sure what to expect. My only accident ever was in 1977 when an elderly woman in a huge Cadillac backed out of her driveway and hit my tiny Mazda while I was stopped at a controlled intersection.

But Progressive was fantastic from the start. I reported the crash immediately, but with duct tape and a new tire was able to ride home. A week later their adjuster came to my home to evaluate the damage. His first comment was “That’s some custom fiberglass work. And there’s no orange peel in the paint; someone spent some time on this rig!” He noted the point of impact and flat out rejected the police finding of no fault. (A few weeks later my deductible was refunded. Progressive had gone after the driver for the cost of repairs.)

The custom shop where the owner lets me work on my stuff was slammed, but winter is his slow time so if I could wait till the snow flew he’d let me do the work with his help as needed. Repairs started today. The lights, hardware, and electrical connections were unhooked, the tub removed and placed on a platform, the cracked fender and trim pieces removed, and all the adhesives taken off.

And now the work begins.
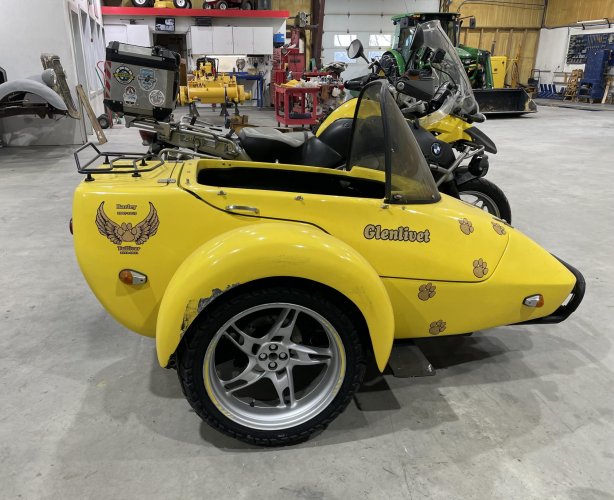
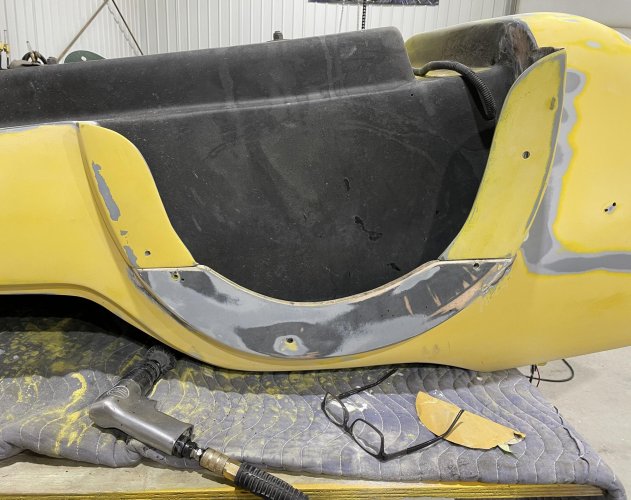
IMG_7206.jpg
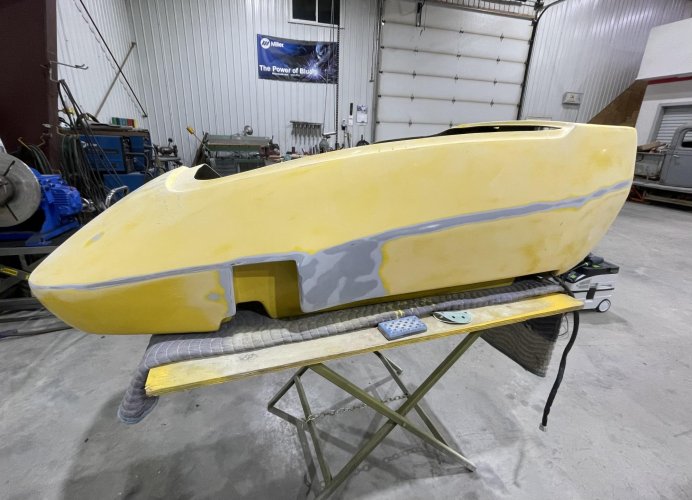
Side view showing fender damage

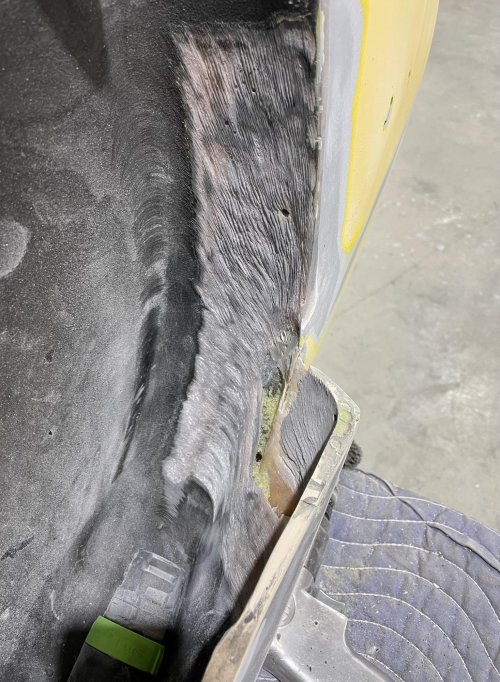
IMG_7208.jpg
Closeup. The side of the tub has similar damage
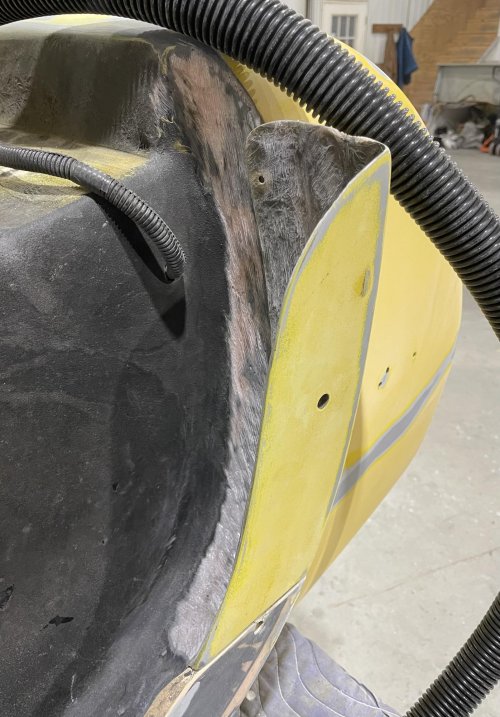
IMG_7210.jpg
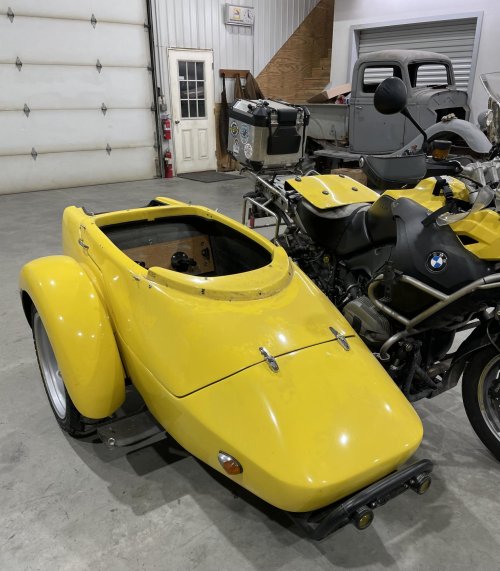
All the hardware needs to come off. Every hinge, twist lock and snap
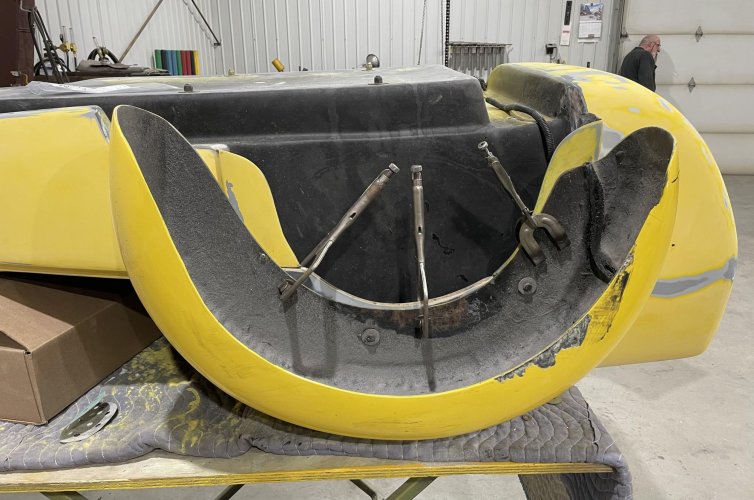
IMG_7216.jpg
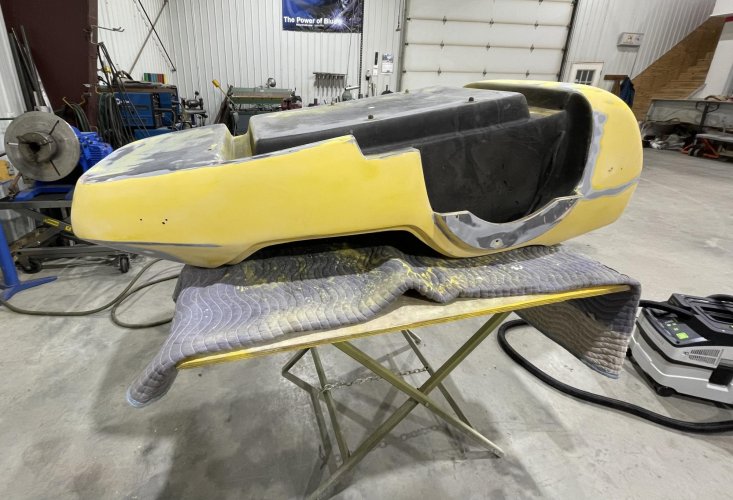
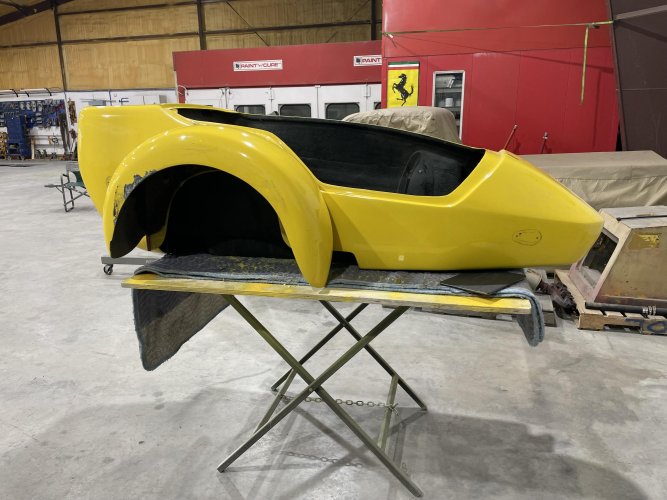
On the gurney prepping for surgery
 
Glad you AND the dog faired well. I’m also glad to hear you were treated well by the insurance company………and you were savvy enough to realize what was going on at the accident scene. :deal

Good luck on the repairs.

OM
 
No fault, my ass! Pull out of a parking lot into a street and it wasn't her fault?!

Stories like this are why I think there is not much you can do, other than be alert. Big, bright yellow side car, and I will bet you had your lights on. Apparently she saw you and still pulled out! It makes zero sense.

Glad you and your traveling companion are of. Fiberglass and metal can be repaired.

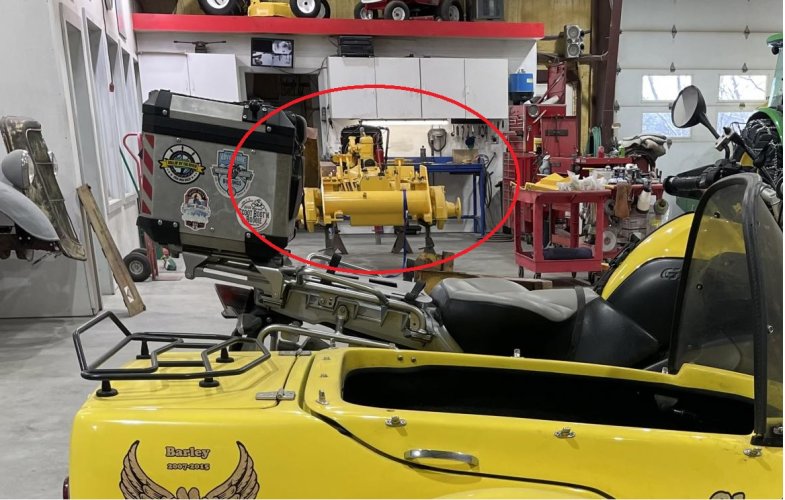
Nice shop! What is this project?

whatisit.jpg
 
@PoorOB - That’s an old Allis-Chalmers forklift undergoing a full restoration. My friend finds some parts online. What he can’t find he machines from scratch. The man is a wizard!

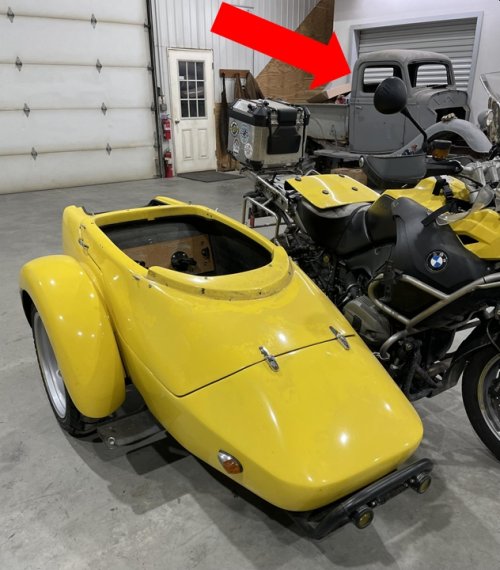
@20774 - The old truck is a Ford from the 30s. He’s going to chop it so his chopped ‘56 Ford has company. He also restored a Ferrari that had been flooded in a Florida hurricane. Funny thing is none of his restored vehicles can make it down his long dirt driveway; they all bottom out on the exposed rocks.

I help with the grunt work, sandblasting or helping move heavy parts. In return I can use his shop and his expert advice. His ability to impart knowledge rivals that of the best of my past professors. Simply an amazing guy!
 
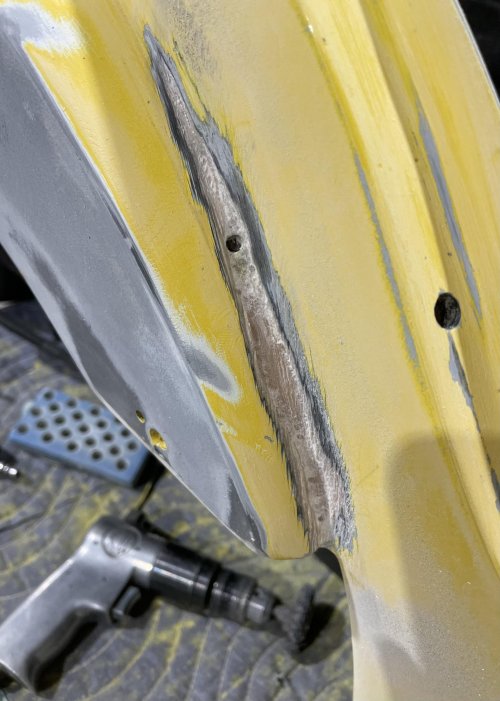
Work continues. Today I focused on the cracks in the tub, drilling the ends then removing the damaged material. In the process I found some voids, defects from the original manufacture, and exposed them so they could be eliminated. The end result will be a much stronger tub

IMG_7236.jpg
The crack forward of the fender took a glancing blow and wasn’t bad at all

IMG_7231.jpg
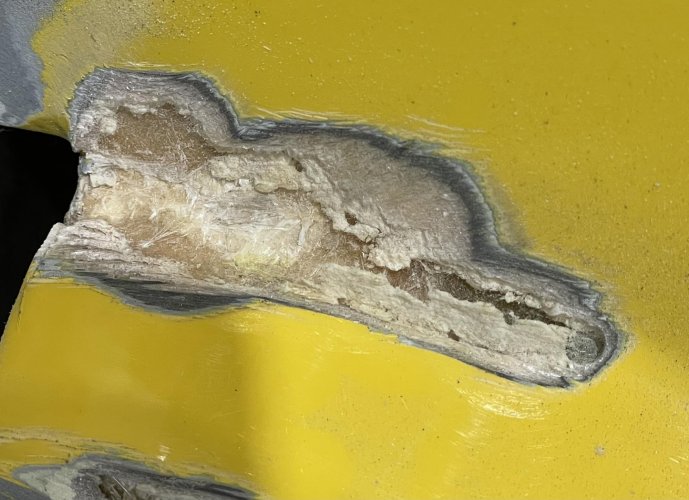
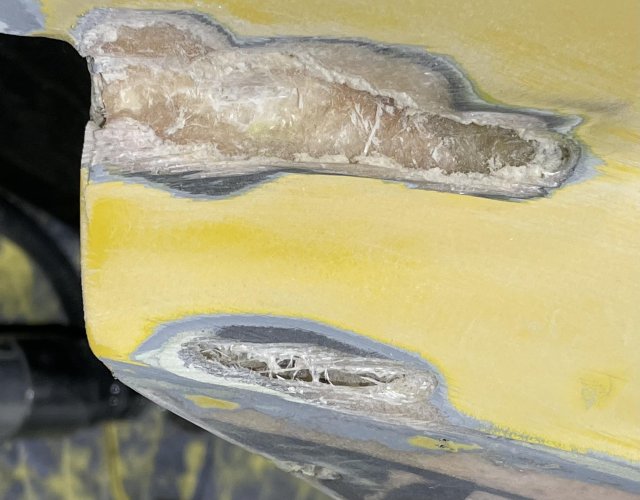
Damage to the rear fender attachment point was more extensive, complicated by a void between layers of fiberglass. I have to completely open the gap in order to eliminate it with fiberglass matting.

IMG_7232.jpg
All loose material removed. With solid margins this defect is ready to fix. Note that I found another gap to fix, however.

IMG_7233.jpg
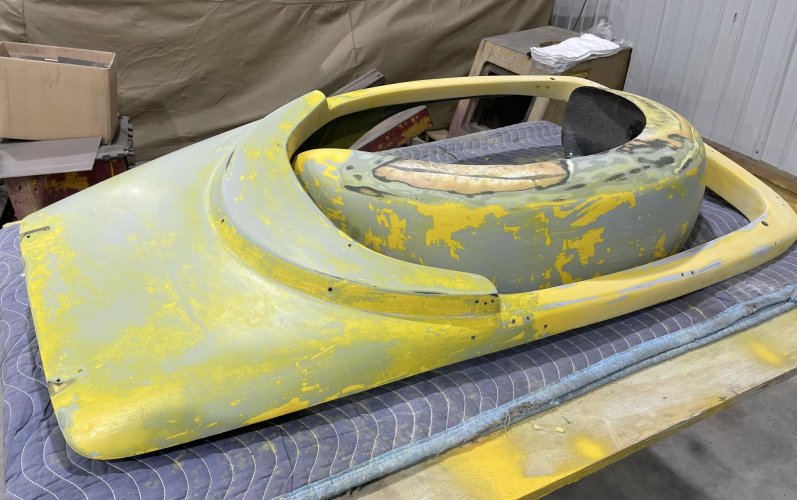
The paint gets scuffed to prep for the application of stripper. Tomorrow I’ll flip the tub over and scuff the bottom side
 
I’m glad that you & Glenlivet are ok. Stuff can be fixed or replaced. Karma will get that stupid idiot and the moron cop.
 
I’m glad that you & Glenlivet are ok. Stuff can be fixed or replaced. Karma will get that stupid idiot and the moron cop.

Karma already bit her twice. First, the damage to her car was far more extensive than the damage to my rig. Second, my insurance (Progressive) went after her bigly.
 
One tip I’ve learned over the years is that damage and wear are easier to spot in good light while I’m in a comfortable position. Gone are the days when my then-lithe body could contort itself to check out some barely accessible nook or cranny. So as part of my end of season inspection (especially after being run into) I flip the tub upside down, don my reading glasses, and use a bright light.

IMG_7237.jpg

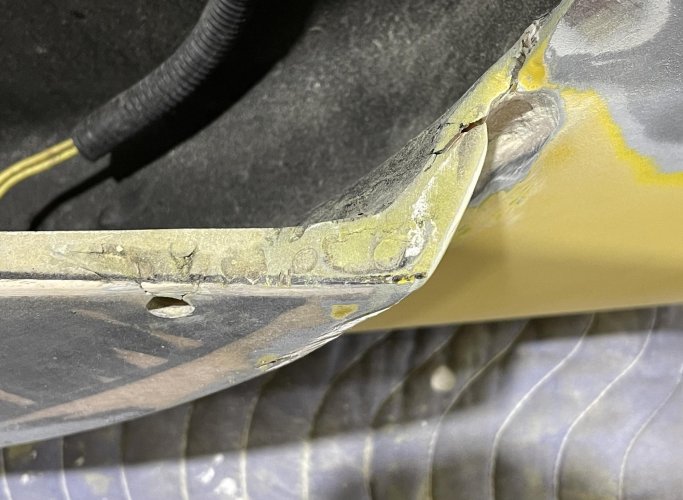
I paid particular attention to where the damaged fender attaches to the body of the tug. I’d already found an outward facing crack in that spot and now, looking down at the underside in good lighting it was obvious the damage was more extensive than at first glance.

IMG_7238.jpg

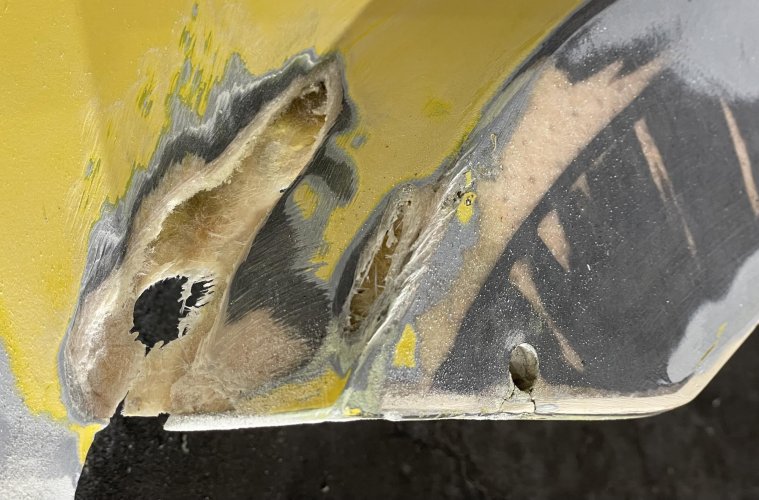
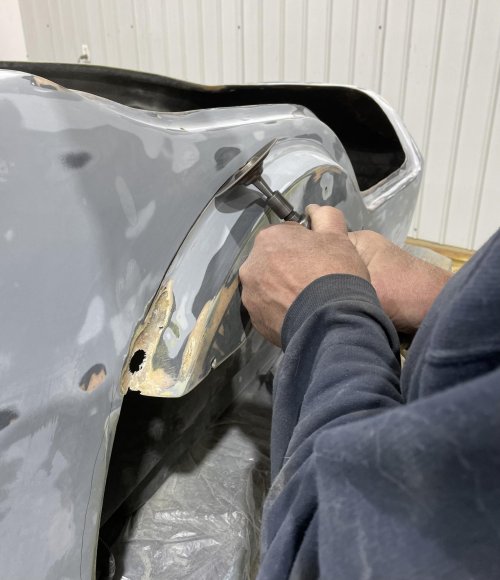
Damaged fiberglass can be repaired and restored to like new condition. It’s time consuming but not difficult, requiring much less skill than trying to straighten crumpled metal. Like a dentist determined to remove all hints of decay before filling a tooth, I used a wire wheel on a pneumatic drill to dig out all bits of fractured fiberglass. Much of it went all the way through, leaving me with a gaping hole. I’ll use tape to form a template in place, then build a patch using fiberglass fabric and matting in layers. Once that cures the tape will be removed and the patch will serve as the template as I repeat the process from the other side.

IMG_7241.jpg
Note also the fractures under the hole where the fender is bolted to the tub. There are several spots like that where fasteners transferred the force of the impact to the fiberglass. Each will be repaired and redrilled

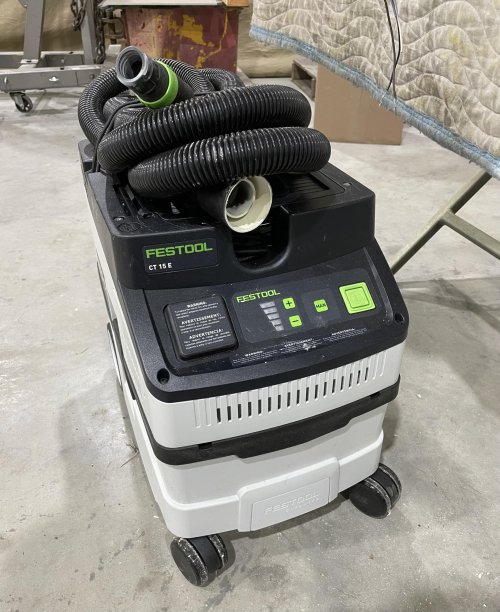
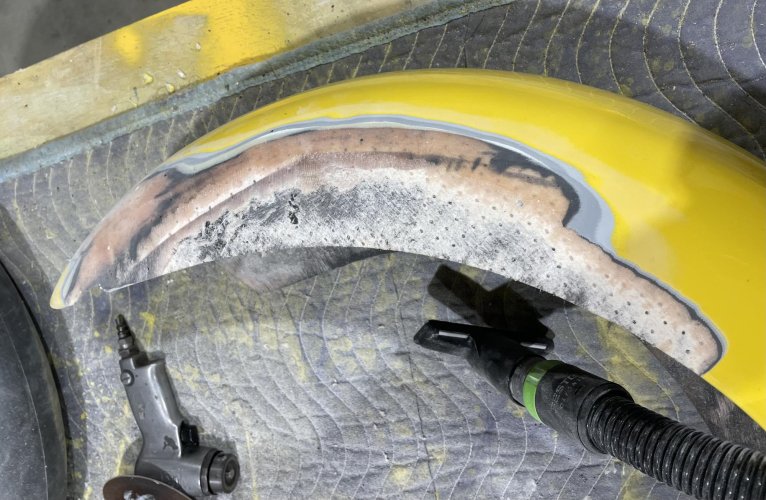
Back in 2018 when I rebuilt and modified this sidecar the entire shop was filled with dust, as was my clothing. The old Sears shop vac didn’t do much at all. This time I decided to try a HEPA vac, and settled on the smallest Festool model. It’s doing a fantastic job! Despite all this sanding the shop (and my clothing) remains free of dust. Definitely a good tool to have.

IMG_7243.jpg
 
Festool has some really nice tools and tool ideas/concepts. 👍
It has been suggested that they come out of the Bosch factory but I don’t know.

OM
 
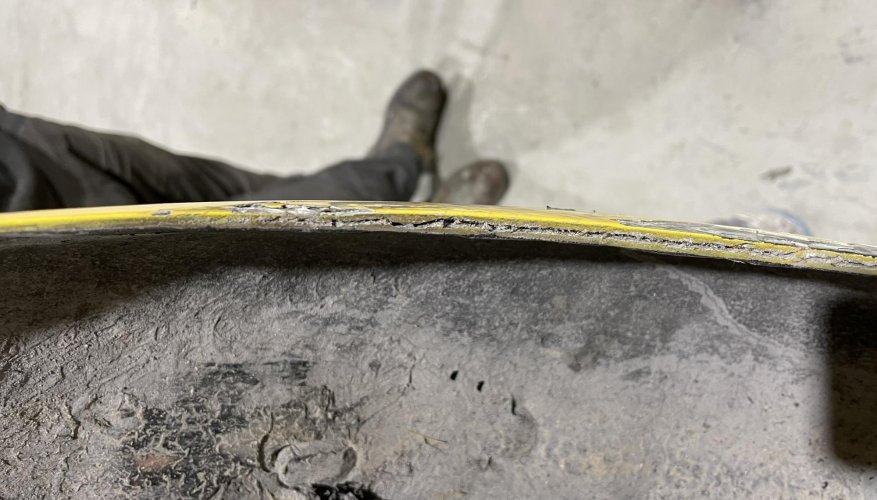
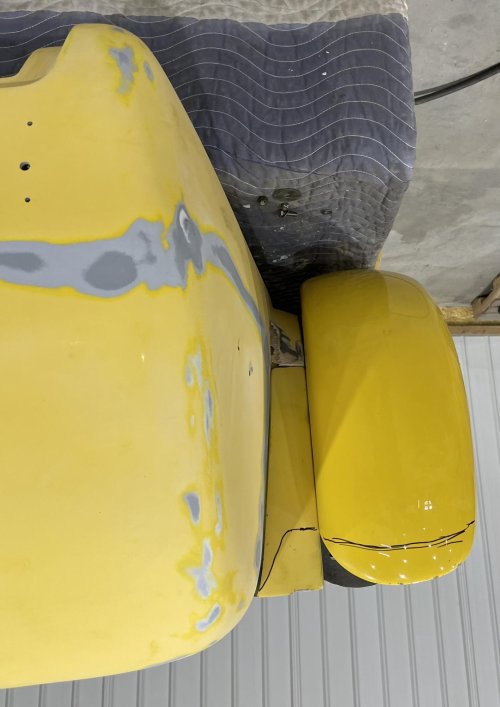
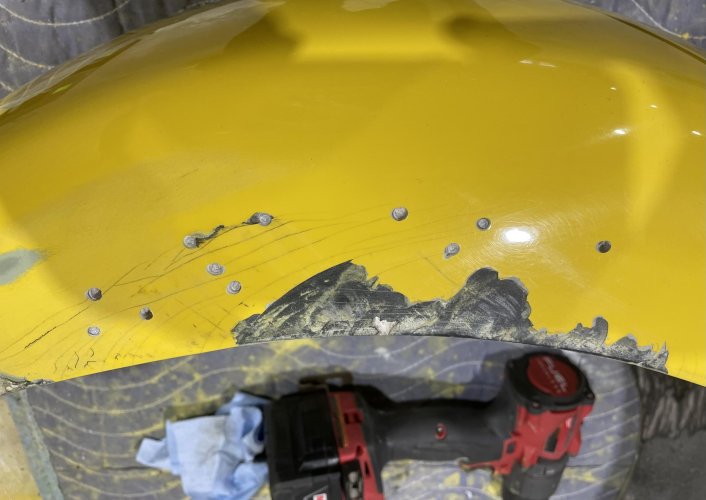
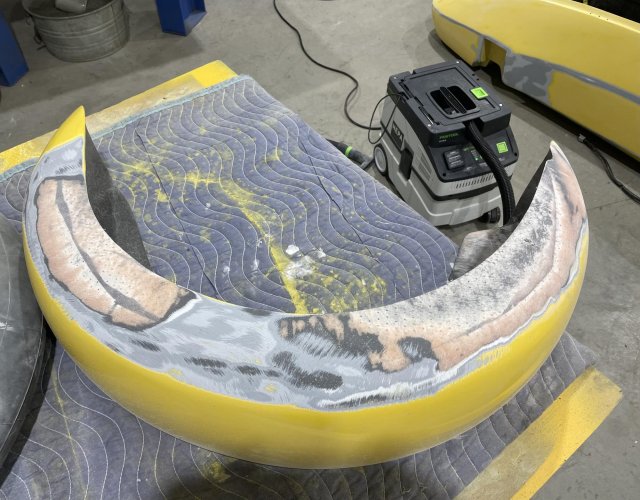
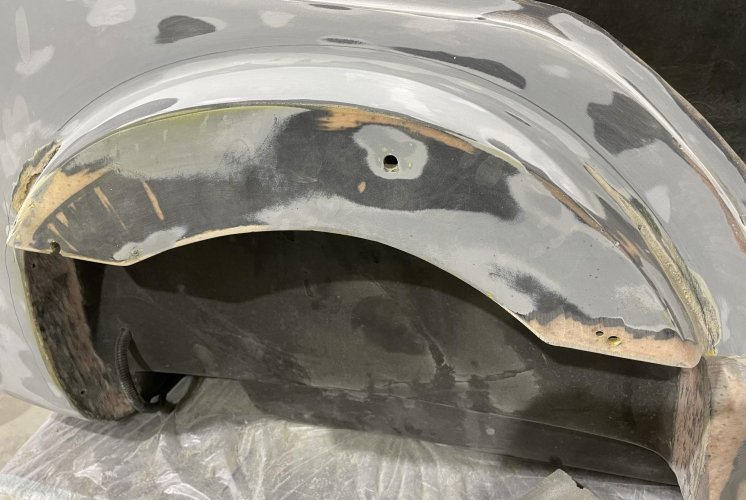
The fender, which served as a sort of crush zone in the crash, took the brunt of the force and shows it. In addition to the gouge portions of it have delaminated. Fixing this will take a lot of work. I’ve never particularly liked the design so will be toying with various ideas for changing it

IMG_7252.jpg

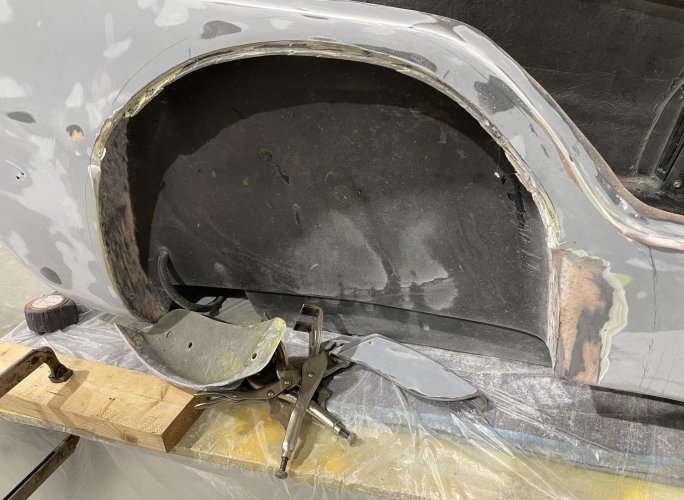
The trim pieces that fit between the tub and fender are particularly unattractive and as they are attached with just two short screws they both fell off at impact. Duct tape got us home but I’ll be fiberglassing them into place for additional structural strength.

IMG_7249.jpg

Fiberglass mods adhere better when the surface they bond to has some bite. I prep the surface with a wire wheel as it gives serious bite.

IMG_7244.jpg
IMG_7245.jpg

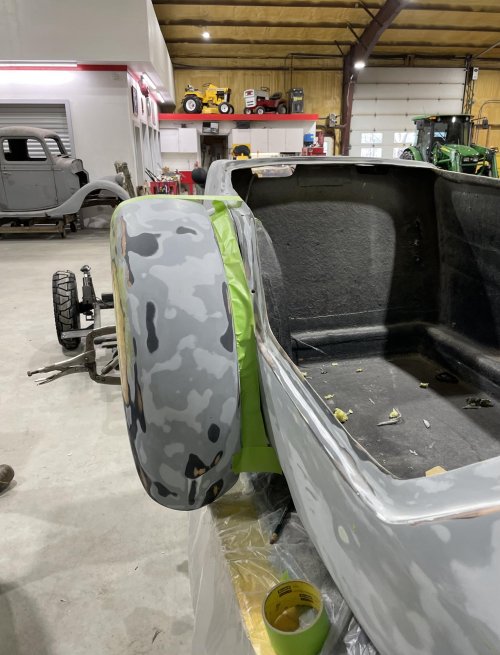
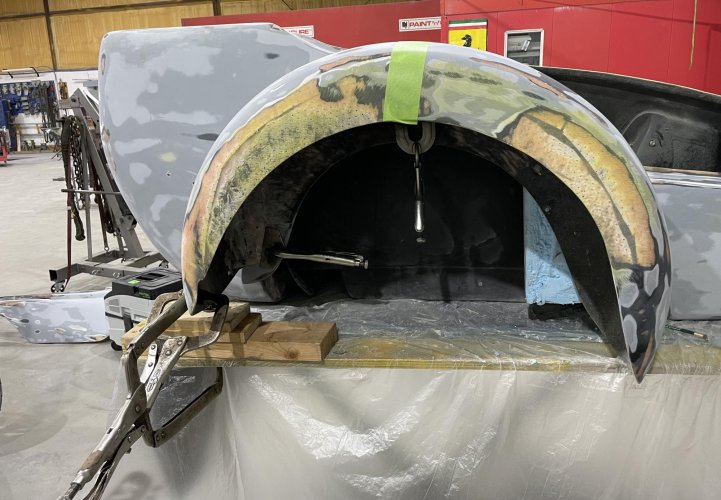
Fender clamped into place. The trim pieces look like afterthoughts. You can’t see it in this image but the mating surfaces aren’t square. The manufacturer got around that by using bolts and double sided adhesive, but once those trim pieces are fiberglassed into position I’ll use a long board to sand till the mating surface is perfectly flat and square.

IMG_7251.jpg

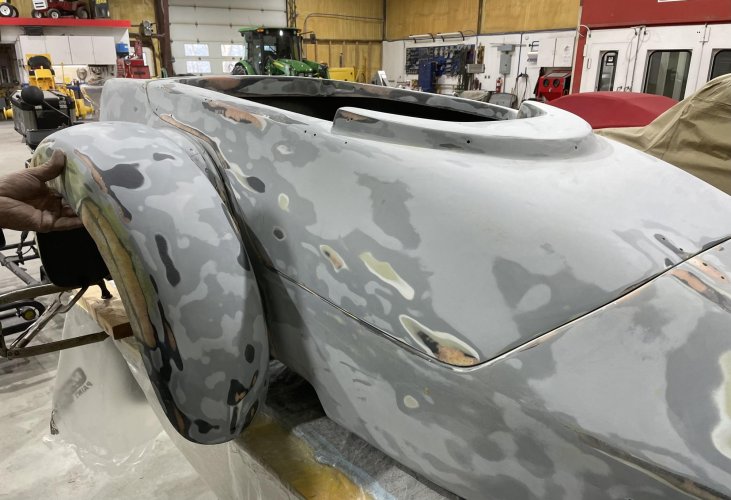
Lines show one of my ideas for improving the aesthetically challenged lines at the rear of the fender.

IMG_7253.jpg
 
Love the work, it's going to be better than new when you finish.
I've also liked fiberglass repairs much better than metal, you can form it with less tooling and looks so nice when finished.
Hope you're wearing a mask and long sleeve shirt!
 
Today I worked on the damaged fender. There was no damage to the section I had previously modified as it was structurally much stronger than the original fender. The original, as shown in yesterday’s photo, had delaminated. Just how badly would dictate how to proceed. There were dozens of cracks, too many to drill all of them, so I picked and drill a few of the longer cracks to limit their expansion.

IMG_7254.jpg

The inner fender liner appeared intact so I left it to serve as a template upon which to build my fiberglass repairs. All the damaged material outside of that liner was removed. I kept at it till the edges of the delaminated portion had been reached, then feathered it gently into the surrounding solid material. In the shot below you can see clean margins on the right, but to the left a bit of loose material remains

IMG_7255.jpg

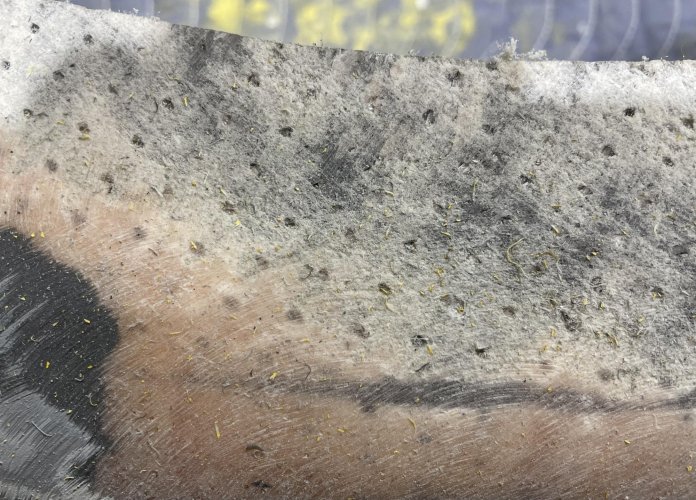
Here’s a closeup of a properly feathered edge ready for the next step. I leave the base distressed to ensure a good grip as I layer in fiberglass matting.

IMG_7257.jpg

Tomorrow I’ll strip off the scuffed paint; next week I’ll dive into fiberglass repairs.

IMG_7256.jpg
 
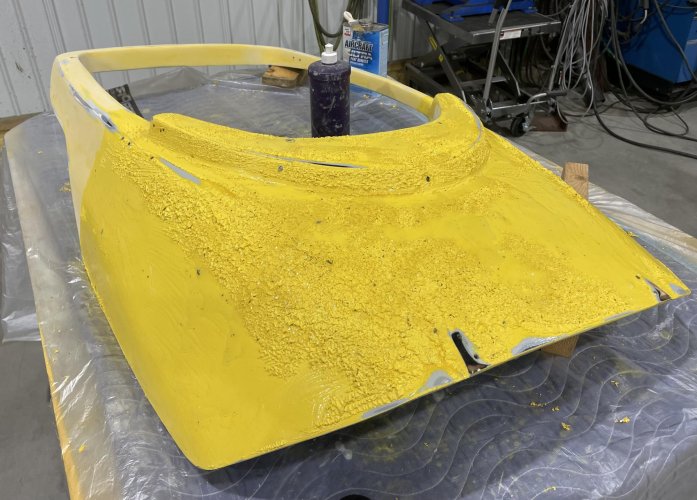
Today marked the start of several days of paint stripping. It will be slow going as I limit my exposure to an hour or so each day. I lost my sense of smell decades ago due to a blow to my brain housing group in the service, so am unable to tell when the fumes reach hazardous levels. And December in Vermont is not the best time to open windows for ventilation.

IMG_7259.jpg

IMG_7260.jpg

IMG_7262.jpg
 
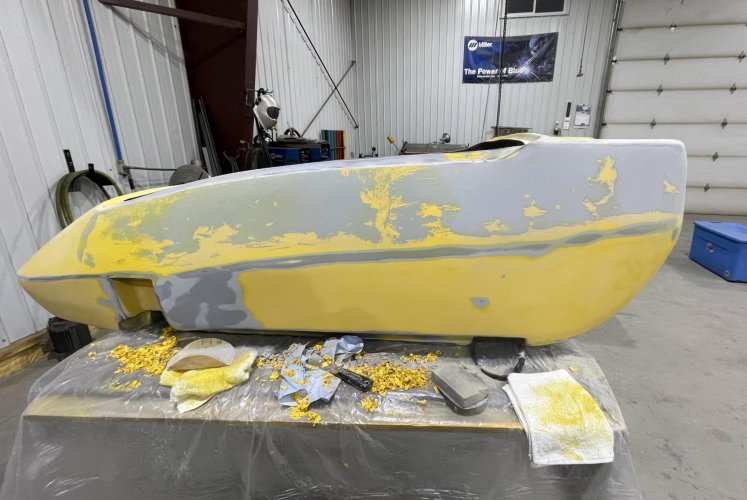
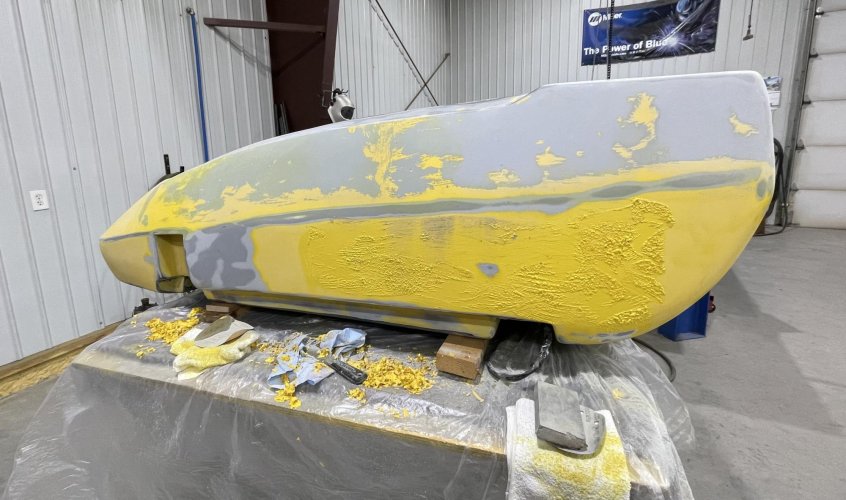
The clamshell lid and trim pieces have been stripped of paint down to the epoxy primer. Now working on the tub one small section at a time.

IMG_7265.jpg
Port side upper chemically stripped, then wiped down with mineral spirits to remove all traces of the stripper. I’ll do the recesses by hand with a sanding block, but the easy to access portions will get the 180 grit treatment with my random orbital sander

IMG_7266.jpg
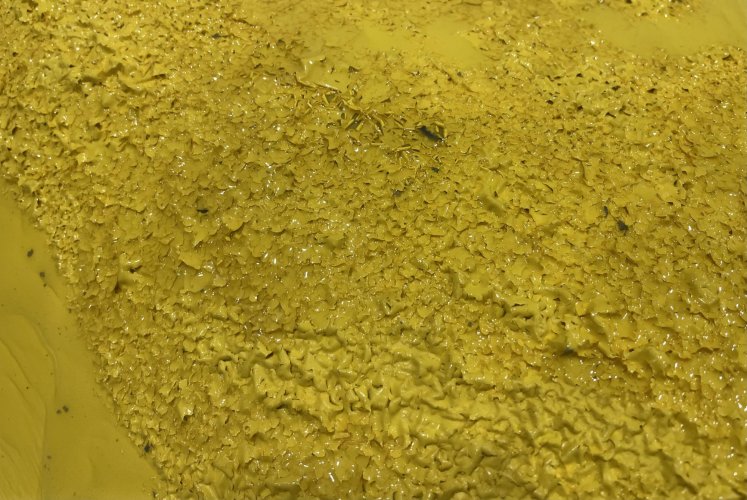
Getting the underside. You can see the paint beginning to blister

IMG_7267.jpg
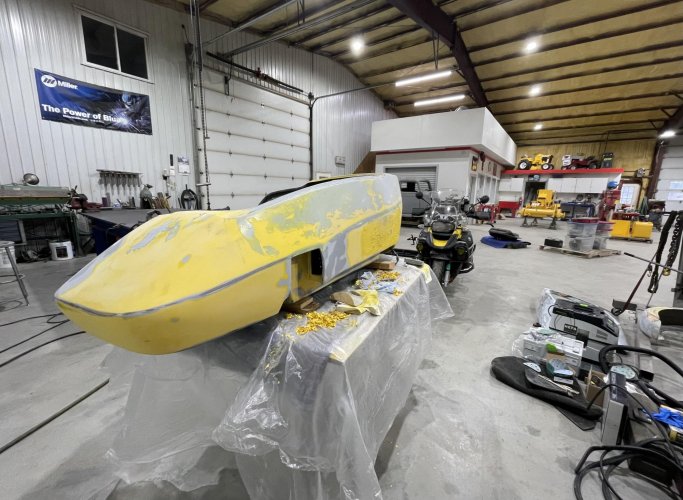
I do small sections of about 2sq ft at a time. It’ll take a few more days to strip off all the paint. Once that’s done I can start working on the collision damage and my planned modifications
 
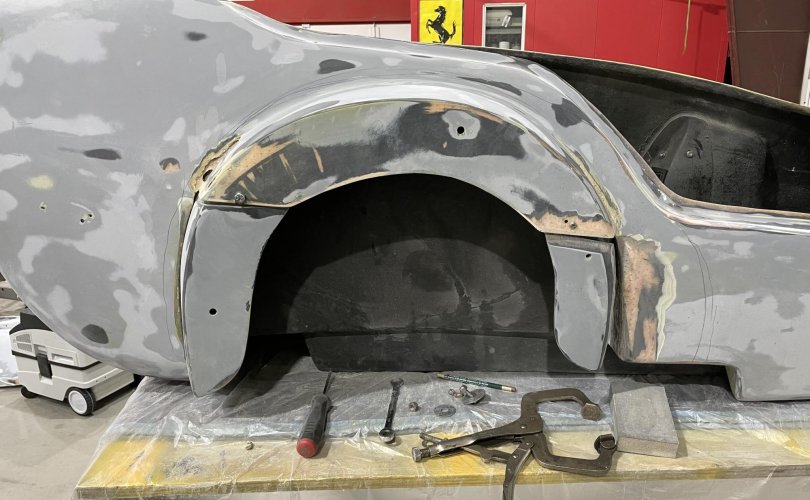
So I was struggling to figure out how to start with three misfit pieces and end up with a graceful arch. This has bothered me for several years and since the worst of the damage involved this area it got me to thinking

IMG_7273.jpg

If only I could move this part up an inch…

IMG_7274.jpg

I have no idea if the plan rattling around in my head would work, but I do have enough confidence in my fiberglassing skills to correct any grievous mistakes I might make. So out came the cutting tool!

IMG_7275.jpg

My first thought was to simply move the cutoff section up an inch, modify those small troublesome trim pieces, and fiberglass the whole thing into place using filler to blend them into one graceful arch. But the compound curves in the tub didn’t lend themselves particularly well to that approach

IMG_7277.jpg

IMG_7276.jpg

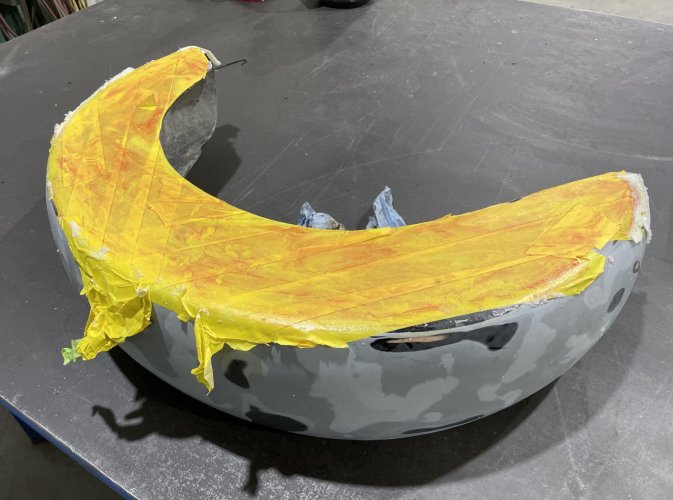
And there was this ugly gap between the fender and tub that I really wanted to eliminate. Partly because of aesthetics but mostly because that deep channel has been a PITA to remove road debris and bug jerky from. So I was all ready to glue a hunk of two inch thick foam to the side of the tub, use a grinder to sculpt it into a work of art, then fiberglass over it before attaching the fender. But that didn’t really solve the compound curve thing. So instead I’m going to try something different. I’ll use wide tape to form a template of sorts, then spray high-density expanding foam. Once that cures I can use the grinder so sculpt it to perfection, with the foam hugging all those curves. This will allow for multiple test fittings of the fender before I fiberglass it. Fingers crossed that it works. If it doesn’t, paint thinner will dissolve the foam and I can revert to Plan A

IMG_7279.jpg
IMG_7278.jpg
 
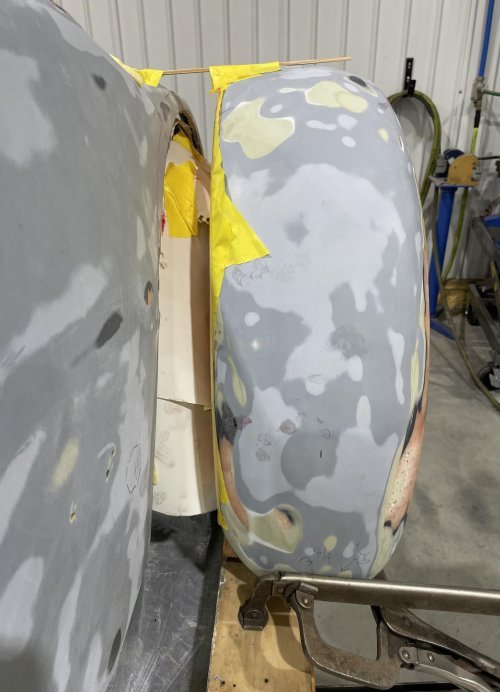
The great foam experiment begins! First step was to cover the mating surface of the fender with masking tape, then spread a thin layer of grease over the tape so the foam wouldn’t stick to it. I then carefully position the fender where I wanted it, taking multiple measurements and recording them on both the sidecar and the fender. That will let me test fit the fender throughout the sculpting process.

IMG_7281.jpg

To keep the foam from falling out of the gap thick paper was used to bridge the gap from the underside

IMG_7283.jpg

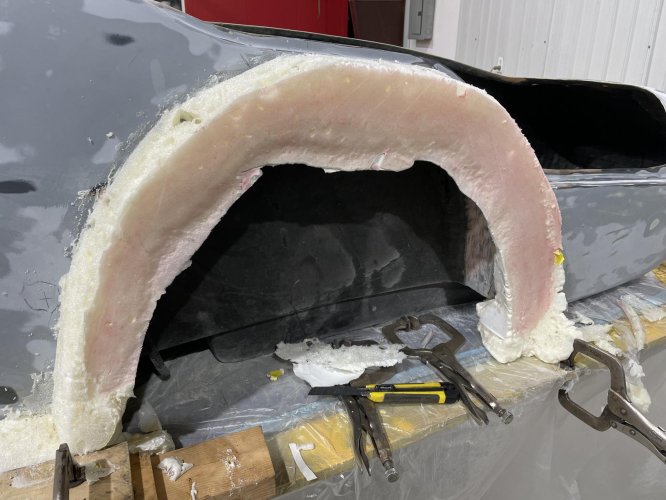
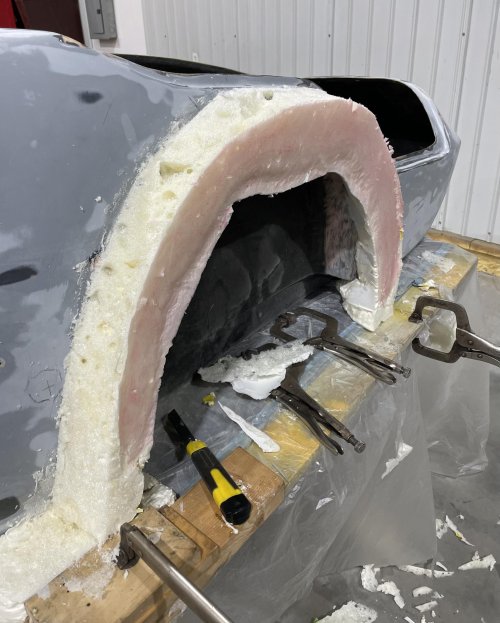
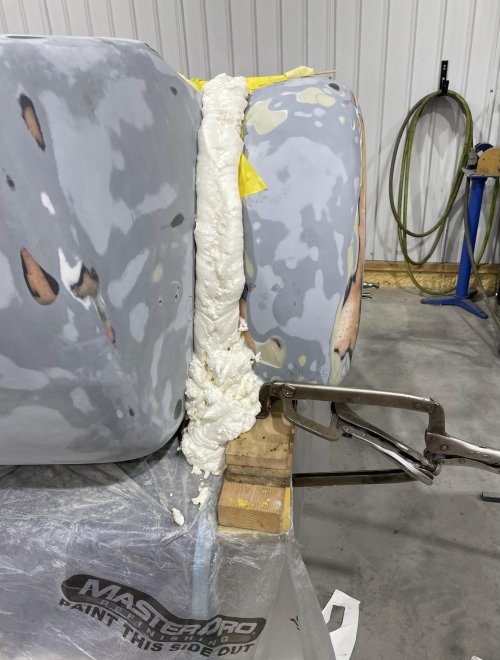
Expanding foam was applied between fender and tub, taking care to ensure all gaps were filled. An IR heat lamp bumped up the temp a bit to assist curing. Tomorrow the measurements will be rechecked, the fender removed, and if this method was a success the sculpting process will begin

IMG_7286.jpg
 
With much trepidation I carefully removed the fender to see how the foam mold turned out. The foam had expanded beyond the greased nonstick boundaries in a few places and some had run down to fuse with the table, but a few minutes with a sharp knife and the fender came free

IMG_7288.jpg

There was a bit of grease and some spots of foam on the fender that had to be cleaned off, but my reference marks survived so it was in good shape

IMG_7289.jpg

Using the knife I carved a rough arch matching the curve of the fender. The foam was well-adhered to the tub and the portion that had pressed up against the greased fender was almost perfectly flat.

IMG_7290.jpg

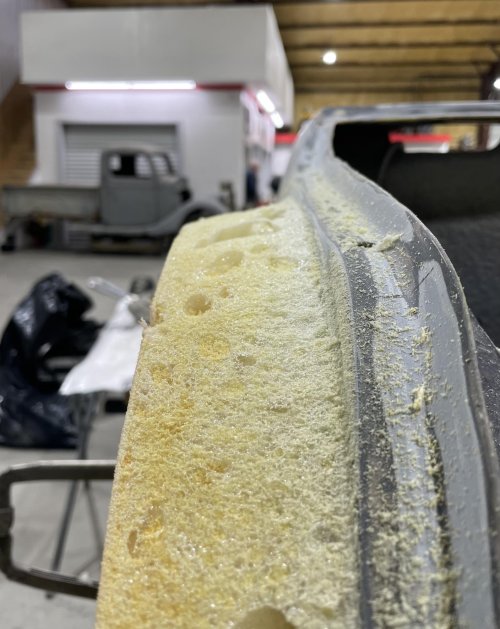
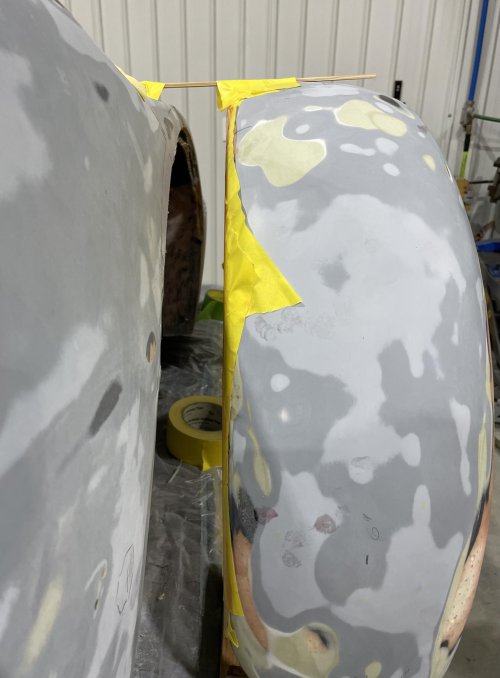
Using 120 grit on a sanding block I smoothed out the curve. The surface is sloped a bit away from the tub to direct wind-driven rain away from the tub so my dog stays dry on our adventures. So far this experiment with foam is going very well!
IMG_7292.jpg

I have a couple of things to test before proceeding. I want to test small pieces of discarded foam to see if it is affected by either body filler or fiberglass resin. A glaze of filler atop the foam would fill the small voids and make it easier to get an absolutely flat surface to work with, but if it melts the foam…
 
Back
Top