• Welcome, Guest! We hope you enjoy the excellent technical knowledge, event information and discussions that the BMW MOA forum provides. Some forum content will be hidden from you if you remain logged out. If you want to view all content, please click the 'Log in' button above and enter your BMW MOA username and password.

    If you are not an MOA member, why not take the time to join the club, so you can enjoy posting on the forum, the BMW Owners News magazine, and all of the discounts and benefits the BMW MOA offers?

  • Beginning April 1st, and running through April 30th, there is a new 2024 BMW MOA Election discussion area within The Club section of the forum. Within this forum area is also a sticky post that provides the ground rules for participating in the Election forum area. Also, the candidates statements are provided. Please read before joining the conversation, because the rules are very specific to maintain civility.

    The Election forum is here: Election Forum

Tire Change Pictorial

jimvonbaden

Kool Aid Dispenser!
Since I am often asked to help people change their tires, I thought it would be cool to make up a little tutorial about how it is done. It wont substitute for direct experience, but it should give you a start.

I will list torque values where appropriate, as well as any hints that might help.

Nail-and-wear-marks.jpg

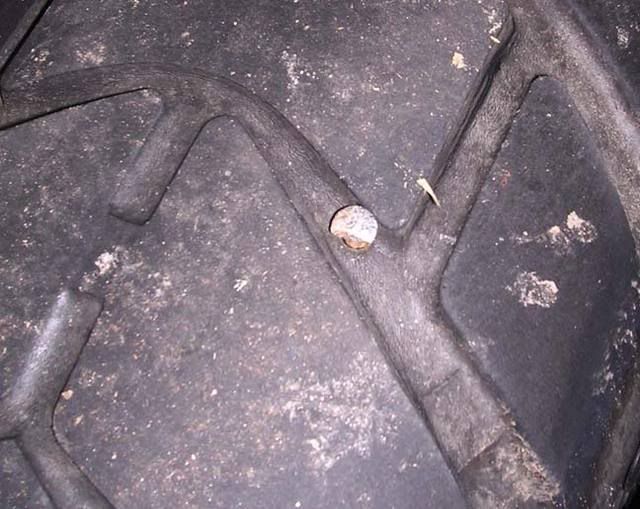
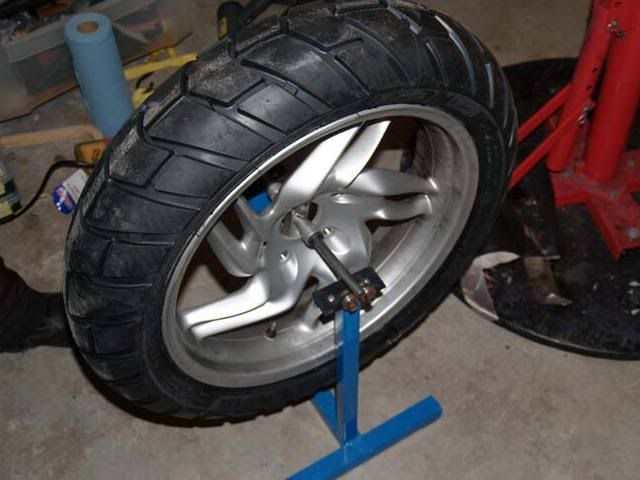
This tire was about worn out anyhow, but the nail in it made me do it sooner. See this thread on how to plug a tire.


If you plan on doing it yourself, it helps to have an assistant. Mine for the evening was my GF Tina. She is assisting by taking pictures! Notmally your assistant will help in a more direct way!

01removelugbolts.jpg

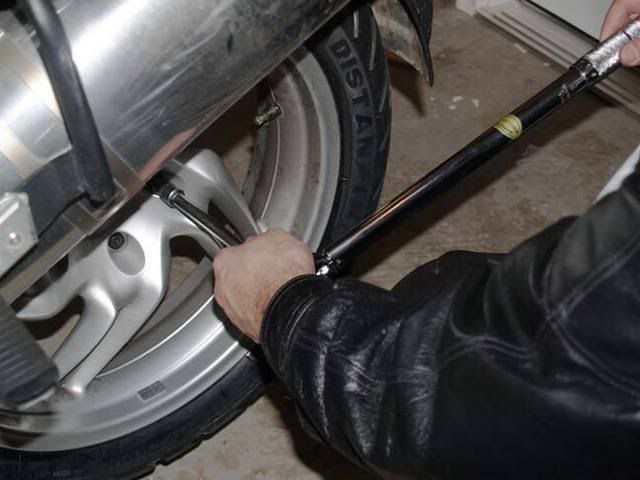
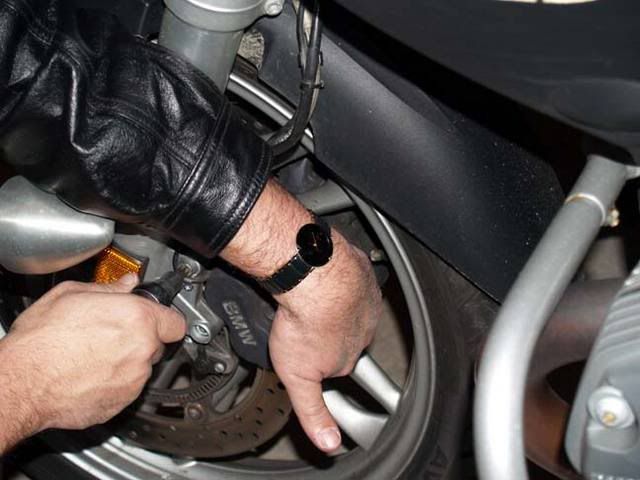
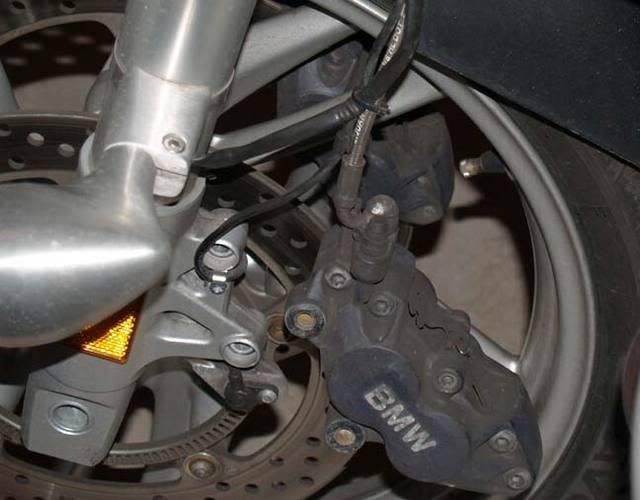
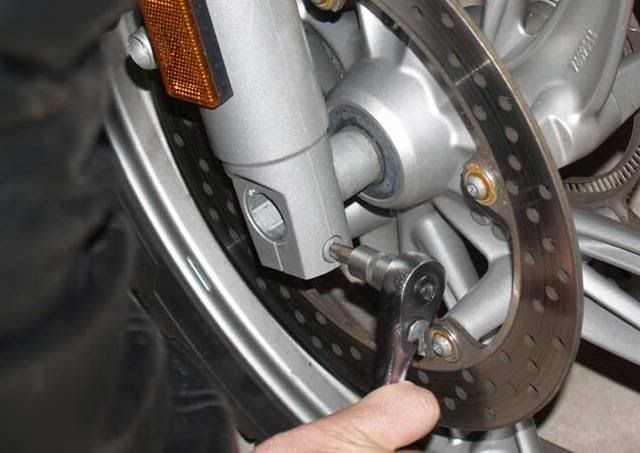
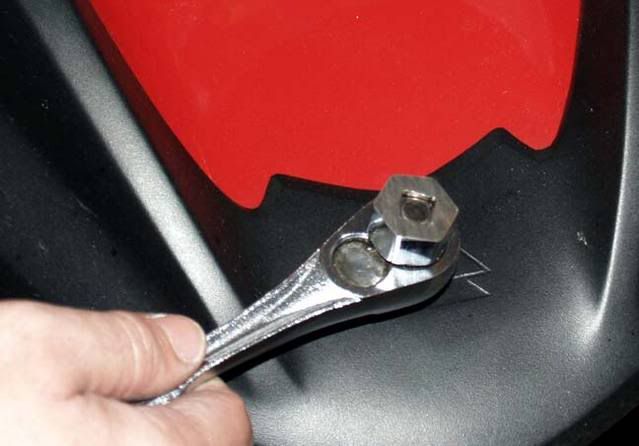
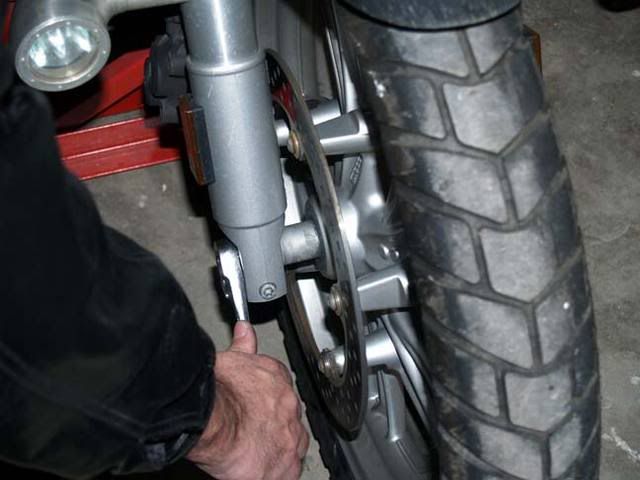
Bike on the centerstand, remove the lug bolts. On the 12GS/ST/RT it is a T-55 Torx socket. No need to remove the brake caliper on the 12 series, though some 1100/1150 R bikes and K bikes need the caliper removed as the rotor comes off with the wheel.

02Remove-Valve-Core.jpg

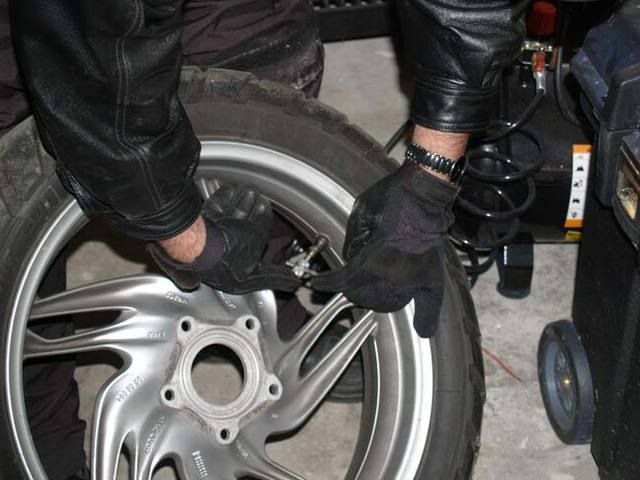
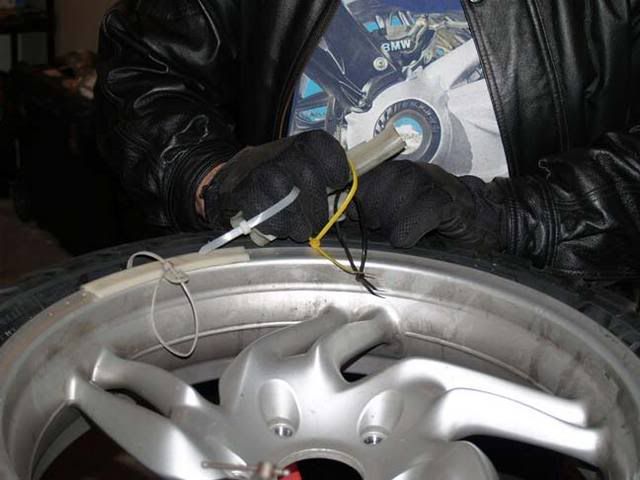
Once the wheel is off, remove the valve cap and valve core with the removal tool. I always have a couple spare valve cores in case one is bad.

03Break-the-bead.jpg

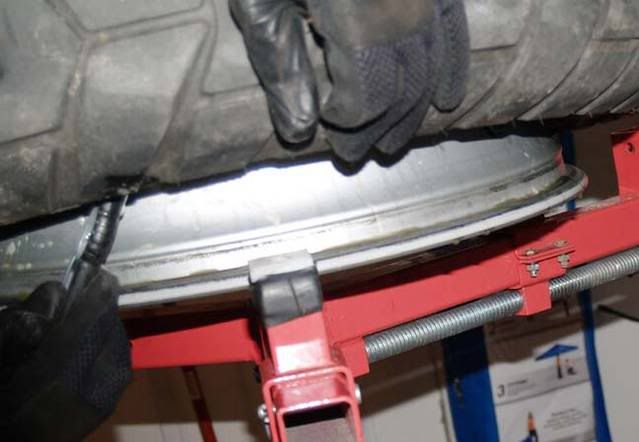
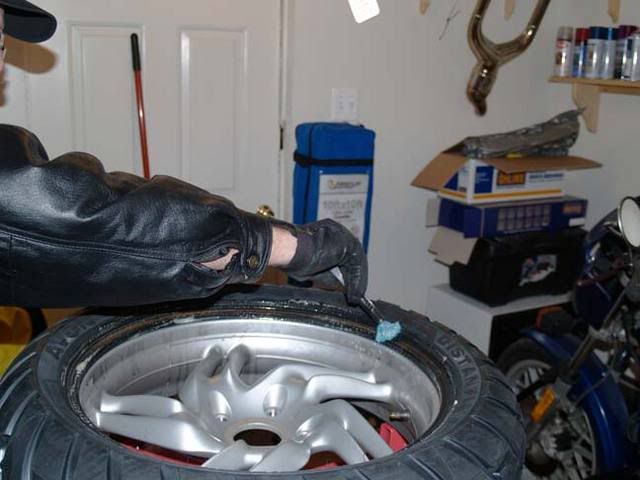
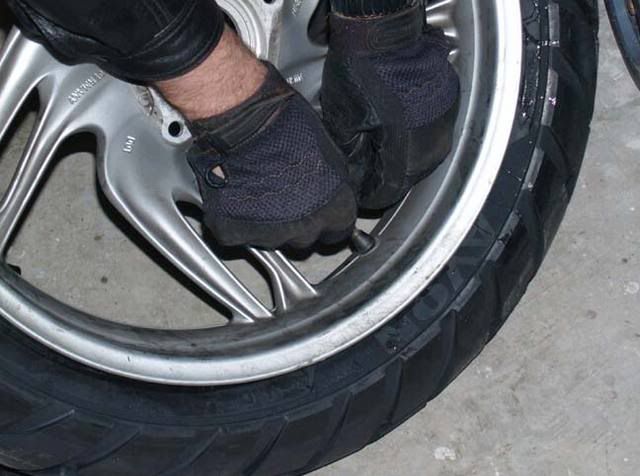
Breaking the bead is made fairly easy with the HF tire changing tool with motorcycle adapter. I make sure not to let the edge of the tool touch the edge of the wheel. I am pretty good at avoiding scratches to the wheel, but it takes practice.

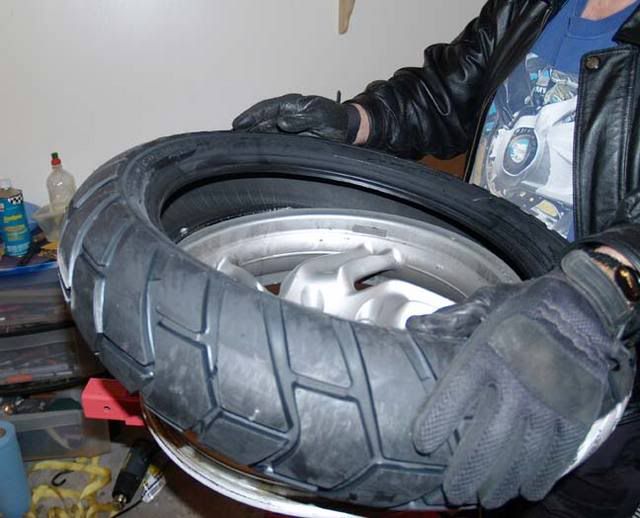
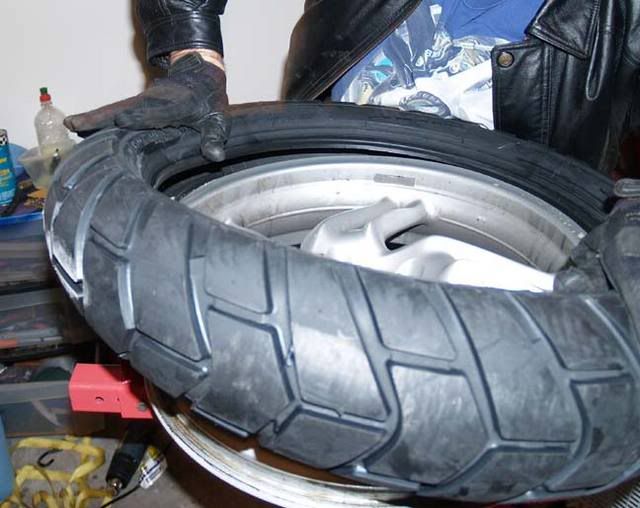
Once you have pushed the bead down off the wheel, you need to push it off all the way around by hand.

Flip the wheel over and do it again. Notice that I use a piece of thick vinyl under the wheel to protect it. I also make sure to not break the bead near the valve core with the machine. I am using the removal bar for leverage.

It probably looks harder than it is.


04Rim-on-HF-stand.jpg

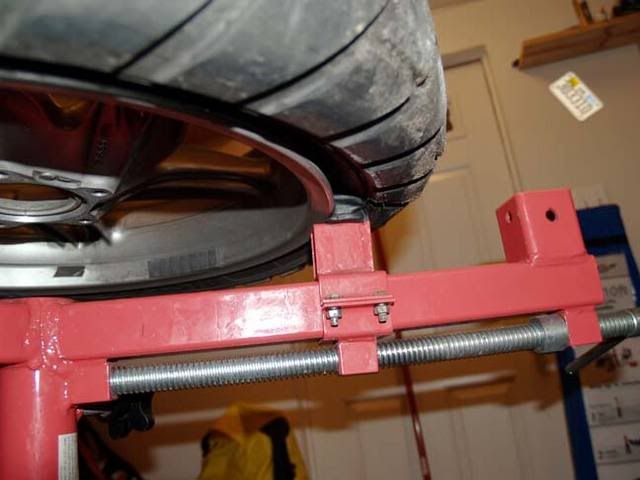
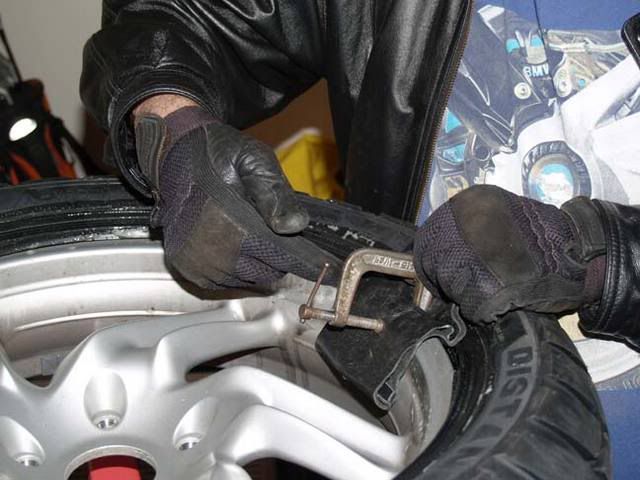
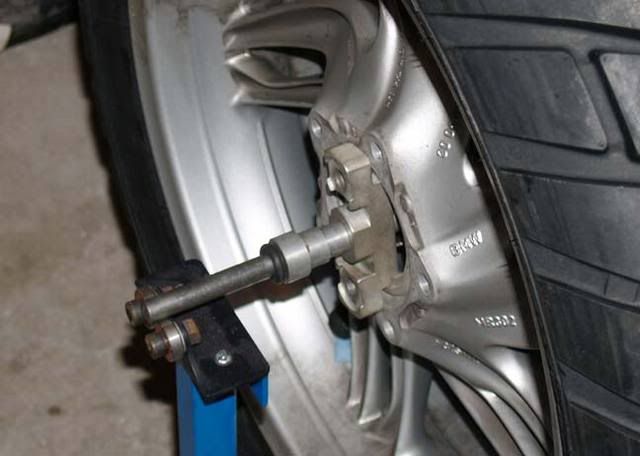
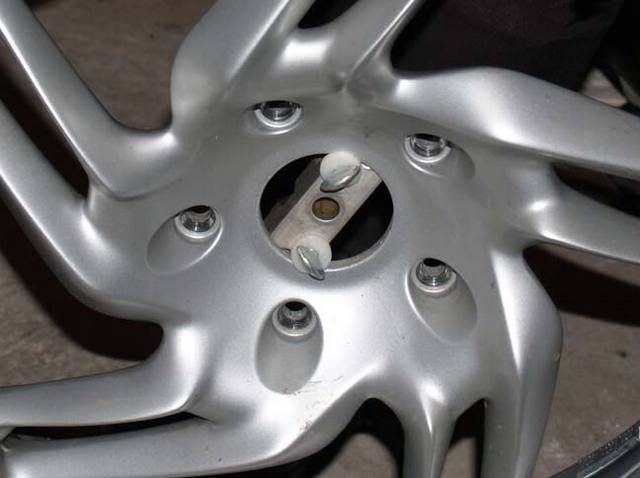
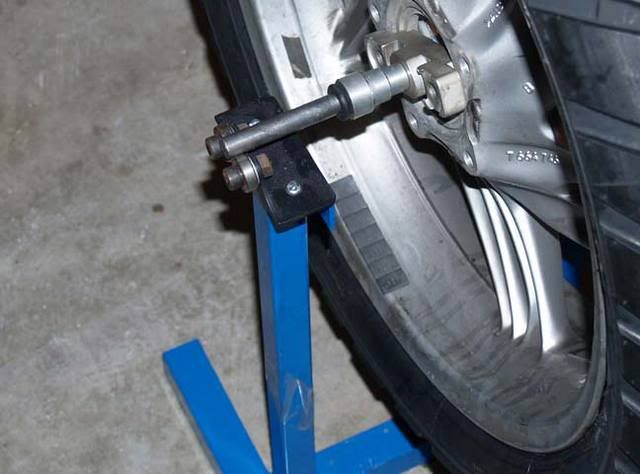
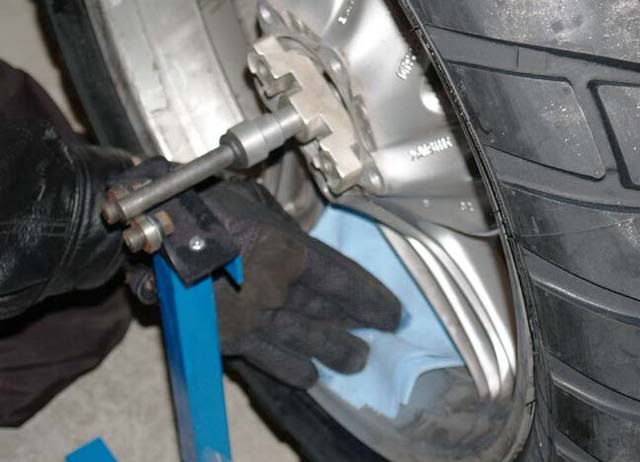
Then I mount the rim on the HF tire clamp. I make sure the clamps are in the right position to allow the center of the wheel to be centered. That way I can install the center levering bar.

DonÔÇÖt be afraid to pull it down snug, your wheel can take it. I also have nylon blocks, made by my friend Kermit, that protect the wheel. The HF clamps are painted metal, and will scratch the wheels. These nylon clamps also work better with GS wheels.

05Lube-the-rim.jpg

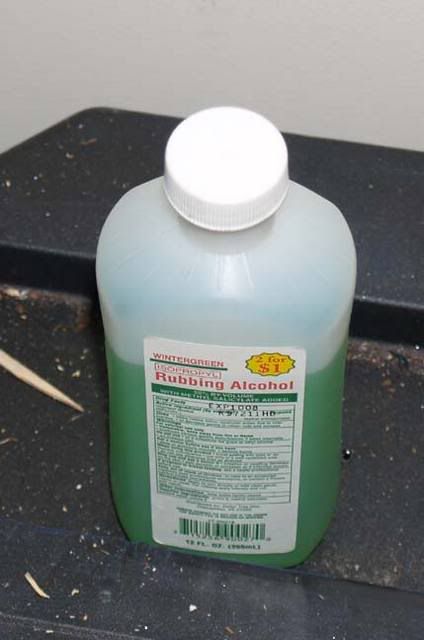
Using a lube, either special tire lube, or dishwashing liquid and soap, make sure you apply plenty to the tire bead, and rim.

05aLube-Leather.jpg

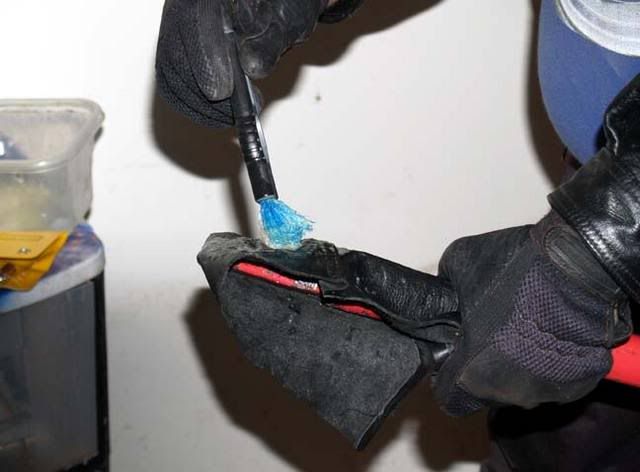
I also use a piece of leather over the end of the HF tire bar to protect the rim. I lube it lightly as well.

Note: There are a few good other bars out there with nylon ends, like the Nomar, but I find the HF init works fine, and came free.

06insert-tire-removal-iron-1.jpg

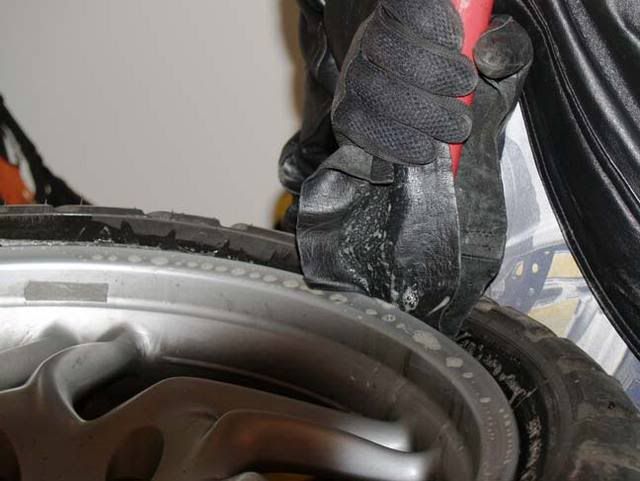
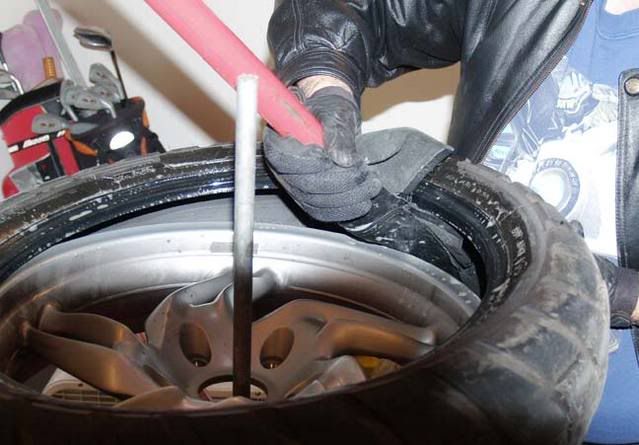
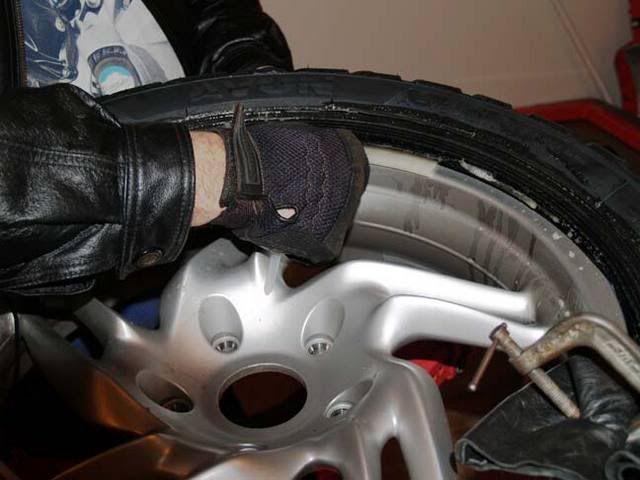
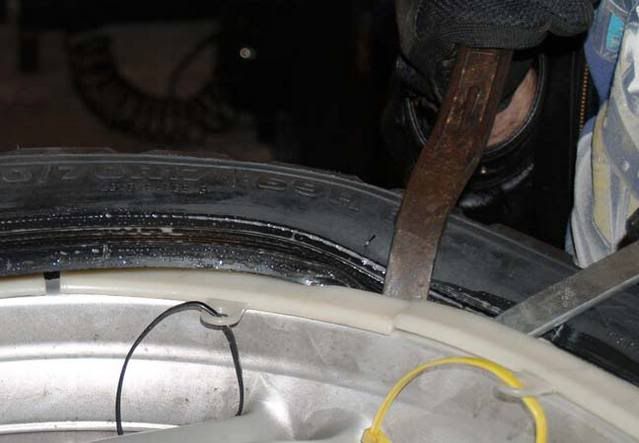
Insert the thin end of the bar in between the tire and rim.

07insert-tire-removal-iron.jpg

Catch the lip of the bead on the tire and pull the bar over.

08Remove-upper-bead-1.jpg

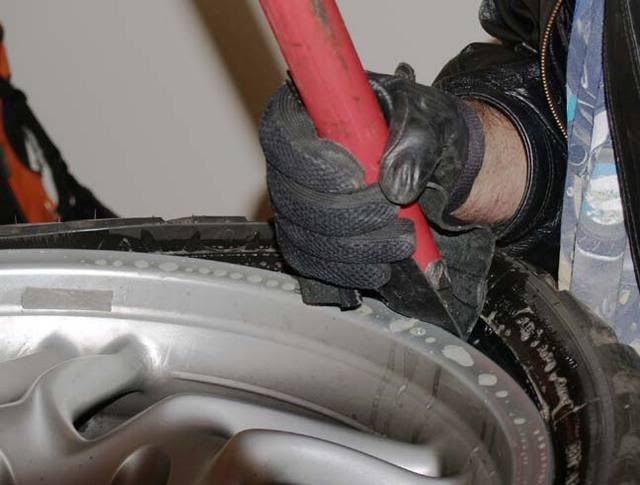
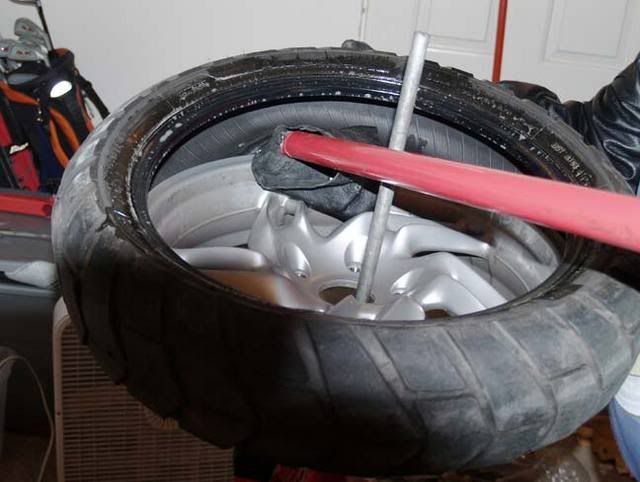
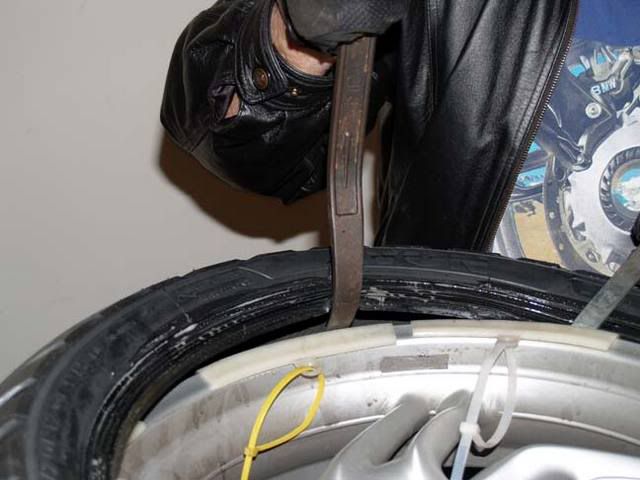
Hook the bar on the center levering bar and begin to pull. The bar will slide along removing the tire.

You may need to hold the tire to keep it from moving on the clamps, and you may need to lift up a little to make sure the tire doesnÔÇÖt slip back on.

09Remove-upper-bead-2.jpg

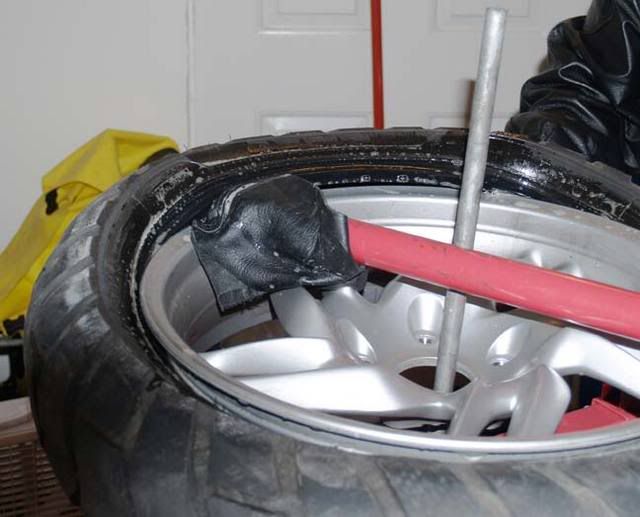
Pull it all the way around, or until the upper bead comes completely loose.

10Lube-lower-rim.jpg

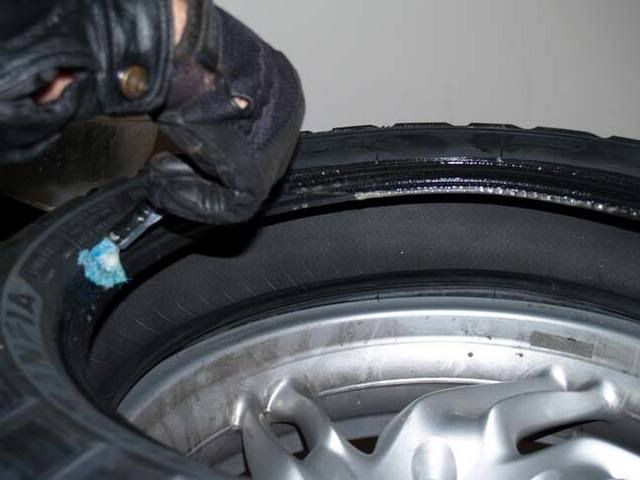
With the upper bead off, you can lift the tire and lube the lower bead.


11Catching-the-lower-lip.jpg


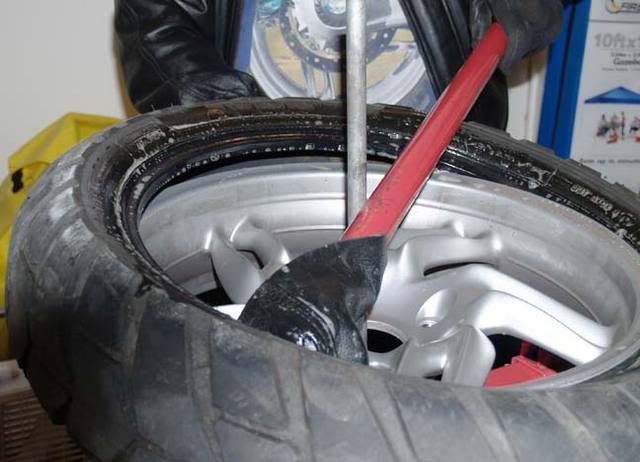
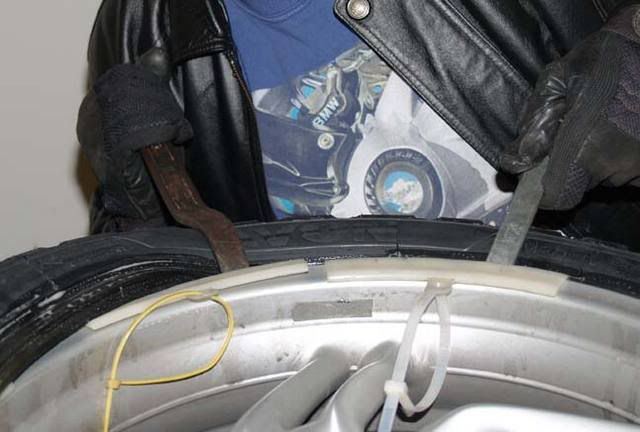
This is a little tricky, but not bad with a little practice. Next you lift the tire and insert the removal tool under the lower bead. Then twist the bar to lift the bead.

12Remove-lower-bead-from-rim-.jpg

As before, you pull the lever around the bar while lifting on the tire.

13Remove-lower-bead-from-rim.jpg

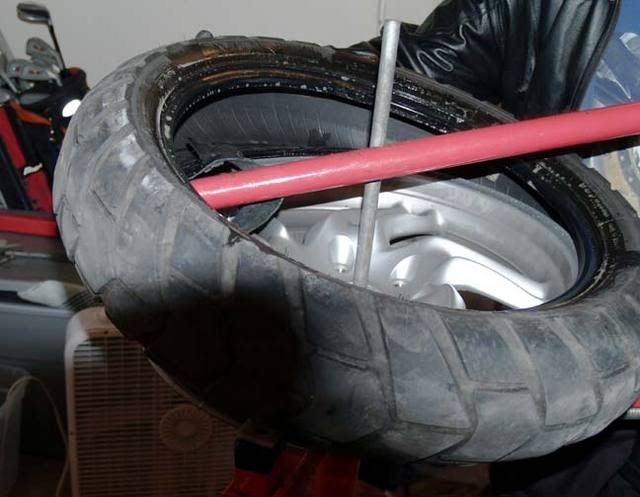
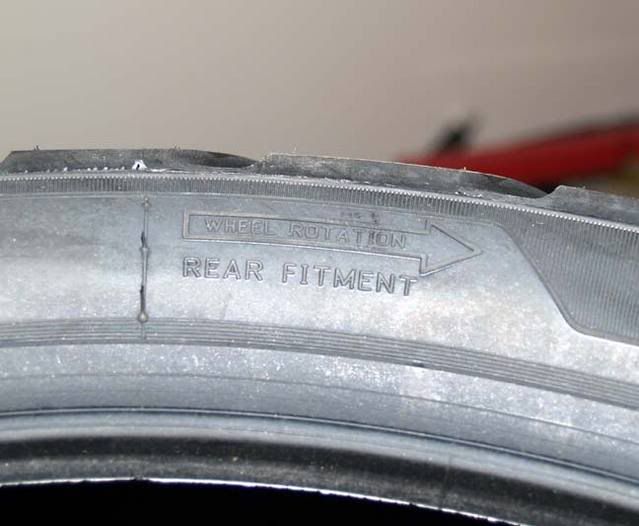
As you come around the bar, the tire will come completely free. But donÔÇÖt remove the tire yet. Let it rest on the rim and check the direction of the rotation.

16Rim-direction-old.jpg

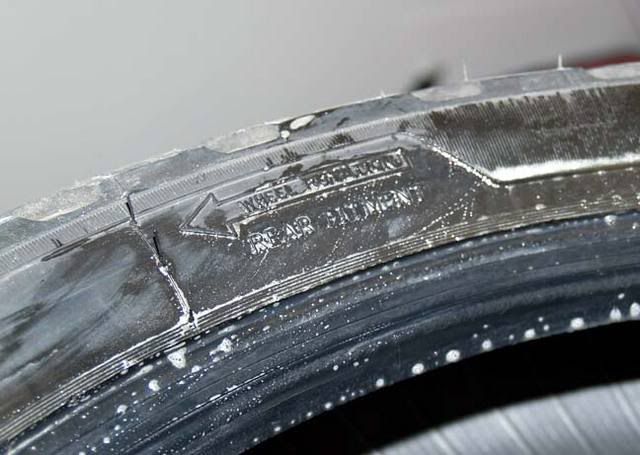
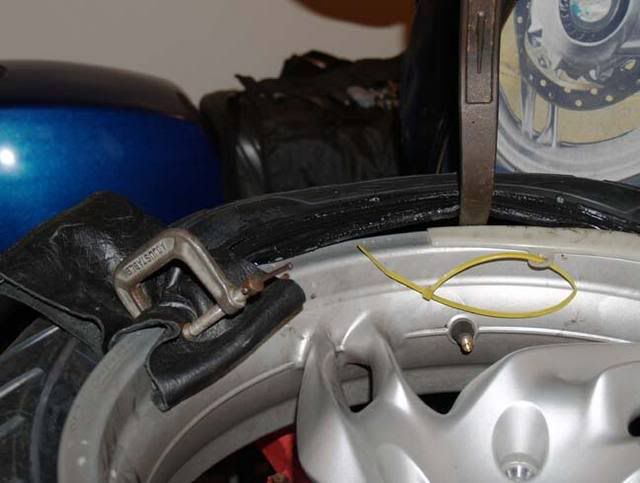
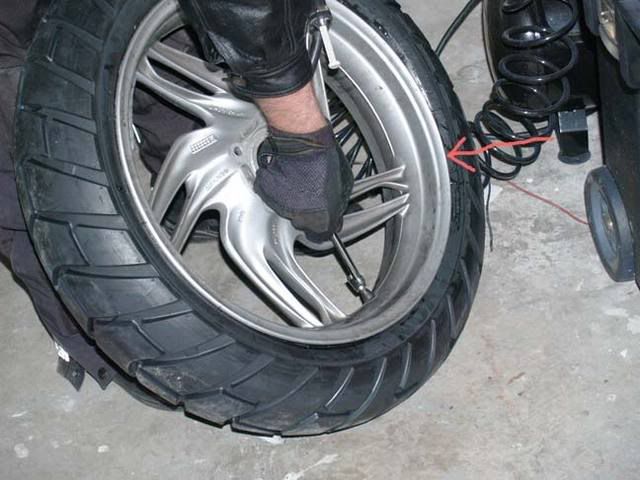
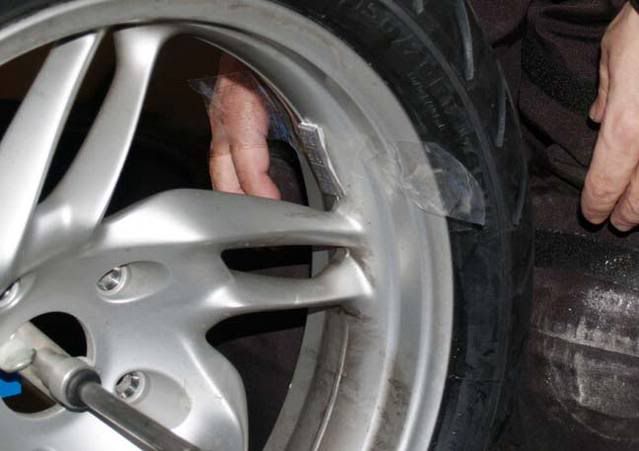
It is a good idea to check the rotation, see arrow, then place the tire on the ground in the same orientation as it came off, just in case you forgot the direction.

14Blank-wheel-on-HF-Stand.jpg

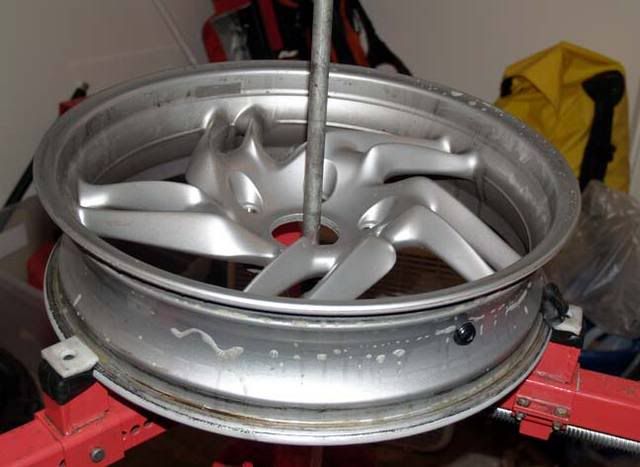
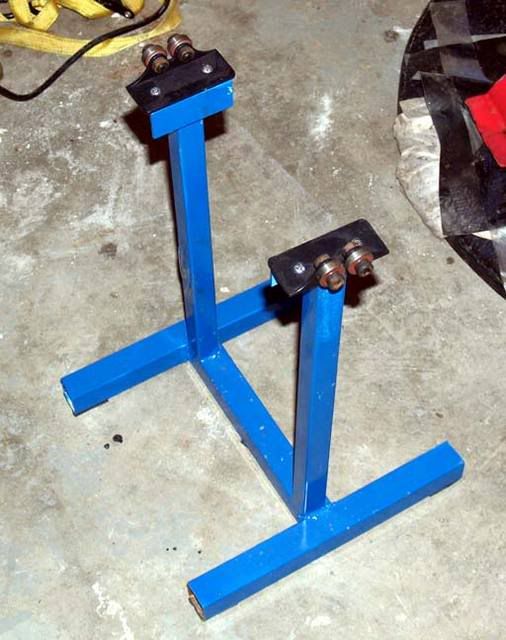
Here is the wheel on the stand. It is a food look at how it fits.

At this time it is a good idea to clean the inside of the rim, and make sure there is no damage, and no burrs on the rim.

Some people actually clean the wheel now as well!

15HF-Rim-Protector.jpg

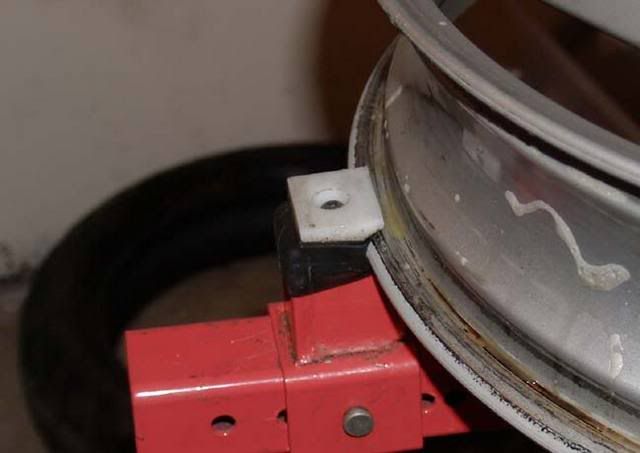
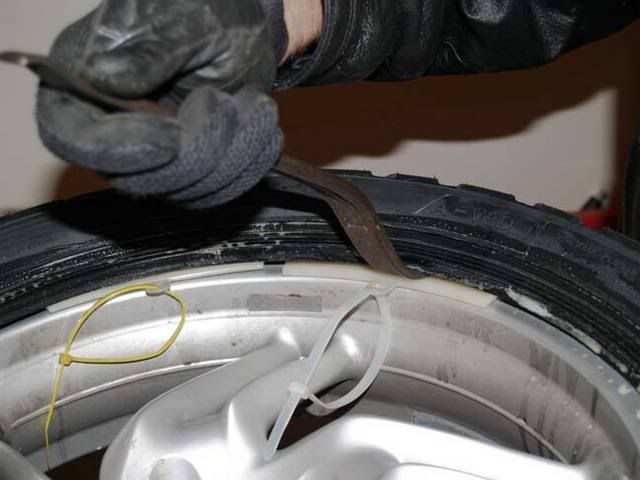
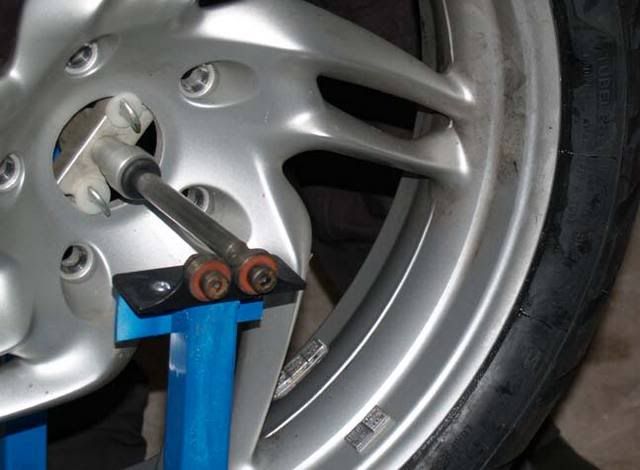
Here is a nice look at how KermitÔÇÖs rim protectors work on the HF unit. And no, he doesnÔÇÖt make them publicly. You can make your own from a 1ÔÇØ square block of nylon. We also add small sections of bicycle innertube to keep the rim from slipping.

16aRemove-tires-from-package.jpg

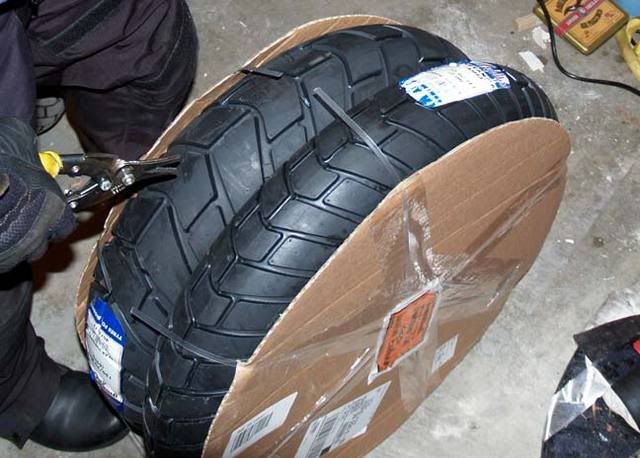
Clip the tires from the package, and ensure they are the correct size. (You should probably do this BEFORE removing your old tires and wheels.

17Check-rotation.jpg

Check the rotation of the new tire. Make sure it is pointing in the same direction. Ignore the tread pattern unless you know that you want to put it on backwards (NOT recommended unless you KNOW what you are doing).

Continued...
 
18Lube-bead-before-flipping.jpg

Make sure you flip the tire over and lube the bottom side thoroughly for installation.

Note: I said flip, but keep in mind some tires have a directional arrow only on one side, so the arrow may be on the bottom. Just make sure you have the orientation correct.

19Press-on-lower-bead.jpg

Flip the tire over and push one side on, just the lower bead. At this time you can use the heal of your hand, or a rubber mallet to force the tire over the rim.

20Press-on-lower-bead-2.jpg

Keep the lower bead centered on the rim, in the indented spot, and the upper bead above the rim. It takes a bit of work on some tires, but isnÔÇÖt that hard.

Occasionally you may have to ÔÇ£spoonÔÇØ the tire on the last little bit. See this technique later.

21Lube-upper-bead.jpg

Once the lower bead is all the way on, lube the upper bead thoroughly.

22Install-C-clamp.jpg

I install a C-clamp on the wheel with a piece of leather, you can use rubber or plastic, to keep the bead from ÔÇ£walkingÔÇØ around as I spoon on the tire.

23Insert-protectors.jpg

I also insert rim protectors to prevent scratches. Notice I used zip ties on them? This is to make them retrievable if they slip off into the tire as I install it. They also help in that I can hold on to them so they donÔÇÖt slip.

You could use thick nylon, plastic or rubber, but these are nice in that they stay in place.

24Lever-insert.jpg

I use a 14ÔÇØ Motion Prow lever to ÔÇ£spoonÔÇØ on the tires. Notice the orientation of the lever. It is precisely this shape of the lever that makes me use it. It is easy to get in, grips well, and allows a lot of leverage.

Make sure the lever is used only on the rim protectors to avoid scratching the rim.

25Lever-on-2-levers.jpg

I have a couple of generic 9ÔÇØ levers that I use to hold the bead in place while I am moving the big one to the next spot. Make sure you place it under the rim protector as shown.

26lever-on.jpg

Here you can see I have moved over about 6 inches and am beginning to lever the tire on again.

27Lever-on-upper-bead.jpg

I have moved again.

Note: It is very important to keep the upper bead of the tire in the deeper middle of the rim. This gives you the needed room to be able to lever the bead over the other side of the rim. If you find the tire getting very hard, or impossible to lever, you most likely need to move the bead on the opposite side into the well of the rim. It will often move out on its own.

28Lever-on-upper-bead-last.jpg

When you get near all the way around you will find that you have to lever smaller pieces of the bead.

The last little bit will be hardest, but you shouldnÔÇÖt have to muscle it excessively. It should pop on fairly easily. Occasionally you may need to give it a rap with a rubber mallet.

28aRemove-rim-protectors.jpg

Remove the rim protectors and the C-clamp. Make sure there is still plenty of lube on it, as it will help the bead seat when inflating the tire.

29Install-valve-core.jpg

Install the valve core and cap. Then bounce the tire several times around the circumference. This helps to set the bead.

30Pop-bead-on.jpg

Using a compressor with decent power, I have used the Campbell Housefeld compressor from my bike before but it doesnÔÇÖt always work, to inflate the tire.

DO NOT HOLD THE TIRE NEAR THE RIM during this process. As the tire inflates it will POP onto the rim in a couple spots. If your fingers are in there you will not like the results. See the red arrow!

I have had a few instances where the tire took as much as 55 pounds of pressure to seat the bead. I wouldnÔÇÖt generally go any higher than 50, though I know a few who have gone as high as 70.

If the bead wont seat, and no air is staying in, you may have to use a ratcheting strap to compress the tire to get the bead to seat with air pressure. Just make sure you remove the strap as soon as it takes air in and holds a few pounds. The pressure on the strap will not only make it hard to get off, but might cause the strap to come off explosively.


31aBalancer-stand.jpg

My friend Chris made this stand for me, and I attached the Beamerbalancer bearings to it.

32Beamer-balancer-install-2.jpg

Place the beamerbalancer insert onto the wheel, ignore the rod for a moment.

31Beamer-balancer-install.jpg

Install the adapter using wing nuts and nylon washers. Then add the rod through and put on the stepped sliders with black o-ring retainers, see above, and place it on the stand.

32aWeights-orig.jpg

Notice I leave the weights on the rim? This is because sometimes it is right on with original weights, and this way I donÔÇÖt have to remove them.

By the way, I did not balance this wheel. It was done for me at the MOA by the NoMar guy. I wouldnÔÇÖt normally use that much weight, I would rotate the tire on the rim.

33On-balancer-rear.jpg

Rotate the tire 90 degrees from where it is and let go. The tire will, if not balanced, rotate on its own so that the heavy spot is down. If the weights are on, and the tire moves on its own. Remove them. If you release the tire and it doesnÔÇÖt move, try again 180 degrees off, and if it still doesnÔÇÖt move, the tire is balanced.

34Tire-on-balancer.jpg

Try this several times until you are certain of where the heavy spot is, always down.

Continued...
 
34aalcohol.jpg

Next get some alcohol for the rim. No, not to get it drunk, but to clean it.

35Clean-wheel-for-weights.jpg

Clean the top of the rim; opposite the heavy spot exactly 180 degrees, with alcohol to remove grease and dirt.

Note: In this picture I spun the wheel 180?? to show me cleaning the wheel.

36Weights-taped-on.jpg

The speed the wheel spins when released will give you some clue about the weight needed, but it takes some experience. Most wheels take less than 30 grams of weight, so you shouldnÔÇÖt start with more than that.

I use tape to hold the weights on to test how much you need. Go through the process of checking at 90?? intervals for balance. Once the wheel stops moving on its own when you release it, it might move a tiny bit and that is OK, you know you have the right amount of weight in the right spot.

I split the weights as evenly as possible and adhere them on both sides of the wheel. I donÔÇÖt know if it helps, but it looks better, and works on car wheels.

You are no ready to remove it from the balancer, and install it back on the bike.

37Install-lug-bolts.jpg

Place the wheel back on the bike and install all the lug nuts finger tight.

38Torque-lug-bolts.jpg


Then torque them to 60NM in a crosshatch fashion.

Now on to the front wheel.

Raise the front of the bike using a jack, like I did, or block it up with wood, or anything you choose. It doesnÔÇÖt have much weight on it, and it will be stable on the centerstand.

39Remove-Caliper-bolts.jpg

Remove the caliper bolts.

40Remove-Caliper-bolts-2.jpg

Remove the inspection sticker placard if you have one.

41Tweak-caliper-sideways.jpg

Tweak the caliper sideways on the rotor, this is especially important for bikes with 17ÔÇØ rims, as you would otherwise not be able to work the caliper off. It also spreads the pads making reinstallation much easier.

42Hang-caliper.jpg

I just gently let the caliper hang by the brake line. The caliper doesnÔÇÖt weigh much, and it doesnÔÇÖt hurt it. However, if it bothers you, use a string or coat hanger to hang the caliper.

Now do the same to the other side.

43Loosen-pinch-bolt.jpg

Next loosen the pinch bolt, but donÔÇÖt remove it, just so it has no torque on it at all, a couple threads out from finger tight.

43a22mm-removal-tool.jpg

I made a tool for the 22mm axle shaft out of a 13/16ÔÇØ Taiwan spark plug socket. I just cut the end off. This makes it easier to carry and use, but you could use the socket on the extension backwards to do the same thing.

44loosen-axle-shaft-bolt.jpg

Loosen the axle shaft and remove it.

Be ready to catch the tire as it will drop partially when you pull the axle shaft out. Also catch the spacer on the left, opposite, side.

45Remove-Axle-shaft.jpg

Pull the axle shaft out and remove the wheel.

See the above for dismounting and mounting the tire, as well as balancing it.

Install the front wheel in reverse order of removal, and tighten the bolts to the following torques:

Front axle 50 NM

Pinch Bolt 19 NM

Caliper Bolts 30 NM

When you are done, and the bike is ready to ride, make sure you give the brakes a couple pumps to get full power back. (Servo brakes do not need this, but you should test them before riding off.)

Other advice, make sure you take it pretty easy until the tires are scrubbed in. Depending on how you ride, this could be up to 200 miles.

I hope this helped, and I hope you will point out any errors to my tutorial.

Jim :brow
 
OK, this whole "JimVonBaden1" thing is creeping me out. Like there's a "2" and a "3" and .........

(Of course, that would explain the growing post count. :stick )

Hi Jim! :nyah
 
keep up the good work jim!

you do your wrenching in leathers:stick ??
 
All those pics scare the hell out of me, C-clamps and all.

I prefer using just my tire irons and strips of cut plastic windshield washer bottle material between my tire irons and rim. Although I have them for my other motorcycle with a thin rim edge, I can't use those rim protectors on the thick edge of a GS cross spoked wheel.

Some of my GS rims are anodized (what was BMW thinking?) and I'd sooner not slide anything along the surface in the way of a tire mounting tool.

Never scratched, nicked or gouged a rim yet...thirty years later.


HI Alex,

The rim protectors actually will stretch on to the wire wheels, though for them I just use thick leather. The windshield water bottles work, but are pretty thin, and since I do so many tires, it is easier to have the thicker nylon rim protectors, rather than mess with cutting bottles all the time. Oh, if you do use bottles, the liquid laundry soap bottles work best since they are so thick.

I found the C-clamp makes it easier to keep the tire from riding back up as you go along.

As for the dismount, I can have a tire off in 10 seconds, top, and ten more bottom with the bar. I wrap it in leather, and have not scratched a rim yet.

The biggest risk for damaging a rim for me, is slipping when spooning on a new one.

But, like I said before, this is just one way, and a decent way for beginners to get a start.

You have to use what works for you. I am sure you have much more experience than I do.:thumb

Jim :brow
 
HI Alex,

The rim protectors actually will stretch on to the wire wheels, though for them I just use thick leather. The windshield water bottles work, but are pretty thin, and since I do so many tires, it is easier to have the thicker nylon rim protectors, rather than mess with cutting bottles all the time. Oh, if you do use bottles, the liquid laundry soap bottles work best since they are so thick.

Maybe you misunderstood. I meant the GS wire wheels with the thick rim beads. The rim protectors that I bought while overseas will fit and actually snap onto the usual rim, but they are way too stiff to spread over the edge of GS wire rims.

Up here, I'll go through a few bottles a year, so I just cut a bunch of 2" x 5" strips when I empty them. No question, the strips are disposable and good for a few tries each...I might use ten per wheel change. I'd hate to scratch a rim and that damn anodized finish on the rims are as delicate as can be. Hey BMW! Anodizing is excellent against corrosion...not abrasion!

Good point on the dish soap bottles.

I found the C-clamp makes it easier to keep the tire from riding back up as you go along.

Now I know why my knees are so sore after a tire change. I change my tires at floor level on an old blanket.


As for the dismount, I can have a tire off in 10 seconds, top, and ten more bottom with the bar. I wrap it in leather, and have not scratched a rim yet.

The biggest risk for damaging a rim for me, is slipping when spooning on a new one.

Thats what scares me. Fast could also end up making a mistake...fast. Something I've learned.

Its also important to know how to change a tire and tube using the least of equipment if anyone is doing any touring in remote areas.
 
There are two types of rims in this world. Those that have been scratched changing tires at home and those that will be scratched changing tires at home. On a more serious note we have an exceptional dealer here in KC with one exception- his price for mounting and balancing tires is really high. I usually do it myself unless its really cold and the tires are stiff. Last time he charged me $300 to mount and balance two tires- off the bike- on my RT. True, I supplied the tires. He had been fair on other things so I didn't ask up front. My mistake. Now browsing want ads for used tire machine (Coats) looking for something under $500. Fool me once...
 
Thanks

Jim, thanks for the excellent tutorial.

I've changed bicycle tires forever and have been thinking about doing MC tires for almost as long. I'm inspired. I think I'll make the investment in tools. Who knows, maybe I can change tires to make pin money when I retire (cash only!).
 
There are two types of rims in this world. Those that have been scratched changing tires at home and those that will be scratched changing tires at home.

Actually there are three; you missed one. Those that are scratched changing tires at the dealer after having to pay them to do it with only a "sorry" as a reply.

Luckily, that never happened to me as I won't let it happen to me. 30+ years of tire changing without fancy smancy equipment and not a single scratch. :nyah


Last time he charged me $300 to mount and balance two tires- off the bike- on my RT.

$300...just to mount and balance a set of tires!!! :rolleyes
 
tire change

great effort thanks... but why didn't you change the valve stems? Now would be the time to install rt. angle ones too. Thanks for the pics... I was busting mine by hand till I bought a HF changer. My wife used to leave the house when I put on new tires because of all the tool throwing and cursing... I used to bust down split-rim truck tires in college. We used to fix an inside dual on an 18 wheeler for $8.00. No blow up cage either.
 
great effort thanks... but why didn't you change the valve stems? Now would be the time to install rt. angle ones too. Thanks for the pics... I was busting mine by hand till I bought a HF changer. My wife used to leave the house when I put on new tires because of all the tool throwing and cursing... I used to bust down split-rim truck tires in college. We used to fix an inside dual on an 18 wheeler for $8.00. No blow up cage either.


I didn't change the valve stems because I have changed them in the past.

I am not sure the right angle ones work so well on the cast wheels, but have never tried them.

Thanks,

Jim :brow
 
Hi, Jim! I'd like to add one item to your fine piece of work. Most new tires come with an index mark stamped/painted on one of the sidewalls. Most I've seen are a yellow circle, but I have seen a yellow dot, or even one or two red dots. After the tires is on the rim, but before inflating to seat the bead, slide the tire on the rim in order to line up the marks with the stem. This is supposed to aid in balancing the assembly.

Hi! to Tina!

This is true!

Unfortunately on the Avon Distanzias there is no mark at all!:doh

Tina says HI!

Jim :brow
 
Thanks Jim

I change tires for three bikes in our garage, and enjoy doing it. I picked up some good tips from your demonstration. Good post!
 
Another good Article....

Jim:

Another, excellent, good "how-to-atricle"! Maybe you should collect the articles for a book for us amatuers. ....And how big is your garage? You have all kinds of nice tools--that I don't have. I think you have about talked me out trying this. Thanks for the info.

--rock
 
Back
Top