• Welcome, Guest! We hope you enjoy the excellent technical knowledge, event information and discussions that the BMW MOA forum provides. Some forum content will be hidden from you if you remain logged out. If you want to view all content, please click the 'Log in' button above and enter your BMW MOA username and password.

    If you are not an MOA member, why not take the time to join the club, so you can enjoy posting on the forum, the BMW Owners News magazine, and all of the discounts and benefits the BMW MOA offers?

need help...simple task turned hard...

Your axle should have looked like #15 in this figure:

http://www.realoem.com/bmw/enUS/showparts?id=0315-USA-01-1977-2474-BMW-R_100_S&diagId=33_0634

There are shoulders machined into the bolt...the figure shows an extra one...I guess I'm not remembering right. But anyway, one of those shoulders should begin to ride on the outside of the bearing on the left side. It can't just keep going in and in. This shoulder and the nut/washer you have on the right side are designed to compress the bearing stack to the proper preload.
 
Be sure to look in your manual and find the proper torque value for the rear axle nut and pinch bolt. There is a post (#3) in Kurt's Resources and Links/Bolt, Stud, and Torque Info thread that references torque values for a '78 R100/7 (http://forums.bmwmoa.org/showthread.php?57001-Bolt-Stud-and-Torque-Information), but I'd also take a look at your service manual to be safe.

Looking at the first pic in your previous post (#17), I think the washer under the axle nut is upside down… the chamfered edge should be toward the nut, if I recall correctly.

Good lookin' bike!
:beer
 
Loosen the pinch nut.

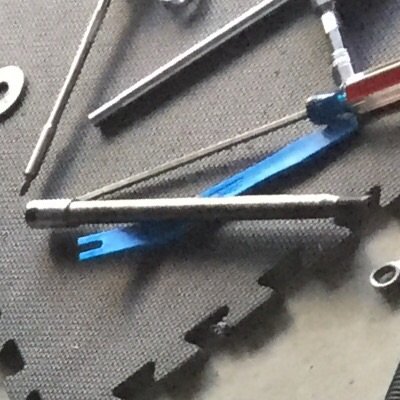
Hold the axle with the rod stuck straight in from the rear (so not to hang up on the swingarm) It is designed to pivot and use the angle face on the swingarm yo lever the axle sideways.

Tighten the axle nut.

Torque the axle nut.

If the axle just keeps coming to the point that the hole in the end of the axle starts to disappear into the swingarm - stop - remove axle - get correct axle.
 
this makes sense!

Thanks for the diagram and the step by step.... you guys could make a better manual than Clymer!
 
Picture is worth a thousand words

Your axle should have looked like #15 in this figure:

http://www.realoem.com/bmw/enUS/showparts?id=0315-USA-01-1977-2474-BMW-R_100_S&diagId=33_0634

There are shoulders machined into the bolt...the figure shows an extra one...I guess I'm not remembering right. But anyway, one of those shoulders should begin to ride on the outside of the bearing on the left side. It can't just keep going in and in. This shoulder and the nut/washer you have on the right side are designed to compress the bearing stack to the proper preload.

Turns out i have the wrong rear axle. Mine steps down once then just has threads at the end. The one in the diagram has two step downs. Is it possible my bike had the front axle on the rear and rear on the front? I'll have to check what the front axle is supposed to look like.

image.jpg
 
Bigger problems

Loosen the pinch nut.

Hold the axle with the rod stuck straight in from the rear (so not to hang up on the swingarm) It is designed to pivot and use the angle face on the swingarm yo lever the axle sideways.

Tighten the axle nut.

Torque the axle nut.

If the axle just keeps coming to the point that the hole in the end of the axle starts to disappear into the swingarm - stop - remove axle - get correct axle.

So this disc brake conversion is with a Grimeca brake. Not sure if it is similar to the usual disc conversion but it seems that the axle in the above diagram will not work with this brake setup which means I have an axle that is for lack of better terms 'floating' and not fully secure. I'm glad when I bought this bike I just had it shipped to me rather than riding it for 200miles. Might have been my last ride if the rear axle just slipped out of position at 70mph!?
 
So this disc brake conversion is with a Grimeca brake. Not sure if it is similar to the usual disc conversion but it seems that the axle in the above diagram will not work with this brake setup which means I have an axle that is for lack of better terms 'floating' and not fully secure. I'm glad when I bought this bike I just had it shipped to me rather than riding it for 200miles. Might have been my last ride if the rear axle just slipped out of position at 70mph!?

With both the pinch nut and axle nut tight the axle is not floating. What seems to be lacking would be wheel bearing preload.
 
Dummy

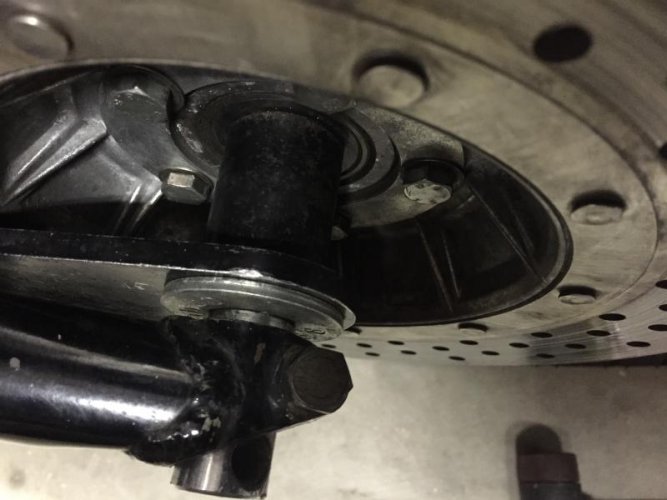
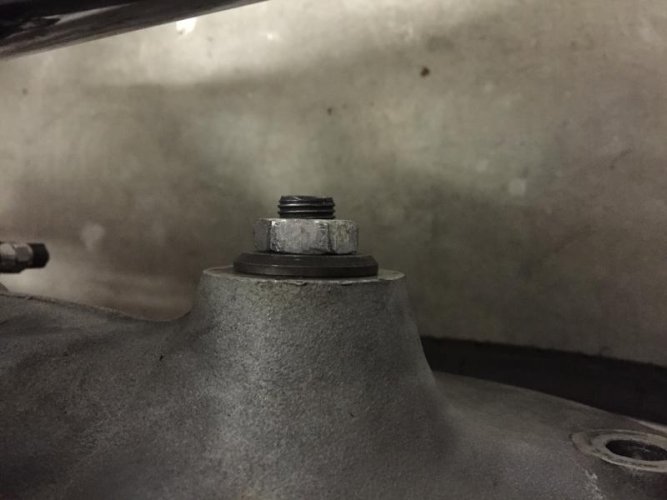
Ok I figured it out. I was overthinking this whole axle part. I just never tightened it enough when I put it back together. I was expecting the hole in the left end of the axle to stay completely outside of the left side of the swing arm. The disc brake conversion has inserts/shims to fill the gaps and put preload on the bearings. When fully tightened it looks like the pics below. The axle does look different for this than the diagram above but maybe it is just that way for the disc brake. Also flipped the washer on the right side around like was mentioned in one of the comments. image.jpgimage.jpg

So finally I can ride this thing again and I was wrong there was never a free floating axle....newbie issues. Actually I'm a longtime airhead rider...just new to working on them. Finally have time to enjoy that part of them as well. Thanks again for all the tips. This forum is priceless!
 
Good experience

You are so lucky to have done all of this while in your garage and with help nearby instead of on the side of the road. With your attitude, you will be fine tackling most maintenance on your beautiful bike.
 
That axle setup looks right. That hole in the end of the axle should just barely be visible/usable when all tight. That cylindrical bar or tommy bar should fit into that hole even while the axle nut is being tightened. I'm glad finally got the orientations right.

Duane Ausherman talks about the "shake the wheel" test to identify if the preload is right on the bearings. As the torque is coming up on the axle nut, one should grab the wheel and push-pull the wheel with your hands to get a sense of any play in the bearings. Up to nearly final torque, the play should be barely noticeable. When that last turn provides the final torque, that play should disappear. If the play disappears too early, then there is too much preload. If the play doesn't go away at all, then there's not enough or no preload.
 
on-line images of /7 owner's manual

here is a link to a page-by-page image of the owner's manual for the /7 bikes

http://www.pbase.com/dwerbil/bmw_motorcycle_r607r757_r1007_r100rs_owners_manual

The OP mentioned finding the IBMWR and airheads.org tech stuff. Another source of info is Snowbum's website

http://bmwmotorcycletech.info/

I sometimes like the Haynes manual over the Clymer or factory manual -
http://www.haynes.com/products/productID/129

I didn't find an on-line factory manual for the /7, but here are links to the factory manual for some newer airheads
http://www.carlsalter.com/download.asp?p=387
http://www.carlsalter.com/download.asp?p=388
http://www.carlsalter.com/download.asp?p=398
 
Back
Top