• Welcome, Guest! We hope you enjoy the excellent technical knowledge, event information and discussions that the BMW MOA forum provides. Some forum content will be hidden from you if you remain logged out. If you want to view all content, please click the 'Log in' button above and enter your BMW MOA username and password.

    If you are not an MOA member, why not take the time to join the club, so you can enjoy posting on the forum, the BMW Owners News magazine, and all of the discounts and benefits the BMW MOA offers?

  • Beginning April 1st, and running through April 30th, there is a new 2024 BMW MOA Election discussion area within The Club section of the forum. Within this forum area is also a sticky post that provides the ground rules for participating in the Election forum area. Also, the candidates statements are provided. Please read before joining the conversation, because the rules are very specific to maintain civility.

    The Election forum is here: Election Forum

2017 R1200RT Drive Shaft

bullet

aka Johnny Hammerlane
So I'm in the process of lubing the shaft and final drive splines and have removed the drive shaft to inspect, clean and lube the front end of the shaft and am having some difficulty getting the shaft to align with the spline on the transmission. Does anyone have any tips or tricks to make this step easier? Any replies are appreciated.
 
The paralever does not have to be parallel to re-insert the front end of the driveshaft on the output shaft of the transmission on the WetHead.
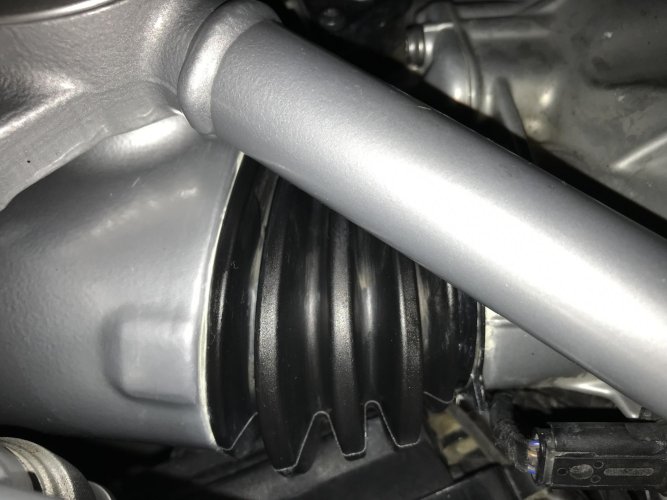
Removing the OEM "zip-tie" from the front of the rubber boot at the transmission will allow you to tip up the nose of the front U-joint when a screwdriver, or similar, while you advance the driveshaft to align with the splines on the output shaft.

If you cut the OEM zip-tie, it is a little more narrow than most bulk type zip-ties, so they are not a suitable replacement unless absolutely needed until you can get a factory replacement one. Part number 33177687623
This zip-tie is used on lots of similar bikes.

K50 (R 1200 GS, R 1250 GS)   (10/2011 — 02/2020)
K51 (R 1200 GS Adv., R 1250 GS Adv.)   (09/2012 — 02/2020)
K52 (R 1200 RT, R 1250 RT)   (01/2013 — 12/2019)
K53 (R 1200 R, R 1250 R)   (11/2013 — 12/2019)
K54 (R 1200 RS, R 1250 RS)   (06/2014 — 12/2019)
K25 (R 1200 GS)   (12/2002 — 12/2012)
K25 (R 1200 GS Adventure)   (03/2005 — 07/2013)
K25 (HP)   (08/2004 — 11/2008)
K26 (R 900 RT, R 1200 RT)   (11/2003 — 06/2014)
K27 (R 1200 R)   (11/2005 — 07/2014)
K28 (R 1200 ST)   (05/2003 — 11/2007)
K29 (R 1200 S, HP2 Sport)   (11/2004 — 07/2010)
K21 (R nineT)   (01/2013 — 12/2019)
K22 (R nineT Pure)   (12/2015 — 12/2019)
K23 (R nineT Scrambler)   (09/2015 — 12/2019)
K32 (R nineT Racer)   (12/2015 — 07/2019)
K33 (R nineT Urban G/S)   (03/2016 — 12/2019)
K48 (K 1600 GT, K 1600 GTL)   (01/2010 — 12/2019)
K61 (K 1600 Bagger)   (01/2017 — 12/2019)
 
Last edited:
No, the paralever does not have to be parallel to re-insert the front end of the driveshaft on the output shaft of the transmission...on the WetHead...maybe for some other bikes Paul.

Since my post turned out to be less than correct I deleted it to avoid any confusion.
 
So, to be clear, there's a zip tie at the front end of the front "boot" that I can cut then pull the boot back to gain access to the front end of the drive shaft as I insert it in from the back end of the swing arm?
 
Yes, that is correct. It helps to be very patient when reinstalling the driveshaft. It can take some time to get the forward splines to mate. Perhaps it is easier on an RT because of the difference in the swing arm angle, but on our GSA and GS it took me 3 or 4 re-installations to get a technique established.
 
Yes, that is correct. It helps to be very patient when reinstalling the driveshaft. It can take some time to get the forward splines to mate. Perhaps it is easier on an RT because of the difference in the swing arm angle, but on our GSA and GS it took me 3 or 4 re-installations to get a technique established.

Cool. Thanks for your reply. I have removed the left side panel and saw the zip-tie there. That should make things go somewhat more easily.
 
Holy moly!! Can you say "finicky"?
I have the zip tie off and the boot pushed back and I'm able to get one finger in there to guide the splines together.
It's been about 1/2 an hour of trying to get them meshed but so far, not so good. At least I can see the front spline, but only if I pull back the boot with the one finger that will fit in there. Time to step away for a while and take a break.
 
I use two mini bungee cords to hold the the boot back. They have sharp wire tips, so I bend the tips back so they won’t damage the boot.

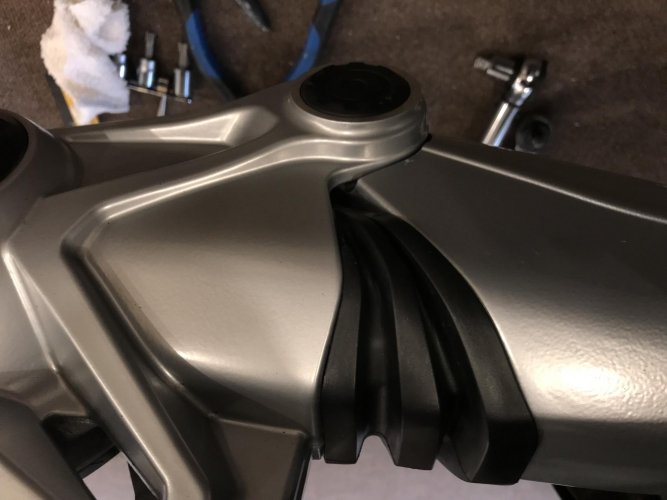
I also have loosened the rear of the boot to get a better view. When reassembling be sure to get the rear side of the boot in place first, then do the forward, zip tied, end.

I also have a screwdriver on which I put two layers of shrink wrap on the shaft. I found that I sometimes had to lever against the frame and the wrap protects the paint.
 
As I demonstrated earlier I am not familiar with the driveshaft setup on Wethead bikes. I am primarily familiar with the classic K bike driveshafts and Oilhead driveshafts. On the K bikes and the Oilheads the front driveshaft splines are clipped with a clip and grooves so for practical purposes don't slide. On the K bikes all of the sliding action is at the rear of the shaft and that is a notorious wear point. On the Oilheads the sliding action is at the splined connection of the two piece driveshaft. So once the front splines are properly greased to protect against impact and corrosion they don't need much attention.

Which brings to my mind the question as to whether these pesky, irritating front splines on the Wetheads are sliding splines or a set that is clipped in place? Real OEM shows a snap ring at the front of the driveshaft as on the earlier models.

If it is a set clipped to not slide, how often are people lubing the front splines?
 
There is a snap ring. When removing, a screwdriver makes easy work of sliding it off. When putting it on some gentle persuasion is sometimes helpful. I use an 8 inch long piece of 1"X2" wood placed on one of the ears of the shaft and then tap the wood gently.
 
I use two mini bungee cords to hold the the boot back. They have sharp wire tips, so I bend the tips back so they won’t damage the boot.

I also have loosened the rear of the boot to get a better view. When reassembling be sure to get the rear side of the boot in place first, then do the forward, zip tied, end.

I also have a screwdriver on which I put two layers of shrink wrap on the shaft. I found that I sometimes had to lever against the frame and the wrap protects the paint.

I would imagine that the rear end of the boot has that special grease as a sealant and should rightfully be cleaned and re-sealed/greased? Might as well as long I'm this far into it.

With the drive shaft out, the front boot should be removable, shouldn't it? I'd wager it has a couple or 3 tabs that pop into nothcges similar to the rear boot?

Thanks for the tips about the shrink wrap on the screwdriver and the mini bungee boot retainers.

Once the front and rear splines are mated and the final drive is back in place, can the rear of that front boot then be popped back into place?

I find that it is easier to install the rear of the forward boot before doing the front of the boot with the zip tie. I believe lithium grease is called for to help seal the boots. That is what I have used and have never had any water intrusion or rust on the splines or drive shafts of any of our bikes. The thicker the grease the better in my opinion.
 
Success at Last

After all that I will never complain about the cost of a professional tech again.
I don't know why the pics keep coming out upside down but there you go.
Now to look up some torque values and get this girl rolling again.
Thanks to akbeemer for your input, much appreciated.

IMG_4306.jpgIMG_4305.jpg
 
Back
Top