•  

    Welcome! You are currently logged out of the forum. Some forum content will be hidden from you if you remain logged out. If you want to view all content, please LOG IN!

    If you are not an MOA member, why not take the time to join the club, so you can enjoy posting on the forum, the BMW Owners News magazine, and all of the benefits of membership? If you click here, you have the opportunity to take us for a test ride at our expense. Enter the code 'FORUM25' in the activation code box to try the first year of the MOA on us!


Master Cylinder Rebuild /6 - missing part!!! HELP!

wired1000

New member
Hello all,

At the advice of the dealer I took my /6 frankenbike to, to have them look it over (been 6 years since a pro checked her out...) the mechanic admonished me for riding the bike with brakes on the verge of failure. "Hmm..." I thought... "They feel the same to me as they have for the past 6 years"

Anyway, proceeded with rebuilding the master cylinder. Once I got it apart, found nasty pitting inside. I had a rebuild kit I'd bought some years back in a fit of overenthusiasm, but I found that the MC had a larger bore than the piston included in the rebuild kit! Ay!

Since it was badly pitted anyway, I bought a proper /6 MC from ebay, and today I was putting it all together. Unfortunately, the seller failed to include one piece...

In between the spring and the piston, there is this "special washer" type thing, that fits inside the spring but also extends around the end of the spring to hold it in place. This part didn't come with my rebuild kit either, so I'm kind of at a loss...

Any chance someone has one of these laying around? Or, is there a way I can just use a flat washer or some other readily available part? I'm afraid to not include this piece as the spring is too big for the next part in line... that little flimsy "cup" thing that fits over the rubber seal. I think over time the spring would damage that cup thing, without that special washer thing protecting it.

Again, if anyone knows a way to jury rig this or has the actual part lying around, I'm all ears!

Thanks!
 
Perhaps I am a bit confused, but why don't you use the spring guide from the original master cylinder piston? I found that part was not included in the rebuild kit and had to be transferred from the old piston to the new. Considering the price of the rebuild kit, I was a bit disappointed.
 
Perhaps I am a bit confused, but why don't you use the spring guide from the original master cylinder piston? I found that part was not included in the rebuild kit and had to be transferred from the old piston to the new. Considering the price of the rebuild kit, I was a bit disappointed.

My old bike being a bit of a frankenbike... the old MC is from a later bike (I think...) It has a larger cylinder bore, so my rebuild kit doesn't fit it. Likewise, the spring guide doesn't fit as it is too large of a diameter for my new-to-me rebuilt MC. Sorry for not being more clear. And yes, I too am disappointed that it wasn't included (in either my ebay purchase or the rebuild kit)
 
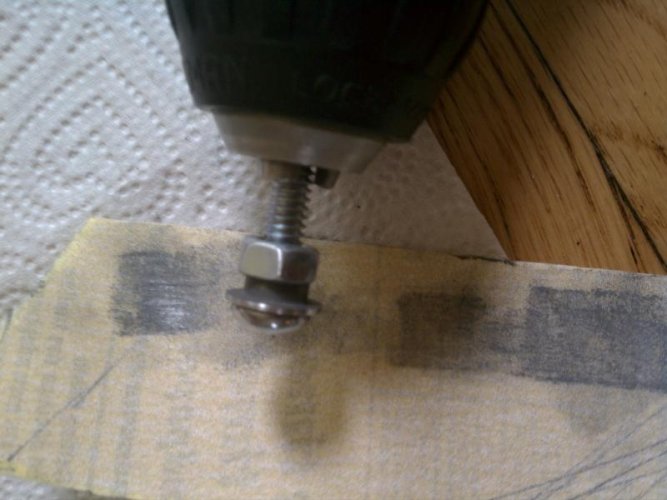
MacGuyver to the rescue... I took the spring guide (about 1mm too large for the new MC) and mounted it, as centered as possible, on this bolt. Then I put it in my drill, held some 250-grit sandpaper around it, and drilled the crap out of it until it was small enough to fit. Removed from the drill, smoothed out the sharp edges, and voila!

Now lets see if I can get this thing back together and get back on the road!
 

Attachments

  • Gretchen Spring Guide MacGuyver.jpg
    Gretchen Spring Guide MacGuyver.jpg
    50.4 KB · Views: 90
Who is the man???

Quote:

"At the advice of the dealer I took my /6 frankenbike to, to have them look it over (been 6 years since a pro checked her out...) the mechanic admonished me for riding the bike with brakes on the verge of failure. "

"Hmm..." I thought... "They feel the same to me as they have for the past 6 years"


So was there a problem or did the professional mechanic tell you a story?? Since you paid him to check things out it was his job to find a problem.

Glad you took it home to fix yourself:dance
 
Well, I'd taken it there for some more-complicated work... (rebuilding the front fork).

I was involved in a complicated rebuild on my other vehicle and was afraid if I attempted this myself I'd end up with two disassembled vehicles and no way to get to work, so I sprang for them to do it, as well as give the bike a professional once-over. I had thought that they'd find all sorts of things wrong with it, so I was sort of surprised that he was like "yeah, it's a great bike, but don't ride it until you rebuild the M/C" Apparently they avoid doing brake work because of liability concerns (or was that the story?) but he said if I needed some advice to call them.

I had bought a rebuild kit a few years ago because I thought the M/C was leaking, but after a few weeks of no fluid level drop, I decided it was fine and put the kit on the shelf.


About the lathe... yes, that and like a hundred other tools :D
 
Quote:


So was there a problem or did the professional mechanic tell you a story?? Since you paid him to check things out it was his job to find a problem.


He was right, actually... the M/C in the bike was pitted as all get-out... Hard to believe it was still working and not leaking.
 
As long as I'm asking about Master Cylinder Rebuild parts...

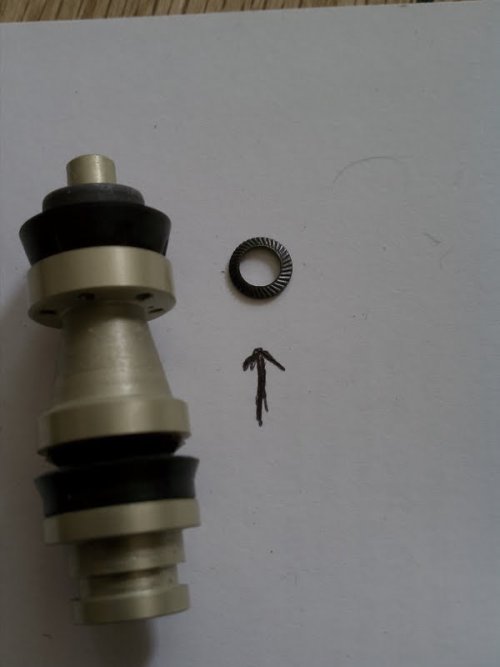
Does anyone know what this is or where it goes? Doesn't seem to fit anywhere...


Thanks
 

Attachments

  • Gretchenmysterypart.jpg
    Gretchenmysterypart.jpg
    19.6 KB · Views: 77
That's used on the bolt that holds the master cylinder reservoir in place. I can't remember exactly where, so if you still have questions let me know and I'll look on my /6 a little harder.

But, if you took it apart, you should find the old one.
 
As long as I'm asking about Master Cylinder Rebuild parts...

Does anyone know what this is or where it goes? Doesn't seem to fit anywhere...


Thanks

I never found any part resembling that during my rebuild. Mine was a 14mm (9/16") single front disk brake master cylinder. Pitting was excessive and it was sleeved by Apple hydraulics. The sleeve was ~$97.00 in total w/shipping. Of course, as soon as I sent my Master cylinder off for resleeving a used one appeared on ebay.
 
Airhead Fun

Good to see you back here, CDD.

With tongue firmly in cheek, I'd ask this question -- Just what knowledge you might have about Frankenbikes???? (heh-heh)

Seriously, you've been missed. Any projects these days?

Walking Eagle
 
As a lathe and mill owner (small mill and 2 lathes) HSM type of guy, I think the solution to this problem was good. After a while, metal working become just that - it is up to the creativity of the operator to figure out how to make or modify a part. The devil is in the details.

The part looks a bit dicey to just chuck up and turn as is - the length scales in this photo are deceiving. Also, it is a thin stamped steel part (as I recall from my rebuild). Mounting the part on a mandrel, similar to the screw shown, would be needed. But then you need to make, find, or buy the correct mandrel.

Then, the part needs to be trued on the mandrel in the chuck. While a four jaw chuck is an option, another is using a file or sandpaper while the part is turning - which is the same basic process as putting the part in a screw and mounting in a drill chuck and using sandpaper. Quite frankly, I am not sure there is a better solution than what was done. In this case, the (MacGuyver) path to the goal was a simple one - but fundamentally the same as the rigorous precision path.

As an aside, I was considering making another clutch lever pin. After disassembling and cleaning the throwout bearing it was not obvious how the pin was retained. I ordered a replacement part (51 23 1864963) which was called a securing plate. The microfiche image shows a circlip. The only way the part received would work was to make a pin having a head because the securing plate went on the end of the pin - not in the circlip groove. Clymer, Haynes, and the microfiche showed a circlip - the securing plate for the end of the pin looked good but would never work to retain the pin without a head. In the end, I went to the hardware store, bought a 5/16" circlip and reinstalled the pin using the circlip.

Edit: I did find the original circlip and reinstall it. Also, after reviewing photo's of the spring guide - it isn't stamped sheet metal. I would need a mandrel to turn it in a lathe. However, someone else may come up with a simpler solution for turning down such a part.
 
Last edited:
I will have a look at the old one, and try to fit this piece on that reservoir bolt... see if I can figure it out. Thanks!
 
Wired,

Here you go. I haven't discovered an easier method of getting the cupped washer over the plunger than using the tip of a caulking gun cut to length. It's almost criminal how simple it can be. Lots of photos here from my rebuild with notes and sketches. Hope this helps.

http://tinyurl.com/3saerp7
 
Back
Top