Navigation
Install the app
How to install the app on iOS
Follow along with the video below to see how to install our site as a web app on your home screen.
Note: This feature may not be available in some browsers.
More options
-
Welcome, Guest! We hope you enjoy the excellent technical knowledge, event information and discussions that the BMW MOA forum provides. Some forum content will be hidden from you if you remain logged out. If you want to view all content, please click the 'Log in' button above and enter your BMW MOA username and password. If you are not an MOA member, why not take the time to join the club, so you can enjoy posting on the forum, the BMW Owners News magazine, and all of the discounts and benefits the BMW MOA offers?
-
Beginning April 1st, and running through April 30th, there is a new 2024 BMW MOA Election discussion area within The Club section of the forum. Within this forum area is also a sticky post that provides the ground rules for participating in the Election forum area. Also, the candidates statements are provided. Please read before joining the conversation, because the rules are very specific to maintain civility.
The Election forum is here: Election Forum
You are using an out of date browser. It may not display this or other websites correctly.
You should upgrade or use an alternative browser.
You should upgrade or use an alternative browser.
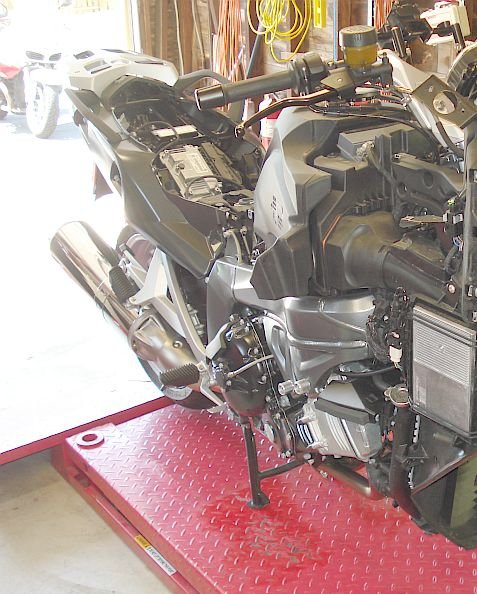
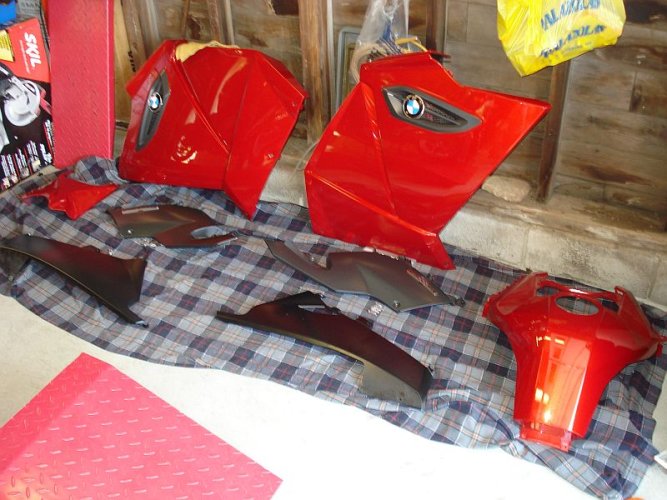
Plastic Cover Removal on a 2009 KGT 1300
- Thread starter Semper_Fi
- Start date
Semper_Fi
Honey Badger
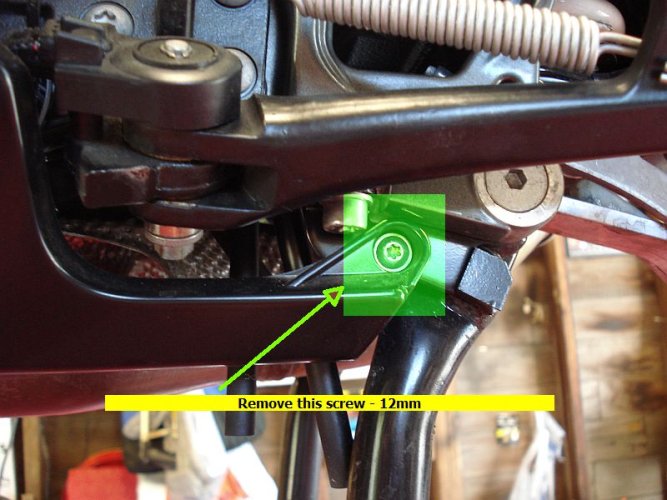
Bottom Skirt Plastic
To remove the bottom skirts you do not need to remove the two side panels - however you do have to remove the 3 screws on the bottom of each of the side panels, and then one from the frame.
The picture shows the screw to be removed from the left side - the same screw is removed for the right side panel, in addition to the 3 from its mating side panel.
Attachments
Semper_Fi
Honey Badger
Assembly Help
What you have just reviewed was the documentation of my first time removing the plastic on a KGT.
It was not a big deal - the most important part is keeping track of where the various size screws go - luckily they are all the same type!!
However one thing noticed is that the parts fit into each other - there are a lot of instances of this and I showed the major ones.
Shown in the next few images are those that you should be aware of to facilitate the reassembly process.
VERY IMPORTANT NOTE - if you are FORCING anything STOP - the bike is very well designed and if the piece is in the right place it will drop right in.
Last edited:
Semper_Fi
Honey Badger
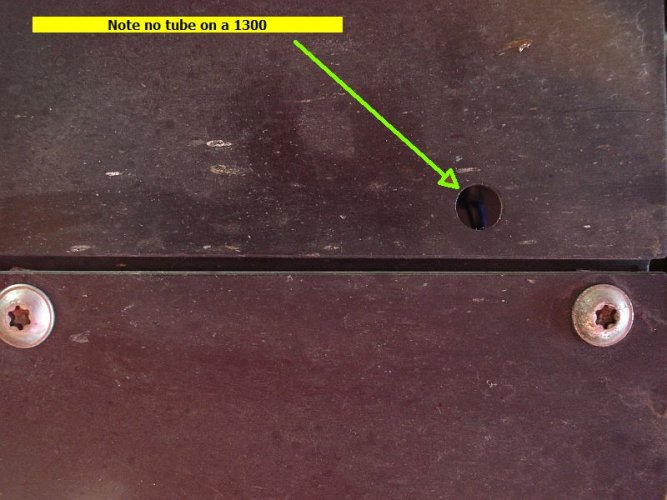
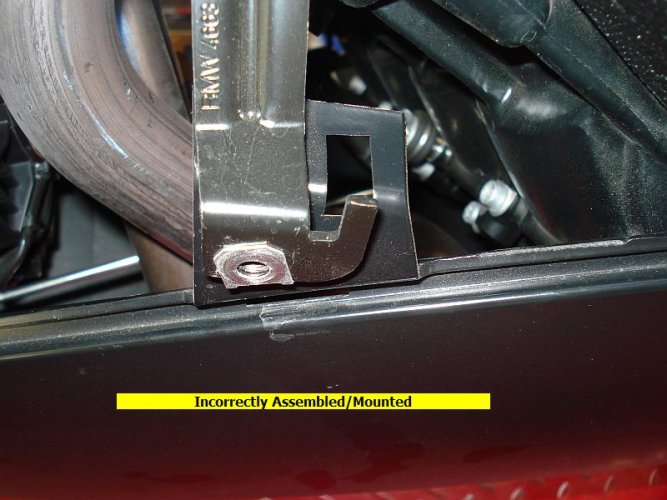
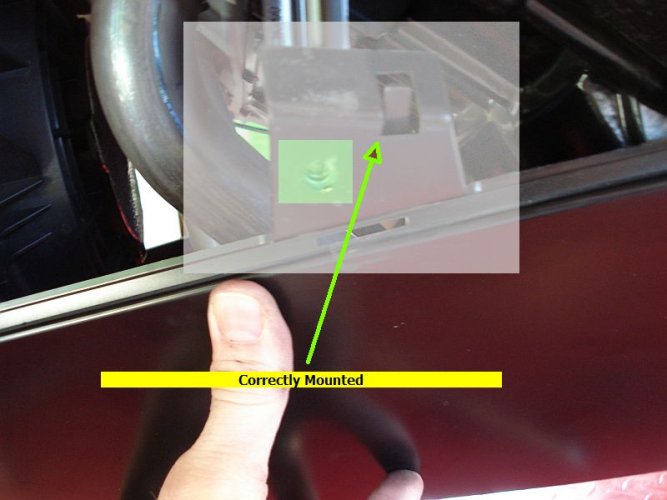
Bottom Skirt Fitment
Shown is an incorrectly mounted bottom skirt
As you can see the support tang should have been inside the notch to provide support as designed.
Please note that it is possible to be assembled in this manner and the large side plastic will be bolted onto it - this leaves the middle of the bottom skirt flapping in the breeze so to speak.
Attachments
Last edited:
Semper_Fi
Honey Badger
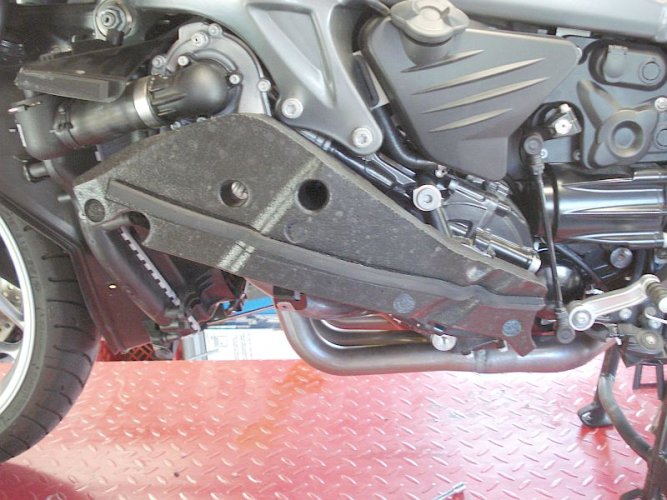
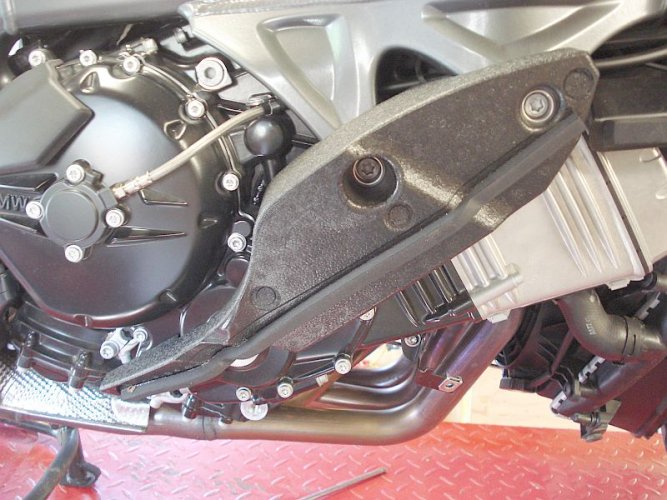
Side Foams
Behind the large side panels are supporting foam.
You can see these pieces when you are on the bike.
When you take off the panel they usually fall off.
They only go on in one positioon - unfortunately I had a little bit of trouble finding the right spot quickly - was a good laugh on me.
Shown below is where the Left Side foam should be placed for assembly.
Attachments
Similar threads
- Replies
- 43
- Views
- 13K
- Replies
- 15
- Views
- 3K
- Replies
- 9
- Views
- 8K
- Replies
- 0
- Views
- 283
- Replies
- 29
- Views
- 13K

