• Welcome, Guest! We hope you enjoy the excellent technical knowledge, event information and discussions that the BMW MOA forum provides. Some forum content will be hidden from you if you remain logged out. If you want to view all content, please click the 'Log in' button above and enter your BMW MOA username and password.

    If you are not an MOA member, why not take the time to join the club, so you can enjoy posting on the forum, the BMW Owners News magazine, and all of the discounts and benefits the BMW MOA offers?

Just joined...1994 K75S...Knowledge Needed Please.

henrymccann

New member
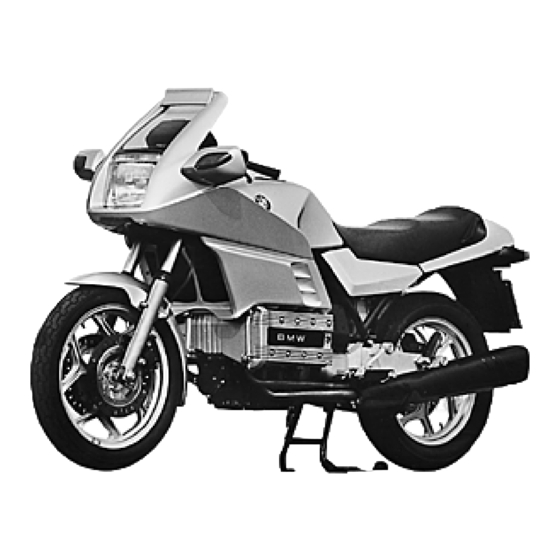
I bought a 1994 BMW K75S two years ago with 25,250 miles, excellent condition and was running well. Tires almost new. Always stored indoors.

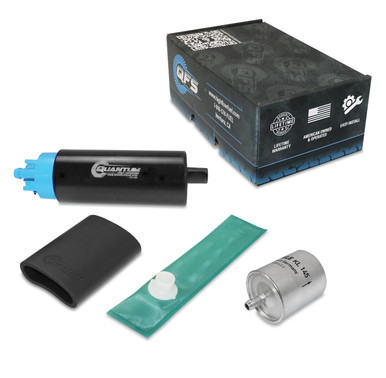
I moved shortly thereafter and it was put in storage, stupidly with gas in the tank. I now have it out of storage and want to get it on the road. A dead battery of course, but before I tried to start it what steps should I take first? Drain and replace gas? Replace what parts? Other?

I've done basic maintenance on a VStrom 650 and a Honda ST1300 but would never pretend to call myself a mechanic. I'm willing to learn and have a brother-in-law with lots of wrenching experience on dirt bikes and street bikes from Honda, Yamaha, Kawasaki, Suzuki and Harley), but never BMW. He lives 3 hours away but FaceTime works.

I've already read posts on the importance of splines checked and lubed and possibly a rubber gasket dissolved into the gas after sitting? My wife wants to ride with me so I'm guessing better suspension is needed.

Since I'm new to the site, I'm happy to read any pertinent old posts I haven't found yet and don't expect the experts here to reinvent/explain the wheel/common information for a newbie.

First BMW and excited to learn and ride this bike, Thank you in advance!
 
Stored with gas? I'd be inspecting all the rubber hoses, fuel pump, etc. that live in the fuel tank. If you have to replace any of the bits, it's pretty evident what needs doing. There are some K75 experts on this board, so please ask.

And you definitely want a strong and well charged battery. K 75s use a relay for the starter and if you try to start it with low voltage, it will weld the relay contacts together and continue cranking even after you've removed the key.

I'd recommend a fluids change, lubing the drive shaft splines at minimum and trans input splines if you're willing to split the bike in half.

That's where I'd start to return it to service.
 
I like having various sources of information. Following are links where some info can be obtained -


Henry,


Welcome to the Forum!

If the bike hasn’t been cranked since you put it into storage, DO NOT CRANK THE ENGINE!!! If you do, you could suck up the dissolved remnants of the rubber pump vibration damper that has pooled just below the intake to the pump and pump it throughout your fuel system and injectors.

I have to be somewhere in a few minutes, but I will get back to you later this evening or tomorrow morning to describe how to inspect it BEFORE you do any damage.


:dance :dance :dance
 
One thing that is easily checked for degradation in ethanol gas is the rubber vibration damper that is around the fuel pump. I'd recommend first siphoning as much fuel from the tank as possible. Next remove the fuel fill cap (#6 in figure) by removing the counter-sunk screws (#9). Some folks like to use this opportunity to eliminate the part shown as #11. I strongly suggest the wearing of suitable gloves when immersing one's hand in gasoline [I like nitrile gloves.]

In the figure of the fuel pump the rubber vibration damper is shown as item #3. If the rubber is degraded then one's gloved hand will have a lot of black residue from the degraded rubber. It will not take much of this gunk to harm the fuel pump and plug the filter. If replacements are needed EME has some options.

The figures came from the Max BMW on-line parts fiche; this is also a useful resource.


k75s fuel tank1.jpgk75s fuel pump filter1.jpg
 
robsryder excellent information and recommendation of nitrile gloves, which I had not heard of before. I would not attempt this without the knowledge and expertise from the members here.
 
I will confess that I purchased my first K75S as a "fly and ride" - the bike was in northern California and the plan was to ride the bike to Ohio. I knew a good bit about airhead BMW bikes, but not so much about K bikes. The feller that goes by 98lee took it upon himself to meet up with me and give me an extensive tutorial (about 12 hours worth) before my wife and I began our cross country trip. 98lee has quite a collection of K75S bikes and he is a very good authority on the topic. I am mostly repeating that which I have learned.
 
Here is another 98lee suggestion for a cost effective fuel pump should such be needed. [I purchased one of these just to have as a spare!]

https://www.highflowfuel.com/qfs-fu...ooter-efi-in-tank-oem-replacement-hfp-437-tf/

The above link gives an error, but the info can be found from this vendor, now at this link -

And, this is the correct link (as of now!) for the K75S -

That tip came from the thread linked below -
 
Last edited:
Henry,


Sorry it took so long to get back to you. Life got in the way. :dunno

The first thing to do is remove the fuel cap assembly. Open cap and remove the 4 phillips screws in the cap base. These phillips heads can strip out easily, so make sure you have a non-worn, good fitting screwdriver. Put all your weight pushing the screw driver down into the screw while turning until it is broken loose. Remove the cap assembly. It’s a good idea to cover the tank with 2 layers of towels with a hole in the middle to access the inside of the tank. This should prevent paint damage from dripped fuel.

Note that there is an open slot in the cap base between the two left screws. This aligns with the hole in the tank between the two left screws. This is the cap rain drain that keeps rain water that collects around the cap from entering the tank. There is a tube inside the tank that drains the water out the bottom. When reinstalling the cap, the hinge MUST be towards the rear of the bike to allow the drain to work properly.

The tank is aluminum, so the inside of the tank SHOULD be bright shiney silver. If there appears to be a light brownish bathtub ring on the lower part of the tank, that is the first indication of the pump damper breaking down.

The next thing to do is drain the tank. The tank will NOT gravity drain by merely removing the hoses from the tank due to the routing of the tubing inside the tank. Yes, a little fuel will come out, but not the majority. The best way to drain the tank is with a transfer pump. A very good inexpensive one can be bought from Harbor Freight or Summit Racing. I have a couple of the Harbor Freight ones that I’ve used for years with great results.
www.harborfreight.com

Battery-Operated Liquid Transfer Pump

Amazing deals on this Transfer Pump Battery Operated at Harbor Freight. Quality tools & low prices.
www.harborfreight.com
https://www.summitracing.com/parts/wmr-w54172#overview
After draining the tank, again look for discoloration below the fuel level.

Next, you will want to remove the fuel pump. It is mounted to a shelf inside the left front of the tank. Part #4 in Rob’s image above has a clip on the front and rear of it that holds the pump down to the shelf. It releases by pressing both tabs towards the pump.

There were two different fuel pumps that came on the Flying Bricks. The 52mm pump was used on bikes built before 1/93 and the 43mm pump that was used on bikes built after 1/93.

The pump on the left is the 52mm pump with the very delicate “cup” inlet screen. The pump on the right is the 43mm pump with the more robust “sock” inlet screen.
IMG_0127.jpeg


If you want to know which pump you have before removing it, look for these wrinkles in the housing at the top of the pump. If it has the wrinkles, it is the 52mm pump with the delicate screen. Be VERY careful while lifting this pump out of the shelf so as not to tear the screen on the cup. If it doesn’t have the wrinkles, then you have the 43mm pump (or perhaps a 37mm aftermarket pump) with the more robust sock filter. The only issue with that is it requires a little more manipulation to get the sock through the hole in the shelf, but it shouldn’t tear.
IMG_0128.jpeg


BEFORE removing the pump, have a 6mm and 7mm wrench (or a tiny crescent wrench) on hand to remove the wires once the pump is out of the tank (the wires are long enough).

Take a long screwdriver or a 7mm nut driver and remove the hose clamp from the short hose that is connected to the fuel filter. Disconnect it from the end furthest from the filter and leave the clamp on the tube in the tank. Disconnect the hose from the tube. Drain as much fuel as you can from filter into tank.

IMG_0133.jpeg


Now, lift filter and the attached hoses straight up out of the tank until the hose is tight. Now reach into the tank with the other hand and grip the two tabs in front of and behind the pump. Squeeze them together, toward the pump to release them from the shelf.

IMG_0132.jpeg


Use the hand on the filter to provide the lifting and the hand in the tank to guide the pump through and clear of the shelf. Once clear of the shelf, remove the hand from the tank and lift pump out of tank. Disconnect wires once pump is outside the tank. Small terminal is positive and large terminal is ground. You do have the key off, right?

Take pump to bench and test with a battery. Just briefly touch wires to appropriate terminals. If it doesn’t turn over, try briefly reversing polarity to see if it will unstick. If it can’t be unstuck, you need a new pump.


Check the rubber vibration damper surrounding the pump for deterioration. It should have the consistency of a tire with no gooeyness and no transfer to your finger. There should be no missing areas around the lower edge.

Now you get to thoroughly inspect the tank. First, with a flashlight and small inspection mirror, inspect the well below where the pump mounts. That is where any dissolved pump vibration damper will settle first. Is it clean enough to eat out of? It better be, because that’s what you pump, filter, injectors, and motor will be eating if it’s not!

ALL hoses used in the fuel system MUST be rated for fuel injection (100 psi+)!!!(Except the vent hose used on the 54mm inlet screen)

ALL hoses used inside the fuel tank MUST be submersible rated!!!


Let us know what you find and we’ll go from there. Who knows, you may get lucky, if no one has pumped any crud through you fuel system. :dunno WAY better to check first than just roll the dice.:thumb


:dance:dance:dance
 
Last edited:
robsryder thank you again. Great information.

98lee I don't know what to say? Extremely thorough with excellent pictures!!! I am much more confident now to remove and assess the fuel pump. I'm guessing the 43mm pump since it's a '94, but will no for sure when I remove it.

I will order a transfer pump right away and keep you posted. Thank you for so willingly sharing your time and extensive knowledge of K bikes.
 
Henry,

Yes, your’s should be the 43mm pump (unless someone changed it). I mostly included the info on the 52mm pump for others that read this thread that might have an earlier bike.


:dance :dance :dance
 
My apologies, I have not ghosted the thread I started. I have been busier at work and have been getting a 4 wheeler ready to sell.

I got the pump to drain the tank and am anxious this week to follow the wisdom and counsel I have received above. I will respond soon about what I find out with the pump. Thank you again!
 
Back
Top