• Welcome, Guest! We hope you enjoy the excellent technical knowledge, event information and discussions that the BMW MOA forum provides. Some forum content will be hidden from you if you remain logged out. If you want to view all content, please click the 'Log in' button above and enter your BMW MOA username and password.

    If you are not an MOA member, why not take the time to join the club, so you can enjoy posting on the forum, the BMW Owners News magazine, and all of the discounts and benefits the BMW MOA offers?

Centech Fuse Panel Install on a KGT 1300

Semper_Fi

Honey Badger
The articles, posts and comments in this tech section are posted by individual members and reflect their personal thoughts and experiences with repairing, maintaining, and generally working on motorcycles. This information may require specific knowledge and skills, may or may not be correct or current to model.

The authors of information found here and the BMW MOA take no responsibility for ensuring the accuracy of any information (including procedures, techniques, parts numbers, torque values, tool usage, etc.), or further for any damage of any kind or injuries incurred or caused by anyone following the instructions or information found here.

It is the duty of the individual to either assume the liability himself for responsibly using the information found here, or to take the bike or accessory to a Dealer or other qualified professional service.


Lastly, please ensure you dispose of your used chemicals, oils and fuels in an environmentally responsible manner. Most Auto Parts stores and service stations will accept used oil and lubricants, tires and batteries, please check for your local availability.


This article, text and photos are Copyright of the individual authors and the BMW MOA, any copying or redistributing is permitted only by prior written authorization.
 
Last edited:
This DIY will show you how I mounted my Centech on my KGT1300.

****This Pictorial does not intend to supercede or replace the instructions provided by the vendor****

The Centech that I used includes a control relay which needs a trigger wire to activate.

The trigger wire that I used was from the auxiliary side lights contained in the front head light assembly.

What this form of trigger provides is instant off, instant on once the key is turned in the ignition - there is no delay in shut off.
 
Last edited:
Preparatory Work

You need to access the battery, the left side (clutch), and the auxilliary light wiring.

The best way for maximum access is to remove all the plastic shown here

To access the auxiliary plug you need to remove one piece but it is layered in so you will need to remove the front nacelle shown here
 
Last edited:
Routing Wiring

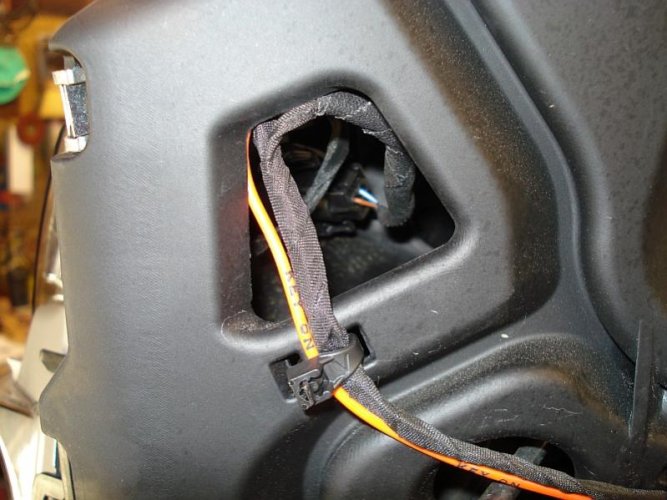
The picture shown below highlights the Orange wire, which from the kit is the trigger wire for the relay.

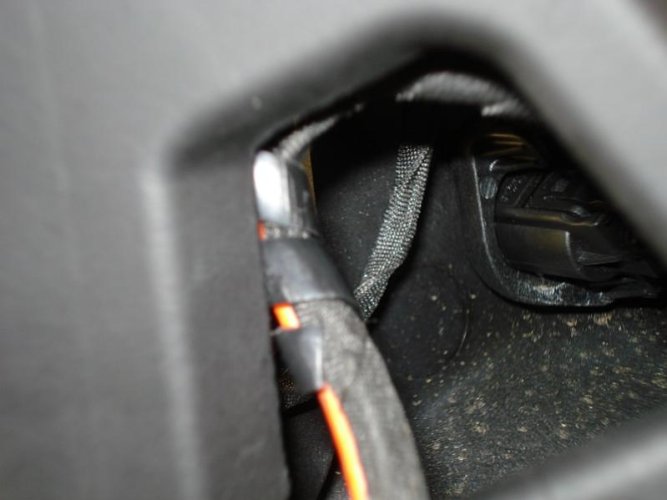
I routed this wire onto an exisiting harness and brought it the point of where the socket of the auxiliary connector reach. Remove the auxilliary bulb to prevent damage to it.

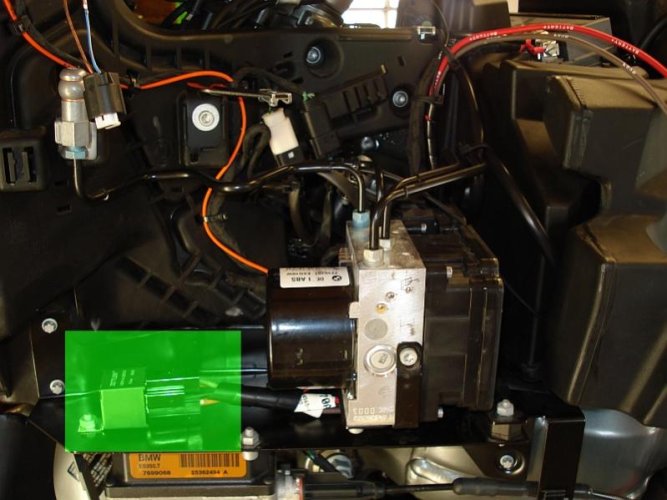
The highlighted green area is where I mounted the Relay of the Centech and routed the wiring under the ABS unit and up along the frame then wire wrapped it for neatness
  • Tools used are a T30 torx and a 10mm wrench

At the top left of the corner you can see the blue wire of the connector prepared to have the trigger wire soldered onto it.
 

Attachments

  • Relay Mounting.jpg
    Relay Mounting.jpg
    62.8 KB · Views: 573
Last edited:
Prepping the Trigger

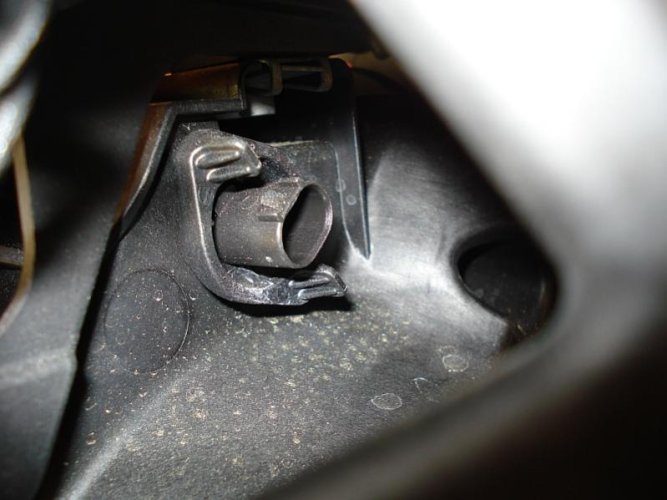
First locate the connector and pull out the male end off of it (located in the left rear of the front nacelle)
 

Attachments

  • Connector for trigger.jpg
    Connector for trigger.jpg
    52.2 KB · Views: 563
Last edited:
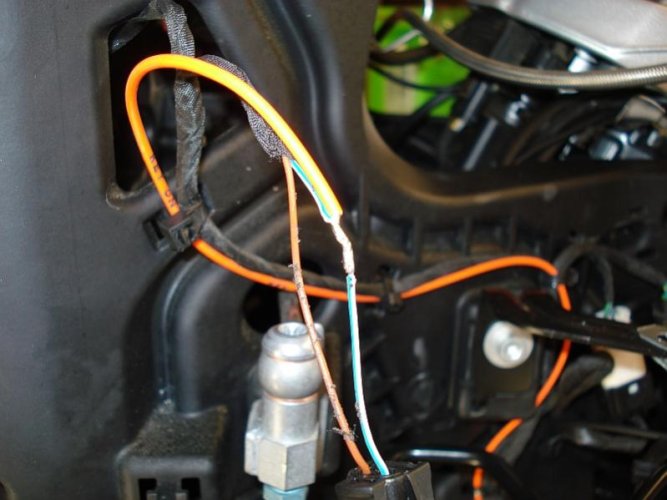
Remove the friction tape wrapping off of the wire harness and expose the Blu/Wht wire.

Remove a section of insulation and wrap into it the trigger wire as shown.

Once mounted, solder in place.
 

Attachments

  • Wire Prep.jpg
    Wire Prep.jpg
    53.1 KB · Views: 562
Completing the Trigger

Wrap up the exposed wire with friction tape
 

Attachments

  • wire wrap.jpg
    wire wrap.jpg
    68.1 KB · Views: 558
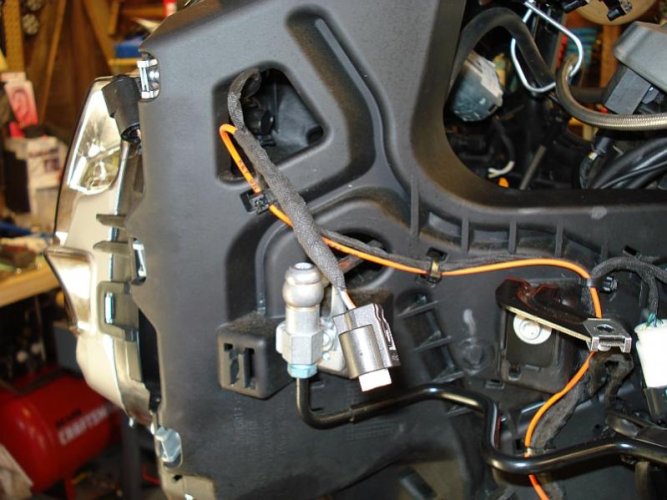
Once the harness is properly repaired/reconstructed install back into socket.
 

Attachments

  • Trigger install complete.jpg
    Trigger install complete.jpg
    70.2 KB · Views: 556
Shop tip - I noticed how the harness fell when i reinstalled it so as added protection I added some wire harness wrapping to it.

Probably not needed - totally optional
 

Attachments

  • Wire protection.jpg
    Wire protection.jpg
    37.6 KB · Views: 552
Last edited:
Mounting the Centech

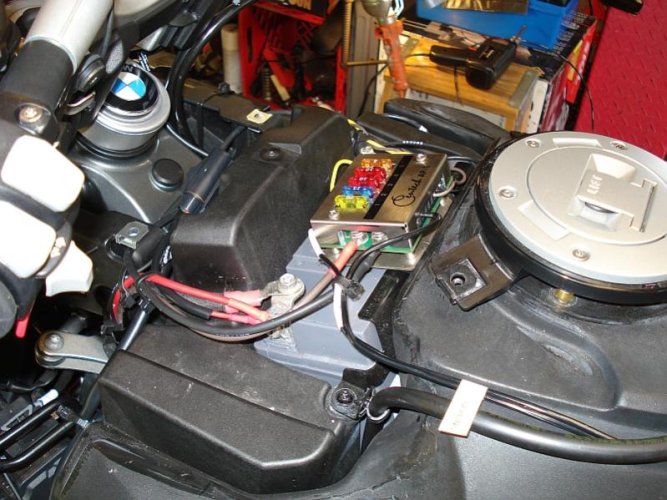
For ease of access I decided to mount the Centech on top of the battery.

You can mount the Centech where ever you want - my method is just another option.

The supplied kit has ample excess wiring to basically mount anywhere on the bike.

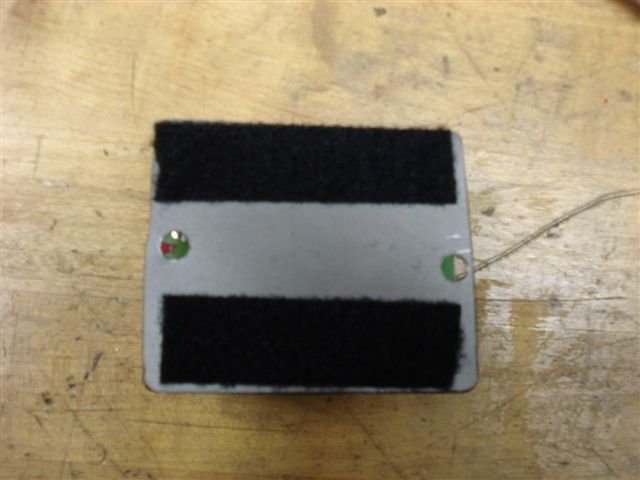
I used a piece of industrial velcro and attached the bottom of the centech to it.

I used a piece of scrap sheet metal to create the attachment point.
 

Attachments

  • DSC02753.JPG
    DSC02753.JPG
    46.7 KB · Views: 560
Last edited:
Back
Top