•  

    Welcome! You are currently logged out of the forum. Some forum content will be hidden from you if you remain logged out. If you want to view all content, please LOG IN!

    If you are not an MOA member, why not take the time to join the club, so you can enjoy posting on the forum, the BMW Owners News magazine, and all of the benefits of membership? If you click here, you have the opportunity to take us for a test ride at our expense. Enter the code 'FORUM25' in the activation code box to try the first year of the MOA on us!


77 R100RS center stand

tleonard

Member
I have wanted to replace the -ride off- center stand for a stock center stand. I purchased what was advertised as a used stock stand off Ebay. Everything appears as it should except I am unclear about the springs. The supplied left spring attaches to the side stand "shackle' or bracket and to the tab on the center stand. This holds the stand up and seems to work ok, not super tight, but ok.

The right side of the stand has the same spring mounting tab as on the left. However, no additional spring was supplied, nor do I see anywhere to attach the front of the spring. Max's Fiche says it needs 2 springs.

Is it supposed to be a 1 or 2 spring setup. If 2, where does the right-side spring attach to the bike.

Thanks, Tom
 
For the side stand you need 1, #14 spring. For the center stand you need 2, #7 springs? Or that's how I interpreted the picture.
 
… the front engine through bolt will have spacers between the engine crankcase and frame tube; the spacers have provisions for attaching the one end of the two(2) springs…

Left Spacer:

IMG_6115.jpeg

Right Spacer:

IMG_6116.jpeg

In this image, courtesy BMWAG, shows their location and orientation of the hole for the center stand springs…

IMG_6117.jpeg

You are correct with the spring count.

There is a “long” and “short” leg on each spring; the “long” end goes to the center stand, “short” to the spacers. The left spacer has a bent “ear” for attaching the side stand spring.

There is some routing required to fit them. I put the bike on its center stand; apply and tighten a ratchet strap from the center stand lower cross-bar to the exhaust headers cross-over tube… this secures the bike from collapsing upon you, while installing the springs !

I use a smooth-jawed Vise Grip to grab the hook end and pull it aft and over the grooved pin in the upper section of the center stand… as with any spring, there are opportunities to get “bitten” !
 
Last edited:
… to follow-up a bit: the right side center stand M10, Grade 12.9 bolt, with hardened steel “donut” that the center stand rotates on, is right hand thread (right is tight); there is a dangerous tendency of the bolt to LOOSEN every deployment of the center stand as, the center stand applies left hand (left is loose) torque as the weight of the motorcycle is applied to the hardened spacer and bolt !

It gradually unscrews and there is the soul crushing, heart breaking final thread of the bolt coming out and the motorcycle falling away to the right hand side ! Grown men have been known to… 😥

Every time you check the engine oil level, wipe off the oil first pulled up on the dipstick onto the right side pivot/spacer/bolt. Then, check the oil quantity and wipe that oil onto the left side pivot/spacer/bolt.

Every engine oil change, check the torque on the pivot bolts ! All Motorrads new to me, while secured on the lift, I remove both bolts/spacers; clean them and the forged steel fitting they fasten to with brake cleaner; RED LOCTITE them upon reinstallation. I torque to 25 FT/LB and apply a “slippage mark” across the head of the bolt, so on a walk-around pre-trip inspection, I can visually to see if the slippage mark has moved 😉

Once AVGAS or JET A get’s in your blood, it’s difficult to give-up old habits that worked !
 
Last edited:
I struggled to fit new center stand springs until I recalled a "trick" that I think came from a motorcycle magazine from the 70s. The trick is to take some pennies (1 cent pieces) and place in the spring; it seems like I used maybe 12 to 15 pennies. This caused the spring to be elongated to facilitate a more easy fastening of the spring to the attachment locations. I then used a ViseGrip to remove the pennies.
 
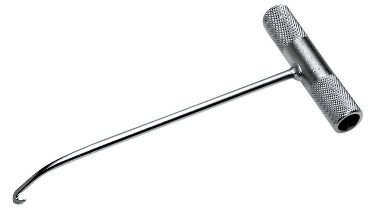
That works, but a strong "spring hook grabber", available from Motion Pro, Cycle Gear, and most auto parts stores works pretty well too.
motion_pro_heavy_duty_spring_hook_750x750.jpg
A couple of weeks ago, a neighbor was having a heck of a time trying to get a new spring on to his HD's sidestand... until I came over with my hooked spring tool, and it went on lickety-split (another one of those hi-tech terms).
 
Flexing the spring side to side, while inserting coins or washers between the coils can work too.
 
As we are talking about how to hook up the spring, while I have the "hook tool", sometimes I just put a looped cord on it and pull it from a distance which gives me (usually) better leverage. Then I cut the cord off at the spring.
OM
 
Thanks all. It seems I'm looking for spacer #6 on the right side. The ride off stand used different springs and mounts so I wasn't sure if 2 springs were even required for my model bike. Olironrider makes a good point; both the right and left bolts were quite loose when I went to remove them.

Thanks----
 
Back
Top