• Welcome, Guest! We hope you enjoy the excellent technical knowledge, event information and discussions that the BMW MOA forum provides. Some forum content will be hidden from you if you remain logged out. If you want to view all content, please click the 'Log in' button above and enter your BMW MOA username and password.

    If you are not an MOA member, why not take the time to join the club, so you can enjoy posting on the forum, the BMW Owners News magazine, and all of the discounts and benefits the BMW MOA offers?

  • Beginning April 1st, and running through April 30th, there is a new 2024 BMW MOA Election discussion area within The Club section of the forum. Within this forum area is also a sticky post that provides the ground rules for participating in the Election forum area. Also, the candidates statements are provided. Please read before joining the conversation, because the rules are very specific to maintain civility.

    The Election forum is here: Election Forum

no compression at all either cylinder!

The safety bars (BMW's description) aren't that difficult; a nuisance, perhaps, but not onerous. Only adds a half hour or so to the disassembly. Besides, they must come off to remove the tupperware. The safety bar base support system can stay where it is, as can the support rods under the cylinder heads.

As I recall, the exhaust system has to come off if the belt cover has not been modified by cutting it in two. Exhaust system removal is also not a big deal as long as you remember to disconnect and clear the O2 sensor harness first!!! Order up a new alternator belt and exhaust gasket rings!

I noticed your mention of a 'timing cover'. All that's in there is the alternator belt and the ignition system trigger which is all but hidden by the pulley on the end of the crank but is probably worth inspecting.

Are you using one of the dealer's on-line fiches for visual reference? I prefer the Max fiche.

It's not as frustrating working on the RTP up here in the Great White North, where the riding season is suspended for at least four months of the year by frozen white fluffy stuff on the ground and where the shop is insulated from the cold.

I get the privilege of clutch duty on the pig next winter. Oh Joy! :banghead
 
Way ahead of you

The safety bars (BMW's description) aren't that difficult; a nuisance, perhaps, but not onerous. Only adds a half hour or so to the disassembly. Besides, they must come off to remove the tupperware. The safety bar base support system can stay where it is, as can the support rods under the cylinder heads.

As I recall, the exhaust system has to come off if the belt cover has not been modified by cutting it in two. Exhaust system removal is also not a big deal as long as you remember to disconnect and clear the O2 sensor harness first!!! Order up a new alternator belt and exhaust gasket rings!

I noticed your mention of a 'timing cover'. All that's in there is the alternator belt and the ignition system trigger which is all but hidden by the pulley on the end of the crank but is probably worth inspecting.

Are you using one of the dealer's on-line fiches for visual reference? I prefer the Max fiche.

It's not as frustrating working on the RTP up here in the Great White North, where the riding season is suspended for at least four months of the year by frozen white fluffy stuff on the ground and where the shop is insulated from the cold.

I get the privilege of clutch duty on the pig next winter. Oh Joy! :banghead
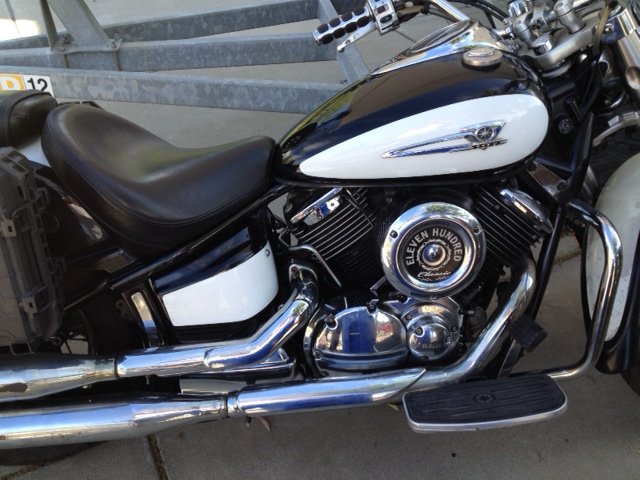
I know it's a long read, but I'm done with what you mentioned. The timing CHAIN cover is what has to come off next. I'm going to remove the wheel and forks to make it lighter up front, and give me more room, I can see this isn't going to be a quick and easy fix. In the meantime, I'm riding my 2001 Yamaha XVS 1100, also black and white, but not a police bike.
IMG_1826.JPG
 
Last edited:
PITA safety bar support removal

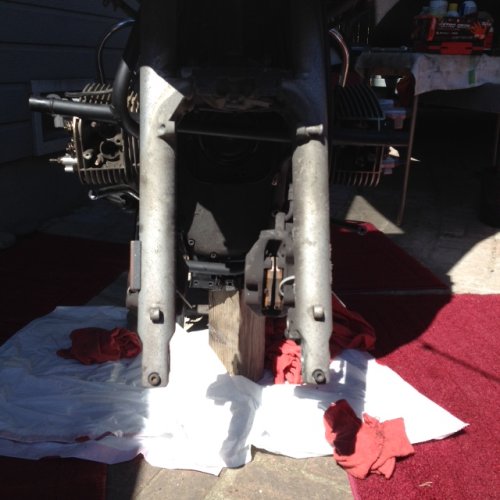
IMG_1867.JPGafter 2 more hours, I have the support loose, but it looks like I need to remove the fork tubes too. I'm seriously considering cutting it up in several pieces with a 4 inch high speed carbide wheel! I wouldn't put this support on my worst enemy's bike much less back on mine.
I can take off the seat, tank, carbs and float bowls and fuel filter on my Yamaha and put it all back together in 1 hour, I've done it a few times, but still, this bike is nuts to work on.
OK, after a good night's rest, sanity has returned, I'll just take off the handle bars and forks today and have a look-see under the chain cover.
 
Last edited:
Taking the forks off is competely optional, but the suspension arm needs to move forward. This can be done with the forks in place, but the pivot shaft for the arm needs to be removed. I remove the front shock and block up the forks to allow them to pivot forward, taking the suspension arm with them, being careful not to tug on the brake hose or abs wires.
 
026.jpg
Taking the forks off is competely optional, but the suspension arm needs to move forward. This can be done with the forks in place, but the pivot shaft for the arm needs to be removed. I remove the front shock and block up the forks to allow them to pivot forward, taking the suspension arm with them, being careful not to tug on the brake hose or abs wires.
Yes, I saw your photo, but at this point, getting everything out of my way, and lighter, is the way I went. The "safety bar" support is now off after I removed the oil cooler return line which had to come off since it looped thru the safety bar support. It was in the way of the chain cover anyway.
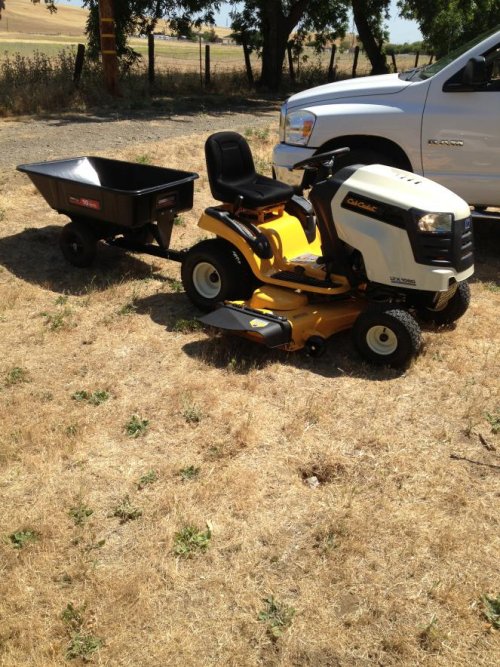
Next is the suspension arm, alternator support bracket, and finally the 20+ bolts securing the cover itself. I'm learning to rest between minor feats, makes it much more enjoyable, which is suppose to be the idea. Also I need the afternoons to spend time with my wife on the ranch, she was getting tired of my 12 hour motorcycle fixing days and being too tired for anything else. Yesterday, I showed her how to change her riding mower blades. Yes, she loves to mow and trim with her little trailer following behind. Cub Cadet 50 inch tri blade.
 
Last edited:
Found the problem

IMG_1873.jpg
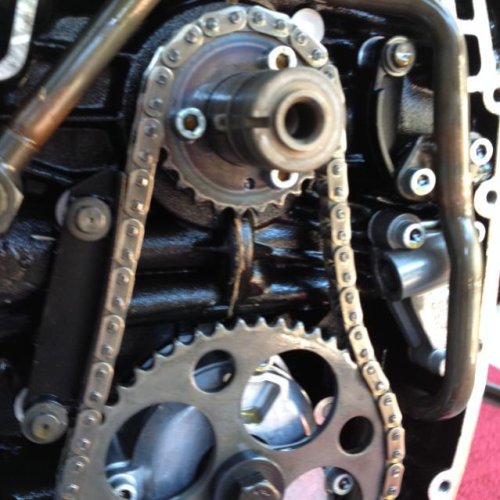
The left timing chain tensioner is broken off, and the tensioner piston is in pieces in the bottom. The timing mark is off on the crankshaft sprocket, should be at 6 o'clock, it's at 4 o'clock. So the tensioner broke, and it jumped time. Getting to this point has been an ordeal, but at least I found out why. I need parts now. And a nap.
 
Most excellent you found the problem by a process rather than SWAG.

I wish the guys that work for me were as patient:hungover
 
Parts in timing case

IMG_1880.JPG
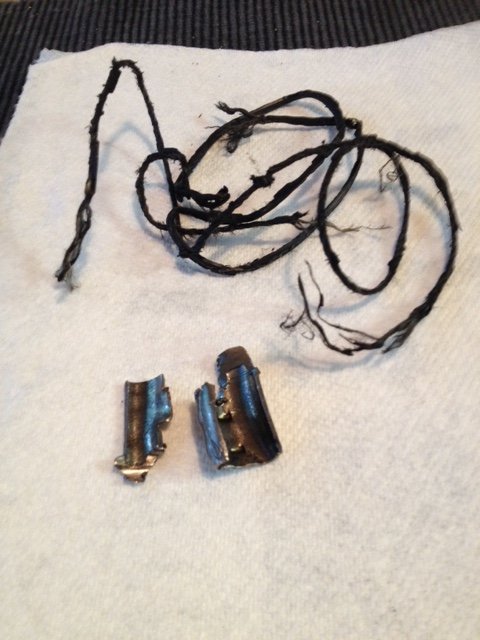
This is what came out of the timing case. The metal is magnetic, the tensioner piston? You can see where the sprocket teeth chewed it up.
The three strand wire wrapped around the crankshaft is not magnetic, it's a dull silver color with black (maybe oil stained) plastic coating. It was caught between the nubs that stick out, perhaps crank position pickups? First time I've been into a BMW timing case, any ideas how this wire got there? I'll fish in the crankcase through the lower sprocket with my magnet and see what else comes out tomorrow.
 
The cord absolutely looks like it's from a broken alternator belt. It's not uncommon that a strand like that will wrap around the shaft behind the lower pulley and damage the HES, but I've never heard of it migrating through the seal into the timing chest.
 
How it got into that cavity is the puzzler. I was thinking it may have been a harness from an HES that got snagged, but then again how? He did say it had 3 conductors, sure would like to know their color code which may give us a clue of where it went. :scratch
 
Alternator belt strand

The cord absolutely looks like it's from a broken alternator belt. It's not uncommon that a strand like that will wrap around the shaft behind the lower pulley and damage the HES, but I've never heard of it migrating through the seal into the timing chest.
This bike has a brand new looking alternator belt, and with your observation, I think that's exactly what it is. Since it has spark at the plugs when grounded on the heads, apparently the non magnetic metal(stainless steel?, do these belts have SS wire in them) didn't disturb the sensor pickup.
How it got there, magic? Also strange, it wasn't wound tightly as I would have expected, like it was loosely wound around there by hand. I reached in and just pulled it out.
 
Last edited:
How it got into that cavity is the puzzler. I was thinking it may have been a harness from an HES that got snagged, but then again how? He did say it had 3 conductors, sure would like to know their color code which may give us a clue of where it went. :scratch

That vintage HES cable actually has 5 conductors - Black, Red, Orange, Brown and a bare shield.

The mangled mess looks too long to be an HES cable as well.
A more detailed picture would be nice.
 
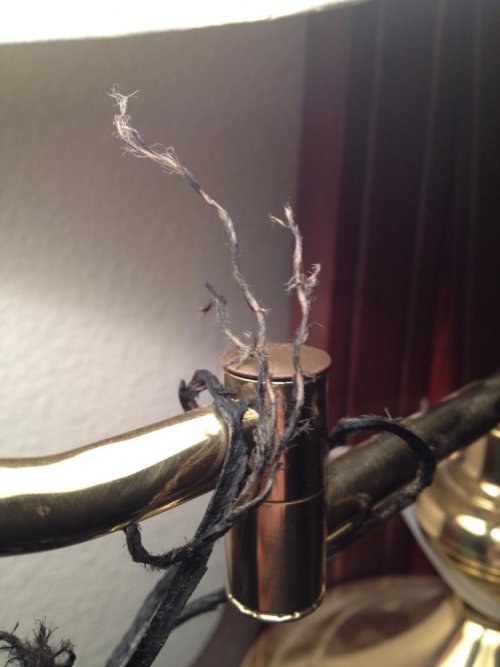
better photo

That vintage HES cable actually has 5 conductors - Black, Red, Orange, Brown and a bare shield.

The mangled mess looks too long to be an HES cable as well.
A more detailed picture would be nice.
IMG_1883.jpg
This is just unwound a bit, you can barely see the thin wire center. I shaved another end, and the wire is strong, not copper.
 
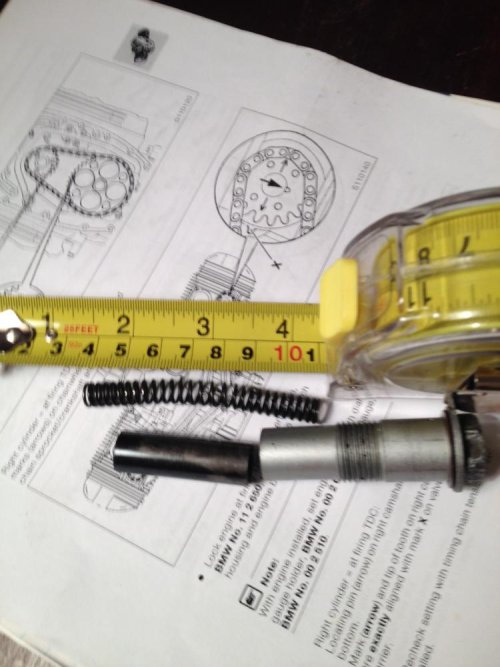
look at what I found with a magnet on a stick tool

IMG_1890.jpg
After some measuring, this is the piston and spring are from the left cam sprocket chain tensioner I lost by not following proper procedure. The chewed up piston from the timing chain chest was recovered earlier, and it's silver colored spring was in my parts pan, must have fell in there when I took off the timing chain cover. So all parts are accounted for.
I removed and realigned the timing chain sprocket, and all 4 the timing marks for the right cylinder and OT line up now, yeah! The holes for the flywheel locking hole above the starter also line up perfectly too. Awaiting parts.
 
Last edited:
Progress

Today I got the rocker arms reassembled and the valves adjusted, valve covers back on. It's sooo much easier with the engine in time. It's starting to look like an engine again.:)
 
Sufferin suckatash what an ordeal! :hungover

At this point it appears you have this sorted and repairs well underway. I commend you for your persistence and can do attitude! Many, if not most, would have packed it in by now... Good on ya. :thumb
 
It's alive!

I got my parts today, and got it back together enough to see if it fires, it does! Now where do all these parts go?:scratch
 
Back
Top