• Welcome, Guest! We hope you enjoy the excellent technical knowledge, event information and discussions that the BMW MOA forum provides. Some forum content will be hidden from you if you remain logged out. If you want to view all content, please click the 'Log in' button above and enter your BMW MOA username and password.

    If you are not an MOA member, why not take the time to join the club, so you can enjoy posting on the forum, the BMW Owners News magazine, and all of the discounts and benefits the BMW MOA offers?

  • Beginning April 1st, and running through April 30th, there is a new 2024 BMW MOA Election discussion area within The Club section of the forum. Within this forum area is also a sticky post that provides the ground rules for participating in the Election forum area. Also, the candidates statements are provided. Please read before joining the conversation, because the rules are very specific to maintain civility.

    The Election forum is here: Election Forum

Neutral Switch (Transmission) - R100 GS

globalrider

Alps Adventurer
It needs replacing.

I take it for those that have or either had a R100 GS which has the factory 2 into 1 collector (BMW calls it the Front Muffler), it needs to be removed as well as the center spacer at the rear engine mount to gain easier access to the neutral switch.

And by the way, can the transmission be removed from the frame without moving the engine forward?
 
It needs replacing.

I take it for those that have or either had a R100 GS which has the factory 2 into 1 collector (BMW calls it the Front Muffler), it needs to be removed as well as the center spacer at the rear engine mount to gain easier access to the neutral switch.

Yes, and loosen all the motor mount bolts before removing the spacer. Before reinserting, file a slight bevel on the leading edge of each end of the spacer—makes it much easier to get it started.

And by the way, can the transmission be removed from the frame without moving the engine forward?

Yes.

Best,
DeVern
 
Last edited:
Yes, and loosen the motor mount bolts before removing the spacer. Before reinserting, file a slight bevel on the leading edge of each end of the spacer—makes it much easier to get it started.

Best,
DeVern

Thanks! :thumb

As for the "spacer" I'll be pulling the long stud out and either support the rear of the engine with a jack/block of wood or just use two long enough bolts to slide into each end through the frame.

As for the spacer, I can stick it in the lathe and bevel the edges as well as run a Weldon countersink in the bolt hole a tad for easier stud insertion. I am assuming the spacer is round and not a U channel. Can't seem to find that part on the BMW microfiche.
 
As for removing the transmission w/o moving the engine forward, it not as easy as it sounds IMO. I'm sure the battery and tray has to come out. Even then I think it's very tight. Usually the swingarm has to be moved back. Given that I'd be inclined to move the engine. OR. Remove mufflers, loosen front engine mount, remove rear mount, rotate rear of engine up about 30 degrees, then pull transmission back and up...might still need to remove the battery/tray. YMMV
 
When the 2-into-1 exhaust collector is removed it might be prudent to clean and touch up (paint) any rusty areas. The part towards the back wheel would get rusty on mine. Several times I removed the exhaust collector and wire brush removed rust and used some high temp (chrome "coloured" as I recall) paint. It lasted for a little while. Eventually I went with a stainless steel Y-pipe in place of the exhaust collector. [A feller on ADV was selling the Y-pipes.]

The EME switch is great, but do not forget to get a new washer. The idea about the beveled edge on the spacer is good also. Battery box, and air filter box also need to be removed to remove transmission (great time to get rid of that extra crap in air box, if still present). With transmission out, great time to clean and lubricate clutch splines (how's that clutch lookin'?).

This is how I can turn a somewhat simple sounding task in to a week-long (or at least multi-day) activity. And if I break something (don't forget to clean and lube the clutch throwout bearing and parts!) I get to order some more parts!
 
I have not heard of the two short bolts technique.

My own idea if you do not want a jack & block of wood under the tail end of the engine/transmission. The short bolts of the correct diameter (a slip fit) would simply go through the frame into the engine casing where the stud goes through but not as far to the spacer. Simply a shear on the bolt to prevent the engine from pivoting on the front engine mount. Jacks simply get in the way.

And... I have been told that Euro Moto Electric has a superior switch at a lower price than BMW.

I get my air, oil and fuel filters (Mahle) and other stuff from them, but what makes you think their switch is better? When it comes to replacing a part that is harder to get to, you want a quality part.

Yes, $29.99 vs $76.43. Now you got me thinking. Whatever happend to all the discount original BMW parts dealers like Competition and then Hammersley? Places I have dealt with since the early 90s.
 
As for removing the transmission w/o moving the engine forward, it not as easy as it sounds IMO.

I was just asking in case I might need to in the distant future. I know on my 1980 R65, it was easy without the need to move an engine or swingarm.
 
This is how I can turn a somewhat simple sounding task in to a week-long (or at least multi-day) activity.

No worries as all of this is a walk in the park for me. Even though in the times prior to the internet, why re-invent the wheel when you can ask about a procedure to make things easier and not cause you grief.

Rust? Not on my BMW. ;) And no worries about a new sealing ring...I always replace them on the engine, transmission, final drive and where ever they are needed.
 
To change the clutch on my /7, I had to remove the battery and move the swingarm back.
 
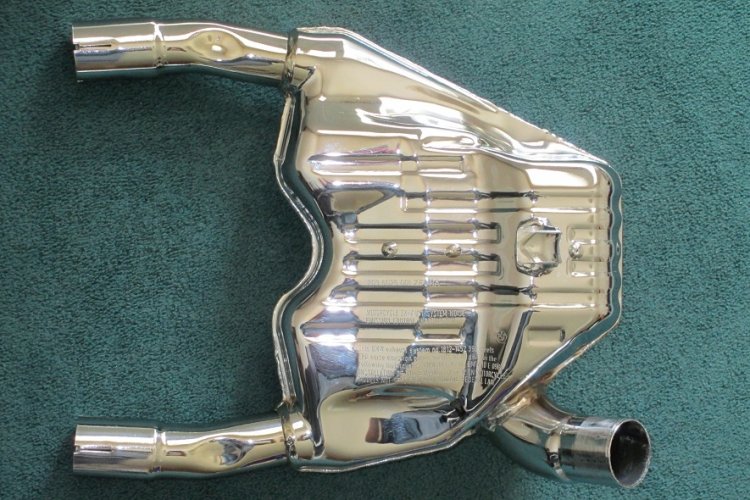
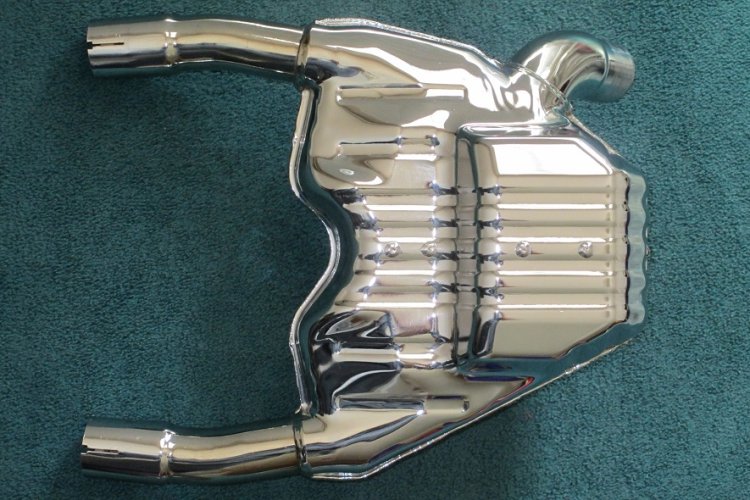
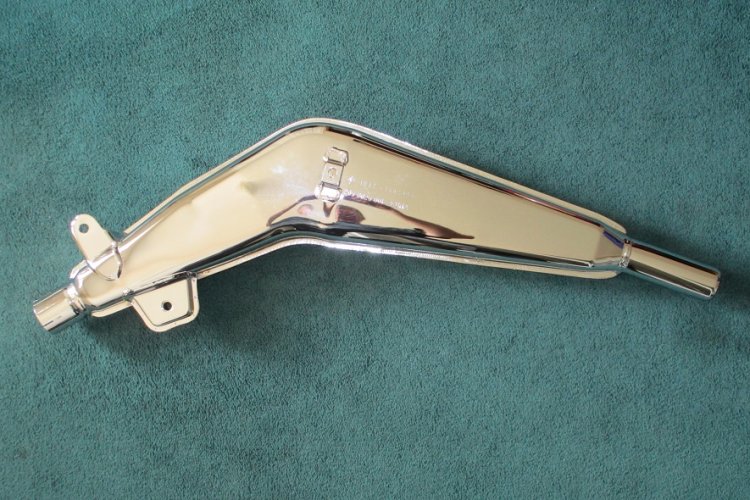
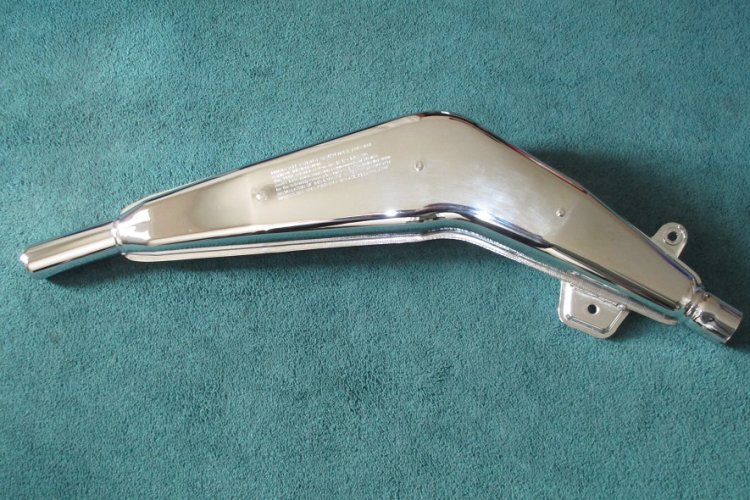
I received my BMW order last week with my neutral switch, aluminum sealing ring and the three aluminum gaskets for the center and rear muffler which needed to be removed for better access to the neutral switch. And sure enough, it was wet.

While I had the center and rear muffler off, I gave them a bit of chrome polish. And since it was warm and sunny out, a few beers to help things along. OK, so I don't have big miles on it, but I do clean it now and then and that keeps the rust off. Not bad for 33 years.

1990 BMW R100 GS - Center Muffler - Top - SM.jpg

1990 BMW R100 GS - Center Muffler - Botton - SM.jpg

1990 BMW R100 GS - Rear Muffler - Outside - SM.jpg

1990 BMW R100 GS - Rear Muffler - Inside - SM.jpg

The next step was removing the rear engine mount stud (295mm long with it being threaded 22 mm at each end for an M12 x 1.50 nut).

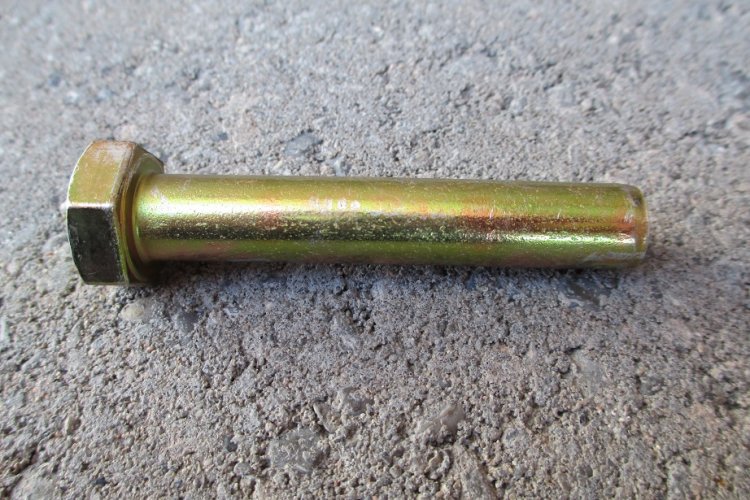
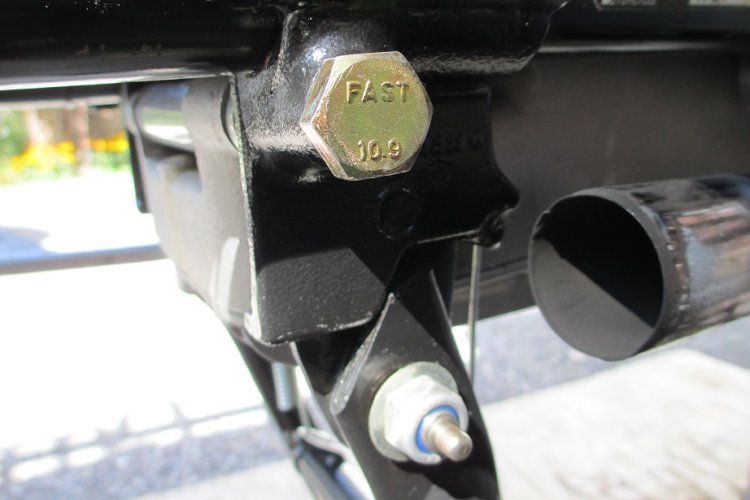
In case the engine could pivot about the front stud, I inserted an M12 bolt. I cut off the threaded portion just to leave the smooth shank for a length of about 65 mm, just under 3 inches.

1990 BMW R100 GS - Rear Engine Bolt 1 - SM.jpg

1990 BMW R100 GS - Rear Engine Bolt 2 - SM.jpg

The spacer is in very tight...I'll get to it the next day and once I get it out, I'll run it in my lathe and take a few thou off so that it is a tight slip-fit..and not a press fit :banghead. In any case, no pry bars...not the way I do things.
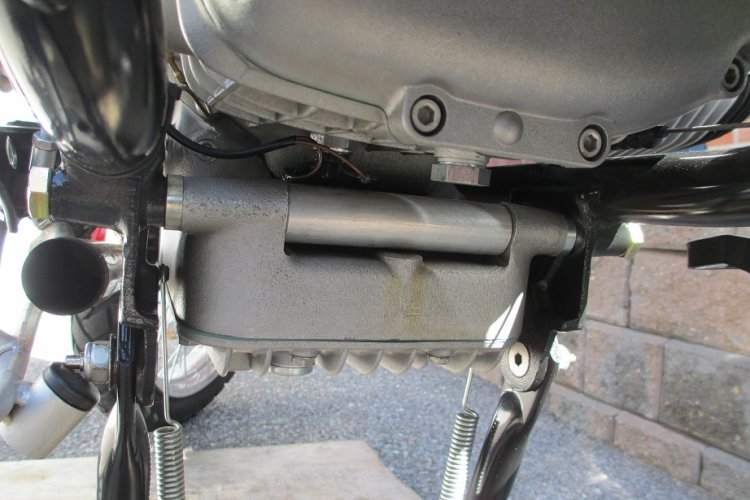
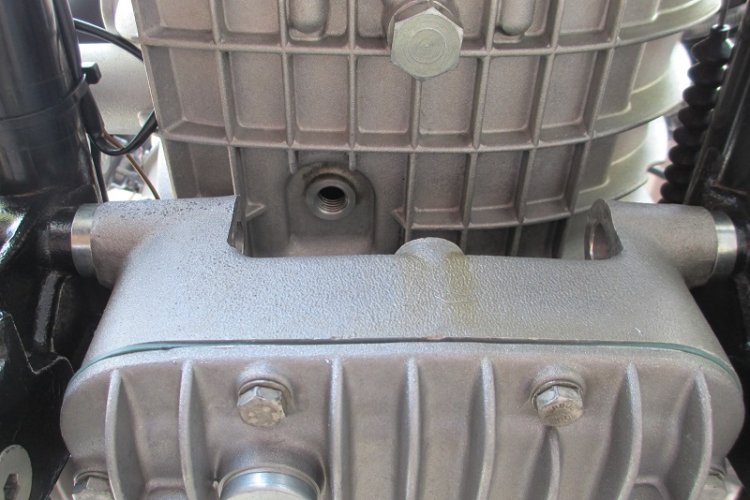
1990 BMW R100 GS - Rear Engone Mount Spacer - SM.jpg
 
Last edited:
Pry bar

Alex, like you, I don't use pry bars. In the case of the engine spacers if they don't fall out, it means the engine is not straight or properly supported with the bolts out. Just saying.

I love the polish work. Where are you at and do you do bike detailing for a price, LOL. St.
 
So, Alex, what did you do to get the spacer out?

Yeah what a job. I've listed some things to do and not to do get the spacer out. If your spacer falls out, you may be applying pressure to the engine casting which is a no-no when it comes to castings.

Rear Engine Mount Spacer Removal

Better get a beer out because I'm about to write a novel.

First of all, I hardly needed a rear engine mount stud to hold that spacer in place. No matter what I did, it might as well have been welded in place. Yeah I guess I could have slipped a pry bar between the engine casting and the spacer, but if I wanted to do that, I could have taken my GS to a dealer.

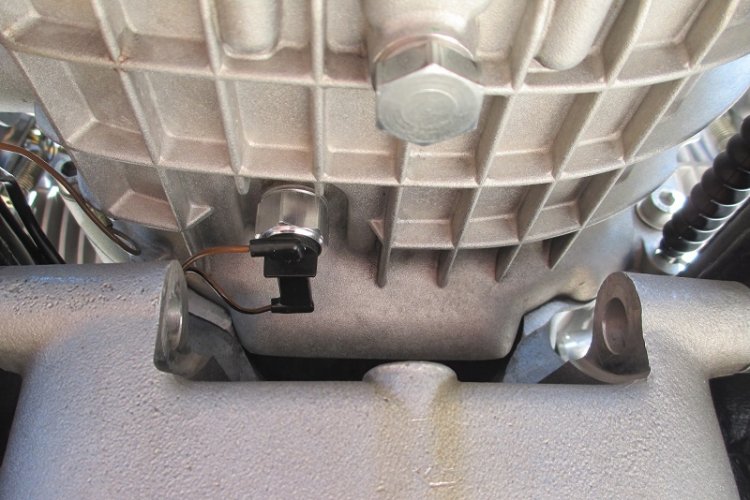
Big mistake and why it took me so long. Thinking the cavity ahead of the spacer was wider than where the spacer mounts, I was thinking of driving it forward by hitting it with a block of wood and hammer into that cavity and then angling it out. Doing that lifted the spacer up towards the neutral switch due to the machining of the engine block. Apparent in the second photo when looking at the engine casting machining. So, don't do that.

The big job now was getting the spacer back to where it was. I used nylon straps wrapped around the spacer in a loop with a block of wood in the loop and hammered the block back. That took forever working both ends of the spacer.

So now I got it back to where it was but higher than its mounted position. Good, so I used some plastic shims and a pry bar to lift it up which reduced the amount of material between the engine block casting and the spacer, reducing friction. The straps and hammer method pulled it out of position.

I glass beaded the engine mount stud and the spacer which had rust within the hole. When slipping them into position, I greased them as well as the cavity in the frame, engine and spacer.

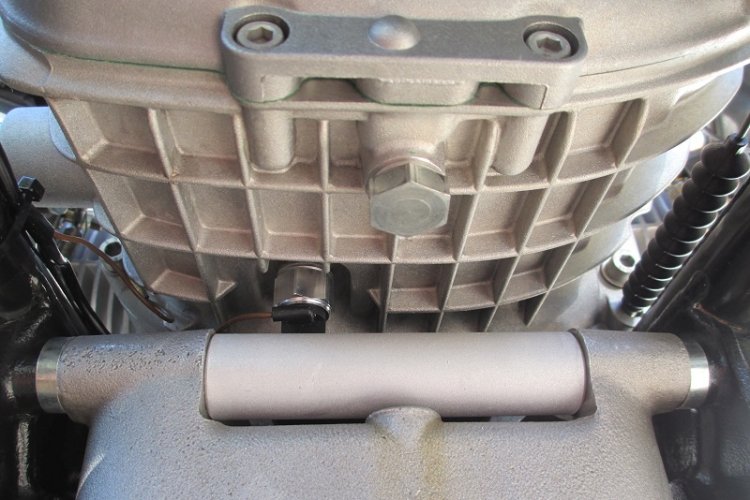
I put the spacer in my lathe and took a hair off each end. It fit but very snugly. The factory spacer already was chamfered at the ends for easy insertion. They could have done the same to the hole making it easier to feed the engine stud through it.

1990 BMW R100 GS - Neutral Switch Location - SM.jpg

1990 BMW R100 GS - Neutral Switch Installed 2 - SM.jpg

1990 BMW R100 GS - Spacer Installed - SM.jpg
 
In the case of the engine spacers if they don't fall out, it means the engine is not straight or properly supported with the bolts out.

The spacer sits between an engine casting that is one piece. They do not flex all that much. I did have the front engine mount loosened.

Those gold colored bolt heads that you see are my own doing and stop about 3/8" short of the spacer. They are just there in shear should the rear of the engine pivot down which was not an issue after all.
 
Back
Top