zip50
Member
I just installed an Admore 11" Light Bar Pro on my 2020 R1250RT. I imagine installation would be similar for most recent model R1200RT's as well.
I mounted the light bar on the raised area below the license plate to provide a triangle affect with existing lights, but you can also mount just above or below the plate with the provided brackets.
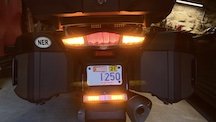
1. Remove the mud flap and drill two holes that match the hole-spacing of the back of the ADM unit. Mount the unit with the provided screws. Drill a hole for the cable through to the rear wheel well roughly centered between the license plate screws.
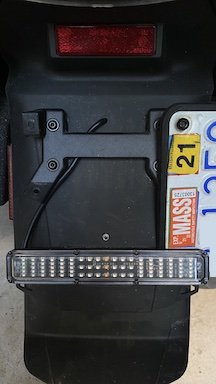
2. Remove topcase, grip handles, rear rack, and cosmetic plastic plate.
3. Drill a hole up from inside the rear wheel well into the cavity behind the rear light cluster. Run your cable. When I finished I sealed with some silicone.
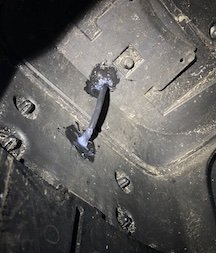
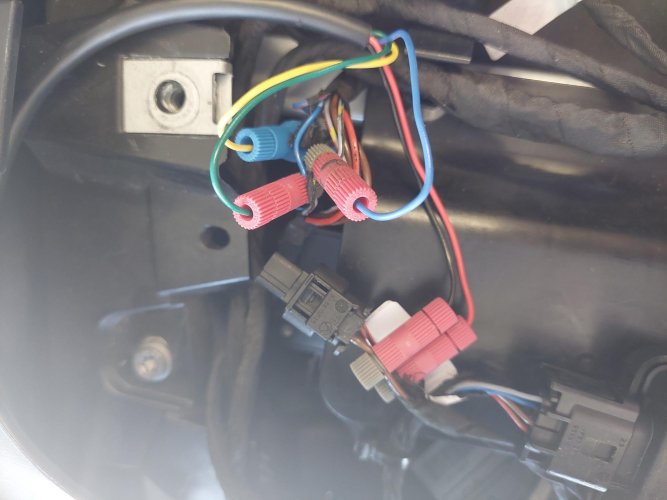
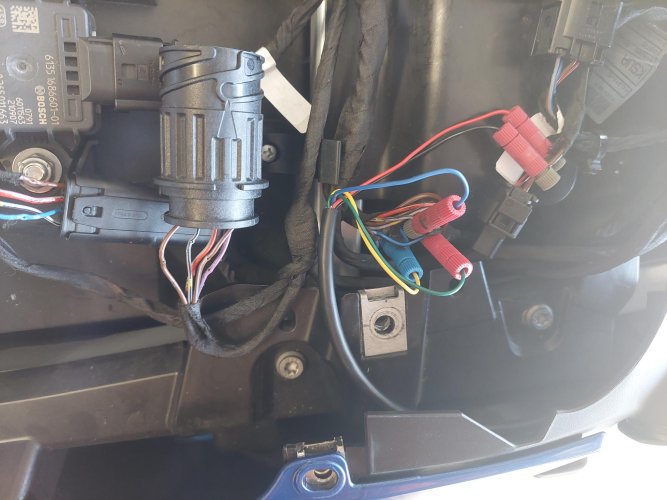
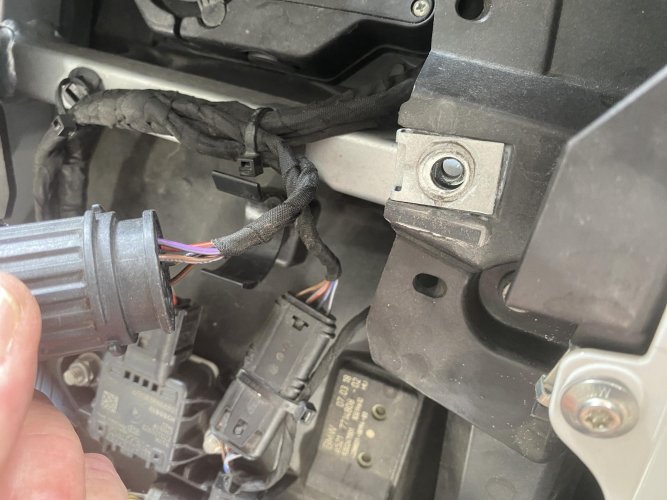
4. Unplug the taillight connector and the auxiliary power connector (left side near back of seat) and bring the combined wire forward. Carefully open the sheathing and expose approx 2" of the wires in the bundle.
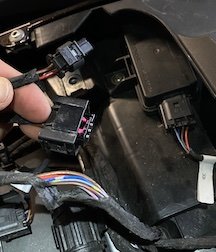
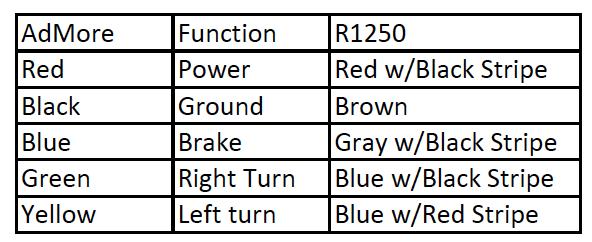
5. Using the wiretap connectors attach the Admore wires as follows:
a. Connect the Red Power wire of the ADM to the thicker Red w/Black stripe Power wire of the AUX Connector.
b. Connect the Black Ground wire of the ADM to the thicker Brown Ground wire of the Aux connector.
c. Connect the Blue ADM Brake wire to the Gray w/Black stripe Brake wire
d. Connect the Blue ADM Right Turn wire to the Blue w/Black stripe Right Turn wire
e. Connect the Yellow ADM Left Turn wire to the Blue w/Red stripe Left Turn wire
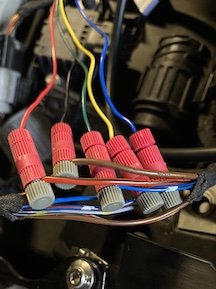
6. Turn on your ignition and test the lights.
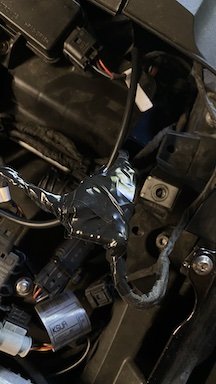
7. Tape exposed wires (if desired), reconnect Taillight and Aux connectors.
8. Reassemble racks and seats and enjoy your increased visibility.
I mounted the light bar on the raised area below the license plate to provide a triangle affect with existing lights, but you can also mount just above or below the plate with the provided brackets.

1. Remove the mud flap and drill two holes that match the hole-spacing of the back of the ADM unit. Mount the unit with the provided screws. Drill a hole for the cable through to the rear wheel well roughly centered between the license plate screws.

2. Remove topcase, grip handles, rear rack, and cosmetic plastic plate.
3. Drill a hole up from inside the rear wheel well into the cavity behind the rear light cluster. Run your cable. When I finished I sealed with some silicone.

4. Unplug the taillight connector and the auxiliary power connector (left side near back of seat) and bring the combined wire forward. Carefully open the sheathing and expose approx 2" of the wires in the bundle.

5. Using the wiretap connectors attach the Admore wires as follows:
a. Connect the Red Power wire of the ADM to the thicker Red w/Black stripe Power wire of the AUX Connector.
b. Connect the Black Ground wire of the ADM to the thicker Brown Ground wire of the Aux connector.
c. Connect the Blue ADM Brake wire to the Gray w/Black stripe Brake wire
d. Connect the Blue ADM Right Turn wire to the Blue w/Black stripe Right Turn wire
e. Connect the Yellow ADM Left Turn wire to the Blue w/Red stripe Left Turn wire


6. Turn on your ignition and test the lights.
7. Tape exposed wires (if desired), reconnect Taillight and Aux connectors.

8. Reassemble racks and seats and enjoy your increased visibility.


