• Welcome, Guest! We hope you enjoy the excellent technical knowledge, event information and discussions that the BMW MOA forum provides. Some forum content will be hidden from you if you remain logged out. If you want to view all content, please click the 'Log in' button above and enter your BMW MOA username and password.

    If you are not an MOA member, why not take the time to join the club, so you can enjoy posting on the forum, the BMW Owners News magazine, and all of the discounts and benefits the BMW MOA offers?

2007 R1200 GSA - Driveshaft Failure

TheRock58

TheRock58
Okay, I've officially joined the 'Drive Shaft Failure Club' at 85,000 miles. It looks like a new drive shaft will cost $1,066.05 plus tax......

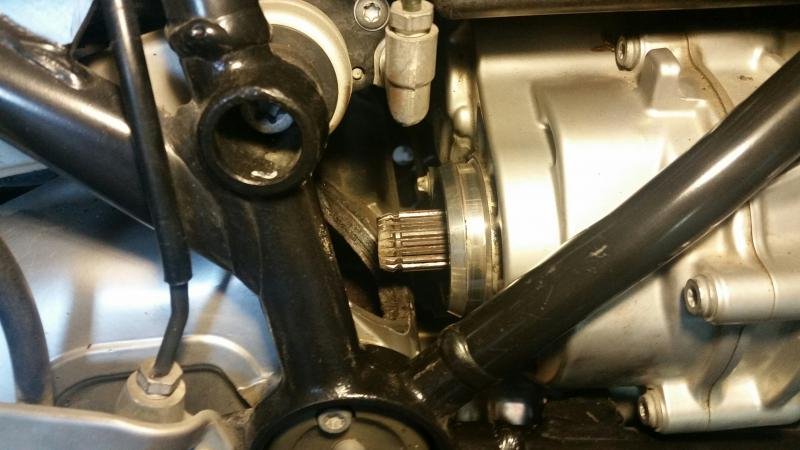
I have removed the drive shaft; however, I can't seem to remove the remnant from the output shaft on the transmission. Clearly it must be pried off the output shaft. I believe there is a snap-ring retainer that is part of the drive shaft assembly (internal). Is there a special tool that I need?

If you have any suggestions or ideas please let me know, thanks in advance.
 
Last edited:
Okay, I've officially joined the 'Drive Shaft Failure Club' at 85,000 miles. It looks like a new drive shaft will cost $1,066.05 plus tax......

I have removed the drive shaft; however, I can't seem to remove the remnant from the output shaft on the transmission. Clearly it must be pried off the output shaft. I believe there is a snap-ring retainer that is part of the drive shaft assembly (internal). Is there a special tool that I need?

If you have any suggestions or ideas please let me know, thanks in advance.

It is just a spring clip in a groove. Straight rearward pressure will slip the clip out of the groove in the output shaft.
 
If it's being recalcitrant I'd suggest prying with some small wooden dowels (wood so you don't booger-up [tech-term] any of the surrounding aluminum bits.)

Curious - did you remove the swingarm? I know most GS's the shaft can be removed without R&R of the swingarm, but having it removed might make getting the remnants of your old shaft off easier.
 
Thanks Paul and Don for your replies.

Yes, steady rearward pressure was the key. I used a wide and thin clutch fan wrench as a lever and placed it on the back of the yoke remnant with a couple of wooden blocks as the fulcrum. A couple of taps on the wrench popped it right off, without dinging-up the aluminum case.

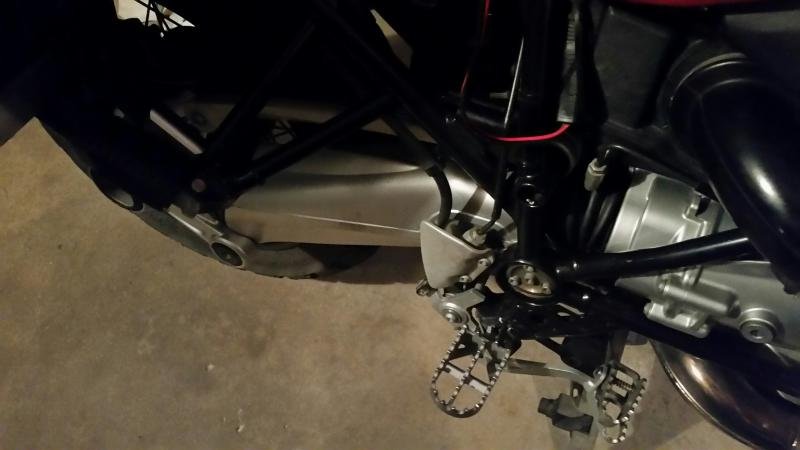
No, I left the swingarm in place.

Now for the fun part.......ordering the new drive shaft!

Thanks again,

not at all repairable by Bruno's....????
 
It probably is rebuildable, but I hear there's quite a wait for a rebuilt drive shaft.

Do you know something that I don't know about Bruno's?

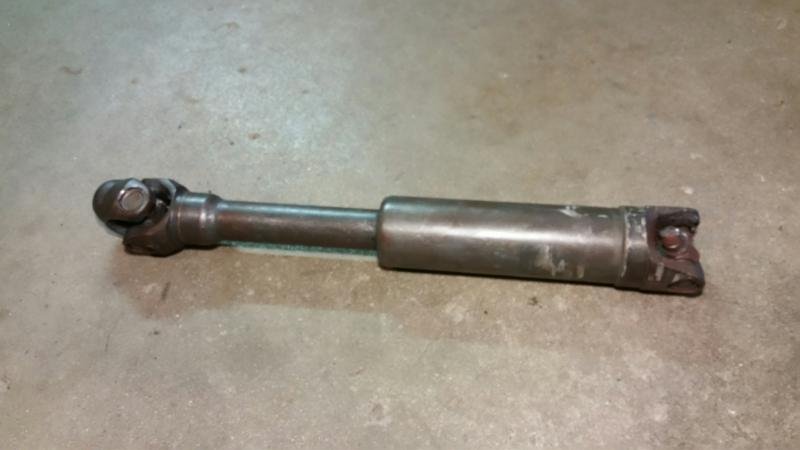
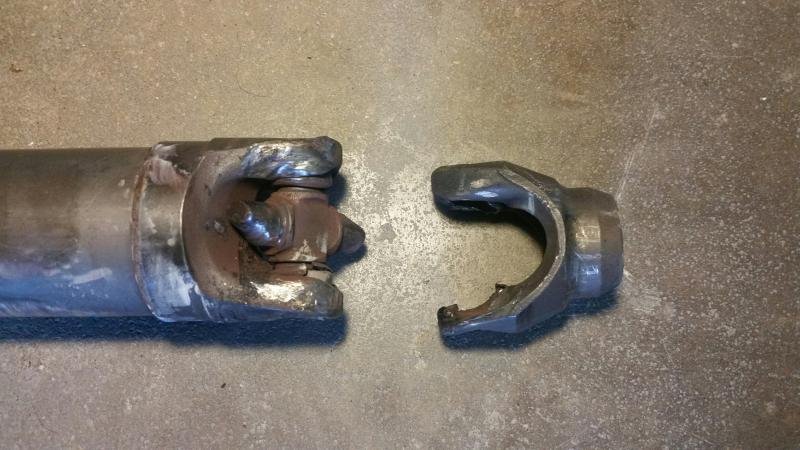
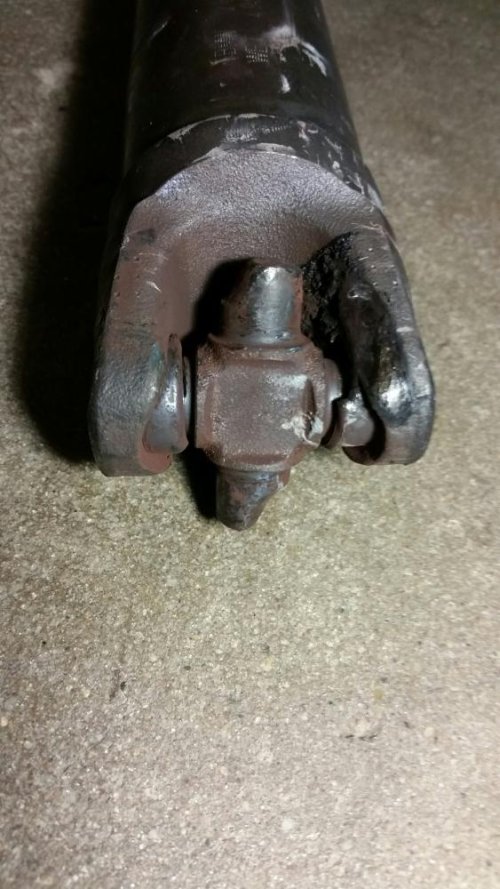
For your viewing pleasure.........

Drive Shaft 1.jpg

Drive Shaft 2.jpg

Output Shaft End.jpg
 
Last edited:
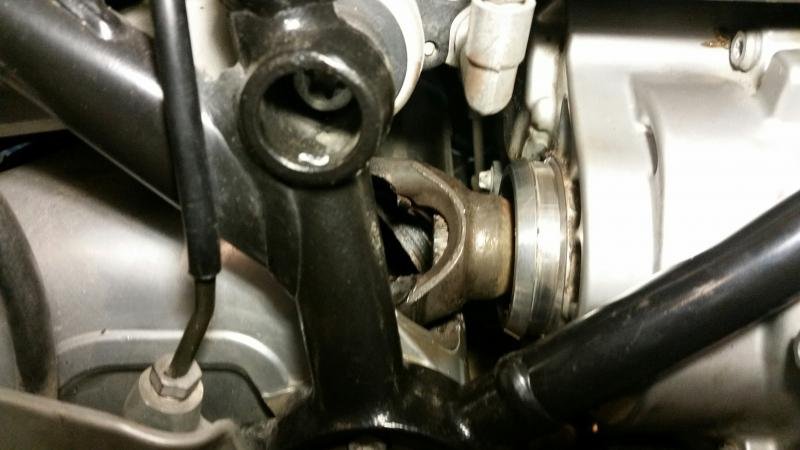
Here's a picture with the yoke still on the output shaft.....

Yoke on Output Shaft.jpg

Here's a picture with the yoke removed from the output shaft....

Yoke Removed from Output Shaft.jpg
 
The new drive shaft was delivered yesterday and installed today. Installing the new drive shaft was a piece of cake, it was the front rubber boot that was a challenge (I believe JVB calls it persnickety!). The swingarm was left in place so there's not much room to work with. It seems to me, if you put the front of the the rubber boot on first, the rear part of the boot falls right into place, with a little finesse.

New Drive Shaft Installed.jpg

I took it for a 15 mile test ride and it really rides nice! It looks like I'm on the road again......:dance
 
Just two comments - and take them as just comments:

1. Make REALLY certain both boots are correctly in position. The part that goes into the driveshaft (and in the rear, driveshaft and rear-drive) has a plastic spacer inside that expands the rubber a bit so as to make a good water-tight seal to the connections. A bit of white-grease is called for on that junction - which also helps keep it water-tight. There is NO drain from that cavity, so if water gets in there, it will stay there until it eventually evaporates out. That's not such a good thing for the bearings.

2. I've seen this end fail more often on bikes where at normal ride height - the driveshaft isn't horizontal. That would include the GS where it is angled upward toward the transmission, and on heavily loaded (2-up with luggage) RT's (angled downward toward the transmission.) A friend in our local club has the body-mass (and weight) to make the GS Adventure suspension run the swingarm horizontally when he was on the bike - his driveshaft lasted in excess of 230,000 miles - still on there when the engine experienced a problem and he replaced the bike. I attribute that to the lack of motion in the U-joints. Nothing much one can do about this, so just put it down as a puzzle to think on when you're riding Rt50 in Nevada.. :dance
 
The new drive shaft was delivered yesterday and installed today. Installing the new drive shaft was a piece of cake, it was the front rubber boot that was a challenge (I believe JVB calls it persnickety!). The swingarm was left in place so there's not much room to work with. It seems to me, if you put the front of the the rubber boot on first, the rear part of the boot falls right into place, with a little finesse.

View attachment 56237

I took it for a 15 mile test ride and it really rides nice! It looks like I'm on the road again......:dance
Nice you got through it on your own :thumb
Gary
 
Glad your rolling again.

The front boot is fun....yeah, grins. And getting it sealed as Don mentions.

That yoke area took a pounding, I err on side of messed up yoke, done for me on a bike. Stress fatigue on the good parts!
I have the OE shaft from my 09 that only has one bearing cup locked and not grenaded... which would be a candidate for rebuilding.
Just haven't sent in on its way before I might need it...this thread reminded me:banghead
 
Thanks for the feedback you guys.

Yes, I double checked both rubber boots and used a coating of white lithium grease to help keep the water out. The rear boot is no problem at all. As I said earlier, the front boot is a challenge. Once I had the front boot in place I was able to look through the swingarm and confirm the seal on the inside. The outside was checked for an even reveal around the perimeter of the opening on the swingarm and it was definitely seated as observed from the outside of the swingarm.

Don, that's a great observation about the angle of the drive shaft, I never really thought about it until you mentioned it. My body mass doesn't stand a chance of evening out that angle. I guess I could work on increasing my mass!:scratch

Steve, another great point on the stress factor too. I'm not sure what the rebuilding process is or if anyone is rebuilding these drive shafts. I'm still kind curious as to why there are no grease zerks on the drive shaft with a maintenance interval recommendation from BMW.:dunno

Let's ride,
 
I'm still kind curious as to why there are no grease zerks on the drive shaft with a maintenance interval recommendation from BMW.:dunno

I see no engineering reason that non-lubeable bearings that are staked in place are superior. Thus, the explanation must be that BMW bean counters thought drilling and mounting zerk fittings and machining grooves for snap rings and stocking an extra few parts in the inventory would be too expensive.

I'll bet everyone on the Forum would make a different decision.

Chevy used to hold their u-joints in with hot, injected plastic. These UJ's were identifiable by looking at the joint and seeing what appears to be a pencil lead sized pin on the side of the joint.
If one was trying to change the joint without knowing this :eek
OM
 
R1200 GS driveshaft

Thanks for the feedback you guys.

Yes, I double checked both rubber boots and used a coating of white lithium grease to help keep the water out. The rear boot is no problem at all. As I said earlier, the front boot is a challenge. Once I had the front boot in place I was able to look through the swingarm and confirm the seal on the inside. The outside was checked for an even reveal around the perimeter of the opening on the swingarm and it was definitely seated as observed from the outside of the swingarm.

Don, that's a great observation about the angle of the drive shaft, I never really thought about it until you mentioned it. My body mass doesn't stand a chance of evening out that angle. I guess I could work on increasing my mass!:scratch

Steve, another great point on the stress factor too. I'm not sure what the rebuilding process is or if anyone is rebuilding these drive shafts. I'm still kind curious as to why there are no grease zerks on the drive shaft with a maintenance interval recommendation from BMW.:dunno

Let's ride,
On the RT and R, the swingarm must be removed to remove the driveshaft. And, with less angle at the u-joints, these models will (usualy) go 100k before the driveshaft fails. Apparently BMW considers 100k to be the life of the bike. Hence, no grease fittings.
 
Back
Top