• Welcome, Guest! We hope you enjoy the excellent technical knowledge, event information and discussions that the BMW MOA forum provides. Some forum content will be hidden from you if you remain logged out. If you want to view all content, please click the 'Log in' button above and enter your BMW MOA username and password.

    If you are not an MOA member, why not take the time to join the club, so you can enjoy posting on the forum, the BMW Owners News magazine, and all of the discounts and benefits the BMW MOA offers?

  • Beginning April 1st, and running through April 30th, there is a new 2024 BMW MOA Election discussion area within The Club section of the forum. Within this forum area is also a sticky post that provides the ground rules for participating in the Election forum area. Also, the candidates statements are provided. Please read before joining the conversation, because the rules are very specific to maintain civility.

    The Election forum is here: Election Forum

Oil filter won't release

FWIW I went by the Charlotte NC dealer today. Asked to speak to a mechanic about the problem. Service Manager inquires why, I show pic, he says they've used an air chisel but when it's been done before they hit the threaded nipple and had to replace. Oooops. Should have persisted in speaking to a mechanic but they have one of those nice showroom kind of shops...
Just so there isn't any confusion, when I use an air-chisel on something like this, it isn't to do any cutting. It's to form a step and "push point" where quick bursts of the trigger can shock/vibrate/push the filter along in a circular motion.
Because there is pressure on such a small part of the circle, 1/4" of movement would be a lot before the other side of the circle would have to be moved- to catch up.
OM
 
As far as the "Nipple" The threaded part on the case that the filter spins on too, some are removable on cars. Usually inside the threaded nipple is an allen-hex that is usually around 12mm hex size. If you're turning what's left of the filter around and around, that threaded nipple which may or may not be removable is not turning also or it would have come loose by now. If it is in fact removable it would take a good bit of force to loosen it as someone else said you wouldn't want it to come off when changing the filter. Hopefully it is removable. I can't imagine how in the world the threads on the filter got stripped.

My best advice to ALL in the future is to lubricate your filter o-ring seal with SILICONE grease. Then spin tight by hand. The silicone will allow the filter to come off much easier when you go to replace it. I have been doing this for years and never had a filter seize or leak and usually I can grab it and turn it loose by hand without a tool if there's access.

I still can't imagine how this filter stripped unless it was just made from some bad metal.

If it was my bike I would very carefully split the filter ring where it's threaded with a hand chisel and if that didn't work, maybe carefully try and cut it with a cutoff wheel.

Sounds and looks like a real booger. Best case would be if the threaded part unscrews from engine block
 
If it was my bike I would very carefully split the filter ring where it's threaded with a hand chisel and if that didn't work, maybe carefully try and cut it with a cutoff wheel.

I was wondering how a professional would deal with something like this.
 
This happened to me (1200rt) a couple of months ago. I took it to Brown Motor Works in Pomona CA and $250 later, they had it off. Eddie is the service manager. My name is Rick
 
This happened to me (1200rt) a couple of months ago. I took it to Brown Motor Works in Pomona CA and $250 later, they had it off. Eddie is the service manager. My name is Rick

Did they happen to say what the most likely cause was?
OM
 
They told me I had tightened the filter too tight. I used a torque wrench but was told next time I put one on, hand tighten as much as I can, then use a wrench for 1/2 more turn.
 
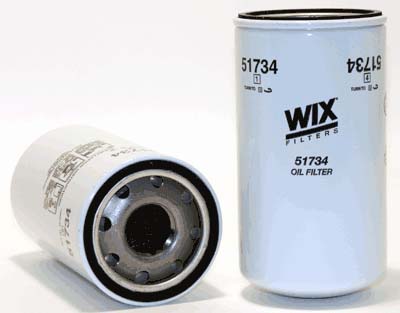
I have used hundreds of the Wix brand filters through the years, with results good enough that I keep using them.
Out of the package there is printed on the can- letters that let you know how tight the filter should (recommended) should be.....Showing 3/4's of a turn.

51734.jpg


Installation tips for these filters are as follows:
1. Using a filter wrench, remove the old filter.
2. Clean the filter mounting base making sure that any remnants of the gasket or other foreign materials are removed.
3. Apply a thin film of clean engine oil to new filter’s gasket and internal seal. Do not use grease!
4. Spin on the new filter. When the gasket contacts the mounting base, rotate the filter 3/4 turn.
5. Re fill the system with the recommended fluid.
6. Start the engine and check for leakage.

Even if I don't use a Wix or the particular Wix doesn't have the "4" reference marks, I add them myself. I have found the 3/4 turn rule works well.
OM
 
i have used hundreds of the wix brand filters through the years, with results good enough that i keep using them.
Out of the package there is printed on the can- letters that let you know how tight the filter should (recommended) should be.....showing 3/4's of a turn.

51734.jpg


installation tips for these filters are as follows:
1. Using a filter wrench, remove the old filter.
2. Clean the filter mounting base making sure that any remnants of the gasket or other foreign materials are removed.
3. Apply a thin film of clean engine oil to new filter’s gasket and internal seal. Do not use grease!
4. Spin on the new filter. When the gasket contacts the mounting base, rotate the filter 3/4 turn.
5. Re fill the system with the recommended fluid.
6. Start the engine and check for leakage.

Even if i don't use a wix or the particular wix doesn't have the "4" reference marks, i add them myself. I have found the 3/4 turn rule works well.
Om


plus 10000!!!!
 
Hand tight plus 1/2 turn, or initial contact plus 3/4 turn are probably approximately the same. For sure neither should strip threads, and also neither will be likely to leak.
 
Hand tight plus 1/2 turn, or initial contact plus 3/4 turn are probably approximately the same. For sure neither should strip threads, and also neither will be likely to leak.

I'm certainly not saying that is wrong, just that I've done all my vehicle's filters about 1/4 turn less than that and never had a problem.
IMO People get in trouble when they try to mash that filter gasket into a fraction of it's starting thickness.
 
I just changed my oil, filter and looked up into the threaded filter attachment piece and it does not come off. It's part of the engine case. I hope I never have this happen.
 
Heading to the BMW Shop tomorrow

Board Folks:
My problem probably stemmed from having an old gasket that stuck in there. I had two in my oil drain pan (knowing I had only changed one bike prior). My tightening after the hand twist never hit a point where 11nm would click. After about 2 turns I quit. Backed it off and fished for the foreign object - it was the gasket ring (the other was from an older change (d'oh!).

I threaded the new filter back on and gave it the 11NM click. Rode 4,000 miles (or my wife did) and then I could not get it off. I am down to the very top of the filter having torn it down and gave up. :banghead Had several friends over to come up with a solution but the threaded sump nipple is worrisome. We had a dremel discussion and action, a turn and pull hard discussion w action, and a cold chisel/drill it discussion with action...
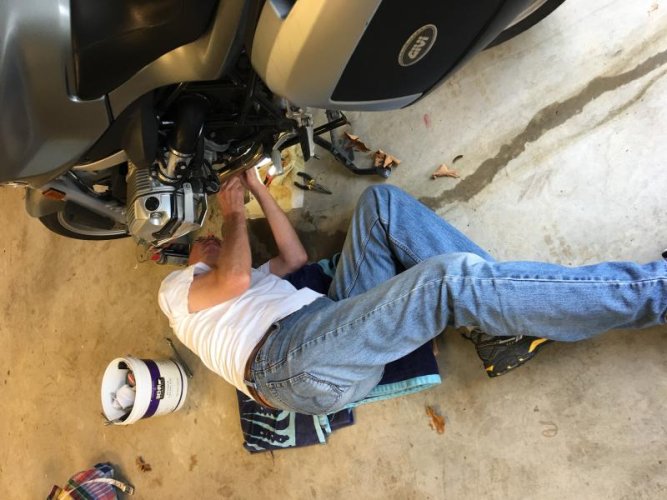
IMG_3525.jpg

I'll let you guys know...I'd like the big boys to look.
 
Good luck.
I do so many oil, fuel, hydraulic or coolant filter changes that I have developed a simple check once I have a filter removed. I run a clean rag around the gasket surface before the new filter(s) are installed. Wether aluminum or steel, I know I should see a round and shiny surface.
It will be interesting to see/hear how they get the old filter off.
OM
 
wish them luck

I trailered the bike 25 M to my BMW Shop. They get a crack at it now. I'll update you soon.
CW
 
Getting the news...

well??? inquiring minds want to know what they came up with...:)

Wyman - Well they removed the remainder of the filter yesterday... He removed it by drilling a series of holes. I got the dreaded but necessary call between flights.
Sump threads are stripped vs. the filter threads (Arrgh!).
We are working through several ideas up to replacing the crankcase. But we're not there yet... We discussed a couple of options and will talk again tomorrow when I go visit to inspect. I absolutely respect this mechanic and the shop. He is the owner as well.


And to top it off the rear tire was flat with a puncture from guess what - a metallic piece of the filter on my floor. When it rains it pours.
 
Back
Top