Navigation
Install the app
How to install the app on iOS
Follow along with the video below to see how to install our site as a web app on your home screen.
Note: This feature may not be available in some browsers.
More options
-
Welcome, Guest! We hope you enjoy the excellent technical knowledge, event information and discussions that the BMW MOA forum provides. Some forum content will be hidden from you if you remain logged out. If you want to view all content, please click the 'Log in' button above and enter your BMW MOA username and password. If you are not an MOA member, why not take the time to join the club, so you can enjoy posting on the forum, the BMW Owners News magazine, and all of the discounts and benefits the BMW MOA offers?
-
Beginning April 1st, and running through April 30th, there is a new 2024 BMW MOA Election discussion area within The Club section of the forum. Within this forum area is also a sticky post that provides the ground rules for participating in the Election forum area. Also, the candidates statements are provided. Please read before joining the conversation, because the rules are very specific to maintain civility.
The Election forum is here: Election Forum
You are using an out of date browser. It may not display this or other websites correctly.
You should upgrade or use an alternative browser.
You should upgrade or use an alternative browser.
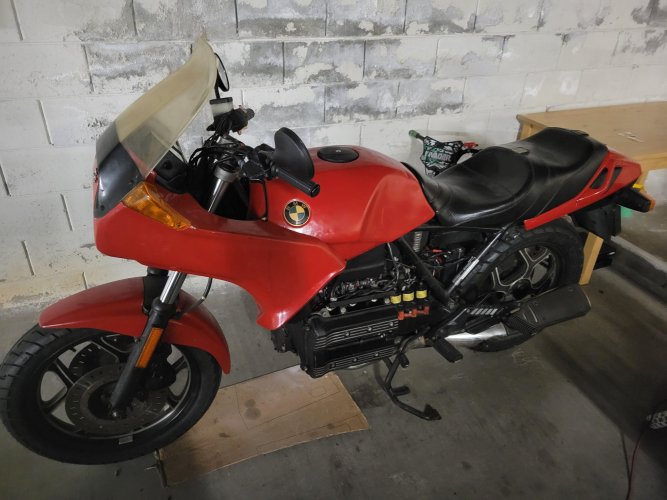
K75S / 1988 Bringing back to life
- Thread starter NomadZen
- Start date
Nomad,
Reread the last part of post #17. I’ve made some updates.


Thank you, I've ordered that newer version on ebay!
I've measure my valve clearences, and they seems to be okayish:
inlet (upper): 0.2, 0.2, 0.18 mm
exhaust (bottom): 0.25, 0.33, 0.25 mm
the only one out of spec is in the middle exhaust, but watching video from Chris on youtube, he says that "loose is okay" so I'm not sure if it worth to adjust.
I've took out 2 shims:
- upper right is 2.6mm
- bottom middle is 2.5mm
anyone knows if those are standard shim sizes, meaning they're like not being replaced?
Nomad,
BMW makes shims from 2.00mm to 3.00mm in .05mm increments. They are about $10 each.
If I was planning on keeping the bike, I would be tempted to change the shims on #1 and #3 exhaust to .05mm thinner.
That will loosen them from .25mm to .30mm. Exhaust valves always tighten over time, so if you loosen them to the high side of spec. (.30mm) now, it will be longer before they become too tight. You are currently at the tight end of spec. And don’t know how long it will be before you are under spec.
Your intakes are fine, as these don’t tend to move very much over time.
One thing you must be aware of: the valve cover bolts have a flange on the thread end that BOTTOMS OUT on the head and then gets snugged to 6.5 ft/lb. Any tighter and it will strip out the threads in the head! The only torque wrench that is accurate at that low torque is an INCH/lb ( usually 1/4” drive) torque wrench). Use 78 in/lb to achieve 6.5 ft/lb. If you don’t have one, borrow one or get one from Harbor freight (less than $20).
Since the bolts bottom out, the actual clamping force on the valve cover gasket is provided by the rubber bushing around the valve cover bolts. Over time, the bushing harden and loose their resiliency thereby loosing their clamping force. Tightening the bolts further will not increase the pressure on the gasket and you risk stripping out the head (NOT GOOD).
When removing the valve cover, you should plan on replacing the 10 bushings ($1 ea.) by having them on hand. If the old ones are still soft and pliable and not permanently flattened, you may decide to reuse them, but you will need to replace them next time. On a new to me bike, I always replace them the first time. Cut the old bushings off with wire cutters, slip the new ones on. Valve cover gaskets are usually good for 2-3 valve checks or several years before needing replacement. Do not use sealer except a SMALL dab on each edge of the rubber half moons at the rear of the head and the two junctions between the timing cover and the head.


Last edited:
Hi all, wanted to report back on this. Work I've done lately:
- throttle body manifolds replaced
- injectors cleaned & synced
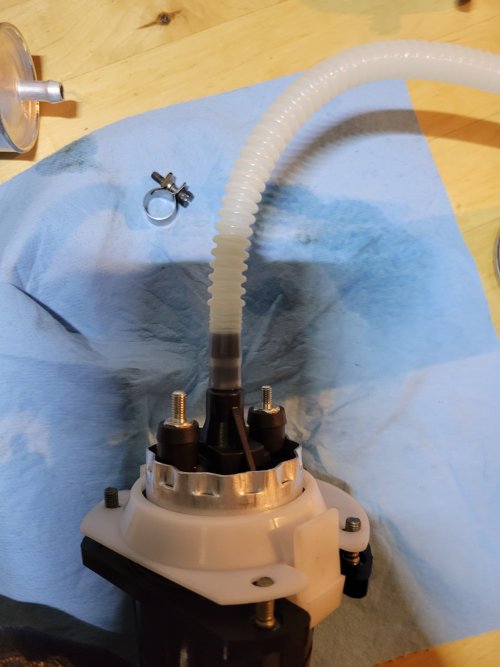
- tank cleaned, fuel pump, filter & subversive fuel line replaced (except for black one filter - to tank)
- valve adjustment, now measured as:
up (inlet): 0.2 0.2 0.15 (didn't change shims)
down (outlet): 0.33, 0.33, 0.35 (changed shims 1 & 3)
Finally bike starts and runs great.
I have to say, I should've listened better and start with cleaning tank first and replacing filter and maybe pump, as even though it didn't look dirty what came out was like a jelly which was probably the biggest reason why bike didn't run well, but also probably clogged up fuel system.
Nomad,
Great to hear that it is running properly!
Yes, you need clamps on those hoses! Either the proper sized fuel hose clamp (like the one in your photo) available from your dealer or possibly auto parts store,or the proper sized Oetiker clamp (available from Quantum among other places). Oetiker clamps require a special tool to crimp them and they require cutting to remove them.
I would use the BMW style fuel hose clamp. Do not use standard gear hose clamps as they will distort the hose and cause leaks or premature hose failure.


Similar threads
- Replies
- 2
- Views
- 1K

