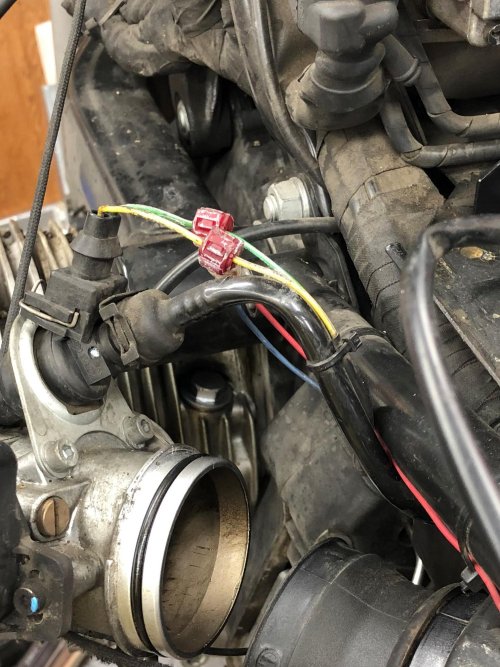
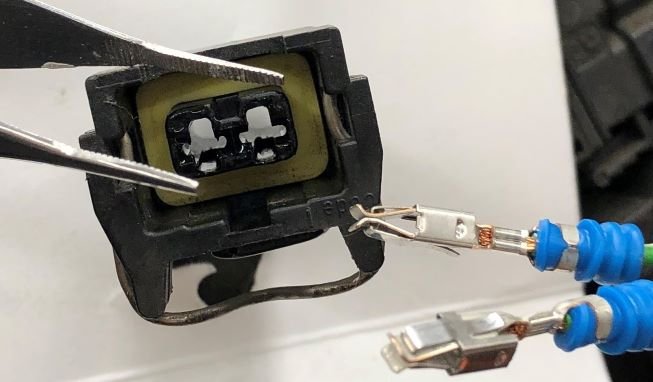
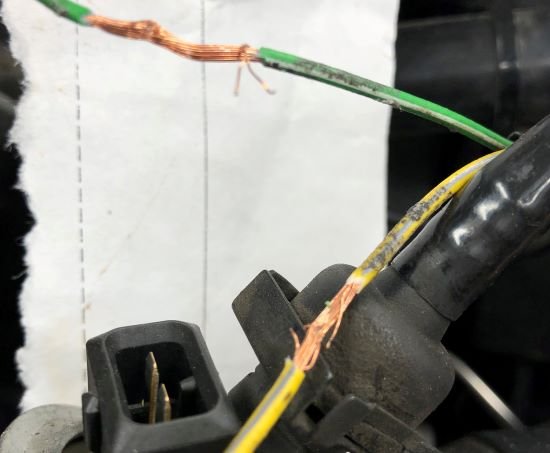
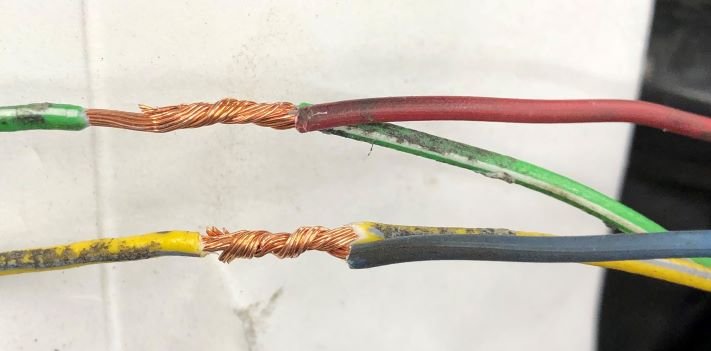
• Welcome, Guest! We hope you enjoy the excellent technical knowledge, event information and discussions that the BMW MOA forum provides. Some forum content will be hidden from you if you remain logged out. If you want to view all content, please click the 'Log in' button above and enter your BMW MOA username and password.

    If you are not an MOA member, why not take the time to join the club, so you can enjoy posting on the forum, the BMW Owners News magazine, and all of the discounts and benefits the BMW MOA offers?

  • Beginning April 1st, and running through April 30th, there is a new 2024 BMW MOA Election discussion area within The Club section of the forum. Within this forum area is also a sticky post that provides the ground rules for participating in the Election forum area. Also, the candidates statements are provided. Please read before joining the conversation, because the rules are very specific to maintain civility.

    The Election forum is here: Election Forum

Wire tap repair

bhulse

New member
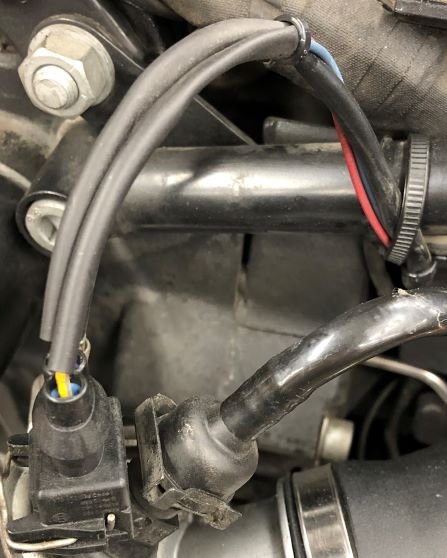
I'm fully committed to upgrading my newly acquired '99' R1100RT I've named Licorice 'Twist', and have in process the left cam chain tensioner update, HES rewire and fuel quick-disconnects. Disassembling the rear lights I found multiple wire taps used to attach a Kisan Vectralight. Removing the parasitic wires I discovered one tap severed a directional lead entirely and THREE of the remaining taps broke at least one of the original nine tiny strands in the OEM loom! My remedy was to remove the taps, splice in and solder new leads to each conductor and renew the terminal ends with readily available spade connectors. The task was pretty straight forward, simple and electrically sound! Then I got to looking at how the fuel management module was wired into the throttle body wires. (see photo) A Remus muffler and a Techluison fuel management module had been installed and the O2 sensor removed! What stopped me from proceeding with the same 'fix' to eliminate the worrysome wire tap was my inability to remove the electrical plug from the conductors to the throttle body, strip back the OEM lead, solder in the management module and seal with shrink seal. How would you accomplish this task?
 

Attachments

  • IMG_0493 (2).jpg
    IMG_0493 (2).jpg
    370.4 KB · Views: 177
Unplug from the injector an you will see a space where you can insert a jewelers screwdriver to release a little tab on each socket.
The socket/seal will pull out from behind.

Edit: I have some extra new pin sockets if you need a couple.
PM me
 

Attachments

  • 20200104_094843_resize.jpg
    20200104_094843_resize.jpg
    112.7 KB · Views: 170
Last edited:
You can also buy a new plug that comes with leads, connectors, and shrink tube from BMW. Part number 83 30 0 402 339. I bought a similar plug for one of my stick coils few years back. When done the repair is like factory.
 
Pins extracted successfully!

Thank you all for your help! Reto, (GSAddict) with pictures of the pins outside the plug body showed me my pin extractor I made twenty years ago was working properly. The difficulty I was experiencing was the hardened and stuck 1999 moisture seal on the wire as it exits the plug. Watching a Chris Harris You Tube segment where he squirts denatured alcohol onto a stubborn intake manifold to loosen it prompted me to apply the same technique to these moisture seals! I worked beautifully and in short order! Now I've successfully extracted the pins I'll remove the destructive wire taps and splice in, solder and seal with heat-shrink making a proper electrical connection! I promise 'after' pictures in this thread to complete the story for anyone thinking of similar work.
 

Attachments

  • IMG_0518 (3).jpg
    IMG_0518 (3).jpg
    207.2 KB · Views: 152
While many of us lack the ability or desire to get deeply into motorcycle repairs I, for one, immensely enjoy these question/answer/solution/positive result threads.

Just sayin '. :thumb
 
Last edited:
After carefully removing the offending wire taps it took patience and time to strip the insulation without incurring any further damage. (Had to buy a LOT of new nylon tie-wraps just because I've cut a number of them getting to the wiring looms!) In the end I've a little cleaner install of the Fuel Management wiring.
 

Attachments

  • IMG_0520_rev1.jpg
    IMG_0520_rev1.jpg
    750.4 KB · Views: 71
  • IMG_0534_rev1.jpg
    IMG_0534_rev1.jpg
    323.8 KB · Views: 70
  • IMG_0540_rev1.jpg
    IMG_0540_rev1.jpg
    821.3 KB · Views: 71
Back
Top