• Welcome, Guest! We hope you enjoy the excellent technical knowledge, event information and discussions that the BMW MOA forum provides. Some forum content will be hidden from you if you remain logged out. If you want to view all content, please click the 'Log in' button above and enter your BMW MOA username and password.

    If you are not an MOA member, why not take the time to join the club, so you can enjoy posting on the forum, the BMW Owners News magazine, and all of the discounts and benefits the BMW MOA offers?

  • Beginning April 1st, and running through April 30th, there is a new 2024 BMW MOA Election discussion area within The Club section of the forum. Within this forum area is also a sticky post that provides the ground rules for participating in the Election forum area. Also, the candidates statements are provided. Please read before joining the conversation, because the rules are very specific to maintain civility.

    The Election forum is here: Election Forum

99 K1200RS sealing the deal

caseyc

New member
Hello everyone. I just scored a 99 K1200RS with 22k on the clock for a whopping 7 bills. It has its typical leaks and was dropped at a stop at some point and shows the associated plastic damage. Other than that, its incredible. Im going through it with a fine tooth comb, and intend to try documenting the process here in order to solicit some feedback.

 
I ordered:
A Clymer manual, spiegler lines, internal tank hoses, quick disconnects, all filters and crush washers for the CC, Trans and FD, 30mm socket with cutout, LED dash lights.


Im not ordering any seals until I get further into it and identify what's needed.


I got impatient waiting for the Clymer, so I started the disassembly with what info I could find online.
Plastic off, tank off, exhaust off. rear tire off, FD and swingarm off without too much trouble. I was one of the lucky ones that didn't have any locktite on the swingarm bolts. :clap
<a href="https://ibb.co/ihkNkK"><img src="https://preview.ibb.co/doYmCz/20180906_194950.jpg" alt="20180906_194950" border="0"></a>
 
Last edited:
FD looks good.
<a href="https://ibb.co/dEFuze"><img src="https://preview.ibb.co/mhnk5K/20180906_194746.jpg" alt="20180906_194746" border="0"></a>
I suspect a leak on the CC main. I didn't experience any slipping but there was oil residue along the bellhousing seal that I wiped away before this pic.
<a href="https://ibb.co/c9a55K"><img src="https://preview.ibb.co/c1s7Ke/20180906_194650.jpg" alt="20180906_194650" border="0"></a>
 
I suspect timing cover leak.....
<a href="https://ibb.co/eYX1xz"><img src="https://preview.ibb.co/cNNeje/20180907_055741.jpg" alt="20180907_055741" border="0"></a>
How tough of a job is this?
<a href="https://ibb.co/dfJskK"><img src="https://preview.ibb.co/k8qisz/20180906_194631.jpg" alt="20180906_194631" border="0"></a>
 
What are these? Clutch
<a href="https://ibb.co/myzyQK"><img src="https://preview.ibb.co/jQOQ5K/20180906_194917.jpg" alt="20180906_194917" border="0"></a>
I didn't have these fittings on my 98 R1200C. Do you remove the entire piece or just the Allen bolt and replace with a bleed fitting? I'm considering speed bleeders just cause they are easy to deal with.
<a href="https://ibb.co/bCFzXz"><img src="https://preview.ibb.co/gUbTQK/20180906_194934.jpg" alt="20180906_194934" border="0"></a>
 
Not sure why I needed to remove the airbox, but I did.
<a href="https://ibb.co/dxEEHz"><img src="https://preview.ibb.co/iMKgxz/20180907_055727.jpg" alt="20180907_055727" border="0"></a>
Does not look like it interferes with anything. I there something I should be concerned with in this area?
<a href="https://ibb.co/n50zje"><img src="https://preview.ibb.co/hCnOAK/20180907_055711.jpg" alt="20180907_055711" border="0"></a>
Ive read that the airbox should be removed to lift the frame for trans removal, but I cant see where lifting the frame would come into contact with it. Also, where do you lift the frame?

I have a EZ-Rizer lift that I had intended to use but not be able to during removal. It lifts from under the oil pan and where the rider pegs attach. I have a metal pipe frame I made to lift the frame on my R1200C when I did the spline lube on it, so it should come in handy for this too. I just cant see where/what to lift.

The battery box and ABS are the only things I can see that interfere with the trans removal. Advice?
 
Okay, so after removing the slave and drive shaft, this is what Im looking at.
<a href="https://ibb.co/b5OQ5K"><img src="https://preview.ibb.co/incUXz/20180906_194904.jpg" alt="20180906_194904" border="0"></a>
Whats that crud?
<a href="https://ibb.co/d9XUXz"><img src="https://preview.ibb.co/i3k55K/20180906_194554.jpg" alt="20180906_194554" border="0"></a>
Output seal looks good! No leaks and appears to be set flush. Dont think I will replace this one.
<a href="https://ibb.co/cq4yQK"><img src="https://preview.ibb.co/ed5SKe/20180906_194543.jpg" alt="20180906_194543" border="0"></a>

<a href="https://ibb.co/cpJgee"><img src="https://preview.ibb.co/iVXk5K/20180906_194548.jpg" alt="20180906_194548" border="0"></a>

I think Im gonna stop here for today. More to come....

Please let me know if you all have any tips or suggestions. Especially on the whole frame lifting thing.
 
What are these? Clutch
<a href="https://ibb.co/myzyQK"><img src="https://preview.ibb.co/jQOQ5K/20180906_194917.jpg" alt="20180906_194917" border="0"></a>

If the top picture is in this location, it's for bleeding the clutch.
Remove the little plug and add a bleeder.
The brake is probably the same. My 2003 came with bleeder installed for the brakes.

Clutch bleed.jpg
 
Lee,

Yes. That's were it was. I assumed it was for bleeding the clutch since it lead to the slave, but just making sure. So, cool. Just replace with a bleeder nipple. :dance
 
Lee,

Yes. That's were it was. I assumed it was for bleeding the clutch since it lead to the slave, but just making sure. So, cool. Just replace with a bleeder nipple. :dance
You might have to grind a little off the end of the bleeder screw so you can get the threads started.
 
Cam Chain Cover Leak

Written in 2013:

Another Leak Plugged!

Our new-to-us K1200RS got a work out this past June when Wanda and I met up with 21 other liked minded SEAT members at Prescott for the SEAT Annual June Overnighter. We did a good stretch of I-10 and a bit of I-8 on the RS as we rode to Gila Bend for our gas and cool off stop. The RS, or Rotti as we have been calling her, runs fine and pulls hard up to as fast as we wanted to go. A couple of passes took us over the ton, but not much.

When we bought the RS used from Cochise Motorsports in October of 2012 she had a dead battery, old brake lines and a massive oil leak from the transmission case. It took me more than a month to do a clutch o ring and main seal replacement. All the other seals on the rear drive and transmission had no seeps or weeps. All the brake lines were replaced and the ABS pumps were flushed.

After several day trips around the southeastern corner of Arizona, a couple of SEAT lunches, and a bit of computer work at Iron Horse, I pronounced the Rotti ready for an overnighter. There were no apparent leaks, runs or drips from any of the joints or seals that I could see. Also, all the temp sensors and the fans were working properly.

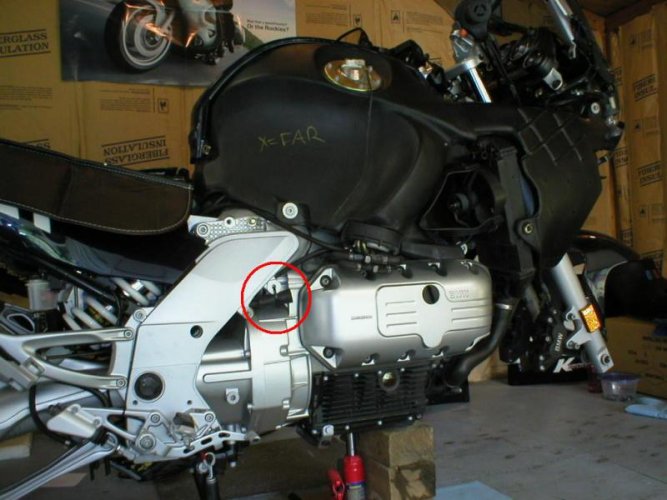
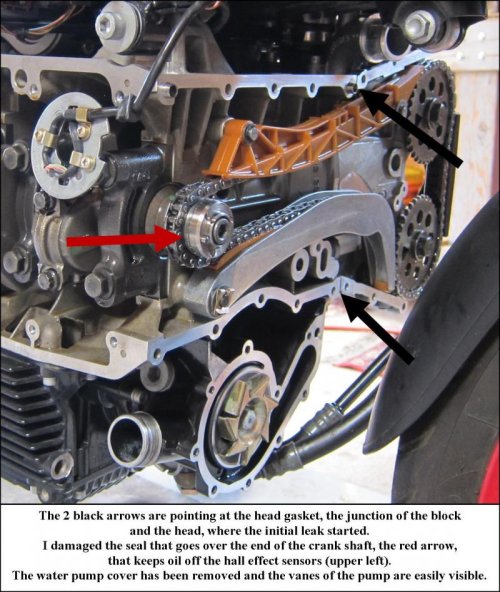
When we got home after 788 miles and three days of riding, I found a pretty good oil leak coming from the cam chain cover. Where the head meets the block there is a small gap that over time may allow a seep or leak. The Rotti had a leak, the front of the cover and bottom of the oil pan had a nice coating of dirty road grunk stuck on by a stream of oil. Time to fix another leak.

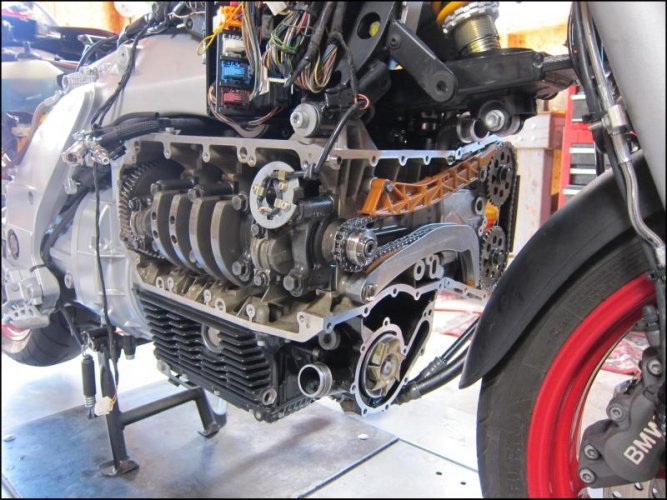
To get the cam chain cover off I needed to remove all the body work, the gas tank, air plenum and the radiators. Because the crank cover and the valve cover overlap with the cam chain cover, they too needed to come off. There is no gasket on the cam chain cover, a sealant is applied that keeps the cover oil tight. To get the lower water temp sensor and the oil temp sensor wires out of the way, they have to pass through a hole in the water pump. Consequently, the water pump cover has to be removed and it too has no gasket and uses a sealant to keep it water tight.

The hall effect sensors and the plates below them need to be removed as well. The HES cover plate has a cork gasket that in my case was not damaged, I reused it. The HES wire was in excellent shape. Before I removed the HES plate I scribed two lines across the HES plate and the engine block. I would later use them to realign the plate in order to maintain the proper engine timing. The two screws that hold the HES plate on have two horseshoe shaped washers that keep the plate at the correct level. They are easy to drop, for sure. Three small screws under the HES plate hold the timing adjusting plate and bowl to the block. They come out easily and there is a pin that insures they will be aligned correctly when reassembled.

A special tool, or a 1/8 inch drill bit, is needed to keep the cam chain tensioner locked back in order to pull the cam chain cover off. The drill is passed through the only hole in the cam cover that is plugged with a torx head screw. With the drill bit holding the tensioner back it took a couple of blows with a rubber mallet to get the cover to break loose. There are three different sizes of screws that hold the cover on, and one screw that does not come completely out of the cover. That screw and a locator pin are the only line ups needed.

Once all four cover were removed, it was only a matter of cleaning up all the surfaces, applying a sealant then bolting it all back up. All went well…it seemed.

To see how my leak fix went, Wanda and I took a 220 mile ride around the block. We did brunch and coffee in Douglas at the Gadsden Hotel then came home the back, back way. I took the bike right to the back shop and put her up on the stand. Damn, there was a serious oil leak running down from the HES cover. There is a seal in the cam chain cover that goes over the crank end where the HES plate sits. I did not reseat the seal on the shaft correctly. It had folded and was leaking badly.

To make a long story short, I did everything again. This time I drove in a new seal and paid special attention to how the seal fit over the crank end. After a 24 hour set up time for the sealant and an initial warm up to make sure the radiators were completely filled, we went for a test ride. I felt confident the old oil leak and my newly induced leak were sealed up tight.

The Rotti is back on the road and ready for another loop around Arizona.
 

Attachments

  • Cam Chain Cover 1.jpg
    Cam Chain Cover 1.jpg
    130.3 KB · Views: 121
  • Cam Chain Cover 2.jpg
    Cam Chain Cover 2.jpg
    94.8 KB · Views: 120
The Full Story

My write up of the full repair of our 2002 K1200RS is a bit too long, 11 pages with pictures, to post.

Contact me at mehrten@cox.net and I'll send it to you. Its about 1,600 kb.
 
So I pulled the slave push rod, and noticed it's the older design without the felt seal. Any merit to updating this to the new style, or should I just keep on trucking with the original?
 
Thanks to mehrten, I was able to get to the clutch without the manual. The manual did end up arriving Saturday evening and will be helpful as well.

After I got the trans off, this is what I was faced with.


Not too bad. I honestly expected worse.

Close ups of the clutch to follow....
 
Well, here it is. What do you all think? The bike has 22k on the clock. The thickness on the clutch plate measured in at a consistent 5.6mm around it. I didn't experience any slipping on the ride home, but there was oil all over the bottom of the engine. When I separated the trans from the case, about two table spoons of motor oil came out, with a small puddle remaining in the housing. The rear main didn't appear to be leaking, but the o-ring was definitely suspect. Not pliable but intact, with oil behind it. Also noticed very small amount of gear oil coming out of the input seal (Clutch side) on the trans. At this point, I intend to order a viton ring, a new rear main seal and a trans input seal. I think Ill try soaking the clutch plate in acetone for a day and reusing it. The disks show a quarter sized spot of blue on three areas. Does this seem normal?


Are these the paint marks Im looking for to balance the clutch?

Brown/Yellow

Purple

White stripe on edge
 
I think I figured out the balance by looking at some identifing marks in the pics I took.

Got a coolant flush done. Waiting on the new seal to show up tomorrow.

Was looking at my slave, and believe it needs a bit of grease, as it appears really dry. Any tips on packing the bearing on the face without disassembling it?
 
My thoughts on reuse of the clutch: You didn't notice any slippage, but there was a fair bit of oil in the bellhousing and that tracking suggests it's a steady leak. You can save money by cleaning up and reusing your old clutch disc, but if it's not clean enough, you'll be redoing the teardown.
Is the money saved on the disc worth the risk of having to redo the job?
 
Back
Top