gtgt_bangbang
New member
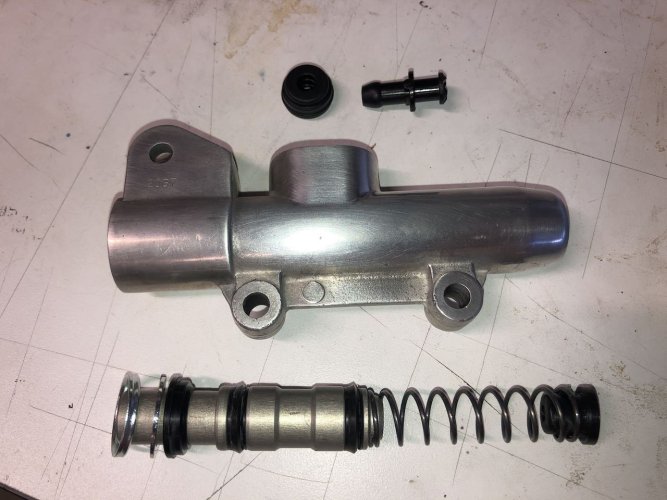
Took apart rear master cylinder awhile back , the usual suspect Reference sources iffy / incomplete at~best .
The Brembo kit comes with a poster-sized instruction sheet written with faded 6-pt type and not one diagram fully matches the piston / seal stack here.
Bravo ! but why should you let Brembo Stop ya ?
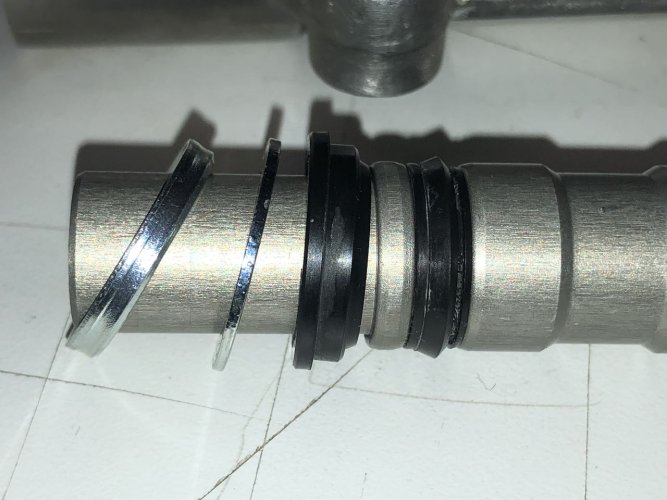
Picture below sure LOOKS like the proper stack but before assembling , I'd prefer to get some practiced eyes on this ,
as the rearmost keeper ring is not a circlip style, rather this is a 1-time drive-in parts ( no mulligans ) . Needs 21.5 mm (max) drift
Can any one recall if this is correct assembly order & orientation ? TIA
the drive-in ring is tapered, going to drive into bore w/ smaller ID headmost.
The flat washer just looks like a back-up for the outermost seal.
This outer seal is a step / taper , also planning on narrow OD first.
The piston is a natural with Flared lips FLARE headmost ( as an expand-against-pressure seal, seals installed at MFG on new piston in kit)
and the internal return spring is a secure fit only on one end of piston,
finally the 'stove pipe hat' grommet is well fitted into spring , cushions the far (outlet) end of cylinder with a hole for fluid passage.
The feed tube grommet is not in the rebuild kit nor BMW catalog, but I located a match under a Duc part number.
Fortunately too, since it was the crappiest part on the original master. But don't let Brembo Stop ya.; put it in the kit, wont ya?
So if you know the stack, please agree with the order & orientation below , or set me straight.
Otherwise , take this diagram to guide your work & your very welcome. Then I can use the instructions as an emergency blanket.


