LED tail light installation - Demonstration on 1978 R80/7
HI! I wrote this post to show installation techniques that can be used on a variety of motorcycles, and accessories. Frequently after market (accessory) manufacturers assume minor modification such as, cutting into wiring harnesses, using insulation piercing terminals, etc. This tutorial shows how non-destructive methods can accomplish your goal. AND allow return-to-stock ability, if later desired.
In this case, if you want to restore originality, keep the terminal insulators. With a careful look at the second picture, you'll notice BMW molds the circuit number into the insulator, so you know where it should plug into the bike.
I recently bought an Emerald Island LED tail light module from Bob's BMW. I installed it in my daughter's 1978 R80/7. https://www.bobsbmw.com/store/product/emerald-island-led-brake-light-for-1970-1978-bmw-airheads
Visibility is our friend! It may not keep you from being hit, but takes away some of the excuses from anyone who might infringe on the space you occupy.
This unit came with no printed instructions. But, the info to match wire colors between the lamp and bike are on the item page on Bob's website.
The unit has fully insulated, male, 'faston' (flat blade) quick connectors crimped on the leads, and includes the fully insulated, female connectors intended to be crimped on the bike wire harness, after cutting off the original connectors from the wire leads.
Having been a technician all my life , I find cutting fully functional connectors from a circuit (simply to replace them with same) to be abhorrent. The original terminals in the motorcycle harness will work with the new LED module terminals. BUT, the insulators on the originals won't fit into the shrouds of the new terminals...WHAT TO DO???
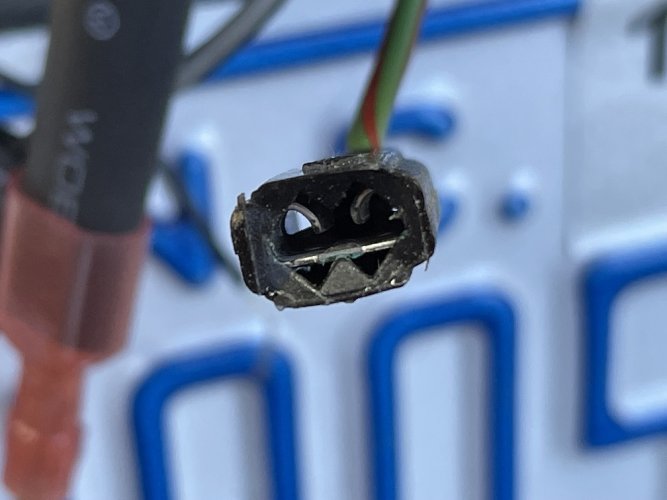
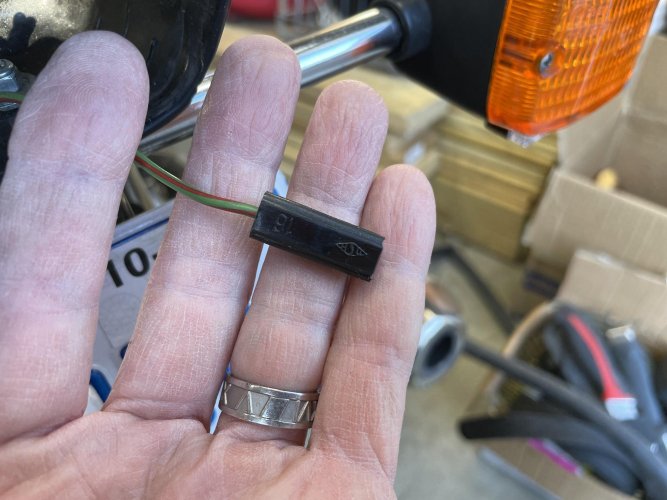
We'll MAKE it fit! (without abuse).
This method will work with other bikes and accessories, so let's get started!
First TURN OFF THE IGNITION KEY! (disconnect the battery negative for double safety, if you like)
Open the tail light pod, remove the old tail light reflector assembly.
ID the wires
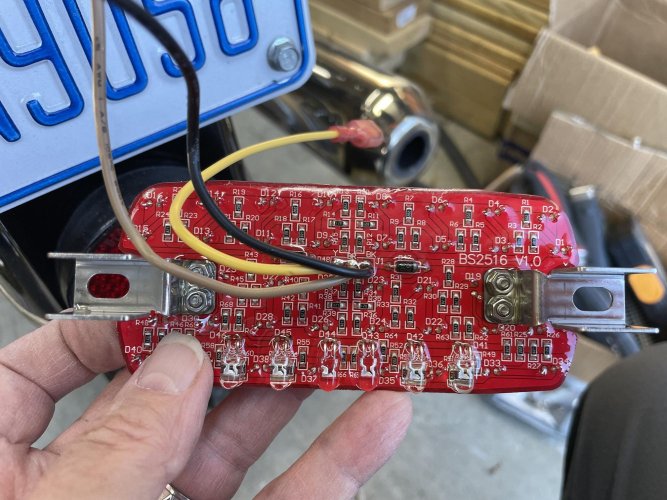
On the side of the terminal where the connector sides are curled over (not the back side), use a suitable tool (I used the medium flat blade screwdriver in my Leatherman Juice) to remove the terminal cover. Slip the blade into the terminal cover as far as possible. NOTE: it will take some wiggling, etc.
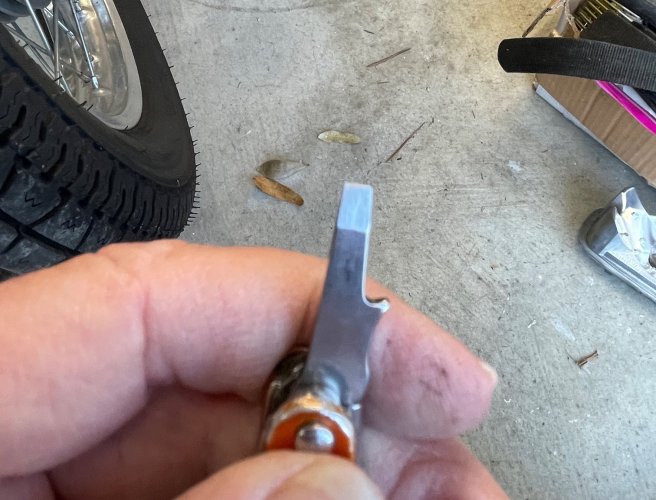
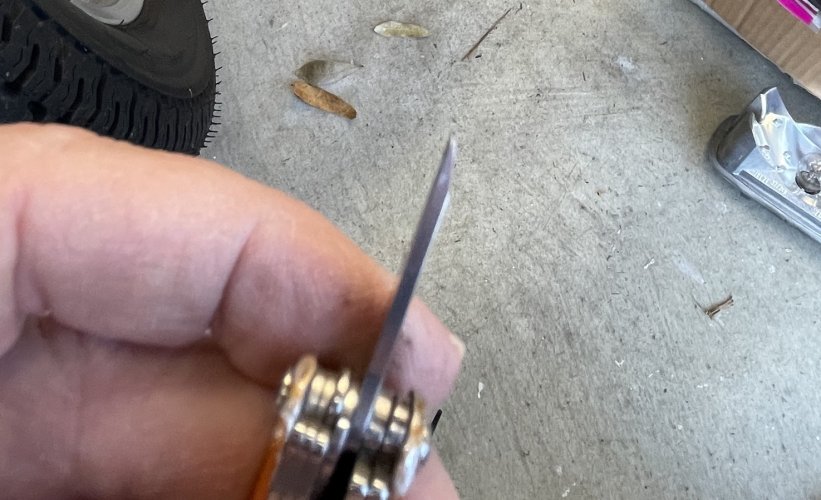
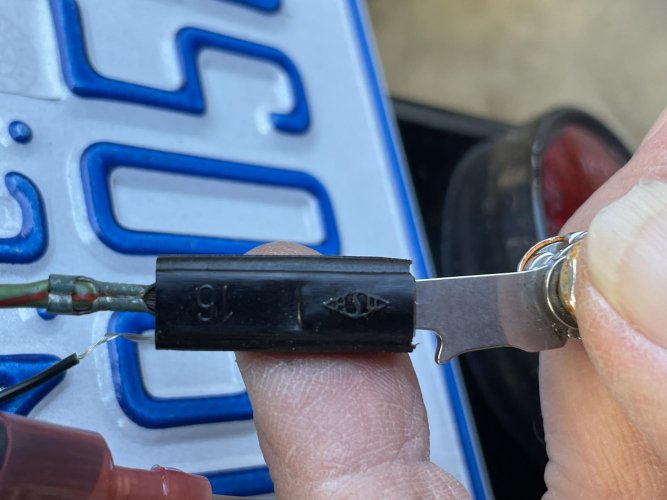
Now, draw the terminal out the back side of the terminal cover.
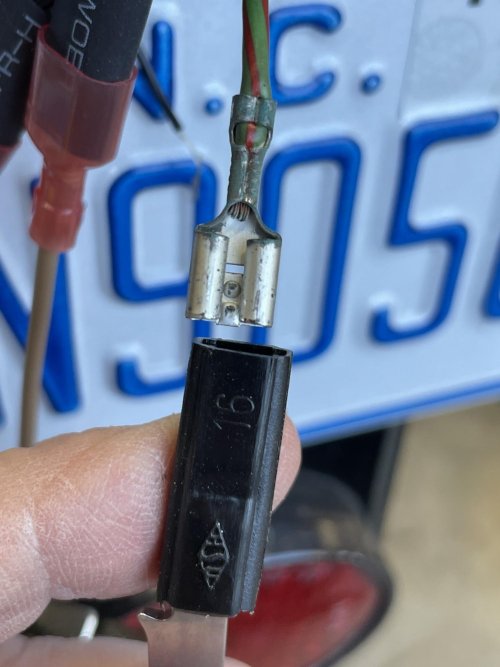
We have pod light modules on the underside of the turn signals. So, here's how I connected them. Hold the appropriate pod leads to the BACK side of the female faston of the motorcycle wire harness, and tuck the wires over the end, into the terminal.
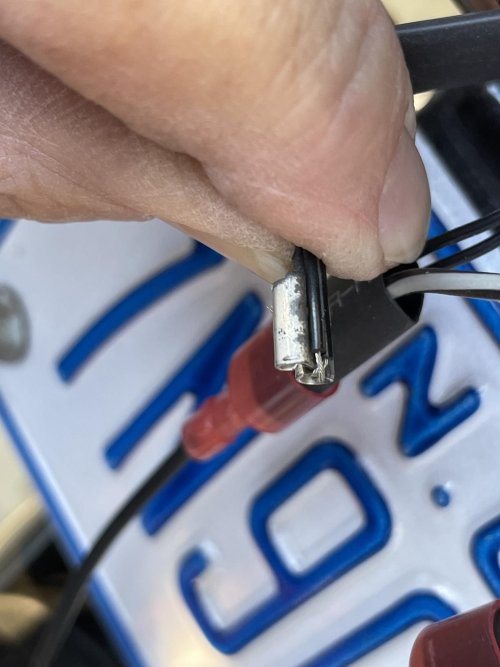
Now the secret sauce, slip a close fitting piece of shrink tube over the motorcycle wire harness terminal, to cover the bare metal.
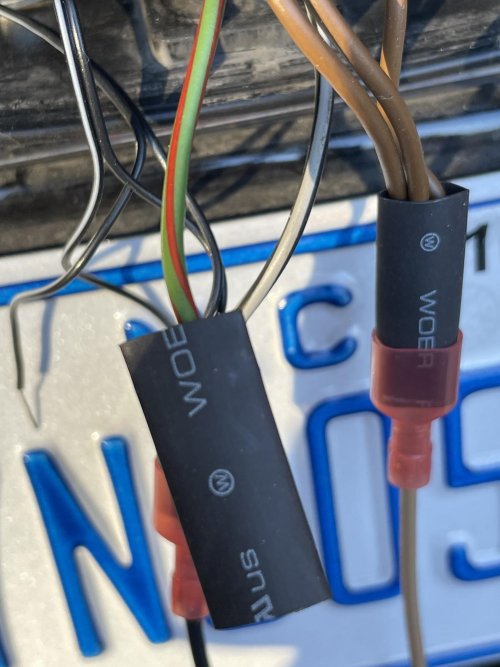
The terminal with shrink tube protection should connect to the LED tail light connector with no shrinking needed. If the shrink tube is a little too big, just shrink it a bit.
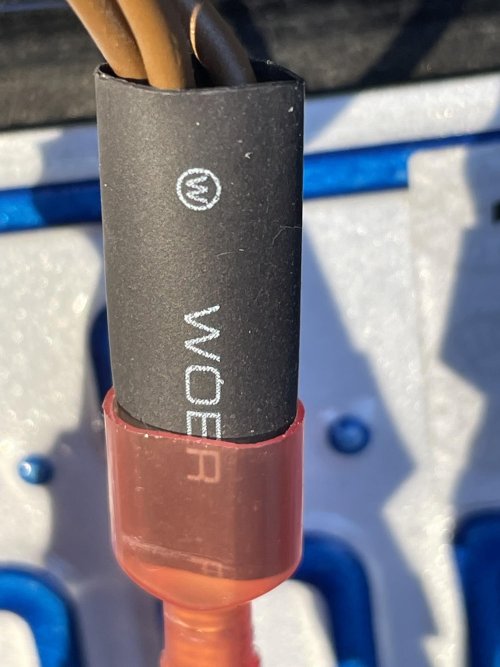
Install the new LED module and lens back into the tail light.
Stand back and enjoy the clean look of your old bike with this modern, ELECTRIC LOAD REDUCING modification.
Now you will be more visible while riding. And you'll tell following vehicles to BACK OFF!!! while braking!
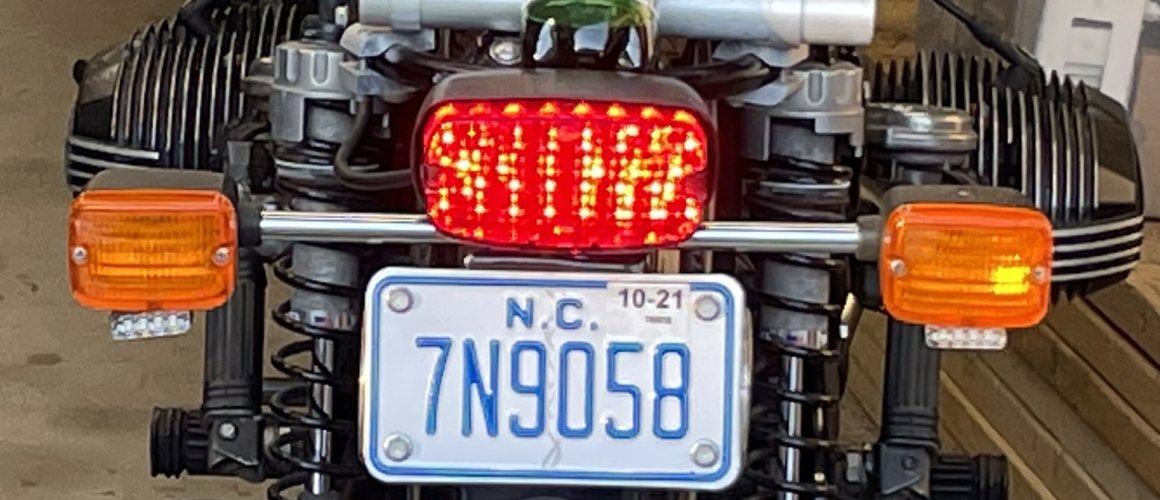
Happy riding!!
HI! I wrote this post to show installation techniques that can be used on a variety of motorcycles, and accessories. Frequently after market (accessory) manufacturers assume minor modification such as, cutting into wiring harnesses, using insulation piercing terminals, etc. This tutorial shows how non-destructive methods can accomplish your goal. AND allow return-to-stock ability, if later desired.
In this case, if you want to restore originality, keep the terminal insulators. With a careful look at the second picture, you'll notice BMW molds the circuit number into the insulator, so you know where it should plug into the bike.
I recently bought an Emerald Island LED tail light module from Bob's BMW. I installed it in my daughter's 1978 R80/7. https://www.bobsbmw.com/store/product/emerald-island-led-brake-light-for-1970-1978-bmw-airheads
Visibility is our friend! It may not keep you from being hit, but takes away some of the excuses from anyone who might infringe on the space you occupy.
This unit came with no printed instructions. But, the info to match wire colors between the lamp and bike are on the item page on Bob's website.
The unit has fully insulated, male, 'faston' (flat blade) quick connectors crimped on the leads, and includes the fully insulated, female connectors intended to be crimped on the bike wire harness, after cutting off the original connectors from the wire leads.

Having been a technician all my life
 , I find cutting fully functional connectors from a circuit (simply to replace them with same) to be abhorrent. The original terminals in the motorcycle harness will work with the new LED module terminals. BUT, the insulators on the originals won't fit into the shrouds of the new terminals...WHAT TO DO???


We'll MAKE it fit! (without abuse).
This method will work with other bikes and accessories, so let's get started!
First TURN OFF THE IGNITION KEY! (disconnect the battery negative for double safety, if you like)
Open the tail light pod, remove the old tail light reflector assembly.
ID the wires

On the side of the terminal where the connector sides are curled over (not the back side), use a suitable tool (I used the medium flat blade screwdriver in my Leatherman Juice) to remove the terminal cover. Slip the blade into the terminal cover as far as possible. NOTE: it will take some wiggling, etc.


Now, draw the terminal out the back side of the terminal cover.

We have pod light modules on the underside of the turn signals. So, here's how I connected them. Hold the appropriate pod leads to the BACK side of the female faston of the motorcycle wire harness, and tuck the wires over the end, into the terminal.

Now the secret sauce, slip a close fitting piece of shrink tube over the motorcycle wire harness terminal, to cover the bare metal.

The terminal with shrink tube protection should connect to the LED tail light connector with no shrinking needed. If the shrink tube is a little too big, just shrink it a bit.

Install the new LED module and lens back into the tail light.
Stand back and enjoy the clean look of your old bike with this modern, ELECTRIC LOAD REDUCING modification.

Now you will be more visible while riding. And you'll tell following vehicles to BACK OFF!!! while braking!

Happy riding!!
Last edited:
