
D
D-Mac
Guest
Hi everyone,
I've seen a lot of discussion on the forum about various kits that give you extra lighting on the rear of the RT. It seems like there are several good options for BMWs, including Hyper-Lites, P3s, or the BMW kit. There is also a lot of speculation about how these work, how hard they are to install, and how they work with CANBUS. One thing is pretty clear - having extra light can only help make us more visible.
If you're an electrical noob like me, you probably want detailed instructions, or at least some confidence that these things actually work. With a lot of help on this forum, I've managed to install driving/fog lights, HID lights, a couple of GPSs, and a fuseblock. None of it was hard.
So today a set of Hyper-Lites arrived in my mailbox. These are made in Michigan (in a place only 40 minutes from my house), so I thought I'd give them a shot. So here goes. Let's get these things installed!
Tools needed: Good set of wire strippers (to strip 18 and 20 gauge wires), good Philips screwdriver, a few zip ties, and THAT'S IT. Everything else is included with the kit.
Degree of difficulty = 2/10. These are very simple to install. The only "tricky" part is finding a source of switched power. There are lots of places to get that from (park light, ZFE GPS plug, alarm plug, etc.) A quick search through the forum will yield lots of good threads about doing this. In my case, I already have switched power on a fuseblock, so it was even easier.
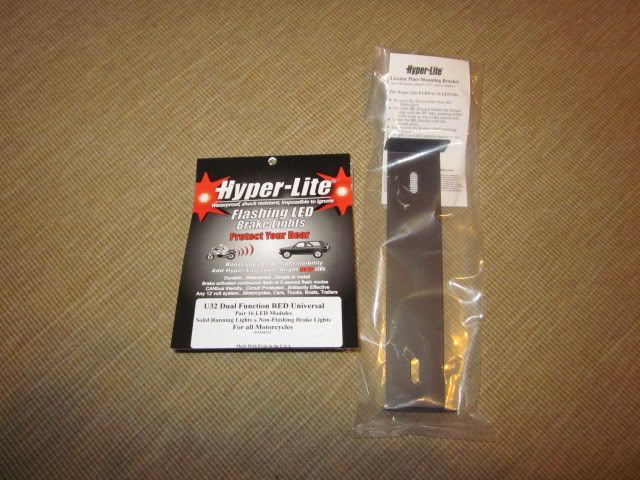
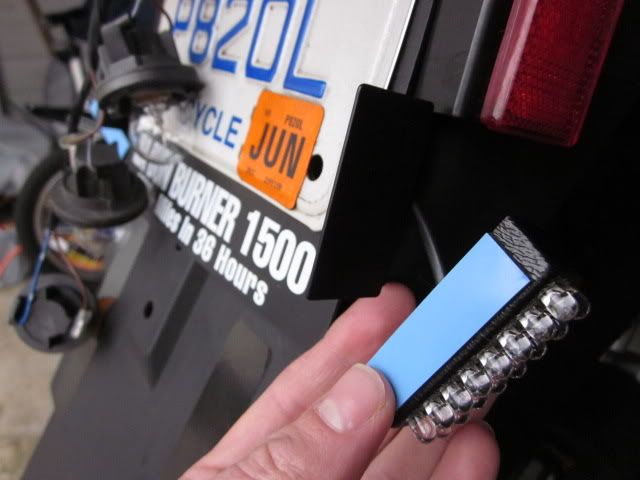
Here is the package. I ordered the set of 16 LEDS and a bracket to mount them to the license plate.
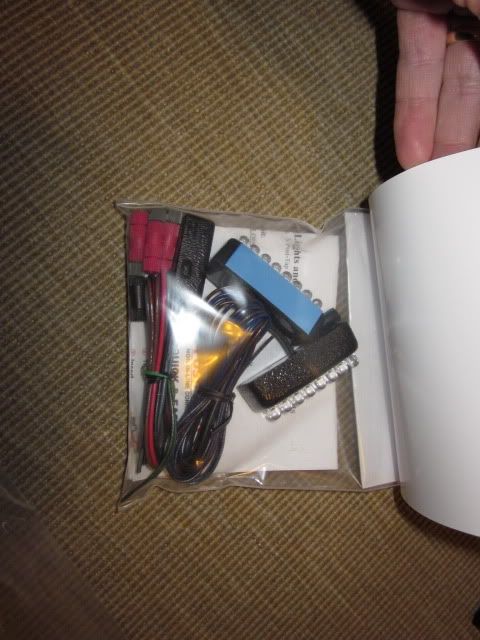
A closer look at the kit. Note that each bank of LED lights has two wires running from it. BLUE and BROWN. The small black box is a control box for the unit. The lights are sealed and look very weather-resistant.
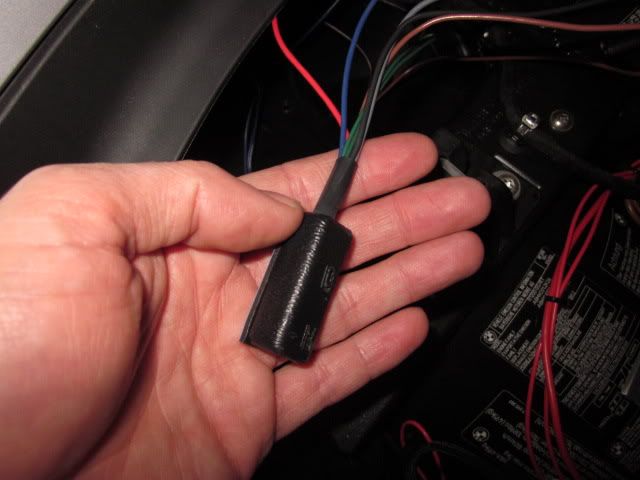
More about the control box. This little box has 5 wires coming from it. BLUE, BROWN, RED, GREY. There is also a GREEN loop. We don't need to touch the green, but the others will be connected by the time we're done.
Start by removing the cover over the tail/brake lights. On my RT these are held on by two Phillips screws on the back-side of the cover (the screws face the front of the bike). Remove the side-cases to make it easier to access these screws. Be sure to use a good Phillips #2 screwdriver so you don't accidentally strip them. They're not on that tight, so it's pretty easy.
There is no particular order to this install, but let's start by connecting the various wires from the control box. You should obviously disconnect power before hooking anything up to your bike. As always, you bear full responsibility for whatever happens to you.
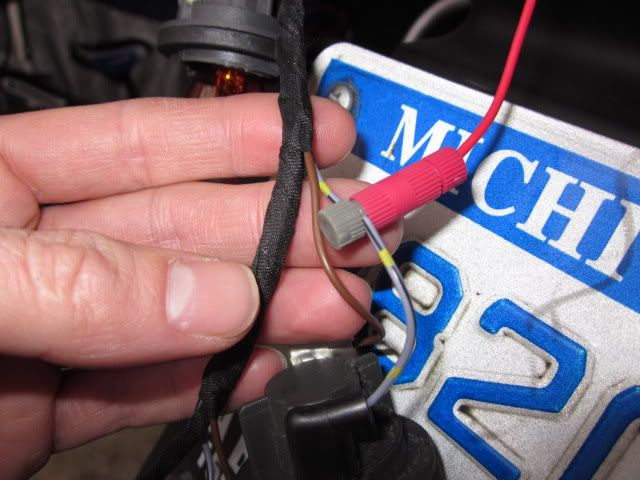
There are two wires on the RT that run to the brake+tail lights. One is Brown and the other is Gray (with a little stripe on it). You can see these wires in the next photo. Like basically everywhere on the RT, the brown wire is a ground. Newer RTs (like my 2010) use the grey (with black striped) wire to power both the tail/brake lights (great when CANBUS works, but you'll lose both the brake and tail lights is CANBUS crashes or if this little wire ever breaks). To signal the Hyper-Lites, we need to tap into the BMW grey-black striped wire. This gives the control box a signal that your tail or brake lights are on. This wire is not used to power the hyper-lites. On my kit, you connect the RED wire from the Hyper-Lite control box into the BMW gray-striped wire. The kit includes a Posi-tap connector to do this, and it works well. Below you can see where I tapped into the BMW wire with the RED Hyper-Lite wire. Instructions on using the Posi-tap connector are included and it's easy if you've never done it.
Next, you have a choice. You can connect the BLACK wire from the control box to the BMW brown taillight wire (a ground) by tapping in to it as described above, or you can connect the BLACK wire to any other ground on the bike. I already have a fuseblock on my bike, so I ran the Hyper-Lite ground wire into a ground on the block (you'll see this in the next pic).
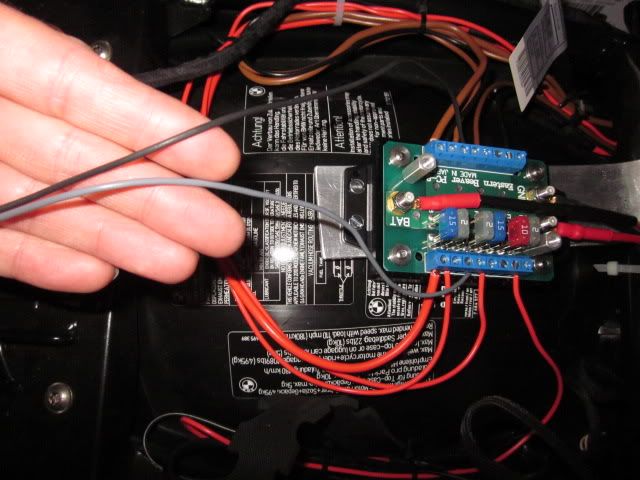
You then connect the Hyper-Lite GREY wire to a positive power source. This obviously has to be a switched source of power so the lights don't stay on constantly and burn out your battery. On my fuseblock, I have several "switched" outlets, so I simply connected the GREY control box wire into the + side of my fuseblock. Again, you can use any switched source on the bike. Many folks run a wire from the park light, or from the headlight connector (P3 instructions explain this process; the wires on the P3 are the same as Hyper-lites other than simply being different colors). I like the GPS connector on the front of the bike as a switched power source. It means that all of my switched devices stay on for about 30 seconds after the bike is turned off, but that's fine (I kind of like it, since it gives me time to decide if I want things like my GPS to stay on). So my Hyper-Lites stay on for several seconds after my bike it shut off.
Anyway, you can see here how the GREY and BLACK wires from the control box are connected to my fuseblock.
You're almost done! All that's left is to connect each Hyper-light to the central control box and then install the lights. This couldn't be easier. Simply connect the BLUE wires from each light to the BLUE wire from the control box. You strip the ends, twist them a little, and use the included Posi-lock connector to attach them together. You could also solder them if you prefer. Next, you connect the BROWN Hyper-Lite wires from each light to the BROWN wire from the control box.

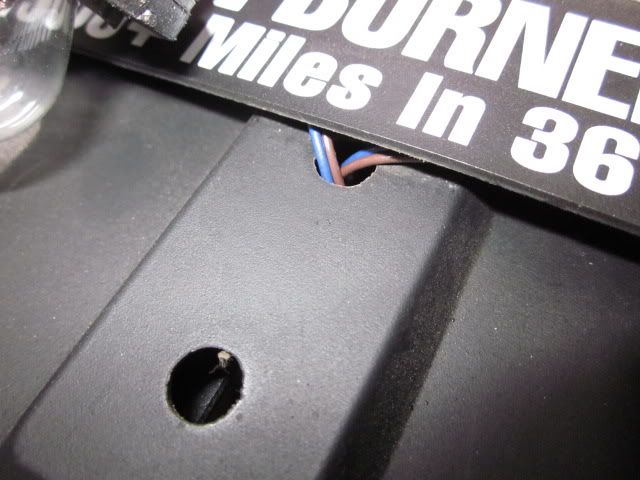
The Hyper-Lite backet is very nice and installs easily. I mounted mine to the bottom of my license plate bracket (remove the plate to access the bottom pair of screws). The lights attach to the bracket with strong tape. I ran the wires from the lights behind the license plate and through the small hole in the rear fender. The wires then run up and into the stock tail-light are and into the back of the bike. It's easy and no holes need to be drilled. Here you can see where the wires come out from under the license plate and goes behind the fender. It's very obvious when you're looking at it in person.
Lastly, I installed a fuse on the fuseblock. A 2 amp fuse is plenty (these lights draw very little power). If you are plugging into a BMW power source directly, you won't need a fuse (as any fuseblock, mine draws power directly from the battery).
Before buttoning everything up I zip-tied the wires to make it neat. The control box also has a piece of 2-sided tape on it, so you can secure it that way too (There is loads of space under the rear seat for everything it fit nicely).
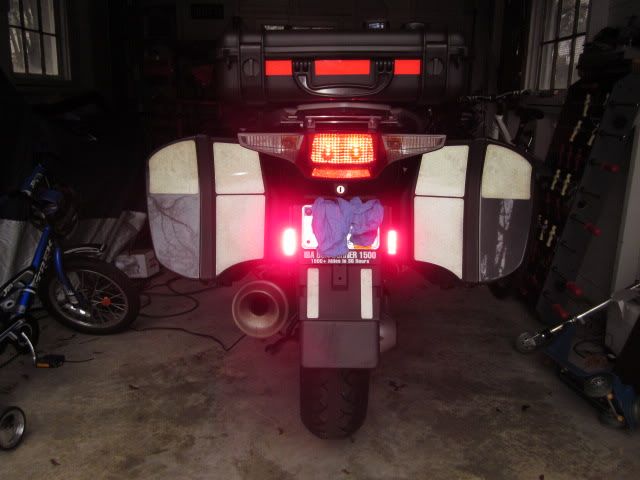
Finished! This is a pic of the taillight only. When you press the brake light, things get very bright! I didn't order any of the flashing brake options, but both P3 and Hyper-lites come in several types if you want to garner even more attention.
The instructions are good, but if you have any questions with Hyper-Lites, you can always call Ron at the company. He's super-friendly, and can talk you through pretty much anything. He's also a BMW rider and BMW-MOA member.
I've seen a lot of discussion on the forum about various kits that give you extra lighting on the rear of the RT. It seems like there are several good options for BMWs, including Hyper-Lites, P3s, or the BMW kit. There is also a lot of speculation about how these work, how hard they are to install, and how they work with CANBUS. One thing is pretty clear - having extra light can only help make us more visible.
If you're an electrical noob like me, you probably want detailed instructions, or at least some confidence that these things actually work. With a lot of help on this forum, I've managed to install driving/fog lights, HID lights, a couple of GPSs, and a fuseblock. None of it was hard.
So today a set of Hyper-Lites arrived in my mailbox. These are made in Michigan (in a place only 40 minutes from my house), so I thought I'd give them a shot. So here goes. Let's get these things installed!
Tools needed: Good set of wire strippers (to strip 18 and 20 gauge wires), good Philips screwdriver, a few zip ties, and THAT'S IT. Everything else is included with the kit.
Degree of difficulty = 2/10. These are very simple to install. The only "tricky" part is finding a source of switched power. There are lots of places to get that from (park light, ZFE GPS plug, alarm plug, etc.) A quick search through the forum will yield lots of good threads about doing this. In my case, I already have switched power on a fuseblock, so it was even easier.
Here is the package. I ordered the set of 16 LEDS and a bracket to mount them to the license plate.
A closer look at the kit. Note that each bank of LED lights has two wires running from it. BLUE and BROWN. The small black box is a control box for the unit. The lights are sealed and look very weather-resistant.
More about the control box. This little box has 5 wires coming from it. BLUE, BROWN, RED, GREY. There is also a GREEN loop. We don't need to touch the green, but the others will be connected by the time we're done.
Start by removing the cover over the tail/brake lights. On my RT these are held on by two Phillips screws on the back-side of the cover (the screws face the front of the bike). Remove the side-cases to make it easier to access these screws. Be sure to use a good Phillips #2 screwdriver so you don't accidentally strip them. They're not on that tight, so it's pretty easy.
There is no particular order to this install, but let's start by connecting the various wires from the control box. You should obviously disconnect power before hooking anything up to your bike. As always, you bear full responsibility for whatever happens to you.
There are two wires on the RT that run to the brake+tail lights. One is Brown and the other is Gray (with a little stripe on it). You can see these wires in the next photo. Like basically everywhere on the RT, the brown wire is a ground. Newer RTs (like my 2010) use the grey (with black striped) wire to power both the tail/brake lights (great when CANBUS works, but you'll lose both the brake and tail lights is CANBUS crashes or if this little wire ever breaks). To signal the Hyper-Lites, we need to tap into the BMW grey-black striped wire. This gives the control box a signal that your tail or brake lights are on. This wire is not used to power the hyper-lites. On my kit, you connect the RED wire from the Hyper-Lite control box into the BMW gray-striped wire. The kit includes a Posi-tap connector to do this, and it works well. Below you can see where I tapped into the BMW wire with the RED Hyper-Lite wire. Instructions on using the Posi-tap connector are included and it's easy if you've never done it.
Next, you have a choice. You can connect the BLACK wire from the control box to the BMW brown taillight wire (a ground) by tapping in to it as described above, or you can connect the BLACK wire to any other ground on the bike. I already have a fuseblock on my bike, so I ran the Hyper-Lite ground wire into a ground on the block (you'll see this in the next pic).
You then connect the Hyper-Lite GREY wire to a positive power source. This obviously has to be a switched source of power so the lights don't stay on constantly and burn out your battery. On my fuseblock, I have several "switched" outlets, so I simply connected the GREY control box wire into the + side of my fuseblock. Again, you can use any switched source on the bike. Many folks run a wire from the park light, or from the headlight connector (P3 instructions explain this process; the wires on the P3 are the same as Hyper-lites other than simply being different colors). I like the GPS connector on the front of the bike as a switched power source. It means that all of my switched devices stay on for about 30 seconds after the bike is turned off, but that's fine (I kind of like it, since it gives me time to decide if I want things like my GPS to stay on). So my Hyper-Lites stay on for several seconds after my bike it shut off.
Anyway, you can see here how the GREY and BLACK wires from the control box are connected to my fuseblock.
You're almost done! All that's left is to connect each Hyper-light to the central control box and then install the lights. This couldn't be easier. Simply connect the BLUE wires from each light to the BLUE wire from the control box. You strip the ends, twist them a little, and use the included Posi-lock connector to attach them together. You could also solder them if you prefer. Next, you connect the BROWN Hyper-Lite wires from each light to the BROWN wire from the control box.
The Hyper-Lite backet is very nice and installs easily. I mounted mine to the bottom of my license plate bracket (remove the plate to access the bottom pair of screws). The lights attach to the bracket with strong tape. I ran the wires from the lights behind the license plate and through the small hole in the rear fender. The wires then run up and into the stock tail-light are and into the back of the bike. It's easy and no holes need to be drilled. Here you can see where the wires come out from under the license plate and goes behind the fender. It's very obvious when you're looking at it in person.
Lastly, I installed a fuse on the fuseblock. A 2 amp fuse is plenty (these lights draw very little power). If you are plugging into a BMW power source directly, you won't need a fuse (as any fuseblock, mine draws power directly from the battery).
Before buttoning everything up I zip-tied the wires to make it neat. The control box also has a piece of 2-sided tape on it, so you can secure it that way too (There is loads of space under the rear seat for everything it fit nicely).
Finished! This is a pic of the taillight only. When you press the brake light, things get very bright! I didn't order any of the flashing brake options, but both P3 and Hyper-lites come in several types if you want to garner even more attention.
The instructions are good, but if you have any questions with Hyper-Lites, you can always call Ron at the company. He's super-friendly, and can talk you through pretty much anything. He's also a BMW rider and BMW-MOA member.
