• Welcome, Guest! We hope you enjoy the excellent technical knowledge, event information and discussions that the BMW MOA forum provides. Some forum content will be hidden from you if you remain logged out. If you want to view all content, please click the 'Log in' button above and enter your BMW MOA username and password.

    If you are not an MOA member, why not take the time to join the club, so you can enjoy posting on the forum, the BMW Owners News magazine, and all of the discounts and benefits the BMW MOA offers?

  • Beginning April 1st, and running through April 30th, there is a new 2024 BMW MOA Election discussion area within The Club section of the forum. Within this forum area is also a sticky post that provides the ground rules for participating in the Election forum area. Also, the candidates statements are provided. Please read before joining the conversation, because the rules are very specific to maintain civility.

    The Election forum is here: Election Forum

K75S DIY painting (& polished tank) thread

Brief 6-month update

Exactly 6 months today since I removed the tupperware.

Unfortunately, nothing new to report in that (painted bits) dept. but I did go out and install some Moto Technique barbacks today. They seem likem they'll be about perfect for what I want to achieve (very minimal rise and setback; about 5/8ths to 3/4 of an inch or so in both planes).

Also removed the old air filter (a K&N that wasn't too dirty), cleaned the lower portion of the airbox as best I could and installed a stock BMW paper filter. That was a real pain and it took me two hours overall! My hands and arms will be a bit sore from wrestling with the airbox and clips. I thought it was supposed to be easy...

Lots of pain, grimacing, cursing and general aggro during that time---but I finally got it seated and the three spring-clips in place. Hope I don't have to do that again for a long time. The spring clips were the hardest part, especially the one way in the back with very little space to maneuver my hands.

So much for complaining. I'm happy to see that the barbacks (which cost around $60 or so) fit perfectly, with no need for longer cables.

I'll fashion a small set of brackets out of some aluminum stock to remount the dash panel whose mounting holes are now a ways apart from the fork tree mounting threads. I wedged the dash pad back in place and will use a couple of long cable ties to keep it in place in the meantime.

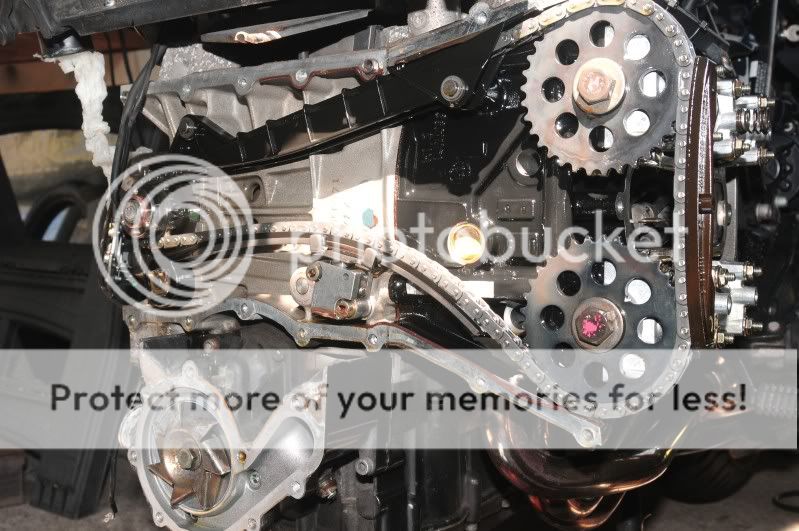
This coming week I'll see if my paint guy has any more bits ready for me to bring home and mount up. Until then, here's a couple of photos of what I did today and a shot of my rusty head bolts that I'll probably replace or refurbish before long, too.

I also ordered a can of PJ1 engine case paint today that supposedly is the best match for K-bike black engines. Mine is getting a bit scruffy as one can see from the photo below; it'd be nice to give it a fresh coat once I'm done with the other stuff.

19dec09010.jpg


19dec09014.jpg


19dec09017.jpg
 
Making Swiss cheese and a question about fairing side screws...

... I removed the two blown bulbs in my Hella FF50s and replaced them with the new Sylvania Silverstar bulbs I bought months ago. I will also redo the wiring some so hopefully I won't blow this pair so soon, either (this is the 3rd pair of bulbs I've put in after little use! I may have a low-voltage situation which is causing this so I will install some heavier gauge wire to my Centech fuse block)

Spent the last couple of days working on the driving light wiring as mentioned above. Replaced all the 16-gauge Hella wires with 14-gauge which should actually make a difference in the voltage drop situation I may have been encountering:
relayboxlighterlightbar015.jpg
(The green wires are the power leads from the relay to the FF50s)

Used some nifty little connectors I found at Home Depot to join some of the wires together; all one needs to do is strip a 1/4" of insulation and jam the end of each wire into the one-way connector hole---presto! Instantly joined together!
(Kind of like a miniature sealed terminal strip with all the terminals connected. They come in a 10-pack for $1.89 and make my life much easier :eat):
relayboxlighterlightbar013.jpg


Here's a shot of my rewired fuse block (I had previously been drawing the power for both the fog lamps as well as the driving lights from the starter relay inside the box---obviously not a good idea in the first place...:blush
relayboxlighterlightbar014.jpg


After all of this rewiring was completed I decided to start making Swiss Cheese out of my light bar that I use for the FF50s. When I had it mounted on the underside of the fairing below the headlight I noticed it seemed to add a good deal of weight to the fairing. As I may have been missing some of the mounting bolts on one side of the fairing I think the end result was a lot of unnecessary up-and-down fairing motion at highway speeds.

Since I reckoned that any possible weight reduction might help alleviate this situation I set about drilling numerous holes in my thick T-6061 aluminum bar:
relayboxlighterlightbar010.jpg


...and ended up shaving well over a quarter pound; exactly FIVE OUNCES FROM THE TOTAL WEIGHT!:whistle Quite a pleasant surprise when I put it back on the gram scale---I would have been happy even if it was only a couple of ounces...
relayboxlighterlightbar011.jpg


Now, if I can just determine what screws are missing from the right side of my fairing I'll have a much more secure fairing the next time I get out on the highway. (Yeah, I've looked at the microfiche on A&S's website a bunch of times but the dang thing is not sharp enough for me to decipher well)

Does anyone here know exactly what screws, bolts and fittings I need at the top right side of the K75S fairing? I've got the lower right side covered; it's only those screws that go in the little round and square holes near the top front area that I'm wondering about.

That's about it for now in the Latest News Dept.

I've ordered some stainless steel bits from a Welsh outfit ( toolsandbolts) on www.ebay.co.uk that will replace most of the rusty bolts and drain plugs now on my bike.

I went ahead and will take the plunge although well aware of the risk of galvanic corrosion---after much deliberating and also encouragement from others who have also done the same (with careful torqueing and plenty of the proper anti-sieze compound). I plan to regularly remove these bolts, clean, re-apply anti-seize and reinsert along with other regular maintenance and am hoping this will suffice to keep corrosion at a absolute minimum.

No further news on the painted plastic parts but I think with the overall dry weather we've been experiencing lately it really won't be much longer before I'm on my way to pick them up from my painter in town. (He only has nights and weekends available to do his jobs on the side).

As soon as there are further developments I will post them here, of course.:type:drink:lurk:eat:laugh
 
Painting done!

My painter called yesterday afternoon to let me know he's done the rest of the parts---so I am going into town today to pick them up. Will post photos soon!:dance
 
Picked up over half of the painted parts yesterday---Chad had a problem with dust after spraying the 2nd coat of clear---so he's going to sand and respray the pieces that need the most attention soon.

Otherwise, they turned out great and I'm immensely happy with my color choice:dance

No time to take any pictures yet as I'm having quite a busy work week.

Today the Eastern Beaver headlight relay arrived from Japan---I partially installed it late this afternoon and will finish it up before work tomorrow.

The PJ1 engine paint also arrived today so I am going to proceed with re-painting the engine casing fairly soon.

I need to decide whether or not to remove all the covers and have them hot-tanked and sandblasted at the machine shop in town beforehand---

or

---simply clean and degrease and sand out the dinged/scratched areas and spray them while they're still on the bike. I could remount the gas tank, start up the engine and get it nice and warm before and after spraying. This would obviate the need for removing them and having to deal with radiator hose wrestling and the head cover spring and rubber gaskets coming loose---but it'd be rather awkward for spraying everything on my hands and knees for sure:scratch:dunno:bolt

I'm leaning towards removing all the parts I plan to spray, degreasing & cleaning, stripping the paint and then sanding/grinding out the imperfections with my Dremel. This would be a lot easier with the parts off the bike, too.

Then I could still have them hot-tanked and sand blasted before spraying the satin black paint. I have an old portable electric "oven" that might just be big enough for most of the parts to "bake on" the PJ1 thereafter (makes the paint much more durable), too.

I'm also considering getting a heat gun regardless of which way I go with this "sub-project" to help keep all the bits warm and dry for the best results, too. Could really come in handy!

I've researched the subject of repainting the black K-engines fairly extensively here on the K-bikes forum but I'm still very open to ideas or opinions---so please speak up if anyone cares to chip in his/her 2 cents on the subject:ear:ear:ear:ear

I suppose I will start on this next Tuesday/Wednesday when I'll have 2 days off.
I want to wrap this up soon and get the bike back together before another month whizzes by if... Even though my work schedule is going to increase from part-time to nearly full-time soon I will devote all my spare time to completion.

The weather is remarkably dry this year and I see lots of guys out riding every time I go to town---it's really driving me nuts! :laugh

At any rate, I'm set on finishing the H4 relay installation tomorrow as well as seeing if I can get the 'new' Corbin saddle mounted on the hinges with the hardware that came with it.

Will take some photos and post them here once I get a chance...

:type

In the meantime, I do wish everyone here a Happy New Year. :drink:usa:dance:whistle

Aren't we Beemerphiles fortunate to have projects like this to focus on and absorb our thoughts in these troubled times?

May we all prosper and enjoy lots of memorable miles in the years to come...
 
New Year's update

5 January 2010:

Finished fabricating a couple of small aluminum brackets that I mounted my dash panel with (after installing some minimal bar-risers/bar-backs last week).:
Catsdashbracketstankon6110019.jpg


Accomplishing this small task brought me great joy. As you can see in the photo, the barbacks put the holes for the dash mounting tabs up and away from their mounting holes---so I cut some small pieces of flat stock, drilled holes in one end of each, then bent them into a flat S-shape until they seemed right. Then I drilled holes in the other ends and attached them with some screws and locking nuts at the top; longer M6 screws for the bottom that screwed into the orginal mounting holes. Voila!
 
New Year's update, cont'd./Stage Two begins...

6th January:

Having finished with the lighting rewiring and relay box I remounted the gas tank which had been sitting clean and bone-dry inside our house since July. Went to the corner store and put half a gallon of gas in my big plastic gas can, brought it home and put it in the tank. Also put a few ounces of Marvel Mystery Oil in with the gas to lubricate things during the startup; the bike had not been started in over 6 and a half months---:brow

I had the trickle charger on the battery for a few days prior as well as having a small
(70-watt 'air dryer' type) heater going underneath the crankcase to keep the freshly-changed oil "warmer" for easier starting. It does get chilly up here at night, figured it can't hurt...

Turned the choke on, ignition on and hit the starter button---bike sputtered to life about four very-long seconds later. That gas had to go through the new fuel filter and into the pump and injectors before the engine started up so I guess that's not really bad at all. I wanted to squirt some oil into the cylinders beforehand but as I started to remove the spark plugs I realized I had nothing with which to squirt oil with---but I decided to start it anyway. I figured it was better to start it up sooner than wait any longer.

I ran the engine for several minutes, warming it well and got the oil sloshing around inside again. Sure was music to my ears to hear my whiner come back to life!:clap

7th January:

Decided to yank all the engine covers off the bike for refinishing (instead of trying to repaint them still on the bike). Guess we could call this the beginning of Stage Two of the renovation that I began last June.

(Haven't finished the first stage yet but that should be wrapped up soon---just waiting on the rest of the body parts to be repainted by my guy in town as mentioned previously).

Before I started unbolting the 5 engine covers I reassembled the rear end of the bike: installed the license plate holder/mudflap, reattached my wireless brake sensor wire to the inside of the tail light (transmits a signal to a row of red LEDs affixed to the back of my helmet whenever I hit the brakes; nifty device I picked up at a cycle shop on the mainland) and then remounted the rear rack, passenger grab bars and ABS brain or ECU (forget which is which) into the rear cowl which I had also installed.

Sorry, no picture of this yet but it all went together nicely. I'll take a picture when the light is better or I've made more progress with the other body parts.

Then I decided to fire up the bike again and get the oil flowing through the engine one more time before I took the covers off. This time it started up immediately upon hitting the starter button. Bravo!

Ran it up for a few minutes at a fast idle then revved it up a couple of times before switching it off. Let it cool down and then got out my torque wrench and socket bits.

Spent the next couple of hours carefully removing the various covers and draining the coolant in the process. No problems but had to refer to some photos on another forum/blog a couple of times to make sure I was on the right track.

Here are a several photos I took during/after the task:
Stage2---EngineCovers004.jpg


Stage2---EngineCovers003.jpg


Stage2---EngineCovers007.jpg


Stage2---EngineCovers002.jpg
(Marked the timing sensor well so I can put it back correctly when the time comes)
 
Few more pix:

Here's the rest of the photos I was going to post with the above; was afraid so many might not upload all at once):
Stage2---EngineCovers001.jpg


Stage2---EngineCovers011.jpg


Stage2---EngineCovers012.jpg


Stage2---EngineCovers015.jpg


Stage2---EngineCovers023.jpg


Stage2---EngineCovers035.jpg


Stage2---EngineCovers036.jpg
 
Oil/Water Pump cover looks rusty even though it's aluminum!

Guess I'll strip the paint off this first to see what it looks like underneath---sure looks like rust underneath the paint, doesn't it? Guess it must be severe aluminum corrosion as the part is not steel, AFAIK.

Stage2---EngineCovers041.jpg


The inside looks fine except for the corrosion in one corner of the black section:

Stage2---EngineCovers042.jpg


I might get a new cover and replace this one unless I can sand away the bad parts.


...to be continued next week or thereabouts...:)
 
Gearing up with fresh gear oil, etc. and a cooling system question

Been down with a cold all week so haven't done a heck of a lot.

Did go to town today and managed to score some Threebond 1216 sealant (under the Suziki name but exactly the same and pricey at $19.78 a tube), a quart each of Mobil 1 75/90 and 75/140 gear oil for the rear dif and tranny which kind of made my day. Been looking all over Hilo for these items last couple of trips to town...

Got some other odds and ends like super-glue for sealing my cluster's faceplate from the inside (see the Gear Indicator thread for that story).

Oh, yeah, I did go out to the carport the other morning and remove my instrument cluster so as to make what I hope will be the "final" fix for it---I had cleaned all the connections inside about a year ago but have had the usual fogging/condensation problem nagging me since. (At least I fixed the intermittent speedo/tach problem the first time around:)).

I figured that the faceplate is the condensation culprit so decided to tackle that problem now while the fairing's completely off. The cluster came off in about 5 minutes and the faceplate is now ready for a careful application of glue along it's inside edges.

I'm also doing a partial replacement of the bulbs inside the cluster and have ordered sets of red and blue LEDS from superbrightleds.com for this (I couldn't decide which color backlighting I want so I ordered both colors to try out before I seal the cluster back up). If I can, I'll try to take and post pictures of my blue/red instrument cluster in the dark so those of you contemplating doing the same can see what it'll look like.

In case anyone's wondering about these, K-bike clusters take Type 194 wedge-base bulbs and the LEDs at this website are quite a steal at 79 cents to $2.59 each (for the brighter 4-led variety WLED-x4 I might use for the clock---98Lee warned me that this might not give me an even distribution of backlighting so I'll play it by ear ---or should I say---by eye:brow). The bulbs are plug and play and have built in polarity protection, too. They were shipped today from St. Louis so I should have them by early next week; probably coinciding with time off from my job to try them out.

Also found a couple of rubber bushings at Ace to replace two that were missing from the underside of my used Corbin saddle (still need to mount that on the bike, too). Got a tube of Devcon Weldit adhesive which should keep them in place.

Picked up a jar of Permatex anti-seize for all the stainless bolts, rubber head bushings, stainless drain plugs and footpeg plate bolts that recently arrived from Wales. After I get the engine covers prepped and painted the anti-seize will come in handy for their careful installation.

Ordered a heat gun (none on the shelves today at Wal-Mart or Checker) to have handy when I do the paint. Should arrive in about a week.

Got a gallon on Prestone, too, as I'll need to refill the cooling system completely once it's all back together. That's going to be more of a chore than I realized originally; since I already have the tank back on with a little gas inside, I'll need to remove it so I can get to the radiator cap to put in a fresh mix of coolant and distilled water. I suppose a Prestone 60/40 H2O mix is optimum; I'll doublecheck my Clymer/Haynes before refilling.

The Catch-22 is that I also need to start up the engine for a few seconds with the fuel pump electrically disconnected so as to relieve the high pressure in the fuel injection system before I remove the tank... See my problem?

So is it OK to run the water pump without any coolant in it for say, 15 or 20 seconds while I do this?

Once I get the tank off I can quickly pour the coolant in and everything should be just hunky-dorey.

That's the update for now, guys. I'll get to work on the engine covers sometime next week when I have some more spare time (and am hopefully recovered from this nasty sore-throat-cold:cry
 
Last edited:
You don't have to run the engine. Either pull the tank connector or the fuel pump fuze and operate the starter for a few seconds.
 
Add some quick disconnects?

I have found that adding a set of quick disconnects to the fuel system is well worth the expense, and since your disassembled now is the time to do it. It eliminates any worries about fuel pressure relief and makes getting the tank off in all circumstances a simple and quick task. There have been a few situations on the roadside where I needed to get the tank off, and the quick disconnects made it so simple to get to the electronics underneath. So, for what it's worth, give that a thought.
 
Thanks, Ron and Tom; The way I've done it before was run the engine without the fuel pump connected until it "runs out of gas" soon thereafter---but if I only need to do so for a few seconds to relieve the pressure then that'll be the ticket for me now.

I've considered adding quick-disconnects before but seemed as though they were a bit pricey---but I will give them a good looking into online today (Aerostitch or Whitehorse probably stock them) . I also want to consider getting some of those EZ-bleeder thingys to bleed the brakes, too---something I need to attend to as soon as I can.

The brake fluid hasn't been changed for over a year and I want to learn how to do this critical task myself---I know it can't be all that difficult and the EZ bleed valves should help. I already got a bottle of DOT4 in my shopping trip yesterday so this will be near the top of my ever-growing agenda.
:bikes
 
Did I miss the memo?

I have always just loosened the hose clamps and let the fuel bleed out before I pull the hose completly.

Just curious.
Scott
 
Did I miss the memo?

I have always just loosened the hose clamps and let the fuel bleed out before I pull the hose completly.

Just curious.
Scott

If the bike has only been shutdown for a short time, the fuel will spurt out when the hose is removed. Overnight, the pressure will probably bleed it's self off.
 
Speed Bleeders

Jeff,

I've got an extra set of speed bleeders. You're welcome to them. If you send me a mailing address I'll send them off this weekend. I've never installed them because I have a Mity-Vac.

:buds
 
Just an FYI - my speed bleeders surprised me by corroding on my K12 here on the west edge of the mainland...maybe slop something on them to protect them in Hilo-town? Or just pay more attention to them than I did?
 
Speed bleeders

Thanks, Tom! PM sent.

Jim; I'll put some grease or something on them to protect them from corrosion, too.

Cheers, Jeff
 
Timing Chain cover reseal

Hi:

Bev Fontaine here 1994 DAKAR YELLOW K75S. Just had my low seat installed yesterday and had a oil leak checked out by the shop. They said it was the Timing chain cover which is a problem with our bikes and takes about 3 hours labor since all the front fairing needs to come off, about 90 thousand bolts removed and take off the cover, clean thoroughly, reseal with silicone. I decided that it was not a problem yet. It has been a while since I checked your thread so you probably have already taken care of this or it is too late or it is not a problem on your bike...

Bev:wave

Picked up over half of the painted parts yesterday---Chad had a problem with dust after spraying the 2nd coat of clear---so he's going to sand and respray the pieces that need the most attention soon.

Otherwise, they turned out great and I'm immensely happy with my color choice:dance

No time to take any pictures yet as I'm having quite a busy work week.

Today the Eastern Beaver headlight relay arrived from Japan---I partially installed it late this afternoon and will finish it up before work tomorrow.

The PJ1 engine paint also arrived today so I am going to proceed with re-painting the engine casing fairly soon.

I need to decide whether or not to remove all the covers and have them hot-tanked and sandblasted at the machine shop in town beforehand---

or

---simply clean and degrease and sand out the dinged/scratched areas and spray them while they're still on the bike. I could remount the gas tank, start up the engine and get it nice and warm before and after spraying. This would obviate the need for removing them and having to deal with radiator hose wrestling and the head cover spring and rubber gaskets coming loose---but it'd be rather awkward for spraying everything on my hands and knees for sure:scratch:dunno:bolt

I'm leaning towards removing all the parts I plan to spray, degreasing & cleaning, stripping the paint and then sanding/grinding out the imperfections with my Dremel. This would be a lot easier with the parts off the bike, too.

Then I could still have them hot-tanked and sand blasted before spraying the satin black paint. I have an old portable electric "oven" that might just be big enough for most of the parts to "bake on" the PJ1 thereafter (makes the paint much more durable), too.

I'm also considering getting a heat gun regardless of which way I go with this "sub-project" to help keep all the bits warm and dry for the best results, too. Could really come in handy!

I've researched the subject of repainting the black K-engines fairly extensively here on the K-bikes forum but I'm still very open to ideas or opinions---so please speak up if anyone cares to chip in his/her 2 cents on the subject:ear:ear:ear:ear

I suppose I will start on this next Tuesday/Wednesday when I'll have 2 days off.
I want to wrap this up soon and get the bike back together before another month whizzes by if... Even though my work schedule is going to increase from part-time to nearly full-time soon I will devote all my spare time to completion.

The weather is remarkably dry this year and I see lots of guys out riding every time I go to town---it's really driving me nuts! :laugh

At any rate, I'm set on finishing the H4 relay installation tomorrow as well as seeing if I can get the 'new' Corbin saddle mounted on the hinges with the hardware that came with it.

Will take some photos and post them here once I get a chance...

:type

In the meantime, I do wish everyone here a Happy New Year. :drink:usa:dance:whistle

Aren't we Beemerphiles fortunate to have projects like this to focus on and absorb our thoughts in these troubled times?

May we all prosper and enjoy lots of memorable miles in the years to come...
 
Back
Top