• Welcome, Guest! We hope you enjoy the excellent technical knowledge, event information and discussions that the BMW MOA forum provides. Some forum content will be hidden from you if you remain logged out. If you want to view all content, please click the 'Log in' button above and enter your BMW MOA username and password.

    If you are not an MOA member, why not take the time to join the club, so you can enjoy posting on the forum, the BMW Owners News magazine, and all of the discounts and benefits the BMW MOA offers?

  • Beginning April 1st, and running through April 30th, there is a new 2024 BMW MOA Election discussion area within The Club section of the forum. Within this forum area is also a sticky post that provides the ground rules for participating in the Election forum area. Also, the candidates statements are provided. Please read before joining the conversation, because the rules are very specific to maintain civility.

    The Election forum is here: Election Forum

Jedz - 1996 R1100R Build / Modification Documentation!

jedz

New member
Greetings!
After about 16 hours in the shop going through the bike thoroughly and also giving the ole gal a proper diet and a final drive fix the R1100R is up and running very well!

Modifications include:
  1. 7/8 Handle bar (FZ1) conversion with headlight tidy(-6lbs)
  2. Instrument cluster swap (-6.5lbs)
  3. Exhaust Swap (-23lbs)
  4. Carbon Canister delete (-3lbs)
  5. Final Drive pivot bearings removed and replaced with Brass (packable) bushings
  6. Broken ABS Unit Removal (-7lbs)
  7. LED upgrade on tail light and headlight
  8. Total weight reduction of 45.5lbs!!!

I also performed these routine maintenance items as I wanted to be sure all was set and complete
  1. Engine oil change
  2. Gearbox oil change
  3. New Spark plugs
  4. Rear / Final Drive Oil Change
  5. Brake System Flush, Bleed and Fluid Change
  6. Oil and Air Filter Change
  7. Spline, bushing and bearing repack of rear swingarm assembly. (although it looked like it was done recently)

Things that I want to get done in the next 1000 miles
  1. Tires (would love some feedback on which way to go!)
  2. Brake Pads
  3. Replace broken headlight bucket
  4. Detail clean and grime removal
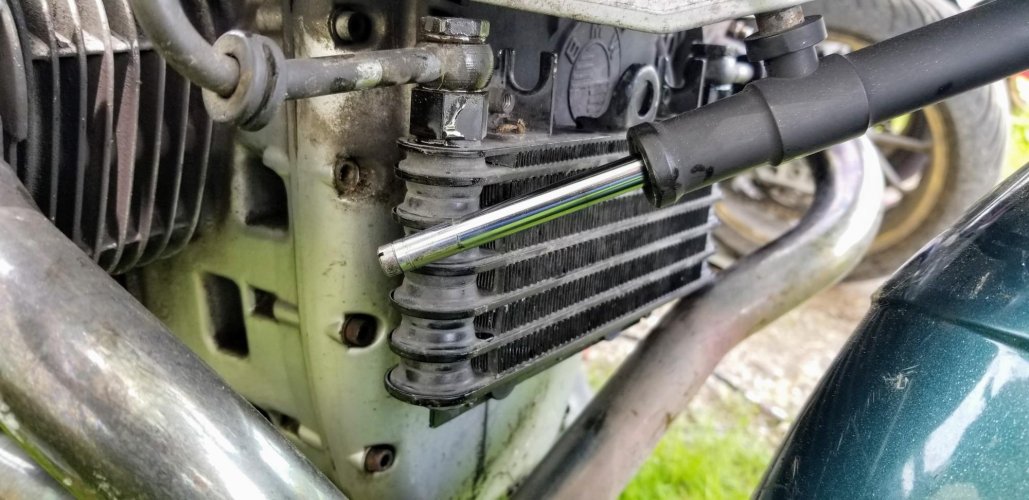
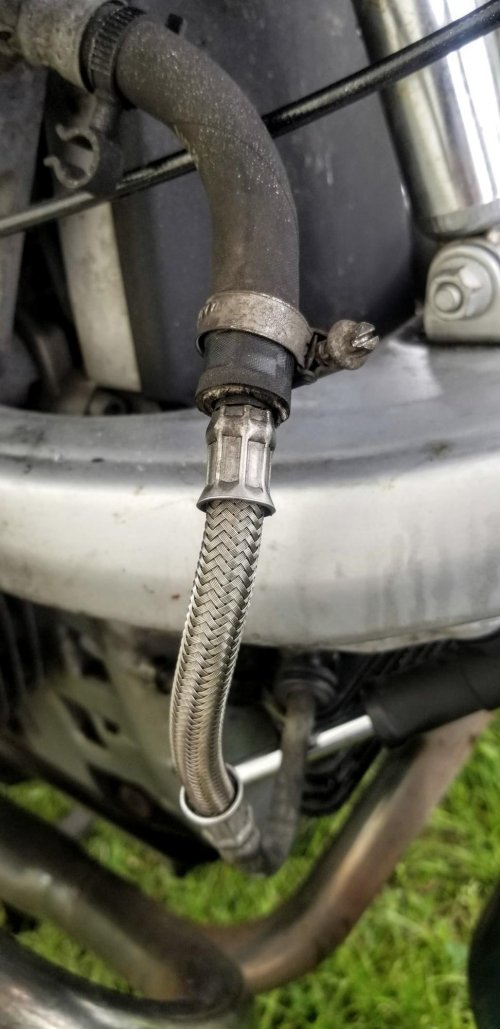
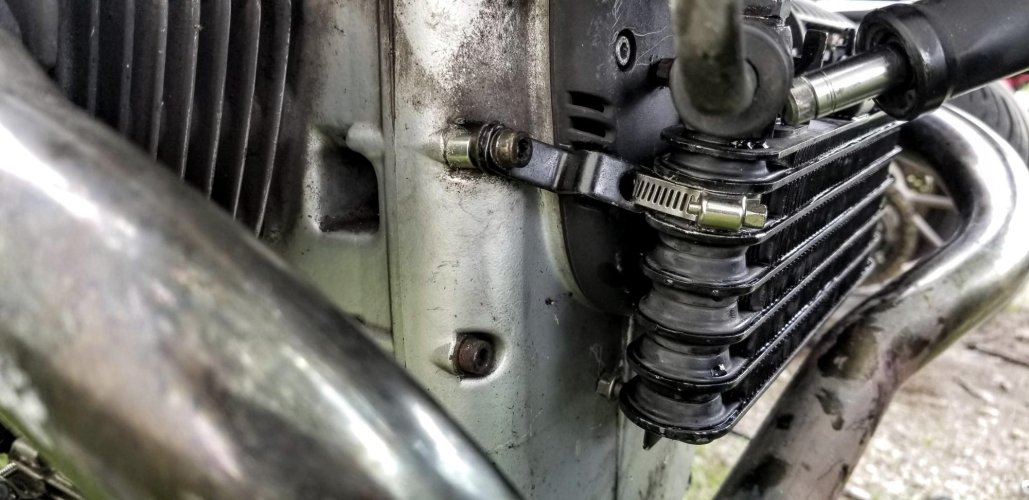
  5. R1100RT oil cooler install (remove the 2 side mounted oil coolers)
  6. Do something to the seat... integrate a bench type seat if I can...

Pics too:
20210706_175915.jpg
20210706_175930_2.jpg

So I'll keep this thread alive as I continue to modify and clean up my R1100R. Cheap old bike that was pretty haggard when I got it. Runs so much better now. The weight reduction is astonishing really. The bike accelerates and handles much better, the FZ1 handlebar makes the bike feel like a proper roadster under me. Slow speed has become much easier.

Hope you enjoy my journey! I'll document as it occurs.

Best,
 
I have a 94 1100 RS. Would be interested in how to do an exhaust change that saves that kind of weight. Good job!
 
Replaced the headlight bucket... Not going to go into details on how to do that as i't just 2 bolts and put the new bucket and lens on. I do have to say that I do like the look of the bike now with the new headlight on it.

Midnight rides prove that mated with a LED bulb the yellow lens is more than adequate for the job, I dare say it shines better than the previous head light bucket that was unable to provide a straight beam pattern like this new lens and bucket. Honestly this was an inexpensive EBay unit. I did have to cut a hole in the back to ensure good fitment around the key switch on the top of the triple tree (or whatever we call it for BMW).

20210710_145930.jpg
Headlight bucket chosen, I will be installing a windscreen as well...
20210711_005232~2.jpg
Beam pattern on low, hard to actually see but it does quite well, you can see anything reflective shows up quite easily.
 
Elephant Ear Oil coolers - delete

So I decided to get rid of the elephant ear oil coolers as they detract from the visual appeal of the engine.

So I went out to my parts yard and found an oil cooler of a Trophy 900 I picked up a while ago and have been using for parts since. I pulled the cooler off and decided it would work well as an oil cooler as the total surface area of the cooler was nearly equivalent to the oil coolers on the bike to begin with.

20210711_120637.jpg
Next we had to go about removing the old oil coolers, this is simple as it's 4 bolts that easily come out after you remove the gas tank shrouding. The oil coolers are also simple rubber tube mounted so I retained the sock oil lines coming out of the motor for the new oil cooler.
20210711_120924.jpg
With the elephant ears out I placed them side by side the new oil cooler to show a comparison of the 2 units. I have to say the 2 oil cooler design definitely is over engineered... I'm surprised BWM just didn't install a single cooler to begin with, also those end tanks are big for coolers... Time to modify the new cooler to fit.
20210711_121427.jpg
So I decided to get the core out of the frame and guard. I deep cleaned off the road grime and I than loosened the mounting bolts (19mm) and let them be loose so I could mock the cooler on the bike.
20210711_122038.jpg
On the bike I was having issues with the front stabilizer knocking at the cooler also the cooler was pressed firmly against the plastic accessory belt assembly cover.
20210711_122258.jpg
To add room I decided to install the oil cooler "backwards" so that I could utilize the threaded rivets and use bolts to create the gap required so air could easily pass through the cooler and it would be suspended above the accessory cover. I than put back on the bike and installed. I utilized stainless hose clamps as mounts for the cooler to the brackets I made. One side used a second clamp to hold fast to the oil line and it's mount to the left and used the lower mounting bolt and spot on the right. The cooler is in there securely. There is a slight offset as to make clearance for the front end dampener.
20210711_130835.jpg
attachment.php

With the oil cooler secure and I satisfied that it was snug and not going anywhere I then cut the lines on the cooler and installed them to the bikes oil lines. tightened down the clamp with a 6mm wrench, tightened down the 19mm banjo bolts on the cooler and then fired the bike up to check for leaks. Success!
20210711_131453.jpg
attachment.php

After that I than rode for a quick 5 mile loop to vary RPM to see if increased pressure would cause an leak, it did not. The next day I rode over 100 miles and check for leaks, no leaks. Bike seems to be running just fine, Not any hotter than before so I guess the clean up was a success!
20210711_135749~2.jpg
I am really happy with how this turned out and it really improves the look of the bike IMO.
Next project will be some heated grips I think. I also want to make a custom seat that is more flat and more of a bench like instead of the odd front scoop and rear slope design... The stock seat is ok... I think a higher bench would me I sit higher on the bike but I would be able to slide back and forth easier, offering some more riding positions. I do intend to do a big ride or two on this bike so I would like to have it ready! Currently the stock seat is not ideal for me.

I also need to put some new tires on.

Keep you guys posted!
 

Attachments

  • 20210711_123244.jpg
    20210711_123244.jpg
    238.9 KB · Views: 202
  • 20210711_131500.jpg
    20210711_131500.jpg
    165.3 KB · Views: 201
  • 20210711_130842.jpg
    20210711_130842.jpg
    219.4 KB · Views: 206
Just an opinion here but, from your supplied pictures, it appears you're not going to get much air flow through your new oil cooler. Not only is it's access to clean air restricted by the front wheel but, more important, there is nowhere for the air to exhaust once it reaches the cooler. As such, you may have defeated its purpose.
 
Just an opinion here but, from your supplied pictures, it appears you're not going to get much air flow through your new oil cooler. Not only is it's access to clean air restricted by the front wheel but, more important, there is nowhere for the air to exhaust once it reaches the cooler. As such, you may have defeated its purpose.

I'll let you know if I have any issues... But it was in the 90' F on my 100 mile day and the bike was running as warm as it usually does. No pinging, no excessive oil consumption or other signs of overheating. I was thinking of installing a temp gauge to see what the operating temps are... I think the main cooling areas of the bike are the cylinder heads themselves which now have increased air flow over them.

Cheers,
 
No pinging, no excessive oil consumption or other signs of overheating. I was thinking of installing a temp gauge to see what the operating temps are...

Its highly unlikely your bike will overheat solely due to your new cooler location. However, it would have been interesting to know the oil temps prior to, and subsequent to, the relocation.
 
Perhaps a mud flap or fender extension to keep the cooler protected from tire-flung debris, and the pipes clean?

You can raise the front of the seat slightly to help "flatten" it overall; here's a picture of a good spacer to put under the front seat mount (it can be whatever thickness you want, and some people just stack washers); you will need longer screws. You can also shave down the rear bumpers (if you have them) just a hair.
Seat Spacer.jpg
 
Its highly unlikely your bike will overheat solely due to your new cooler location. However, it would have been interesting to know the oil temps prior to, and subsequent to, the relocation.

Something worth trying if I get a day off to run an experiment for sure, jedz moto video? My guess would be the teampature will be in the ball park. I'm looking at different gauge options right now. BC1100S you do have me biting my nails just a bit... The Cylinders and cylinder head are probably the biggest and most effective heat sinks on the engine. Quite a good design to dissipate heat.

Best!
 
BC1100S you do have me biting my nails just a bit... The Cylinders and cylinder head are probably the biggest and most effective heat sinks on the engine. Quite a good design to dissipate heat.

I wouldn't get TOO worried. Your bike is severely understressed however it is air/OIL cooled. Your bike has 2 oil circuits - one for lubrication and one for cooling. There's a reason BMW included an oil cooler, in your case 2 coolers, and ensured adequate air flow on these bikes.

PS The best way to measure the effectiveness of the cooler is to measure the inlet temp versus the outlet temp.
 
Perhaps a mud flap or fender extension to keep the cooler protected from tire-flung debris, and the pipes clean?

You can raise the front of the seat slightly to help "flatten" it overall; here's a picture of a good spacer to put under the front seat mount (it can be whatever thickness you want, and some people just stack washers); you will need longer screws. You can also shave down the rear bumpers (if you have them) just a hair.
View attachment 84471

Great! Thanks for the resource here!

I'll play with the seat some, it just puts you n one position. I rode it home when I bought it sight unseen from MD (480 miles) and it was comfortable enough. If I could slide that would be awesome, big reason why my Bonneville T120 is so dang comfy!

Cheers!
 
Just to be clear ... are you aware that the seat is height-adjustable? When you take off the front section, there is a little bar to pull on that will change which notch the seat fits into; higher also moves it back a tad, but many of us don't like the factory tilt or the overall softness.

ALSO - Go over to the R18 threads in this forum and have a look at what Enzo did with his cooler (protection screen).
 
Last edited:
Just to be clear ... are you aware that the seat is height-adjustable? When you take off the front section, there is a little bar to pull on that will change which notch the seat fits into; higher also moves it back a tad, but many of us don't like the factory tilt or the overall softness.

ALSO - Go over to the R18 threads in this forum and have a look at what Enzo did with his cooler (protection screen).

So the bike is setup for Vermont Mountain Gap running and occasional long days, long gone will be its touring ventures fair to say the bike spends more time getting detail cleaned than ridden, that's ok. I would like to keep it for a long time. So I'm not concerned about debris and grime hitting the oil cooler, if it's bad the bike can be taken off the roads. I will put the plastic shrowd back on and it should be just fine.

As for the seat it's not the height but the shape that really is not great. I have foam coming in and I'll be re shaping and re covering it to make a more flat bench like seat instead of the lock you in seat design of the current seat.

Rolling project!
 
Engine DEEP CLEAN and paint.

Today I decided to just give the engine a deep soak with some heavy duty degreaser, a brush and also decided to paint the valve covers and hand paint than seal with 2K clear coat the spark plug covers.

While I was at it I deep degreased the front swing arm, fork rubes and attempted to get clean the rims up... I also installed a fly screen and I think it really ties the front end together now...

So after a few hours of elbow grease and paint I would say the engine came out pretty dang good!
20210718_153815.jpg
20210718_153803.jpg
20210718_153853.jpg

Unfortunately the rims are really corroded. Appears they are aluminum! Which is great but I'm half tempted to buy new rubber and just repaint them after getting the oxidation scars out silver or maybe another color?

New seat vinyl and foam is on the way. I also will be brass plating the bolt hardware! All of it is very rusted so I will be taking it off, cleaning it than brass plating it! We will see how it works out...

Keep you guys posted!
 
Unfortunately the rims are really corroded. Appears they are aluminum! Which is great but I'm half tempted to buy new rubber and just repaint them after getting the oxidation scars out silver or maybe another color?

I'll trade you for a set of 3-spoke aluminum wheels! :D


I had never thought of hand-repainting those plastic spark plug covers. That looks pretty neat. That might be a good option for all my sun-bleached parts. What paint did you use?

If you're plating your metal fasteners and already have the electrical setup for home electroplating, you should strongly consider electrolysis as a method of rust removal. It can literally convert certain iron oxide compounds back into elemental iron instead of simply removing them like abrasive or chemical rust removal, and if you're plating at home you already have the means to do it.

What are you planning to do about the seat foam and vinyl? I'm thinking about recovering my seat with bulk marine vinyl and would like to hear what your ideas are.

No trade! These rims are pretty cool so I think at this time I'll attempt to restore them. A good friend of mine told me they take to powder coat so I may go down that route.

I'm trying a brasing technique which requires a freshly exposed surface. If it works great! If not than I'll move onto replacing with stainless hardware.

The seat is such a hot mess in design. I plan to attempt to convert the 2 peice seat into a single seat. I'll make a Jedz Moto video of that process as I'm sure other may want to emulate it. I've done a couple other seats with foam and vinyl which is what I'll be doing. I won't be doing any special stitching.

Paint is an automotive enamel sealed with an epoxy 2 part (2K) clear coat that I use when I paint bikes.

Best,
 
Update!
So the project is really coming along well. I painted the rims and brass coated nearly all the exposed hardware that was all rusted out. I also wire brushed the front forks and repainted them. Bike is looking GOOD. I'm very happy with how things are looking. Next project will be the custom seat. I've got brown vinyl coming in to match the new brown grips. I love how the bar needs look. The bike just looks stellar... IMO.
Also thinking about a custom paint job or color change... Going to sleep on it though.
Just a before and after of the rust removal and rebrass finish:
Before
20210725_185134.jpg
After
20210725_191908.jpg

And some final pics after the detail work:
20210725_134933~2.jpg
20210727_135344~2.jpg
20210727_135400.jpg
20210727_135437~2.jpg
20210727_135425~2.jpg

I also Swapped out the pads when I dissembled to detail and inspect the calipers...
20210726_141104.jpg

Best,
 
Good by (dis)comfort seat, hello comfortable bench.

Today I decided to get rid of the two preice bucket ball smasher seat and make a 1 price bench seat. It was actually really easy to do. To note that I have one of the more comfortable bike seats I've made (I've done this with a Concours 14 and Bandit 1200). So my method may seem crude and up for scrutiny but damn it makes one hell of a comfortable seat that true may not have the finesse of a custom seat but it's comfortable and holds up to the elements just fine


So step one is to join the pans I took off the vinyl which clearly was replaced at some point. And used simple screws to join the 2 seats. How they interlock meant I had no need for metal braces or joints. They joined very easily andhen screwed together madeq solid pan
20210729_085321.jpg
20210729_085328.jpg

Next to get rid of the tail bone back support thing that forces you into a crotched ball crushing position. So with the heat knives I removed the foam so I could start to build a flat bench seat.
20210729_085532.jpg

I used seat foam bricks to build the basic parts bench. True it looks crude but it's all about creating a flat wide seat to ensure comfort.
20210729_093230.jpg

Once I got the height correct I then cut with the hot knife to make the bench height and pitch perfect. After this I start to fill in the holes and fill and smooth and ready for the comfort foam layer.
20210729_094047.jpg

The comfort foam layer is than applied and I finally got to sit on the seat and adjust if needed. Once perfect I glued the comfort layer on.
20210729_095208.jpg

Than it's time to put the Vinyl on. I chose brown I think I'll end up keeping the color. Allot of stretch and folding to make it look good. But all of a sudden bam we have a benc! I added the rear cargo net to give some definition to the seat but the bench is awesome and comfortable. Big but that's to be expected I'm half tempted to drop the seat off at a marine reupholster to add stitching but the foam, height and pitch is perfect. I went for a long ride and boy was it COMFORTABLE!

20210729_103452~2.jpg

Best,
 
Custom made oil temp gauge filler cap

So I really wanted a means to see what my oil temps were I started to fiddle with the idea of making a custom temp gauge filler cap for my oil head. Obviously they make no such thing so I decided to give it a whack myself. It was pretty straight forward, you want a short thermometer and you use the stock oil cap. the longer oil sticks for HD DO NOT work as they will interfere with the rocker arm.

So I sourced a coolant reservoir cap from ebay as I knew they had the shorter thermo in those radiator caps. I went with a C' temp gauge as I now both F and C well enough and the price was just right!
s-l1600.jpg

Link to radiator cap

So for $10 I made myself a fully functional thermometer cap. It was easy, planed down the R11100R oil cap and drilled a hole at an angle so to clear the rocker assembly. I than cut the radiator cap tabs to free the thermometer, with a heat gun and a little prying with a flat head screwdriver the thermometer came right out. I was actually impressed with the thermometer quality. I did do a boiling water test and sure enough 100' C at boiling which made me happy the gauge was accurate up to 212' F

Used some Yama Bond I use on 2 stroke engines to create the seal against the cap and the gauge sensor stem. I used JB weld and JB stick weld to bond the gauge in the position I liked, once all 3 bonds cured I sanded and applied a band of tape to give a more uniform look. For 10 bucks, you can't knock it and I think it looks great on my build.

225756349_10215306712939982_3922911919747527998_n.jpg


227968975_10215306713379993_4712891638259169633_n.jpg


It comes on and off easily and it's very easy to read from the cockpit. Nice to have some numbers to look at with my oil cooler cleanup.
226090032_10215306714020009_5225557265959685662_n.jpg


So I went for 150 mile ride in the valleys, mountains and gaps to see how the temps looked on the bike.

The bike like to sit at 75 C (170ish F) at idle once warm. Cruising the bike tends to move from 75C to just under 80C (170-175ish F) is where it spent the most of it's day. I did push the bike hard up the a mountain pass to see how high it would go, the highest I saw was 90'C which is 195'F. I'm not 100% sure how hot is too hot for this bike but I do know my Bandit 1200 was happy all day at 100C so I'm not biting my nails in the slightest... If anything this bike seems to run pretty cool for an "oil boiler"/


Pics of my 150 mile ride.

226303982_10215306714580023_617479963321057165_n.jpg

225822931_10215306714860030_2624933898555197100_n.jpg

228299792_10215306713099986_3898732565300941773_n.jpg

223419158_10215306714060010_2352320068246513338_n.jpg


The seat cosmetically is growing on me... I'm not 100% in love with the look but boy am I in love with the comfort!!! I did a 150 miles on the BMW than did a 100 miles on my Bonneville and wanted to have my BMW seat back. I did order a stock R850R seat to have on hand (just in case and for better cosmetic shots). I absolutely love this motorcycle. It runs like a dream and is just a true gem to ride....

Well I'm off to work. Sorry for updating my thread here but the project continues!

Best,
 
Back
Top