• Welcome, Guest! We hope you enjoy the excellent technical knowledge, event information and discussions that the BMW MOA forum provides. Some forum content will be hidden from you if you remain logged out. If you want to view all content, please click the 'Log in' button above and enter your BMW MOA username and password.

    If you are not an MOA member, why not take the time to join the club, so you can enjoy posting on the forum, the BMW Owners News magazine, and all of the discounts and benefits the BMW MOA offers?

  • Beginning April 1st, and running through April 30th, there is a new 2024 BMW MOA Election discussion area within The Club section of the forum. Within this forum area is also a sticky post that provides the ground rules for participating in the Election forum area. Also, the candidates statements are provided. Please read before joining the conversation, because the rules are very specific to maintain civility.

    The Election forum is here: Election Forum

Pulling the motor to fix this?

r65_steve

Member
My new bike has already bit me. Two stripped oil pan bolts and a stripped oil filter housing bolt. I don't see a way to do this without pulling the motor.

Do you?

Remind me on the major steps

- disconnect wiring, cables, exhaust
- drive shaft bolts
- I can't recall do I need to pull the final drive,etc.
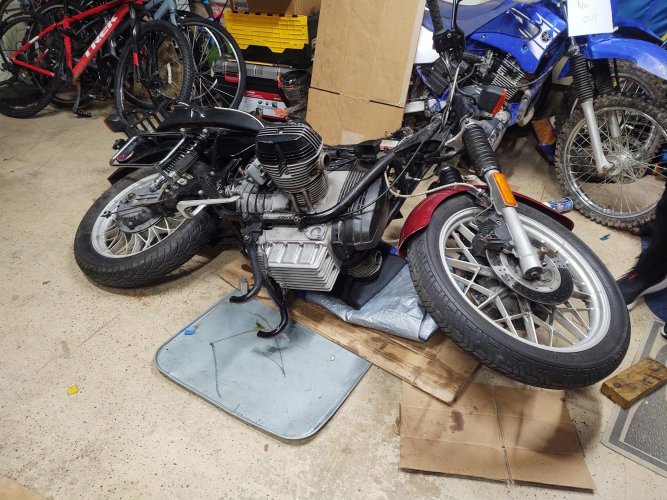
IMG_20201128_203914219-2.jpg
 
You could probably fix the oil pan bolts with helicoils or timeserts by simply tipping the bike over onto a soft landing surface for the valve covers. As for the oil filter cover bolts, you could just slide the engine forward enough to get access to the bolts. That would involve the transmission-to-shaft bolts and the engine mount bolts as well as the muffler mounting bolts. That's the big stuff I think. You would need to support the engine with a floor jack or something.
 
Wow. Great ideas. I never thought of tipping it over. And sliding the engine forward is also a great idea.

I think the front of the engine can be rotated downward by loosening the nuts on the rear motor mount stud and removing the front motor mount stud. I think it advisable to also remove the swing arm pivots. Then as the front of the engine tilts downward the rear can pivot upwards. Support the front of the engine with a jack and then lower it slightly so the stripped thread in question clears the frame.
 
I think the front of the engine can be rotated downward by loosening the nuts on the rear motor mount stud and removing the front motor mount stud. I think it advisable to also remove the swing arm pivots. Then as the front of the engine tilts downward the rear can pivot upwards. Support the front of the engine with a jack and then lower it slightly so the stripped thread in question clears the frame.

This worked out well ....had enough room to work the drill and the helicoil tool. Bolt torqued up OK. It was dinner time so tools down till tomorrow to address the pan bolts.

Bonus in disconnecting the drive shaft. 3 or 4 bolts were loose. Like real loose.

I'm gonna go over all the bike but glad to catch that.
 
.Bonus in disconnecting the drive shaft. 3 or 4 bolts were loose. Like real loose.

I'm gonna go over all the bike but glad to catch that.

You were lucky to catch that! Many people prefer to treat those bolts as one-time-use. Others feel that since the bolts are not
“stretch” bolts, torqued to a yield point, that they can be safely reused so long as they thread in and out easily with no evidence of deformed threads. Where the bike has been operated with loose bolts, the bolts should be inspected carefully.

Either way, when reinstalled the bolts and threaded holes should be clean, dry, and some blue loctite on the bolts. There is a torque value specified but it’s a difficult bolt to get a torque wrench on if you don’t have a box-end “crow’s foot” adapter. So, most people put a short box-end wrench on the bolt and apply “good grunt” torque setting. :)

Best,
DeVern
 
I've got that special tool from my last bike, so I'll do it right.. I got a set of new bolts. They came with purple locktite on them.
 
Glad you were able to deal with the oil filter holes without pulling the motor. Also, reading about your loose driveshaft bolts caused me to put one more task on the to-do list for my RT. Especially after finding the timing adjustment bolts slightly loose on my RT today, each one needed at least 1/4 turn. These Airheads are simple to work on, but we must leave no stone unturned.
 
JHall, me too....but it's only a hand full of other things to disconnect and the motor would be out. I really debated going all the way.
 
Messed up things

Airheads are very easy to work on and IF properly maintained will go for a long time before breaking. I can attest to this from the history of my main bike. I bought it new in 85 and it has gone now for 240K miles with nothing more than normal rebuilds and care. Now it is getting a major rebuild for mainly cosmetic reasons.

One of the saddest things I see in the forums is a new to airhead person dealing with previous owner disease. This malady can happen to anyone who buys an airhead from any other person. No matter how well the bike is looked over, the germ waits to attack the wallet of the unsuspecting new owner. I have fallen victim to it myself when I bought my second used airhead.

Loose drive shaft bolts on a new to you bike is a sure sign the germ is or was on your bike. In your case, you got lucky and tightened them without a cost, a mild case.

While some and I would say most airhead owners are diligent about maintaining their bikes and doing good repairs. There does exist a group of morons who do not know how or what to do to keep their bikes running properly. They do things like strip bolts, because they don't know how to use a torque wrench, They forget to tighten bolts because they are in a hurry. Things get put back to getter in the carbs wrong and they crank up the idle speed to compensate rather than fix the problem. The list goes on.

Then, the worst thing these people can do is sell the bike to an unsuspecting new guy or even an old airhead owner looking for a good bike. The germ now infects the victim. We have to fix the problem, and it comes out of our wallet or time.

We can call ourselves brothers of the messed up airheads now, we who have gotten a "good" bike and have had to fix the previous owner's mess. Take pride in this!! Good job! When the little things are finally fixed may you enjoy the ride and may it not break the bank to get to this point. St.
 
Loose drive shaft bolts on a new to you bike is a sure sign the germ is or was on your bike. In your case, you got lucky and tightened them without a cost, a mild case.

Saw this referenced, retighten drive shaft bolts in this thread several times now...............

NEVER JUST TIGHTEN OR RE-USE DRIVE SHAFT BOLTS!!!
instead ALWAYS get new bolts and WASHERS. Then tighten as much as you can with that 12 point wrench in your tool kit.....BEAR DOWN ON IT......

I missed out on the activities at the 2nd BMWMOA National at Jellystone Park because of not doing this. Before leaving for the Rally, I pulled all to replace the dripping flywheel seal with a new one......All went back together fine right along with the old driveshaft bolts and washers. There we were in the "PARADE" around the countryside with all the others and I heard a "CLUNK" from the bottom end. All went fine until we got back in the campground gate and lost all forward motion. Thankfully, a real RIDER BUDDY, went into Springfield, Mo to the closest dealer by noon to get new bolts and washers. Spent the whole day there pulling the rear end and driveshaft to make sure I got all the parts. It all went back together and went another umpteen thousand miles with the new bolts and washers......LESSON LEARNED. ALWAYS USE NEW WASHERS AND BOLTS ON THE DRIVESHAFT. ESPECIALLY THE ONES SPECIFIED FOR THAT USE...............
 
Last edited:
Dennis brings up another point. If you take things apart or are looking into this and you find lock washers under the bolt head, these are no longer recommended by BMW. The issue was that the washer could break in some situations, releasing it's tension on the bolt allowing it to back out. Once one starts, others are likely to follow. BMW came out with a service bulletin that indicated they had completed some testing (no idea what that entailed) and recommended that the lock washer be eliminated and a shorter bolt (less length by about the thickness of the washer) be used instead...unfortunately the part numbers are the same! So, if you're going to buy new bolts and you're offered bolts and lock washers, say no thanks and request the shorter bolts.

The shorter bolts do "stretch" but only in their elastic range...they don't distort under normal use. Theoretically they could be reused, but a shop would never do that. Each owner can make the individual call, but it is a critical attachment. As mentioned, make a clean/dry joint and use blue Loctite on the threads. A good grunt with the tool kit wrench and a rag in your hand should be good to make sure the bolt stays put.
 
Agree

Steven, I agree with you, many folks are not mechanically inclined and should not try to work on their own motorcycles, as they tend to screw up more than they fix. (But some would argue, that's part of learning.) Also, some apparently suffer from short term memory loss, which may explain the PO's universal joint bolts. But I suspect ST memory loss is often due to pot consumption, especially in younger folks. Then too, some simply neglect maintenance and figure it will be the next owner's problem.

With BMW, there's also a need for riders to address factory neglect, for lack of a better word. For example, if the Airhead still has the OEM side stand, it's gonna need an aftermarket one that actually works safely. Or the Boge shocks that are garbage on the showroom floor, and will have a ridiculously short life span if you try to run them. It's as if BMW does not respect the customer and is resting on their laurels, relying on marque status to sell future bikes, instead of quality engineering and construction.

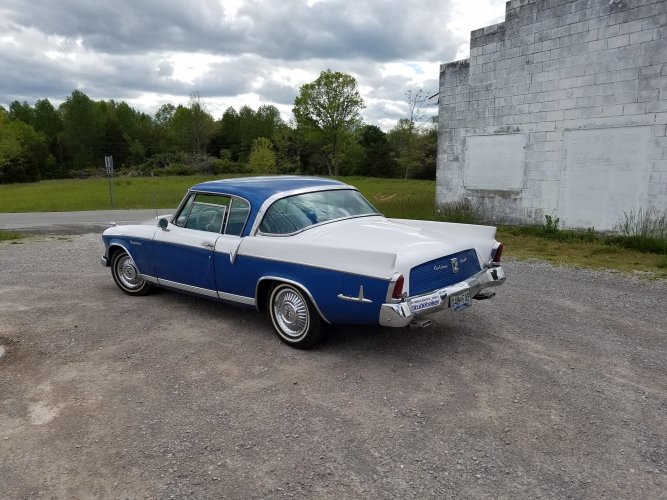
I find Airheads and Studebakers to be very comparable. If we actually use them, they are gonna need special care and feeding. But if we love them, it's worth it. I have driven Studebakers over 700,000 miles, and have been asked many times how I can force myself to drive such unsafe, unreliable, uncomfortable vehicles. My answer, I stay the heck out of modern vehicles, lest I become spoiled. Btw, I have never walked a step due to a broken down Studebaker but, admittedly, have done a few roadside repairs. Here's a pic of my 56 Golden Hawk, owned since 1986 and driven (by me) over 165,000 miles. LOL56J Lft Rear.jpg
 
This is my project to stay away from germs! All day on conference calls, so I spend a little time in the garage to avoid my family...also trapped at home.


I've got no good tires on this and not in a rush because I need to make an appointment at the DMV and who knows when I can get one. So I take my time.

Ordered new driveshaft bolts and no washers. I checked the fische a bunch of times and then called Boxer2Valve to confirm.

The bolts are a PITA to put on. What's your trick to get them started? I might "make" an open ended 12pt wrench to add to my tool kit.

Gonna have to do the swing arm bearings because who knows what surprise I'll find. But again no rush.
 
The bolts can be difficult to put in but pulling back the boot usually gives enough room to carefully and slowly put the bolt in with your fingers. I'd suggest not using an open ended wrench for this...you're going to put a lot of load on the wrench and it can open up then ends and slip or round the bolt flats off. Sounds like you don't have the stock 12-point closed end wrench from the tool kit. It is ideal and thin to fit the space. I'd suggest that you try and find a suitable closed end wrench for this job.
 
The bolts can be difficult to put in but pulling back the boot usually gives enough room to carefully and slowly put the bolt in with your fingers. I'd suggest not using an open ended wrench for this...you're going to put a lot of load on the wrench and it can open up then ends and slip or round the bolt flats off. Sounds like you don't have the stock 12-point closed end wrench from the tool kit. It is ideal and thin to fit the space. I'd suggest that you try and find a suitable closed end wrench for this job.

Open ended was an idea just to get it started. No tools came with this. Bill of sale, two fuses and a bulb.


The operation appears to have been a success on the helicoils. Torqued right up to Snowbum's spec.

I wanna do the valves before I put oil back in it (and I might have to go buy some).

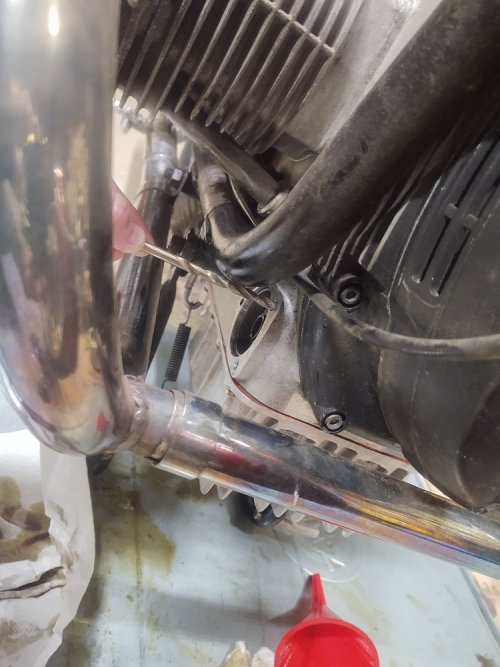
Next question....do I have the right plug wires? These are NGK. The old plugs have no tip (just the threads). I test fitted a new plug with the tip into the NGK wires and it didn't fit. I've never used plugs without the tips before. I'm not sure this is right, or does it matter?


IMG_20201205_115220684.jpg
 
Last edited:
Tips on the plugs? Are you talking about the end of the plug opposite the spark area? AFAIK all of the plugs used on Airheads should be just threads...the spark plug cap is designed to grab those threads for contact. I seem to remember that plugs with a round-ish thing on the end are similar to what I have on my old car and truck. What is the NGK plug you're using? Note that typically that round end on the plug can be screwed off leaving just the threads.
 
Tips on the plugs? Are you talking about the end of the plug opposite the spark area? AFAIK all of the plugs used on Airheads should be just threads...the spark plug cap is designed to grab those threads for contact. I seem to remember that plugs with a round-ish thing on the end are similar to what I have on my old car and truck. What is the NGK plug you're using? Note that typically that round end on the plug can be screwed off leaving just the threads.

Yeah, the non firing end. I ordered Bosch plugs to replace Bosch plugs. I knew the tips/caps come off, I've never seen an application where it didn't use the tips/caps is all.

Thanks for the info.
 
OK having a ball. Adjusted the valves, new plugs, fuel and air filters. Starts right up. Leaks.

Leaking from the valve cover gasket. No big deal, gotta pull that again because I wanted to paint it AND the pushrod seals are really leaking. Leaking so much that after I tipped it back up yesterday and with NO oil in it, there was oil leaked down to the oil pan this morning.

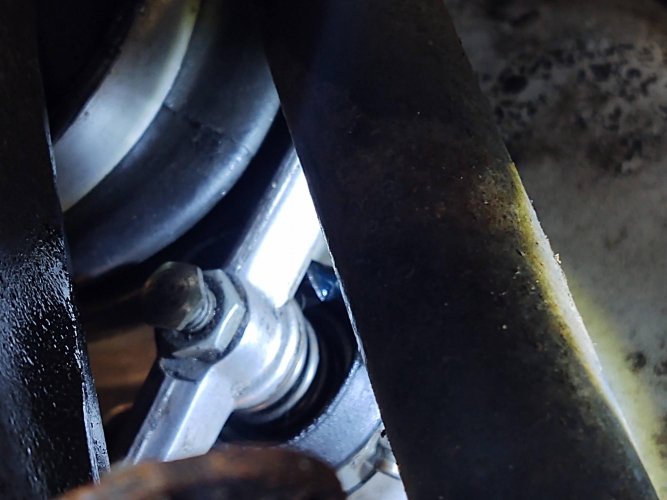
Also it kept dripping from the transmission. I chalked it up to a messy fill job, but then got down low and realized it's coming out the back of the clutch actuator boot. I can see the spring #4 in there, so I think the boot #5 is shot. Like a whole section missing. How does this seal on opposite side of the clamp?

https://www.ascycles.com/bmw/1979/R100/Clutch/Clutch control.html#PartsTable

IMG_20201206_155903562.jpg
 
Back
Top