• Welcome, Guest! We hope you enjoy the excellent technical knowledge, event information and discussions that the BMW MOA forum provides. Some forum content will be hidden from you if you remain logged out. If you want to view all content, please click the 'Log in' button above and enter your BMW MOA username and password.

    If you are not an MOA member, why not take the time to join the club, so you can enjoy posting on the forum, the BMW Owners News magazine, and all of the discounts and benefits the BMW MOA offers?

  • Beginning April 1st, and running through April 30th, there is a new 2024 BMW MOA Election discussion area within The Club section of the forum. Within this forum area is also a sticky post that provides the ground rules for participating in the Election forum area. Also, the candidates statements are provided. Please read before joining the conversation, because the rules are very specific to maintain civility.

    The Election forum is here: Election Forum

Newbie Saying Hello

What kind of prep did you do on the painted engine, especially since you didn't take it all the way apart.

Also, roughly how much does it cost to powder coat the frame?

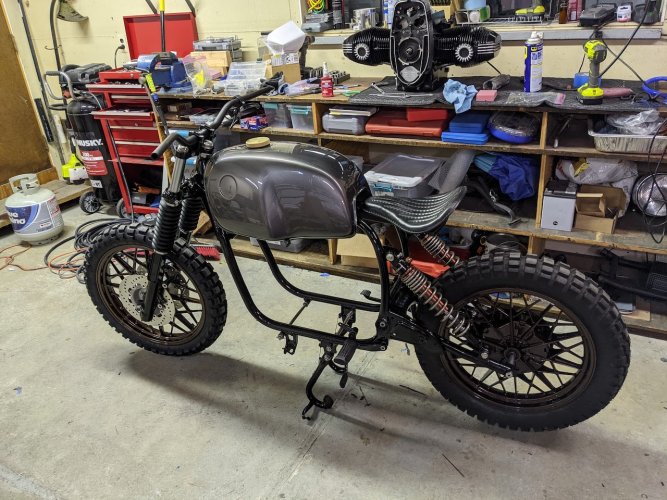
The engine is still in process... for all the other parts that I did, I took them down to bare metal, mostly using Nyalox brushes, which are nylon brushes infused with an abrasive. I then cleaned with isopropanol, followed by a second clean with duplicolor prep spray, using blue paper towel, till no dirt was present anymore. Many hours spent on prep!!!! Then three coats of each "color": primer, black and then clear, per the instructions on the can, which call for two light coats, followed by a heavy coat, all with a 10 minute dry between coats. The engine I decided to try a bit differently as I was not too happy with the masking results I had on the cam covers. With those, I masked off the fins, and went through the primer and black, then de-masked and did the clear. I was not happy with the masking lines... I wanted to try something different on the engine - (paint, dry , sand paint off the fins and then clear coat afterwards). I asked Duplicolor, and they actually replied. They said it was fine to clear coat afterwards, but wait the full 7 days that is needed for the paint to cure. I actually sanded them down today and will do the final clear coats tomorrow!

I had the frame, swingarm, fork legs, fork clamps, center-stand and a hand full of smaller parts done for $400.

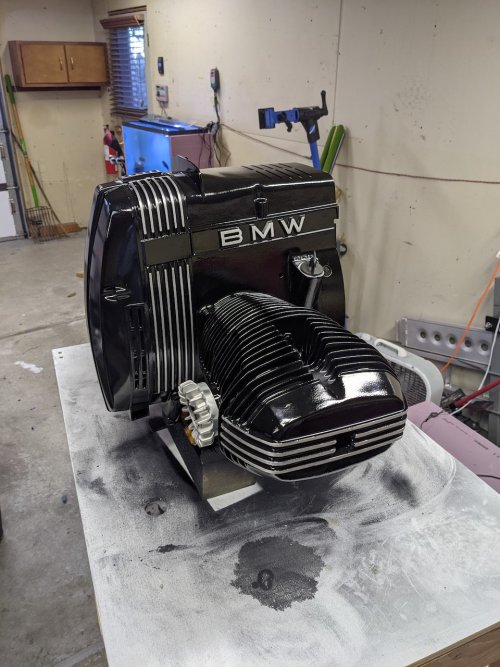
Are you sanding off the fins back to bare metal? And just the tips right?

I'm excited to see this turn out.

I was thinking of doing something similar to mine...but all black with a red powdercoated frame. The tank and fender, etc are in such nice shape, it'll either make that work easier and/or the BMW world sad.


yeah, just the outward-facing edges of the fins. Sanding has left a much better looking outcome so far, lets see how well the clear coat adheres now!

I think red would be nice! Do it!
 
Heat Disappation

I wonder if the multilayer skin of paint is gonna inhibit heat dissipation, especially on the cooling fins? I know some radiators are painted black, but with a special kind of paint, and have read precautions not to use regular paint.
 
I wonder if the multilayer skin of paint is gonna inhibit heat dissipation, especially on the cooling fins? I know some radiators are painted black, but with a special kind of paint, and have read precautions not to use regular paint.

From what I have read, a few 10-100µm of paint make no difference to the heat dissipation. For something to actually insulate the motor/fins it would need to be much thicker and ideally not solid... like a nice fur coat :p
 
The engine is still in process... for all the other parts that I did, I took them down to bare metal, mostly using Nyalox brushes, which are nylon brushes infused with an abrasive. I then cleaned with isopropanol, followed by a second clean with duplicolor prep spray, using blue paper towel, till no dirt was present anymore. Many hours spent on prep!!!! Then three coats of each "color": primer, black and then clear, per the instructions on the can, which call for two light coats, followed by a heavy coat, all with a 10 minute dry between coats. The engine I decided to try a bit differently as I was not too happy with the masking results I had on the cam covers. With those, I masked off the fins, and went through the primer and black, then de-masked and did the clear. I was not happy with the masking lines... I wanted to try something different on the engine - (paint, dry , sand paint off the fins and then clear coat afterwards). I asked Duplicolor, and they actually replied. They said it was fine to clear coat afterwards, but wait the full 7 days that is needed for the paint to cure. I actually sanded them down today and will do the final clear coats tomorrow!

I had the frame, swingarm, fork legs, fork clamps, center-stand and a hand full of smaller parts done for $400.
How's the project coming? I wanted to follow up on something....did you use the Nyalox on the engine parts too? I need to take my head's off, so I figured I'd get the valve covers and repaint at the same time. I'm curious if that what you used on the engine bits.
 
How's the project coming? I wanted to follow up on something....did you use the Nyalox on the engine parts too? I need to take my head's off, so I figured I'd get the valve covers and repaint at the same time. I'm curious if that what you used on the engine bits.


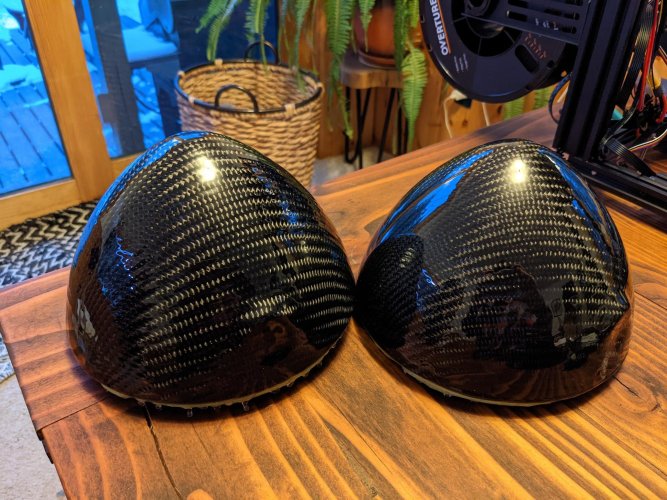
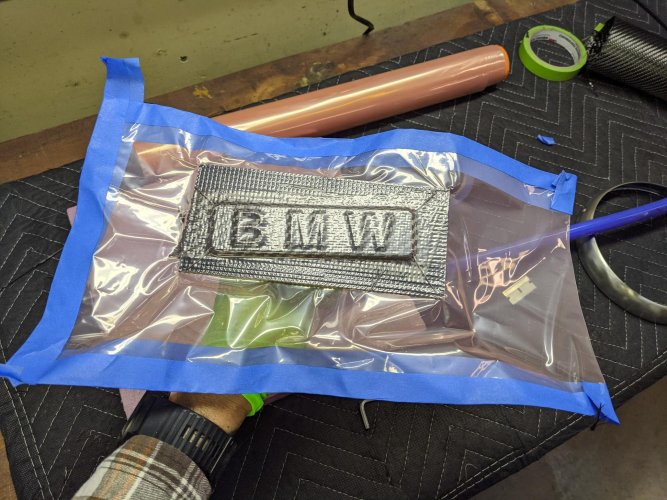
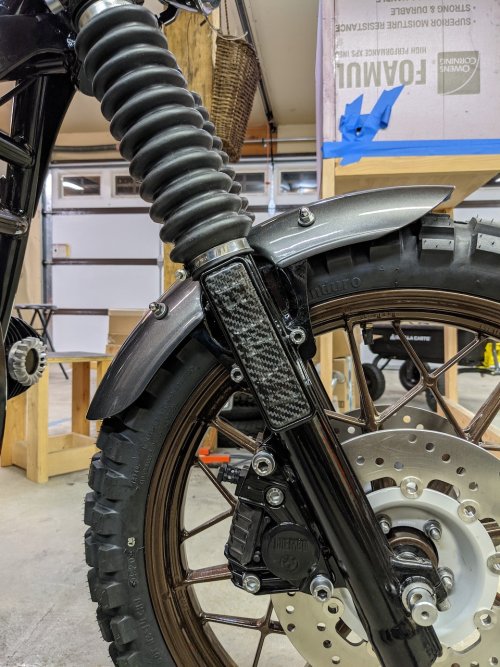
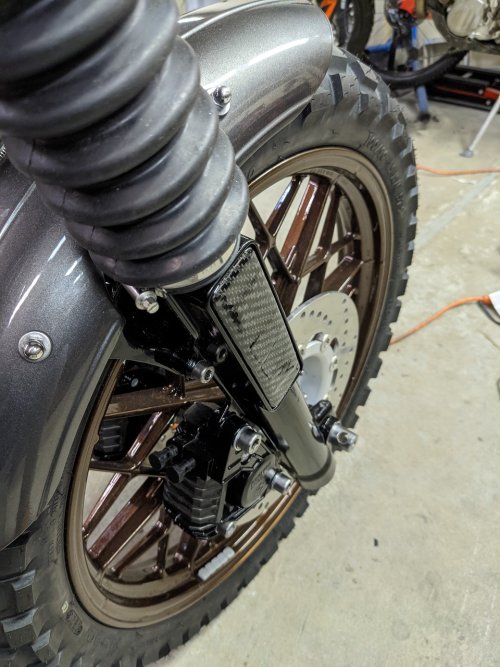
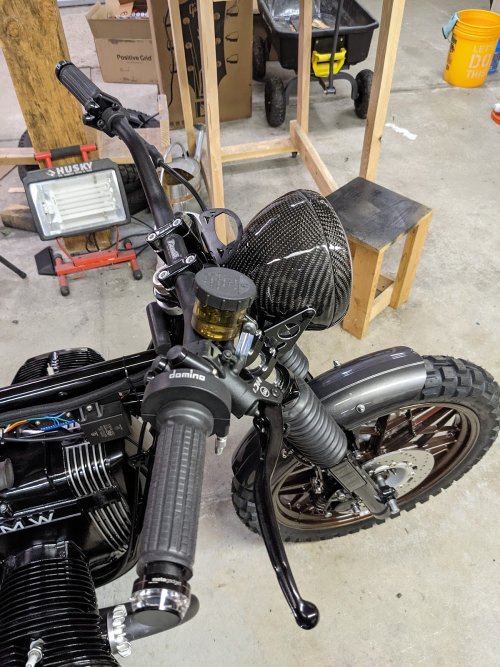
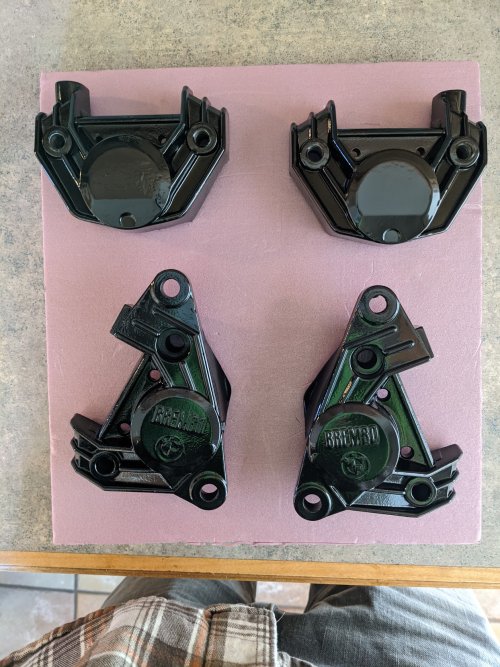
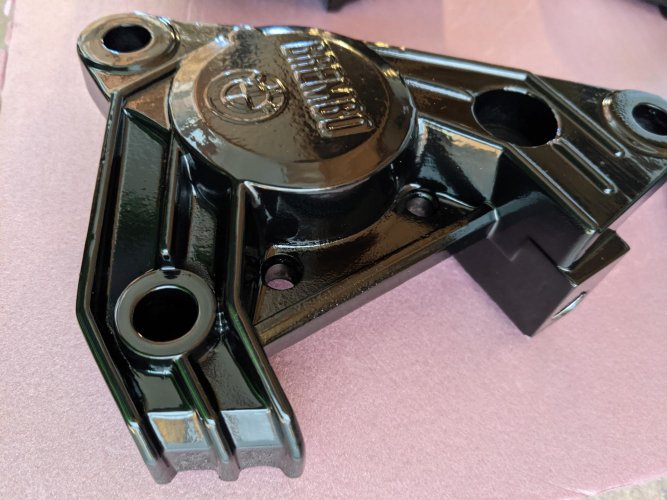
Thanks for asking. Mostly waiting for COVID delayed parts now... got a few more things to work on though too. Caliper repaint went well, used VHT caliper paint. Working on some carbon fiber skinned headlight buckets too. One practice one and one I'll use. I'll probably sell the test one as it has come out quite nice too :). Also working on carbon fiber skinned, 3D printed inserts, to replace the fork reflectors. When they're done the BMW lettering should be very slightly embossed, so should be very subtle!

PXL_20201205_021303563.jpg
PXL_20201206_205029401.jpg
PXL_20201206_205037286.jpg
PXL_20201212_233056592.jpg
PXL_20201207_003446978.jpg

Yeah the orange NYALOX on a cordless drill was definitely the best thing I tried. It doesn't seem to take any material away, just leaves a fresh aluminum! Steel brushes were too extreme and gouge into the aluminum, and the brass brushes just leave everything coated with brass.

I'm not yet sure of self-painting with rattle-cans is gonna leave me with something I'm super happy with... time will tell, so other options are a) professional paint job and b) powder coating (which I think is the most robust). Getting deep into the fins is pretty hard. I kind of wish I had a blasting cabinet and then just used something that isn't too abrasive. Harbor Freight does em cheap!
 
Thanks. .

I have a HF blasting cabinet. It's buried in the basement under a ton of stuff. It's "OK"....makes a huge mess and my wimpy compressor can't really keep up.
 
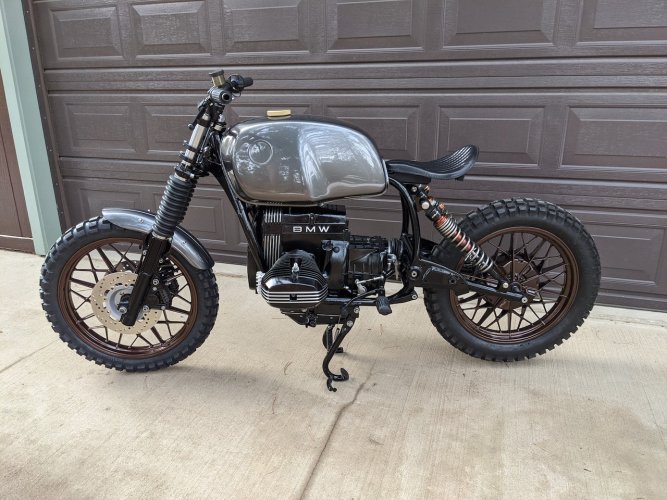
Starting to come together :)

PXL_20201231_213157083.jpg

Got a few chips to the motor paint job, so I'll touch them all up at the end of the project!

I'm working on a 3D printed battery box that's gonna go behind the airbox (that's why its not present in the photo)

Merry Christmas and Happy New Year to all!!!
 
Making progress... I've started with electrics the past week. I've opted for a VAPE full ignition and then full MotoGadget electrics. Once it's all in, I'll take some snaps, but in the meantime, I did finish the fork inserts (reflector replacements). They came out as I'd hoped, which is barely embossed at all, but with the light on them, its clear they say BMW :)

PXL_20210110_032706733.NIGHT.jpg
PXL_20210110_032716355.NIGHT.jpg
 
Coming along nicely

The project is looking pretty good.

Might I ask how you mean to deal with the electrics? Are you going to make harnesses, or adapt the stock ones? From what I have seen in some cases of motorcycle modifications to bobbers, or cafe or custom bikes, the electronics can be the most trouble down the road.

Not saying you haven't thought about it or haven't planned how to make things work, so far you impress me as knowing what you are doing.

I may be poking, but I will tell a tale of my friend's experience with buying a customized bike. Not a BMW but a Harley. He bought the bike from the guy who "customized" it, and it was a neat bike, cool looking. But, it didn't charge the battery. In fact, the alternator didn't work at all. The previous owner who had done the work, had given up on it and sold it to my friend, not telling him this of course. After a couple of rides and finding the bike was running only on the charge in the battery we sat down with a test meter, test light and wiring diagram. After a few hours of poking and prodding, we finally figured out when the PO had changed out the speedometer for a "custom" unit, he had neglected to make amends for the lack of a alternator charge light bulb. Viola! Like the BMW airheads, this bike needed the bulb to be in the circuit in order to complete the circuit for the charging system. Take the bulb out and the alternator wasn't energized to charge. A simple fix but, it should have been thought of by the builder of the bike.

Okay, I have added my two cents, LOL, I can't wait to see the finished project. My friend has a Bober sitting on his lift he was building for a fellow, it is not complete because the owner had a stroke. Some day it may get done, so far it is neat looking as well. St.
 
Haven't seen an update in a while, how's it going? (It's been cold here, so my project is stumbling along).

Hi!

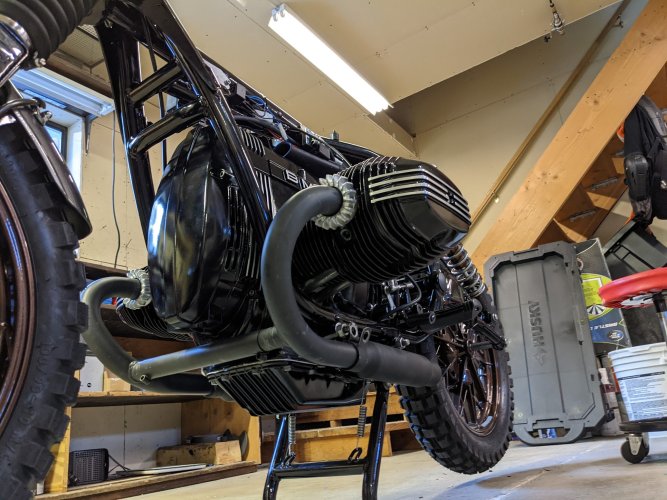
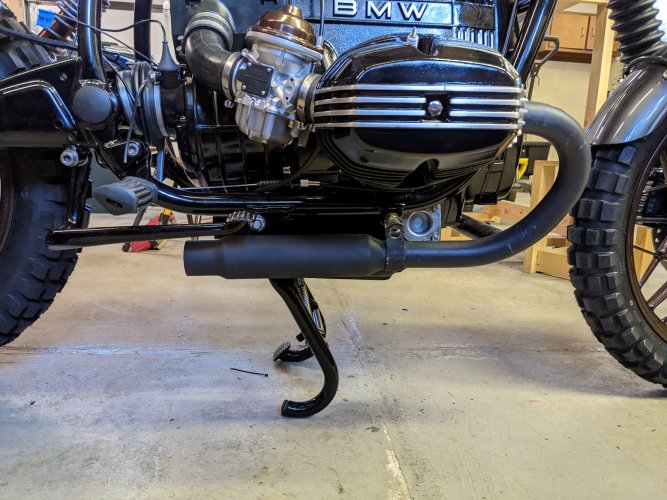
Yeah, un-heated garage has kept me from big jumps, but saying that I've taken lots of little steps and am nearing assembly completion

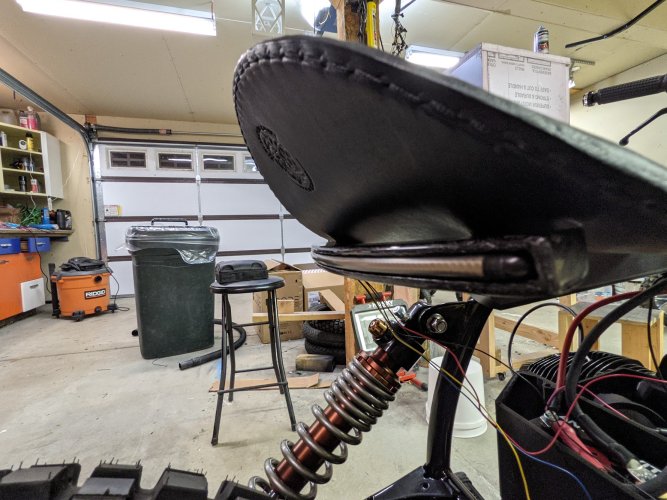
- Vapor blasted carbs came back, so I rebuilt them and got them fitted
- put all the in-bar wiring together and finished up the handlebars
- built the clutch cable
- Installed front brakes and bled the new lever/MC
- Did a test fit of the exhaust pipes
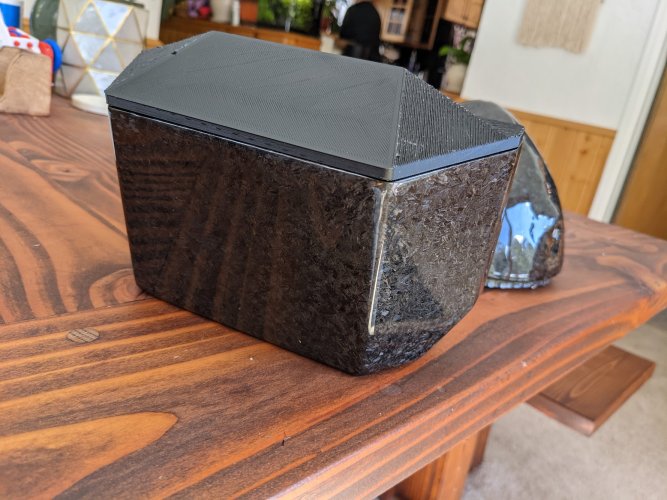
- Finished the carbon-fiber skinned battery box - went for the "forged carbon fiber" look. The photo shows the lid, which is 3D printed, but not yet carbon fiber finished.
- Tail light fitted
- Wiring!!!

Expecting high 50s this weekend, so I think I may get close to the point of being ready for a first start.

bmw1.jpg

bmw2.jpg

bmw3.jpg

bmw4.jpg

bmw6.jpg

bmw5.jpg
 
Thanks! excited for the first start and then the first ride! But I'm a wuss when it comes to cold weather, so I can imagine the first ride will be when we hit the 70s :p

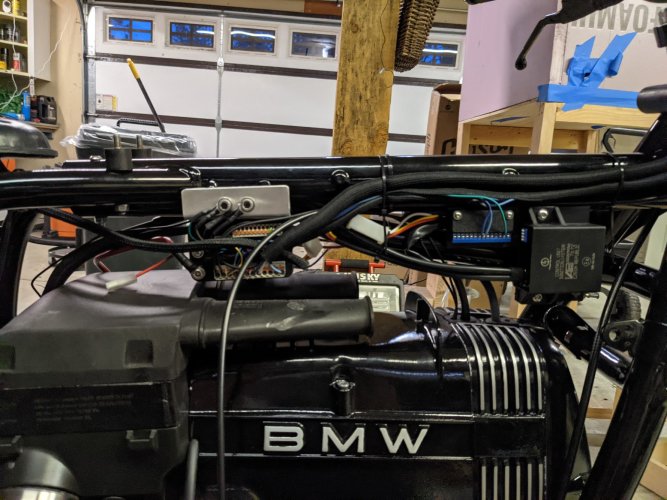
I have ditched the entire original electronics system, including the starting/charging system. I've gone for the moto-gadget M-unit system to replace the electronics and then a "VAPE" CDI system (Czech company doing modern CDIs for old bikes). I've also switched out to a lithium battery, and the VAPE system has a reg/rec suitable for lithium battery charging. The battery swap from the original must have shed at least 20lbs! One of the photos, I just posted above, shows some of the electronics (which I've already neatened up a bit). The MotoGadget stuff is not too cheap, but it's really remarkable. Does away with most fuses/relays etc.


The project is looking pretty good.

Might I ask how you mean to deal with the electrics? Are you going to make harnesses, or adapt the stock ones? From what I have seen in some cases of motorcycle modifications to bobbers, or cafe or custom bikes, the electronics can be the most trouble down the road.

Not saying you haven't thought about it or haven't planned how to make things work, so far you impress me as knowing what you are doing.

I may be poking, but I will tell a tale of my friend's experience with buying a customized bike. Not a BMW but a Harley. He bought the bike from the guy who "customized" it, and it was a neat bike, cool looking. But, it didn't charge the battery. In fact, the alternator didn't work at all. The previous owner who had done the work, had given up on it and sold it to my friend, not telling him this of course. After a couple of rides and finding the bike was running only on the charge in the battery we sat down with a test meter, test light and wiring diagram. After a few hours of poking and prodding, we finally figured out when the PO had changed out the speedometer for a "custom" unit, he had neglected to make amends for the lack of a alternator charge light bulb. Viola! Like the BMW airheads, this bike needed the bulb to be in the circuit in order to complete the circuit for the charging system. Take the bulb out and the alternator wasn't energized to charge. A simple fix but, it should have been thought of by the builder of the bike.

Okay, I have added my two cents, LOL, I can't wait to see the finished project. My friend has a Bober sitting on his lift he was building for a fellow, it is not complete because the owner had a stroke. Some day it may get done, so far it is neat looking as well. St.
 
Like I said

Like I said, so far you look like you know what you are doing, now reading your latest post and looking at the pictures, it looks like you have the bases covered.

Not that I am going to be building a bike but I'm going to look over the web sites for the companies you are using. Cheers, St.
 
Back
Top