• Welcome, Guest! We hope you enjoy the excellent technical knowledge, event information and discussions that the BMW MOA forum provides. Some forum content will be hidden from you if you remain logged out. If you want to view all content, please click the 'Log in' button above and enter your BMW MOA username and password.

    If you are not an MOA member, why not take the time to join the club, so you can enjoy posting on the forum, the BMW Owners News magazine, and all of the discounts and benefits the BMW MOA offers?

  • Beginning April 1st, and running through April 30th, there is a new 2024 BMW MOA Election discussion area within The Club section of the forum. Within this forum area is also a sticky post that provides the ground rules for participating in the Election forum area. Also, the candidates statements are provided. Please read before joining the conversation, because the rules are very specific to maintain civility.

    The Election forum is here: Election Forum

Valve Cover Nutz!

nevadaslim

New member
Ok, I just torqued my head nuts and set my valve clearances for the first time on my 1980 R100T.

Now my new problem, getting the bottom valve cover nut by the exhaust pipe back on. The flat and wave washers went no problem.
But the nut, what a bear!

I know you guys must've developed an easy way/technique over the years to get those nuts back on. Please share!

PS: I have new polished stainless steel nuts so a magnet won't help.

This is one of the few times I really wish I had a motorcycle lift to get up off the ground.
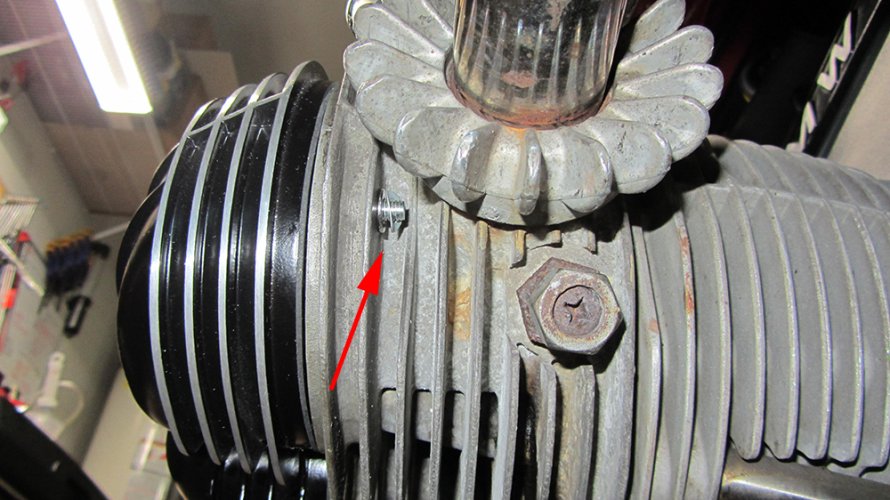
Bottom Nut.jpg
 
The stud is not adjusted properly into the valve cover. Remove valve cover and using a double nut on the stud, try to drive the stud deeper into the cover (easy does it)
 
The stud is not adjusted properly into the valve cover. Remove valve cover and using a double nut on the stud, try to drive the stud deeper into the cover (easy does it)

Thanks for the reply ebeeby. However, I did discover the "trick". And it was quite obvious. I don't know why I didn't see it before. Too much of a hurry I guess.

Anyway, the trick is to get the exhaust nut out of the way! I have the long exhaust fins on my exhaust nuts which makes things even worse. So I loosened the exhaust nuts and dropped them down to the bottom of the exhaust pipe "U", out of the way.

Then I was able to get my fingers in and start the nuts. Still not easy, but doable.

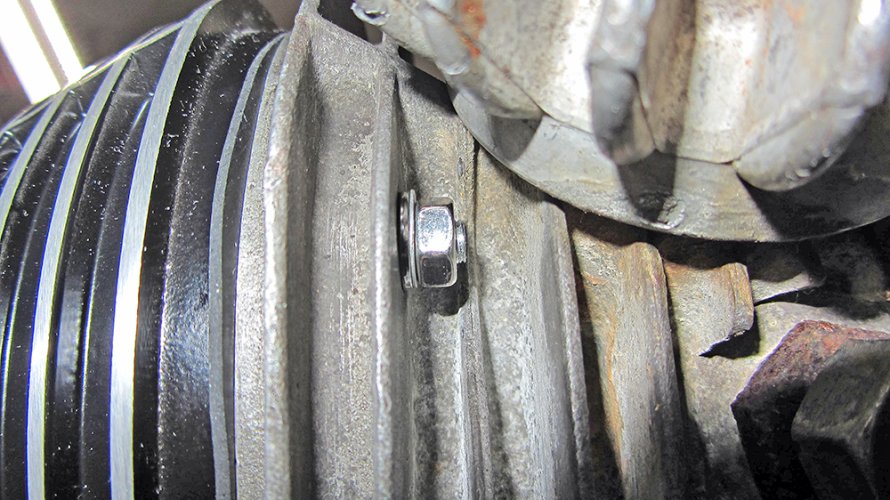
As far as the studs sticking out too far. As per Chris Harris, you should have a flat and wave washer under each nut. I decided not to move the studs in. Below is a photo of how much thread is left after I got one nut on and tightened down. Not a whole lot thread left.

Nutz.jpg

Now I've got to do the other side and pray I don't have any oil leaks!
 
RealOEM shows only a nut and wavy washer for the valve cover studs on my /7. In reality, I do have a flat washer along with a wavy washer. But my flat washer is the same thickness as the wavy washer. You have a very thick flat washer which tends to push out the nut and covers the exposed threads.

It's a shame you have to remove the exhaust nut each time. I've never had to do that...I agree that one of them is tigher than the other. Well, at least you have an opportunity to remove the exhaust nut and renew the anti seize paste! :thumb
 
RealOEM shows only a nut and wavy washer for the valve cover studs on my /7.
from the factory, as far back as I can tell / remember, only one wave washer is used per valve cover stud. However when your airhead was new the rear stud had two wave washers. Reason: the washers are easily lost in the process of replacing the nut and so one spare per side was provided initially from the factory. Additional flat washers unnecessarily complicate the process but, it is still very handy to add an extra wave washer to each rear stud for the time when you will most assuredly loose one.


So today I had to remove the valve covers from one of my RS and tried out the method I outlined earlier. Seems that I actually use my thumb and forefinger to locate the nut on the stud but I use my forefinger and middle finger to engage and turn the nut on one or two threads. After that I use my forefinger to spin the nut tight to the washer and a wrench to finish. So, YMMV...Practice makes perfect...Any way that works for you... Over and out.
 
Last edited:
from the factory, as far back as I can tell / remember, only one wave washer is used per valve cover stud. However when your airhead was new the rear stud had two wave washers. Reason: the washers are easily lost in the process of replacing the nut and so one spare per side was provided initially from the factory. Additional flat washers unnecessarily complicate the process but, it is still very handy to add an extra wave washer to each rear stud for the time when you will most assuredly loose one.
To replace the valve cover nut first install the washer then hold the nut with thumb and forefinger and position it over the end of the stud. Using the forefinger only, rock the nut over the end of the stud till it sits squarely over the end. Carefully turn the nut with your thumb while holding it to the end of the stud with forefinger until you feel the threads engage - a turn or two should do. Finish with open end 10 mm wrench.
My method is, I use one of those cheapie little pocket screwdrivers with a magnet on it and stick to the nut, then place the nut right on the end of the stud, hold it with my other index finger, pull the magnet away and spin it on. Always have done it this way and never gave it much thought.
 
My method is, I use one of those cheapie little pocket screwdrivers with a magnet on it and stick to the nut, then place the nut right on the end of the stud, hold it with my other index finger, pull the magnet away and spin it on. Always have done it this way and never gave it much thought.

Really good method for many types of mechanisms......Just hold the cover up and in place. When the stud begins to come through slip on the washers, move the stud just a bit further and start the nut by putting it in place with the method above or your fingertips...……….

What I worry about is taking off that exhaust nut ever thousand or so to check the clearances if you haven't had valve updating performed and the seats aren't something to be concerned with or at least every 3 thousand...……………….Sooner or later those really fragile threads on the exhaust nut will come to a not so good ending...…….God bless....Dennis
 
The exhaust threads are really not fragile. The issue is if they aren’t maintained with anti seize and the nut seizes to the threads. The torque of the nut turning past the stopping point will tear the threads off. Properly maintained threads and the nut will spin off and on easily.
 
The issue seemed to be lack of space caused by the stud protruding into the space between the mating surface and the closest engine fin. You could reduce the length of the stud or just pull the rocker cover back a bit, creating the necessary space to get the nut on the threads.

Woodgrain
 
Back
Top