• Welcome, Guest! We hope you enjoy the excellent technical knowledge, event information and discussions that the BMW MOA forum provides. Some forum content will be hidden from you if you remain logged out. If you want to view all content, please click the 'Log in' button above and enter your BMW MOA username and password.

    If you are not an MOA member, why not take the time to join the club, so you can enjoy posting on the forum, the BMW Owners News magazine, and all of the discounts and benefits the BMW MOA offers?

  • Beginning April 1st, and running through April 30th, there is a new 2024 BMW MOA Election discussion area within The Club section of the forum. Within this forum area is also a sticky post that provides the ground rules for participating in the Election forum area. Also, the candidates statements are provided. Please read before joining the conversation, because the rules are very specific to maintain civility.

    The Election forum is here: Election Forum

1990 R 100 GSPD oil leak

chasmrider

not lost til out of gas
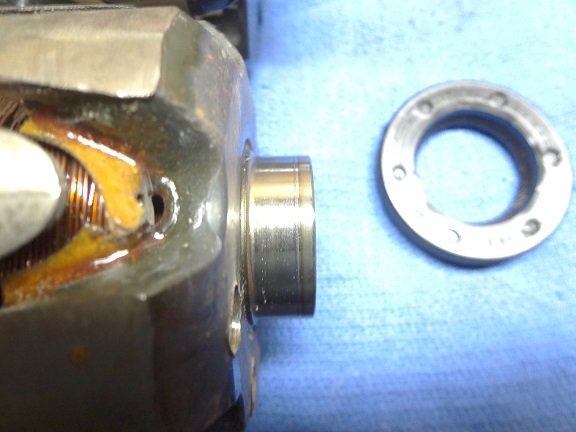
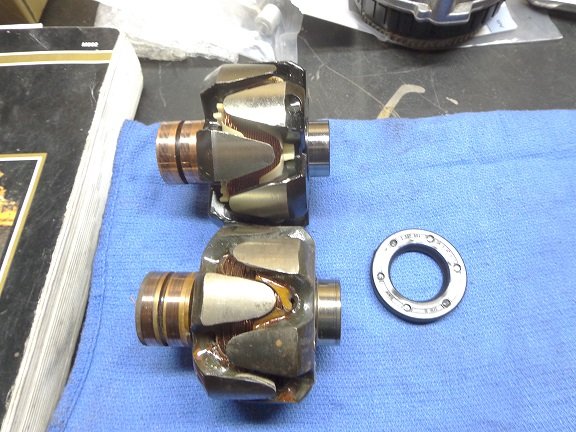
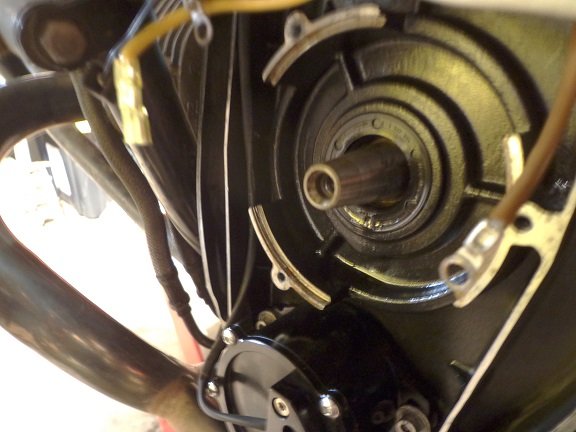
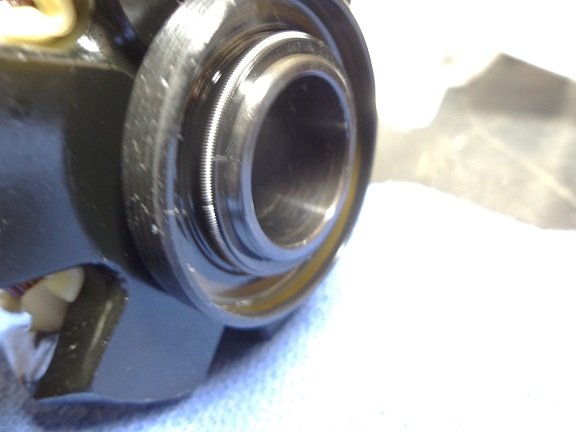
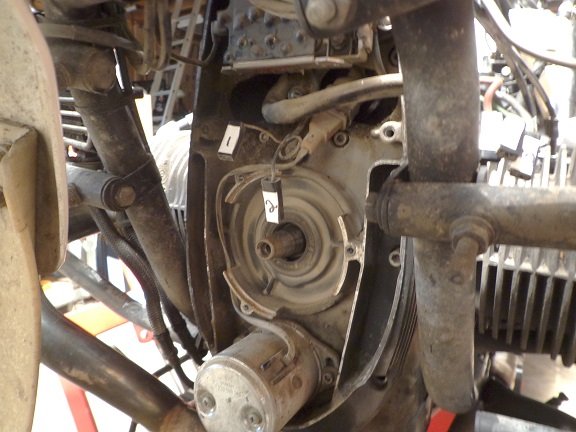
hey all, I just replaced my alternator with an IE 600w kit. for some reason I can't get the seal on the back of the rotor to seal. it looks straight forward, the seal seems to fit, doesn't leak at idle but starts leaking when I ride it. is there a trick that I don't know? any help would be appreciated. Chuck
 
If you haven't damaged the seal somehow, I'd be checking the rotor to make sure the sealing surface is smooth and true. I have found an aftermarket rotor that had a really awful finish on it.
 
Last edited:
I test fit the seal on the back of the rotor, seems good. put some ATF on the seal prior to installation. I was going to replace the timing chain, and removed the cover to inspect. I decided the chain was ok and just replaced the tensioners. the cover seemed to go back on ok. I was reading what Snowbum says ( which gave me a headache ) He was saying something about heating the cover on reinstallation which I didn't do. it seemed to go back on ok though. I am going to get a new seal and try again today.
 
I test fit the seal on the back of the rotor, seems good. put some ATF on the seal prior to installation. I was going to replace the timing chain, and removed the cover to inspect. I decided the chain was ok and just replaced the tensioners. the cover seemed to go back on ok. I was reading what Snowbum says ( which gave me a headache ) He was saying something about heating the cover on reinstallation which I didn't do. it seemed to go back on ok though. I am going to get a new seal and try again today.

The idea of reheating the cover is to ensure the nose bearing has seated all the way into the bore. You don't want the inner timing cover to be stressed, nor the bearing to have an axial load since it's a ball bearing. I have used a heat gun around the outside edge of the aluminum bearing cup after installing the inner cover and tapped the cover with a rubber mallet before tightening the bolts to ensure the nose bearing is fully seated.

BTW, I think it's a good idea when lubricating a seal to use what it will be exposed to, in this case engine oil. That avoids any unexpected swelling due to fluid/seal material incompatibilities.

Hope that helps.

Best.
Brook Reams.
 
thanks for the replies, I will go out to the shop and take some pictures. I got a new seal and am going to get one of our local airhead experts to help me install it.
 
so here are a few pictures, the first is the old rotor you can see where the seal was for the last 65,000 miles. the next is both rotors. old on bottom.
 

Attachments

  • DSC01840a.jpg
    DSC01840a.jpg
    82.6 KB · Views: 106
  • DSC01842a.jpg
    DSC01842a.jpg
    132.7 KB · Views: 106
here is the seal as currently installed, and the seal where I think it should ride, based on the mark on the old rotor.
 

Attachments

  • DSC01848a.jpg
    DSC01848a.jpg
    99.3 KB · Views: 106
  • DSC01845a.jpg
    DSC01845a.jpg
    64 KB · Views: 104
morning all, Anton hit the nail on the head. ( like he has done this before ) my friend Lance came by to look at my problem, a close inspection revealed the seal surface on the new rotor was rougher than a stucco bath tub, to coin a phrase. after about a half hour of wet sanding, and another half hour of polishing with fine steel wool we think the problem is fixed. the bike is back together, and as soon as the rain slows a little I will get out and test. I will post the results in a day or two.
 
so that was it. the seal surface on the rotor looked smooth and new, so I didn't question it. however when we compared the two, the new one felt like sandpaper compared to the old rotor. so the lesson is don't trust just because it's new. thanks for your replies.
 
Back
Top