• Welcome, Guest! We hope you enjoy the excellent technical knowledge, event information and discussions that the BMW MOA forum provides. Some forum content will be hidden from you if you remain logged out. If you want to view all content, please click the 'Log in' button above and enter your BMW MOA username and password.

    If you are not an MOA member, why not take the time to join the club, so you can enjoy posting on the forum, the BMW Owners News magazine, and all of the discounts and benefits the BMW MOA offers?

  • Beginning April 1st, and running through April 30th, there is a new 2024 BMW MOA Election discussion area within The Club section of the forum. Within this forum area is also a sticky post that provides the ground rules for participating in the Election forum area. Also, the candidates statements are provided. Please read before joining the conversation, because the rules are very specific to maintain civility.

    The Election forum is here: Election Forum

r75/5 Seat lift off solution

9842

Member
Hi
I looked at seat lift off solutions for removing seat went using Wixom saddle bag brackets as they keep the seat from opening with the hinge set up. Found fixes for /6 and /7 but none for a /5. looking for a fix for a /5 so I can remove seat to access tool tray and battery.
Thanks
Brian
 
The /5 seat hinge(s) part number(s) is/are listed for /5, /6, /7/ R80, and R100.

I'm curious... what "lift off" fix is there?
 
I'm curious... what "lift off" fix is there?

Lew -

He wants to be able to remove the hinges and have a locating bolt somewhere on the seat pan to slip down into a hole on the frame. The seat sits well with the rider's weight on it, but it can easily be lifted straight up to access the tool kit, battery, etc., and also to eliminate interference with the right-hand saddlebag.

Duane has shown a "fix" for /6...I have something similar on my /7. I've pinged him asking him if he recalls something similar for the /5.
 
Your Wixom racks should be able to swing out to allow the seat to open fully. Is that not an option anymore?
 
I guess my point was, the seat hinges are the same for the /5,6,7... wouldn't a /6 "fix" work just as well on the /5?

edit

seatmod3.JPG

source> http://w6rec.com/bmw-6-motorcycle-seat-modification/

edit

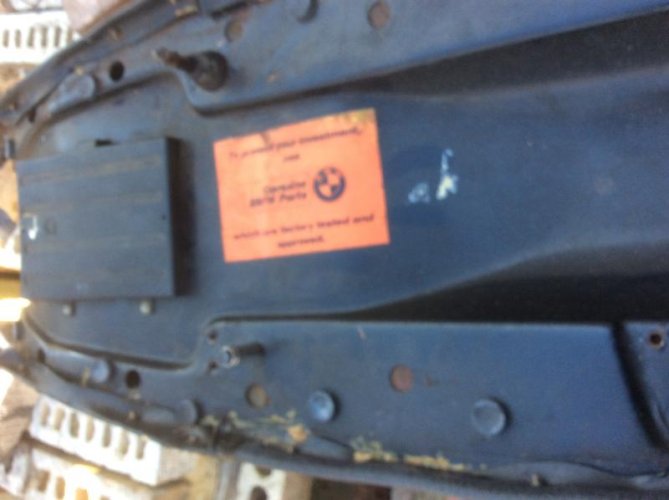
/5 frame cross member under the seat is not a "stamped" part, it's usually a tube (like it is on the /6). So a tab might be to be welded on to make this work.

005.jpg


/6 and later cross member
seatmod1.JPG


edit

here's a better shot of a /5 subframe (some had two cross tubes (mine for example)) Last build /5s may have had a stamped cross member.

$(KGrHqQOKm8E1ShZNZPsBNdWpkd)Nw~~_12.JPG
 
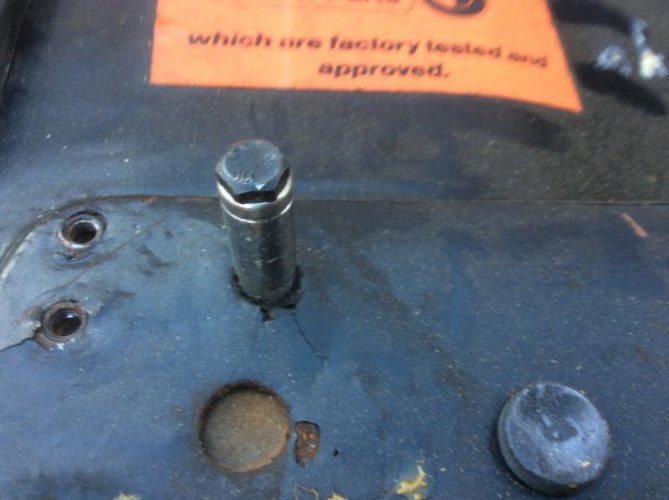
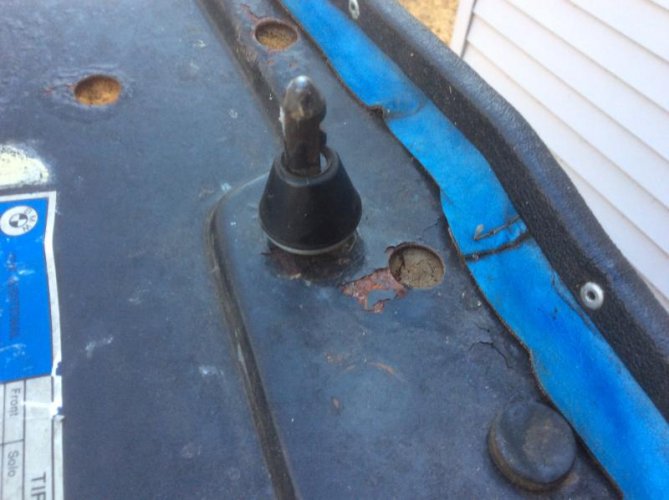
I've done the little pin conversion on mine and other's motorcycles.
IMG_0753.jpg
This one has a 7/32 socket as a spacer. I've used bolts, rubber hose covers, etc.; whatever I had.
IMG_0752.jpg
A cheap socket. :)
IMG_0756.jpg
The oem tapered rubber piece on the latch pin really needs to be used to locate the seat for a good fit. Hope this helps a little.
 
I've done the little pin conversion on mine and other's motorcycles.
View attachment 66465
This one has a 7/32 socket as a spacer. I've used bolts, rubber hose covers, etc.; whatever I had.
View attachment 66466
A cheap socket. :)
View attachment 66467
The oem tapered rubber piece on the latch pin really needs to be used to locate the seat for a good fit. Hope this helps a little.

Except the /5 rear subframe does not have a flat with a hole in it. So then what??
 
Well, you take it to a shop where they use a combination of welding, fabrication, and machining to make it work. Sometimes their are not easy, cheap solutions like the simple pin. :banghead :)
 
Another solution is kinda the same. Remove the original subframe. Buy a doner /5 subframe. Do your mods to it to run the takeoff seat. Install that one. Use as instructed and directed. Then when your thru with running the Wixom bags, swap back to the unmolested original subframe. :dunno
 
Lift off seat on a /5

Hi guys
I'm trying to learn from the mistakes of others as I will never live long enough to make all of the mistakes myself, haha. Thanks for the photos and /6 & /5 tail sections showing the difference. I'm thinking of something simple. Maybe one or two of those clips you put on the garage wall and push/hang your rake. Screw a few on the bottom of seat and push seat down on the outer rail of tail section, just an Idea. Another idea is use the tabs that hold the fender and make up a plate with a hole to receive the new pin and screw it to the tabs, what do you think? Or try to locate stud type bolts with pin holes so I could quickly remove the bag brackets for under seat access. As a retired shop teacher I find it fun solving problems, just need a little help along the way.
Thanks and keep the ideas coming
Brian
 
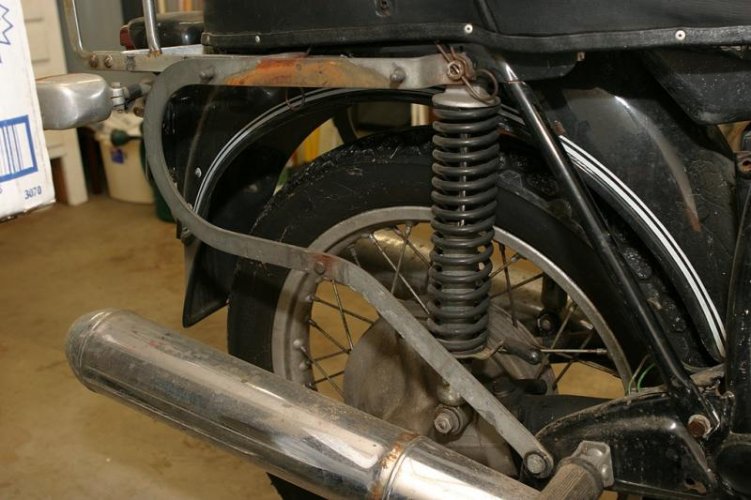
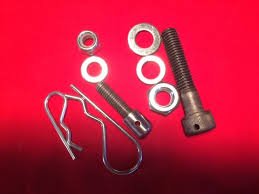
Let’s get back the original post. The right bracket has a large hole at the point where the top shock bolt holds it on. When you bought the set you got an Allen head bolt to replace the original hex head bolt. The bag bracket hole fit over the round Allen head and was held on by a pin going through two holes drilled through the head. There was a pin provided that bolted into the flat plate on the subframe that fit through the other hole in the bag bracket and also had a pin to hold it all together.
So when you wanted to open the seat, you would pull the locking pins, swing out the bracket from the mounting pins and rotate thr bracket down, being still mounted to the bike by the bolt at the end of the lower bracket attached to the plate where the rear foot peg is mounted.
I’m not saying that this was/is the ideal solution, but it was what Wixom went with. The “lift-off” solution came about after the /6 came out with the cross tube being replaced with the plate with the hole opposite the hole for the locking latch pin.


Thank you and good post! Took me a while to figure mine out for my short wheelbase /5. Luckily my bags and mounts came with the necessary hardware to do this except the pins, picked them up at the hardware store. Some one is selling this hardware separately in the "Marketplace" on this site, just checked, they are still there for $20. With a little work one could make these with a couple bolts, a grinder and drill. It is a pain to pull the pins with the bags still attached and let the bag/bracket pivot down and out on the muffler but it beats taking the bag off then the pins and bracket. But it is kind of cool IMO to have it working the way it was intended. Just another oddity of the mark.

Not mine but.............. 50908248.CRW_6165.jpg
And there is another pin hidden from view behind the visible rear part of the bracket that has to be removed as well.

imagesU39YD71Z.jpg
 
Last edited:
Wixom hardware

Thank you and good post! Took me a while to figure mine out for my short wheelbase /5. Luckily my bags and mounts came with the necessary hardware to do this except the pins, picked them up at the hardware store. Some one is selling this hardware separately in the "Marketplace" on this site, just checked, they are still there for $20. With a little work one could make these with a couple bolts, a grinder and drill. It is a pain to pull the pins with the bags still attached and let the bag/bracket pivot down and out on the muffler but it beats taking the bag off then the pins and bracket. But it is kind of cool IMO to have it working the way it was intended. Just another oddity of the mark.

Not mine but.............. View attachment 66473
And there is another pin hidden from view behind the visible rear part of the bracket that has to be removed as well.

View attachment 66474

Hi
Ah yes, back to original post about removing bracket to open seat. I actually have two sets of brackets and they have different size holes that go on shock bolt on right side. I did not get any hardware with these brackets so I was confused. after seeing the photo I now understand the old swb set up I would like to find or fabricate this hardware for the brackets. I will look in the marketplace and hopefully come up with a solution. Will keep you posted. Thanks so much with the last few posts.
Brian
 
Wixom hardware/bolts

Wow Just looked at marketplace and the hardware i am looking for is there. Hopefully I can buy it and solve the problem. If not then it's off to the hardware store. Sharing information is one of the reasons I have been a MOA member for 40+ years. Thanks again for all the posts and wish me luck.
Thanks
brian
 
Back
Top