• Welcome, Guest! We hope you enjoy the excellent technical knowledge, event information and discussions that the BMW MOA forum provides. Some forum content will be hidden from you if you remain logged out. If you want to view all content, please click the 'Log in' button above and enter your BMW MOA username and password.

    If you are not an MOA member, why not take the time to join the club, so you can enjoy posting on the forum, the BMW Owners News magazine, and all of the discounts and benefits the BMW MOA offers?

  • Beginning April 1st, and running through April 30th, there is a new 2024 BMW MOA Election discussion area within The Club section of the forum. Within this forum area is also a sticky post that provides the ground rules for participating in the Election forum area. Also, the candidates statements are provided. Please read before joining the conversation, because the rules are very specific to maintain civility.

    The Election forum is here: Election Forum

Bing 32 (11/12) question

Just a quick update (because I hate threads that fade out with no resolution) - between rain and travel for work I haven't been able to do more with the flywheel. So in the meantime I've done the following:
- I unmounted the old rear tire and started trying to sort out what makes sense to put back on (lots of opinions...)
- Then I worked on the wheel - I pulled the cap off the wheel bearing stack and was pleasantly surprised to find reasonably fresh grease. Continuing on I degreased the left-side bearing and internal parts that I couild remove (the wedding band and inner spacer came out as well). I found that the race and bearing looked perfect. So I packed it all up with wheel bearing grease and put it back together. I thought about pulling the stack, but changed my mind as it all just seemed like it was in really good condition.
- I also cleaned the hub and rim and everything seems in good shape there as well, though some of the spokes are starting to lose small bits of plating. Need to keep an eye on that...and if this bike turns out to be a keeper, then re-lacing may be in the future.

- I ordered a few tools (flywheel puller/blocking bar and grease tool from Cycleworks) and I have a list going for bolts, gaskets, o-rings, etc. - but I want to get the flywheel off so I can figure out how things look and what size flywheel bolts I have before I place the order.
- I also ordered some moly paste after spending what seemed like a ridiculous amount of time sorting through what was recommended, what what was not, and what was still available. Holy ****! (for the record I went with Loctite LB 8012)

- Still need to meaure the drum to see where it's at for wear.
- And before I'm done I will check the preload by following the "wheel shake procedure": http://w6rec.com/bmw-motorcycle-wheel-bearings-1956-through-84-repair-preload-and-spun-hubs/

So, I'm still at it...
 
Keep up the good work. There may come a time when it is better to walk away for a while, rather than go too fast and miss something. Never be afraid or ashamed to ask for help or advice. You are doing well.
 
Very much apreciate the support. I'm definitely not one to rush things even though I'm anxious to keep going - which is why I got the correct tools on order. I should be back home Friday and working again over the weekend.

Btw, just ordered tires, tubes and new rim strips...
 
More updates...

My tools came in and I got to it, but as expected I found a few more things that needed attention:

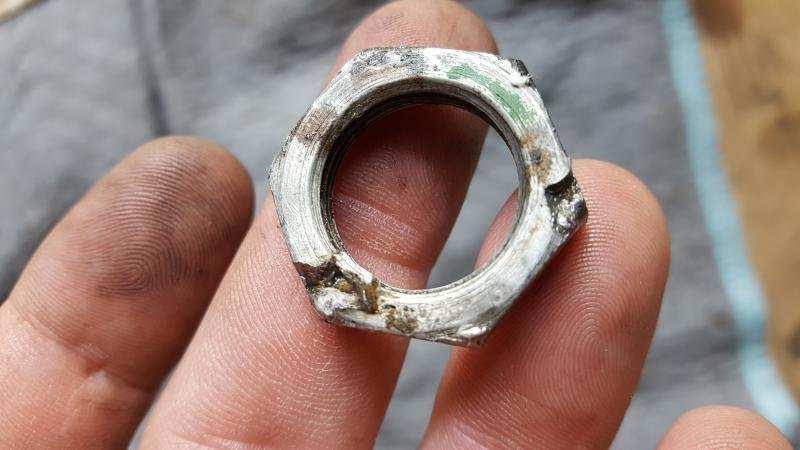
Axle nut with some hefty chisel marks in it:
20170930_154558.jpg

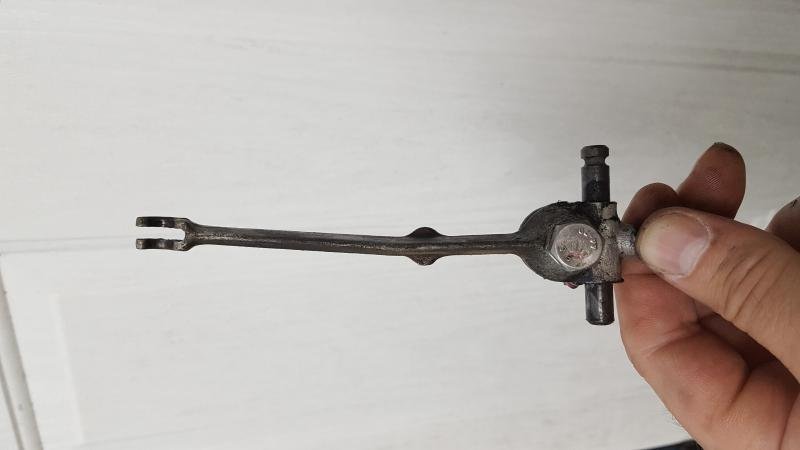
Bent clutch release lever - though this may have been done to allow for more clearance near the frame, I need to look into it a bit more.
20170930_170842.jpg

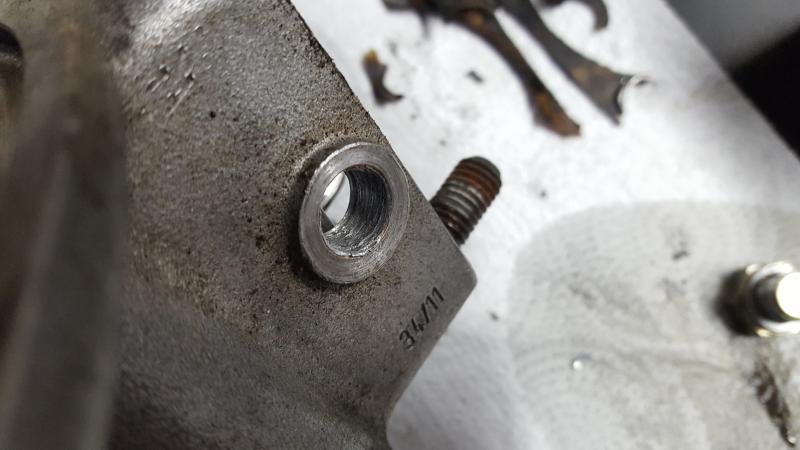
Stripped final drive filler hole:
20171001_113926.jpg
 
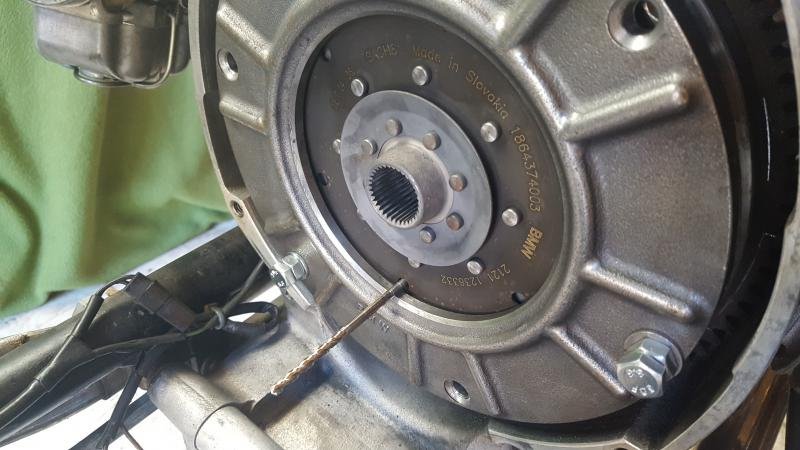
But on the plus-side, I got the flywheel off, cleaned, inspected, and reinstalled in the correct position:
(I forgot to make the clutch centering tool, so I used a drill and the small outer holes to center it relative to the large hole in the compression ring )
20171004_095125.jpg


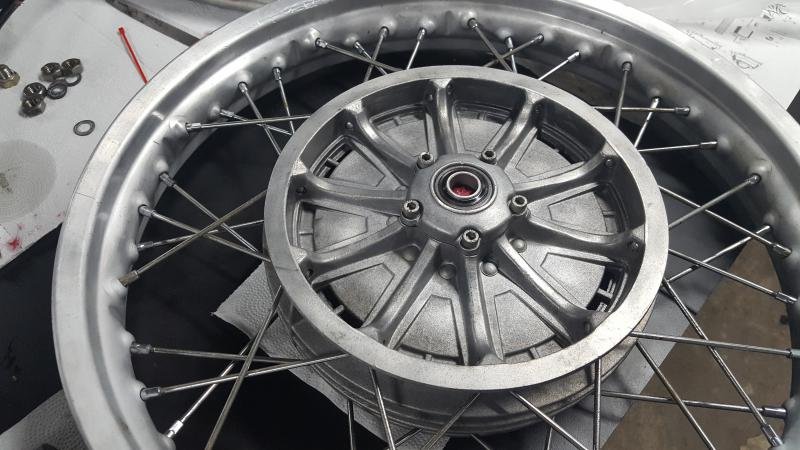
The rear wheel is now cleaned and greased:
(Yes, there is a lot of grease in the axle hole...)
20171004_195146.jpg

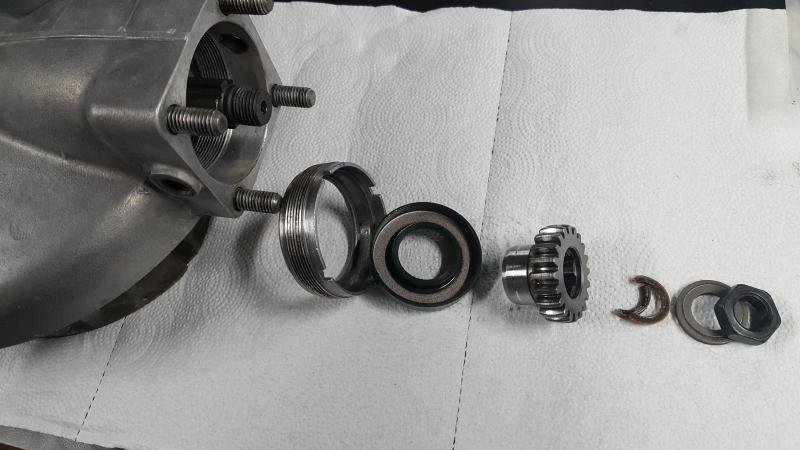
I even got the rear drive assembly apart with a LOT of grunting, but only one trip to the local auto supply store:
20171004_195117.jpg
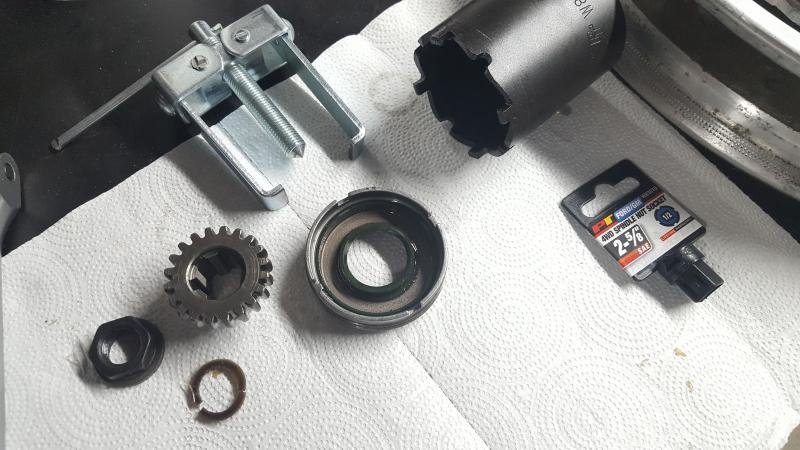
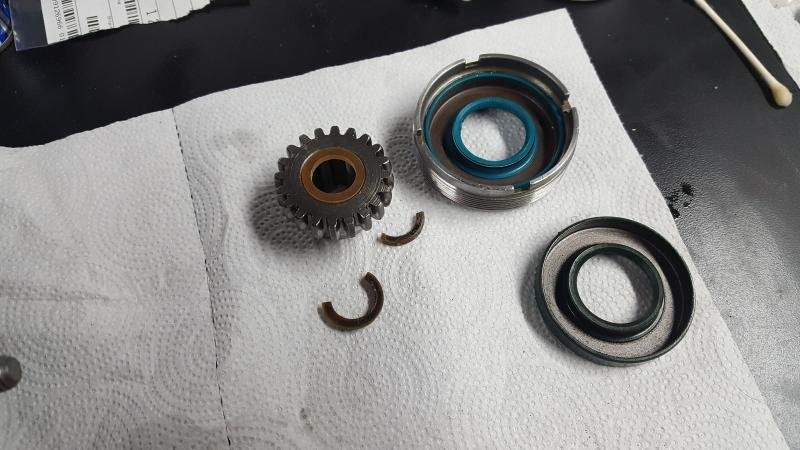
I ended up ordering the green seal as well as the one that is cracked. I figured while it was apart, why not...
 
Last edited:
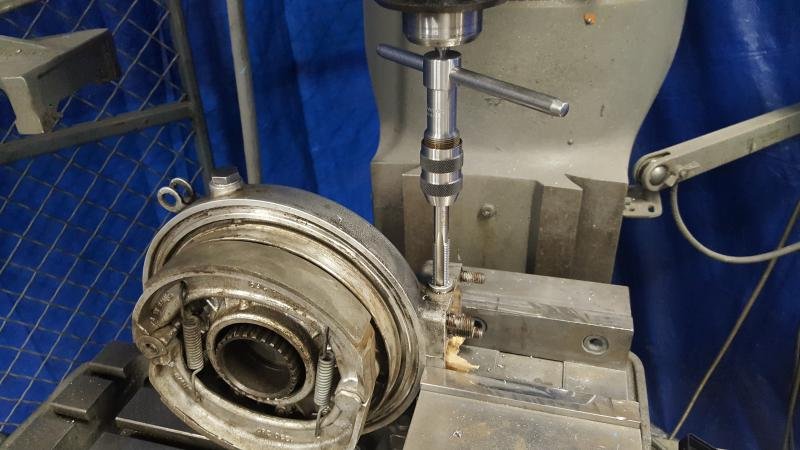
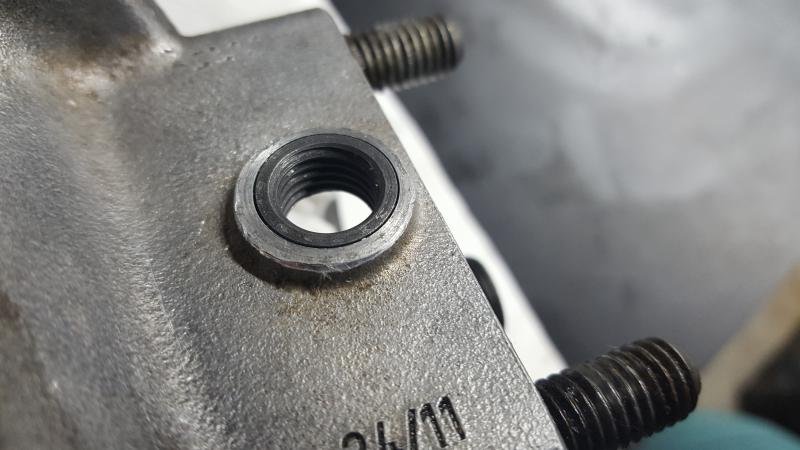
Since the final drive filler threads were stripped and the drain threads were messed up due to someone using a 3/8" NPT plug in place of the correct bolt, I decided to fix them both with a Time-sert:

20171005_121140.jpg

In case anyone is wondering, the drive unit is being supported with a machinist screw jack and the vice is only applying enough force to keep it straight while drilling and tapping.
 
Ok, threads are all set on the final drive:

20171008_011853.jpg


So while I'm waiting for my parts to be delivered I'm sorting out the final drive reassembly:

20171009_095654.jpg

And from what I've just read on various sites, it appears that thread seal is appropriate for both the large threaded ring and the hub gear nut. But I have a question: Snowbum seems pretty adamant that the entire rear hub needs to be heated up, not only for disassembly (I managed to get it out without heat), but also for installation as well?

"When replacing the blue seal, be careful with it, it is a press-fit into the threaded ring (heat it a bit), and the ring is installed (entire rear drive again heated) to about 85 foot pounds. First coat/seal the ring's threads with Hylomar or other good sealer, and do not forget that the housing must be HOT when tightening the ring."


I realize that he is pretty emphatic about everything he recommends, but I'm stumped by this. So can someone explain the necessity of heating the entire final drive to install the threaded ring? Especially considering that with the newly cleaned threads I can thread the ring in by-hand.
 
Last edited:
I don't really have any insight on your question. As for the leaks, Duane mentions three paths for fluid to transfer that needs to be dealt with, towards the bottom:

http://w6rec.com/duane/bmw/oil.htm

Duane mentions that the threaded ring needs a special tool...kinda suggests that it just can't be threaded by hand. :dunno

Thanks for the link, I have thread sealant (Permatex 80019 Aviation Form-A-Gasket No. 3) and two seals (shown above) on order. I also have a spindle socket that fits the threaded ring (also shown above), which will allow for installation to proper torque. So unless someone can offer a compelling reason not to, I'm thinking of skipping the heating process and just put it all back together (with a bit of loctite as needed).

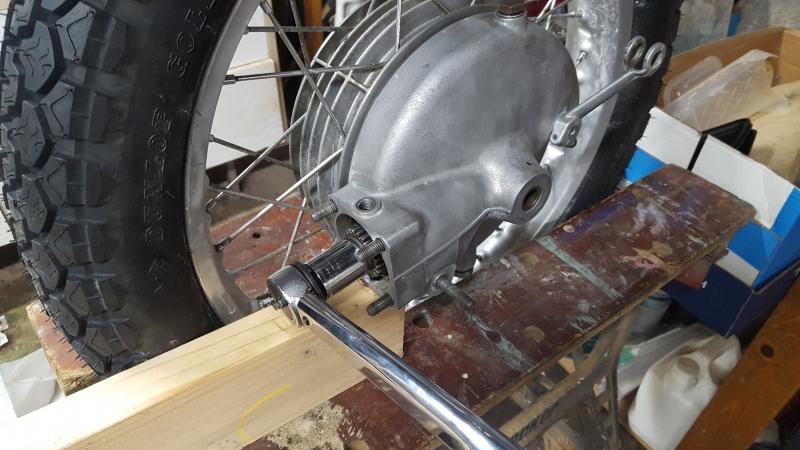
Upon re-reading the info from the DA site linked above, I believe the tool he is referring to (to remove the nut) is used to keep the assembly from spinning as you try to loosen it. I would imagine the tool would be quite useful, but I resorted to reattaching the rim to the final drive and then lightly clamping the final drive in an my decades-old Black & Decker Adjustable Wood Bench. Then with my son hanging onto the rim I used the breaker bar on the nut. Not easy, but it did come off, with no harm to anything.
 
Last edited:
The factory spec actually changed over time...it was 0.10 and 0.15mm at different points. Don't know if there's any consensus, but I would think that 0.15mm is better. The amount of heat subjected to the intake valve is less than the exhaust valve because inrush of fuel/air tends to cool the valve and seat. That said, it does get hot so having a wider setting might be better. It won't make any substantial difference in the way the bike runs. I suppose that with the clearance being bigger, the intake valve opens sooner and those a bit more fuel/air gets pushed into the combustion chamber. On the exhaust stroke, it will stay open a tad longer and more combustion products will get pushed out. But the differences are hardly noticeable.

Confused...:scratch This sounds backwards to me and I'm probably looking at it the wrong way however:
If the setting is .15 it seems to me the valve will be pushed open LESS not more and the open duration will also be LESS not more since there is less distance to travel back to the valve seat.

Having a tighter setting (.10) would mean the tappet is closer to the valve stem therefore the valve will open MORE when pushed open and take more time to get back to the seat due to the distance being longer from fully open to closed.
 
Well, it's the same as the points gap setting. With a wider setting, as the camshaft comes around, it has to move farther around(and hence long) before movement of the cam lobe finally pushes open the valve off the seat. Consider if you set the gap at 5mm...don't try that at home!! In that situation wouldn't the valve never open, thus sitting on the seat 100% of the time? Consider if the gap were 0mm. The cam lobe would come around and open the valve and almost instantly let the valve close. If the gap were set to -0.10mm (ie, it's open), then the valve never gets to the seat. So, somewhere between those extremes are the best values. HTH...
 
Just to close out the thread - got all my parts, so it started to go back together...

Cleaned all the old grease from both the final drive and wheel. Both sets of splines look great. I put a light coating of moly paste on the splines and I think the wheel should be good to go for a while (well, at least until I have it re-laced):
20171014_104913.jpg

New seals for the front of the final drive:
20171014_103558.jpg

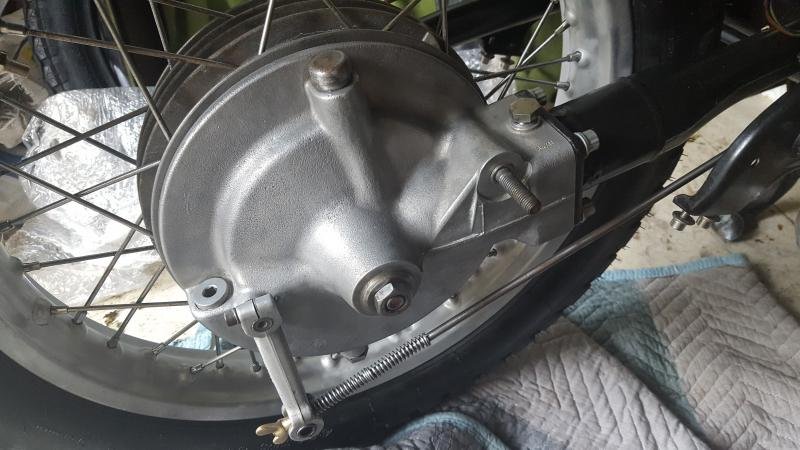
This was my answer to the question of how to torque the hub gear nut to 120 ft-lbs. I used the bench to apply just enough pressure to hold it vertical, then had my son hang on to the tire to keep it from rotating. (yes, I know there is a tool, but once again I didn't order it):
20171014_113306.jpg
 
Last edited:
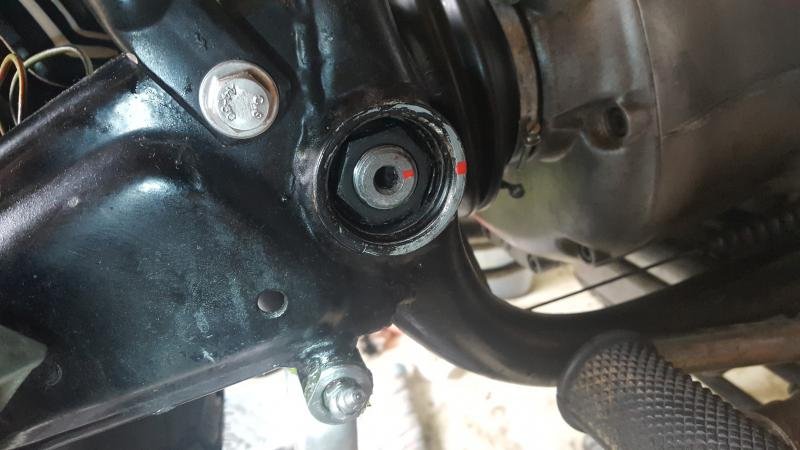
Swing arm in, with new nuts and fresh grease in the bearings.
20171014_161520.jpg

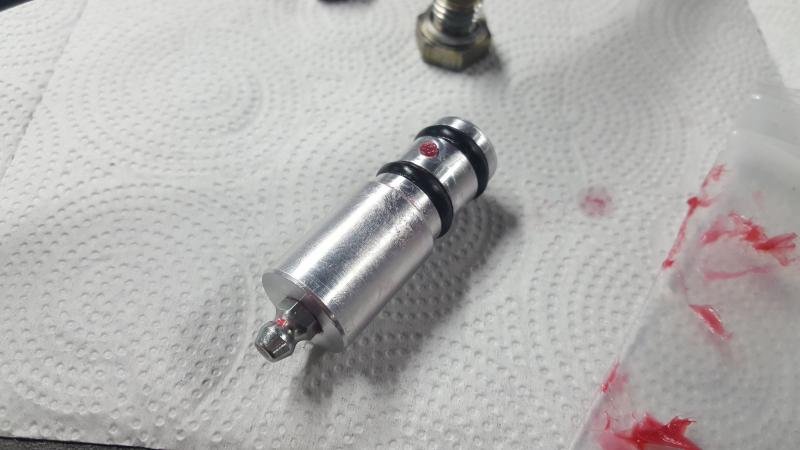
BTW, this tool is intended to be used to grease the rear wheel bearings, but it happens to fit the swing arm as well. The hole isn't located where you can just pump it in with a grease gun, but if you pack the swingarm cavity with grease and then just shove it in, it forces the grease out through the bearings. It takes a few times but eventually you'll see fresh grease coming out...
20171004_195240.jpg

Final drive on with new nuts and a fresh gasket (I slid the axle in before I tightened it up per recommendations here):
20171014_155825.jpg

After this pic I managed to get the shocks on (they'll need attention over the winter) and the final drive and driveshaft filled with gear oil...
 
Last edited:
So I finally got a few more hours to put it all back together.

I set the points to .016, rotated the carrier plate slightly, and...
20171021_162904.jpg

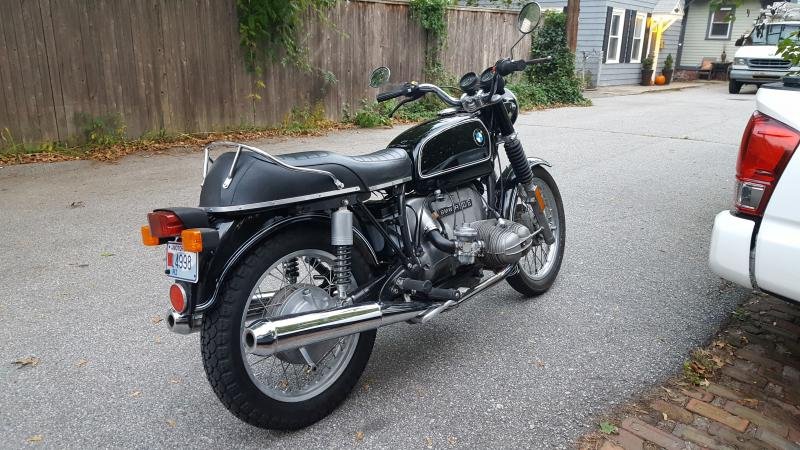
Still needs the carbs balanced, but it's running better than before..
20171021_174201.jpg


Thanks again for all the help, it was much appreciated.
 
Back
Top