• Welcome, Guest! We hope you enjoy the excellent technical knowledge, event information and discussions that the BMW MOA forum provides. Some forum content will be hidden from you if you remain logged out. If you want to view all content, please click the 'Log in' button above and enter your BMW MOA username and password.

    If you are not an MOA member, why not take the time to join the club, so you can enjoy posting on the forum, the BMW Owners News magazine, and all of the discounts and benefits the BMW MOA offers?

  • Beginning April 1st, and running through April 30th, there is a new 2024 BMW MOA Election discussion area within The Club section of the forum. Within this forum area is also a sticky post that provides the ground rules for participating in the Election forum area. Also, the candidates statements are provided. Please read before joining the conversation, because the rules are very specific to maintain civility.

    The Election forum is here: Election Forum

Removing nose fairing panels from 2014 RTW

fletchdude

New member
I'm finally getting around to pulling panels to paint my bike. I managed to pull all the Tupperware that was covered by JVB in the video, Thanks Jim! All I have left are the two side tail trim pieces and the two nose fairing pieces. The tail pieces look intuitive but the nose pieces have me puzzled. I looked at a parts breakdown and it looks like they are held in by push grommets. Anyone know how to pull these off? I'm nervous about yanking anything on this bike and breaking a tab or worse.

Jim
 
A typical push-grommet has a pin in the middle that expands the grommet when pushed in. Most of the pins can be pushed on through the grommet, thereby releasing it. Use an appropriately sized pin punch.

See the Haynes manual for additional information on push-pin-grommets.
Brant
 
Thanks but the panels with grommets usually are pulled off. What I'm not sure of is there a screw as well to be removed from inside the faring. The parts breakdown shows both but I can't tell if that's for the nose panel or trim piece.
 
fletchdude - There are two Torx screws in each side panel. In addition to the screws (which have to come out to remove the panel) there are a couple of push grommets AND two very fragile tabs at the rear of each panel. The way to make sure these tabs stay pristine and inviolate is the take out the Torx screws, and then from the front (holding the rear in place) pull the panel away from the body. This will allow the grommets to be released from their holder. Finally, lift the entire panel back and to the rear to carefully lift the tabs out of their slots. Reverse the procedure the get each panel back in place successfully.

The tabs are not great engineering, but we're stuck with it, I guess.
 
ExGman and LFarling, thanks for the explanation on the two front side panels. I got those off, without breaking the tabs. I had one of the panels just replaced under warranty and was extra, extra careful. Those sort of pop out of the tab/slot and yes the tragetrary of removal is normal to that path. I put a space heater on the panels like you suggested to warm them up. Mine were stubborn, they didn't come out as easy as the JVB video. I was holding my breath the whole time. I agree, really bad design.

So it's the two front nose fairing pieces I can't figure out how to pop off. It's the two panels in front that are on either side of the headlight below the windshield. If I knew how to post pictures I'd post a photo. The more I look at it I think each one is held by 3 torx screws. But I can't tell how to get at them. It looks like there are two screws at the bottom of the panel, and maybe a third behind the mirror. Do these mirror's pop off like the older ones? I'd like to remove the mirror and take a look.

I found this from the LT site:

It's the two in front surrounding the headlights that have me stumped.
Enlarge these, maybe that'll help some:

http://realoem.com/bmw/partgrp.do?mo...id=56210&hg=46

http://realoem.com/bmw/partgrp.do?mo...id=56210&hg=63
 
Sigh, figured it out. Not intuitive and since there isnt a reason to remove these panels other than painting, there's not a lot of internet intell. It's really easy once you know what to do. Two body panel screws at the bottom, one behind the speaker, which has to be removed, one push pin into a grommet, and the Rosetta Stone was a black plastic body pin/plug not listed anywhere, also behind the speaker. For the few that want to paint these to match the San Marino blue or other color, pm and I'll walk you through it. I took photos.
 
The insight and suggestions on the panel were great, saving me any damaging of the panel - warm panels help a bunch too (ask my old K-bike).:)

With each of the grommet/pegs, don't forget to lube the inner diameter of the grommet along with the peg with a silicone lubricant - it'll make future removal and re-Installation easier.
 
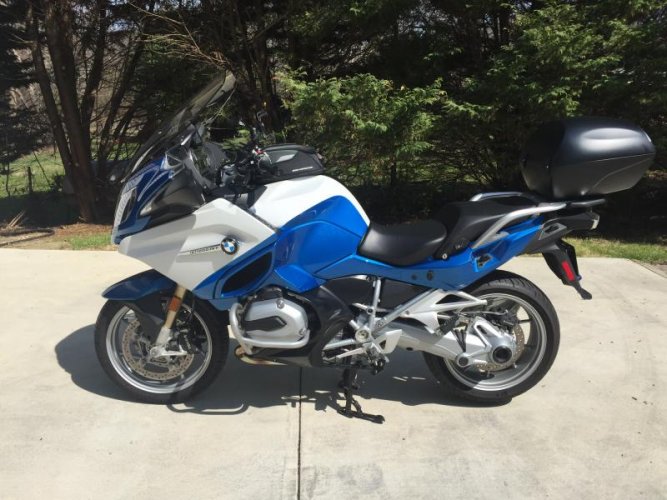
Wow!! That looks great.

I ride mine in that same setup 95% of the time, small tail case and no other bags. Works well for my daily riding needs. :)
 
Wow!! That looks great.

I ride mine in that same setup 95% of the time, small tail case and no other bags. Works well for my daily riding needs. :)

Ja, thanks. I really like the way the paint came out. I ride RT about same as you with the small top case. Sometimes with just a tankbag. I think it handles different with less weight. I usually only use the side cases when touring or picking up things from the store. If I have a base camp (Hilton) on a road trip, I leave the cases in the room for day trips. I picked up the 49L top case but use that even less, mainly for Really long trips or if carrying the wife. I had the side and 49L top case painted to match the bike.
 
Back
Top