• Welcome, Guest! We hope you enjoy the excellent technical knowledge, event information and discussions that the BMW MOA forum provides. Some forum content will be hidden from you if you remain logged out. If you want to view all content, please click the 'Log in' button above and enter your BMW MOA username and password.

    If you are not an MOA member, why not take the time to join the club, so you can enjoy posting on the forum, the BMW Owners News magazine, and all of the discounts and benefits the BMW MOA offers?

  • Beginning April 1st, and running through April 30th, there is a new 2024 BMW MOA Election discussion area within The Club section of the forum. Within this forum area is also a sticky post that provides the ground rules for participating in the Election forum area. Also, the candidates statements are provided. Please read before joining the conversation, because the rules are very specific to maintain civility.

    The Election forum is here: Election Forum

Adjusting the engagement point of a Wethead Clutch or Brake! (pictorial)

jimvonbaden

Kool Aid Dispenser!
This process is identical for either the brake or the clutch. It takes almost no time to get the engagement point either closer, or further away from the grip.

NOTE: I have aftermarket levers, but they use the stock plungers. There is no difference in the process.

First, you need to remove the T-25 Torx that holds the inside point on your hand guards. (Not needed on the RT/RS/R.)
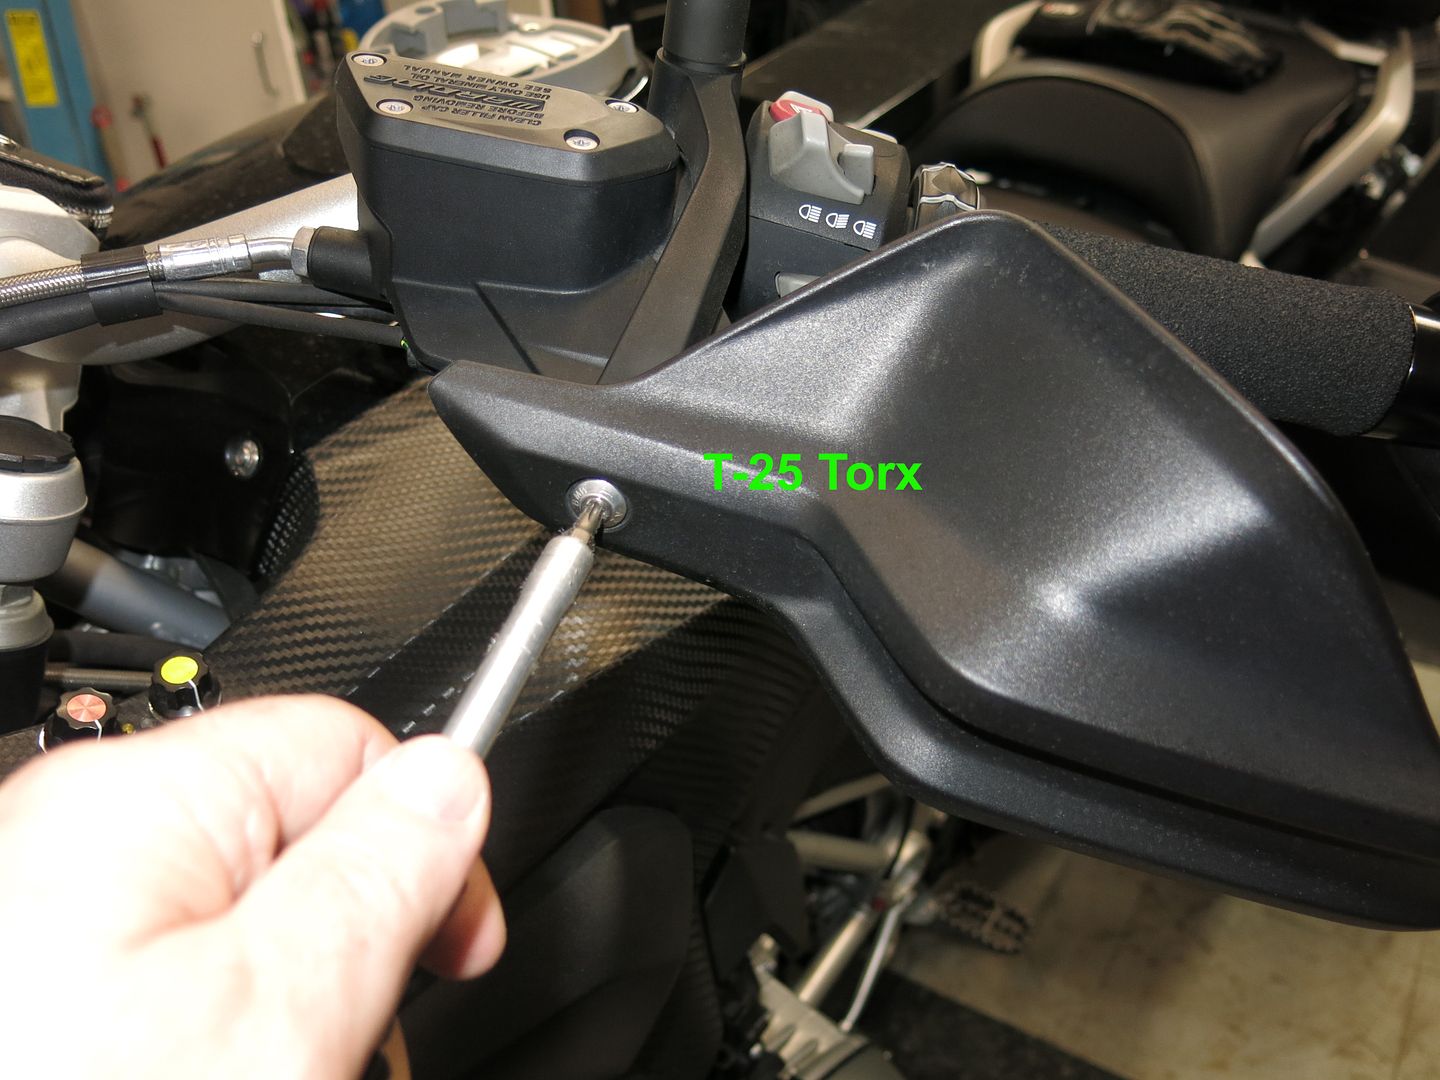
01%20Clutch%20Lever%20Adjust%2014%20copy.jpg


Move the hand guard out of the way.
Clutch%20Lever%20Adjust%2017.jpg


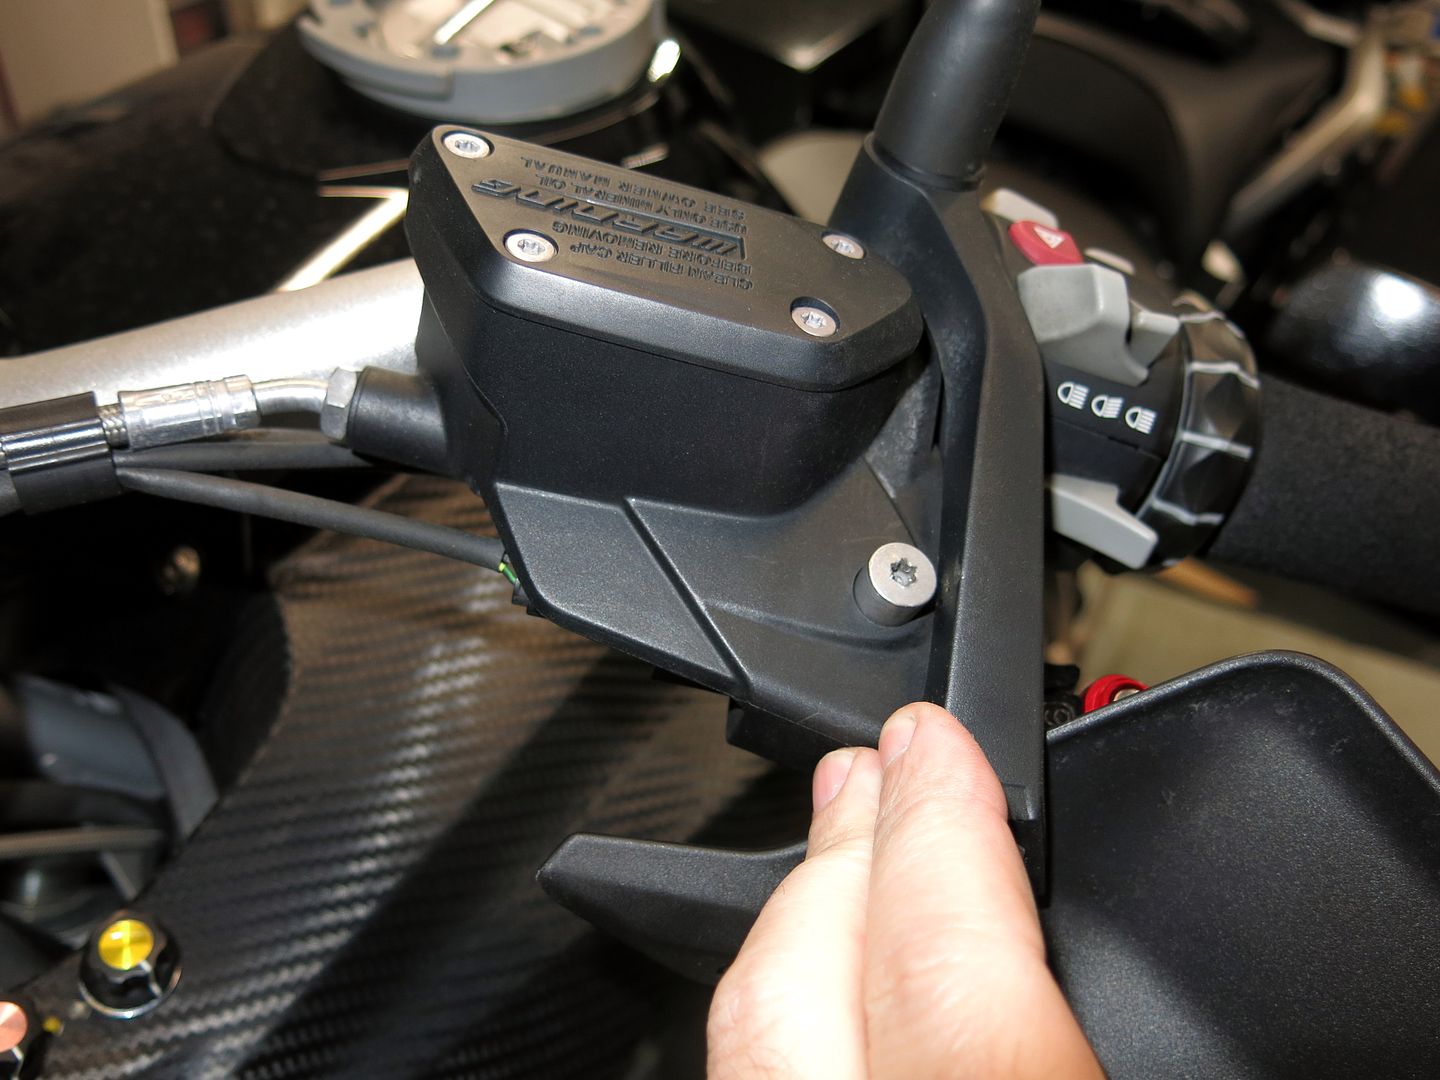
Push the hand guard mount to the right to clear the lever mount bolt.
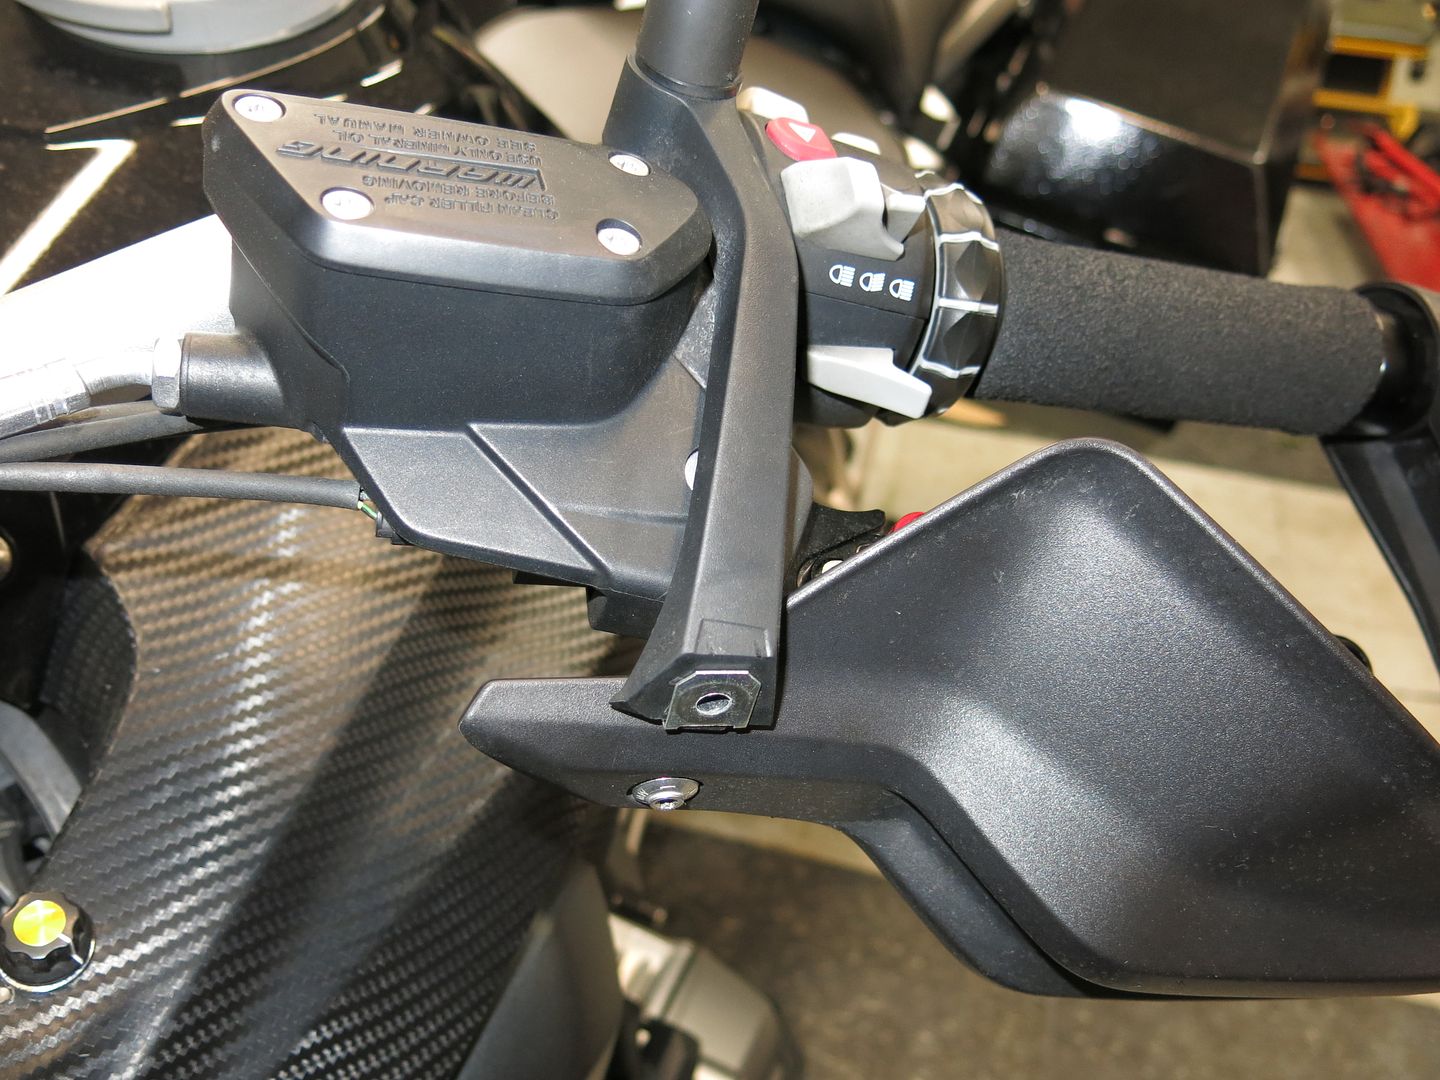
Clutch%20Lever%20Adjust%2017.jpg


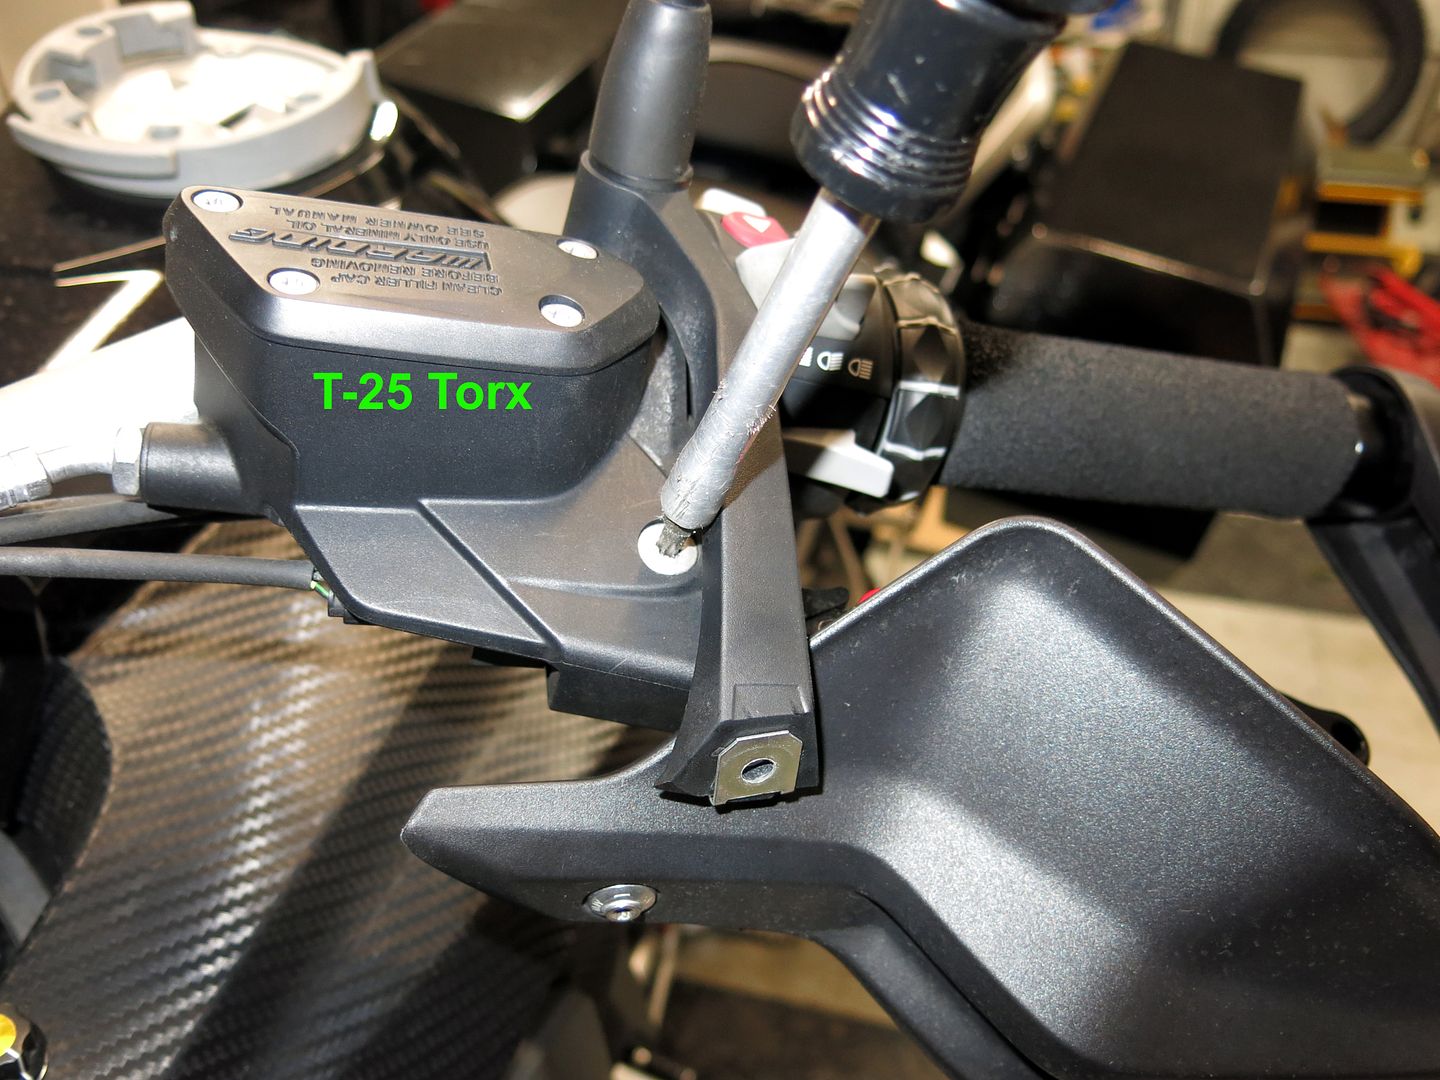
Use the T-25 Torx to turn the mount bolr.
03%20Clutch%20Lever%20Adjust%2018%20copy.jpg


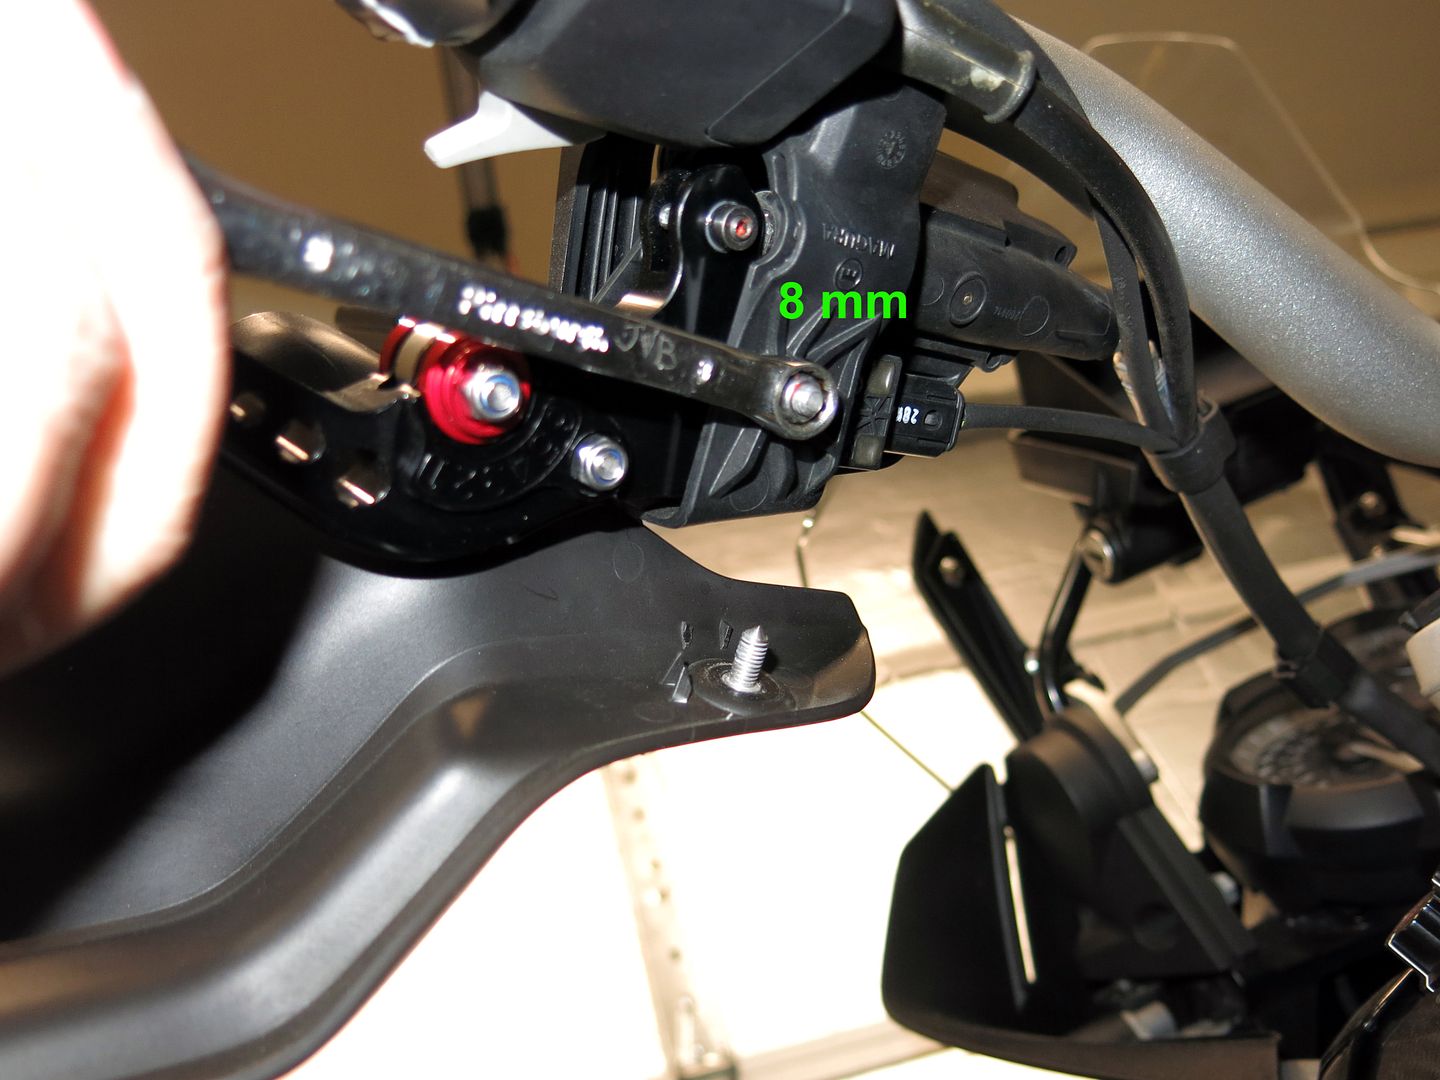
On the bottom is an 8mm nut that you need to hold.
05%20Clutch%20Lever%20Adjust%2020%20copy.jpg


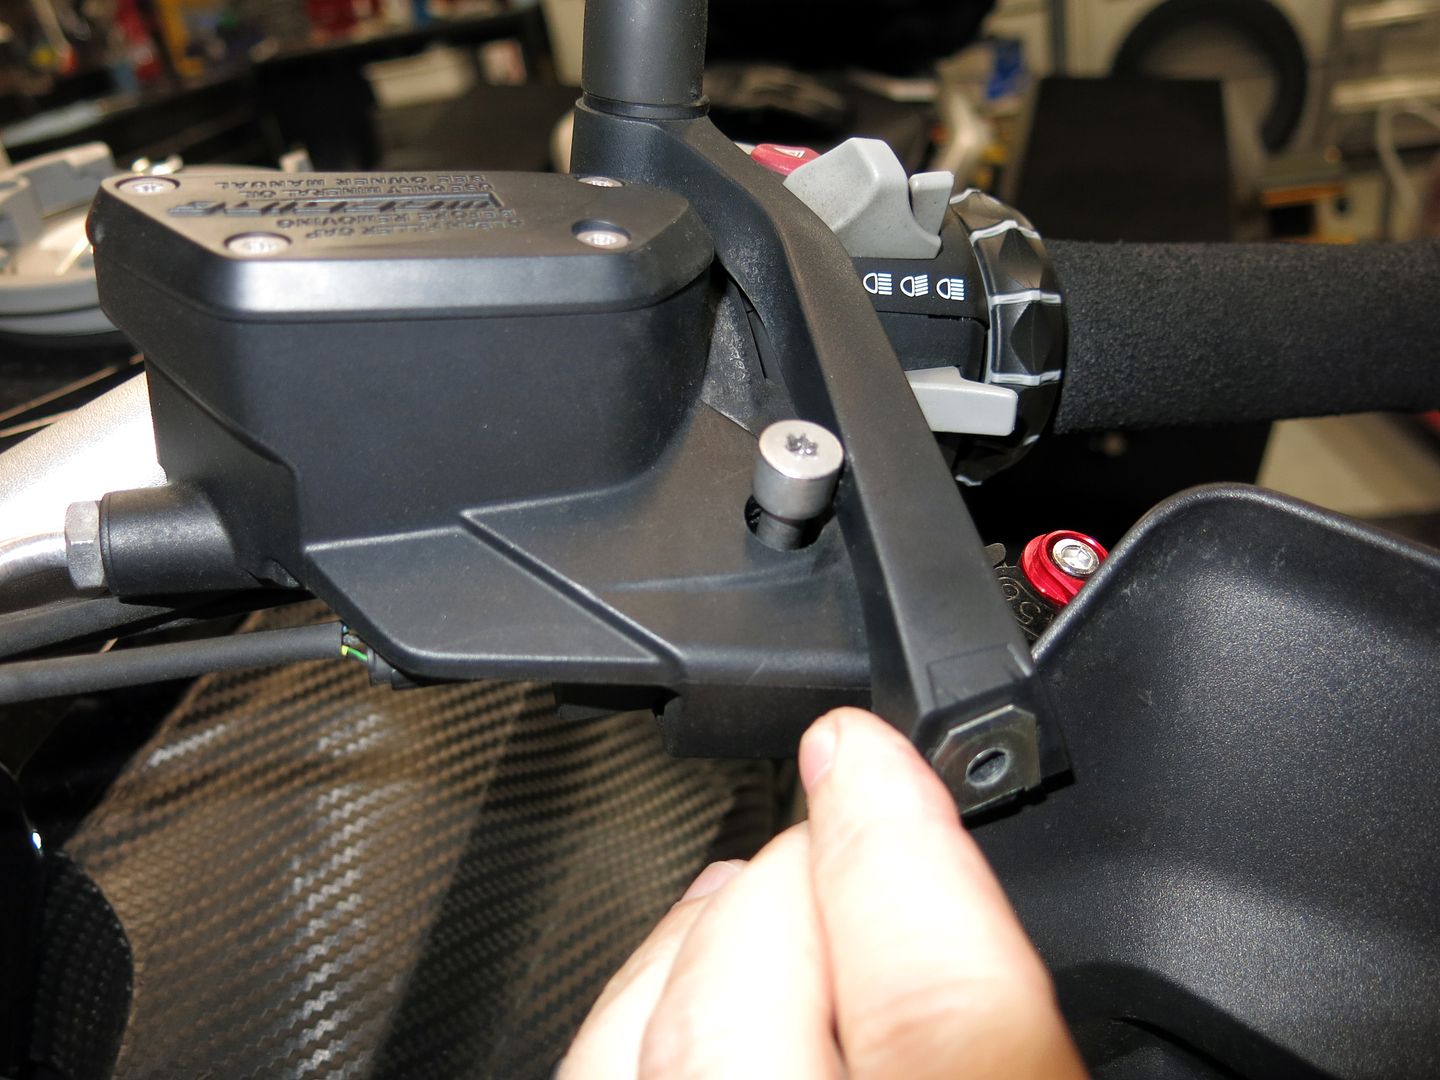
Once the nut is off, push up the bolt until you can grab it and pull it all the way out.
05%20Clutch%20Lever%20Adjust%2023.jpg


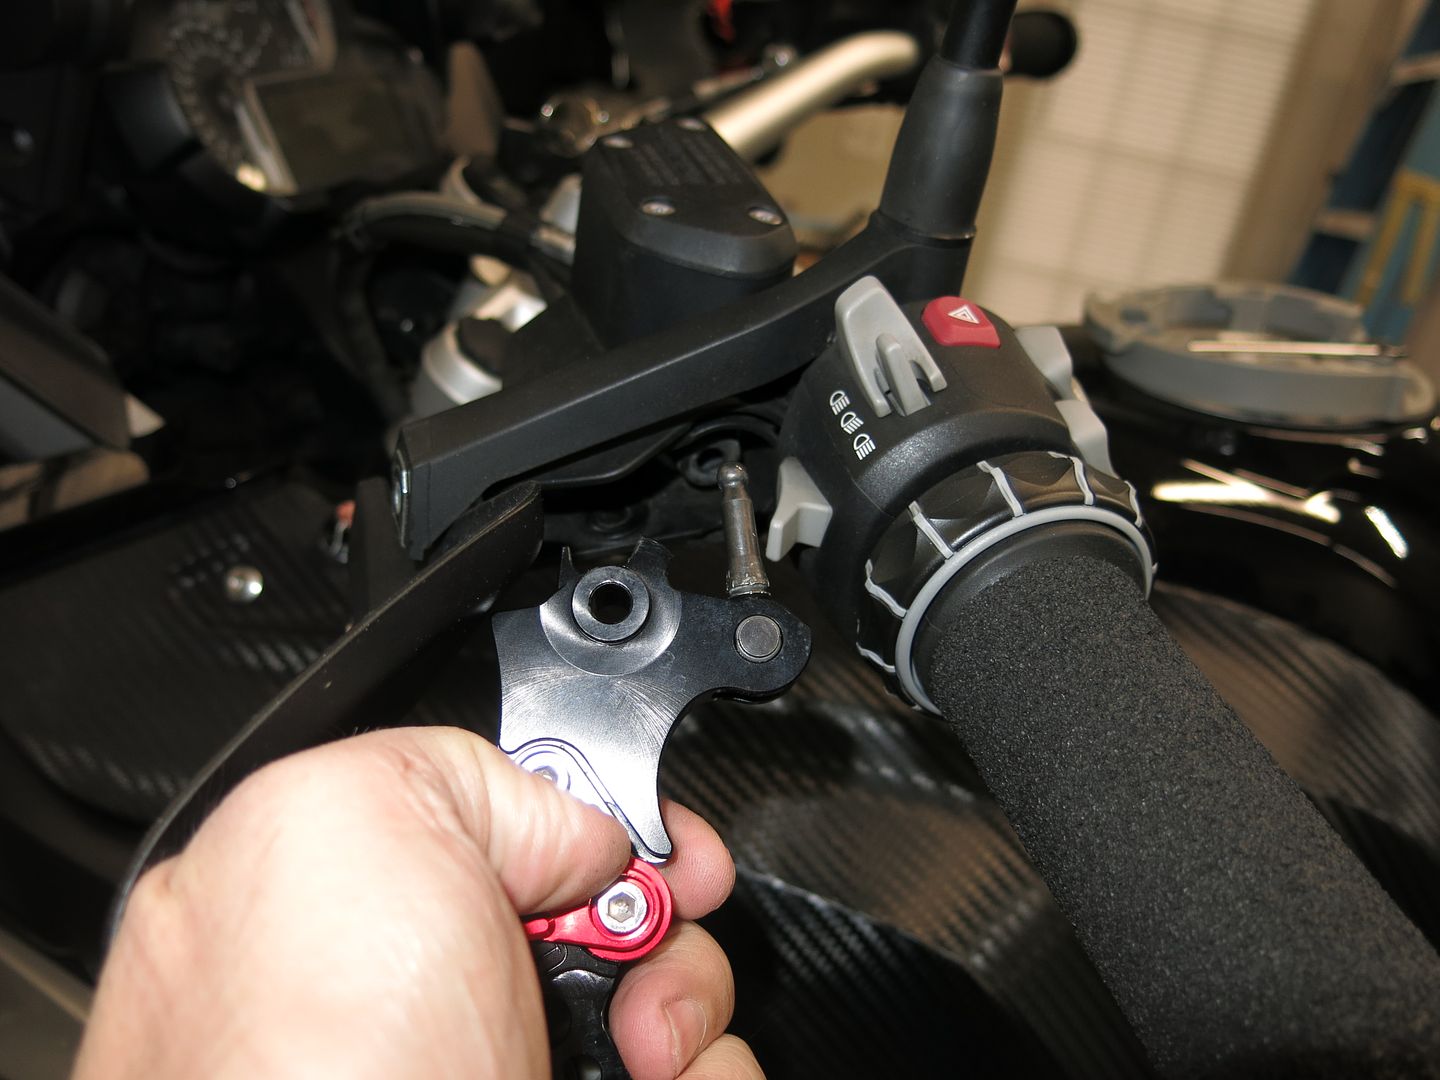
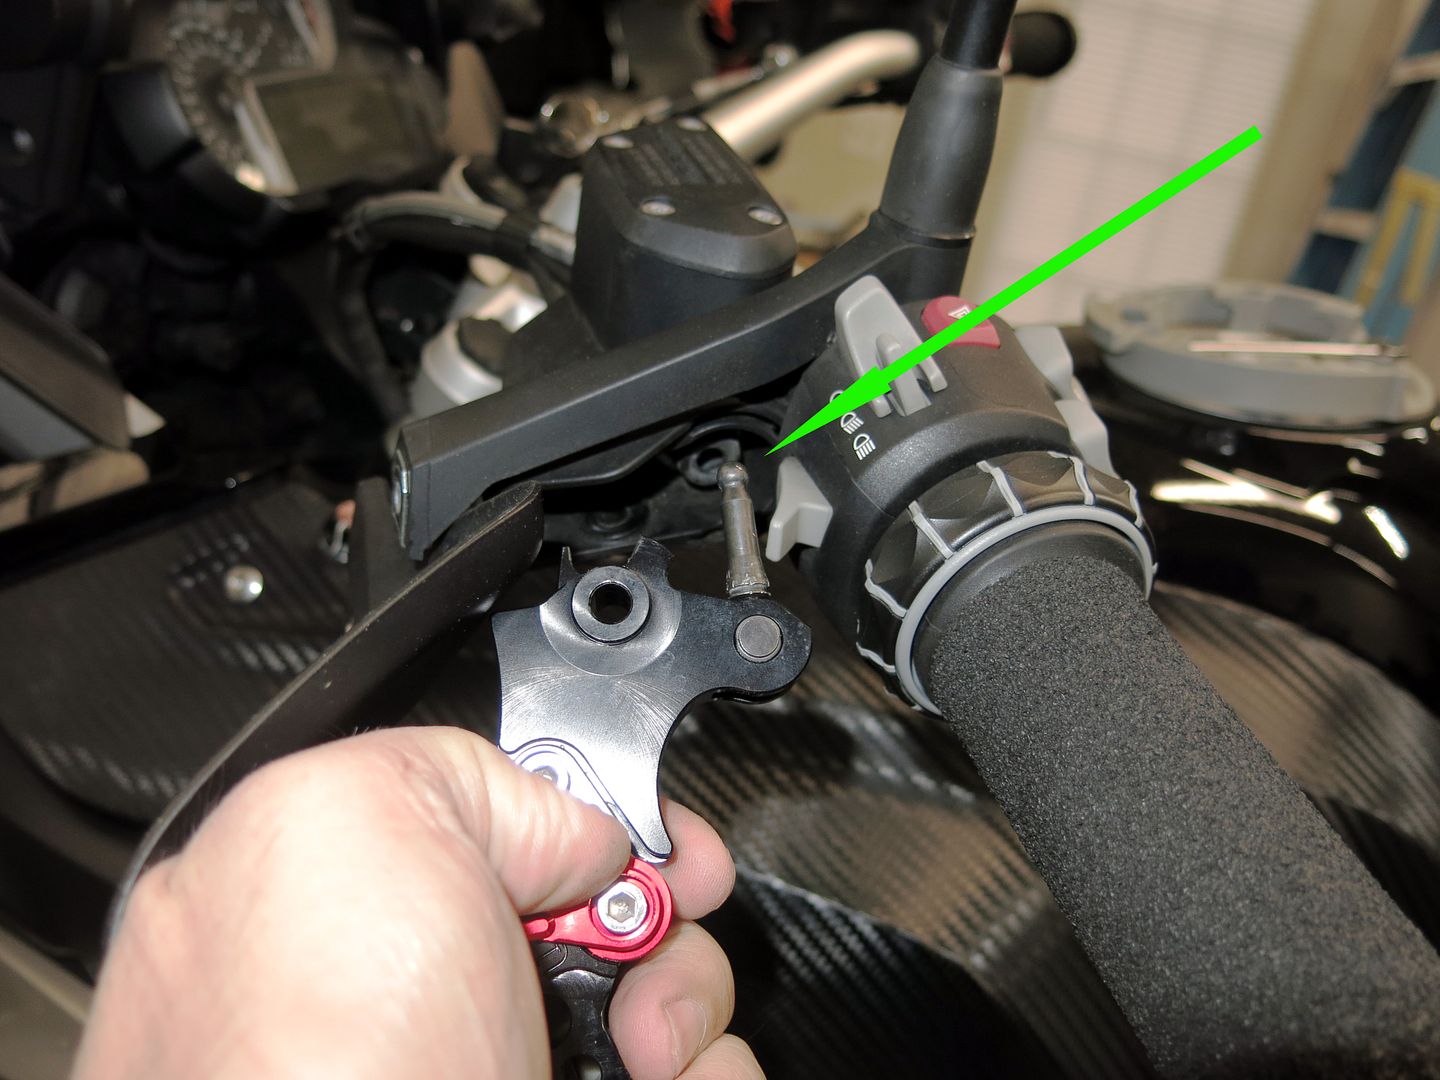
Once the bolt is out, simply pull the lever until the plunger pops out.
05%20Clutch%20Lever%20Adjust%2026%20copy.jpg


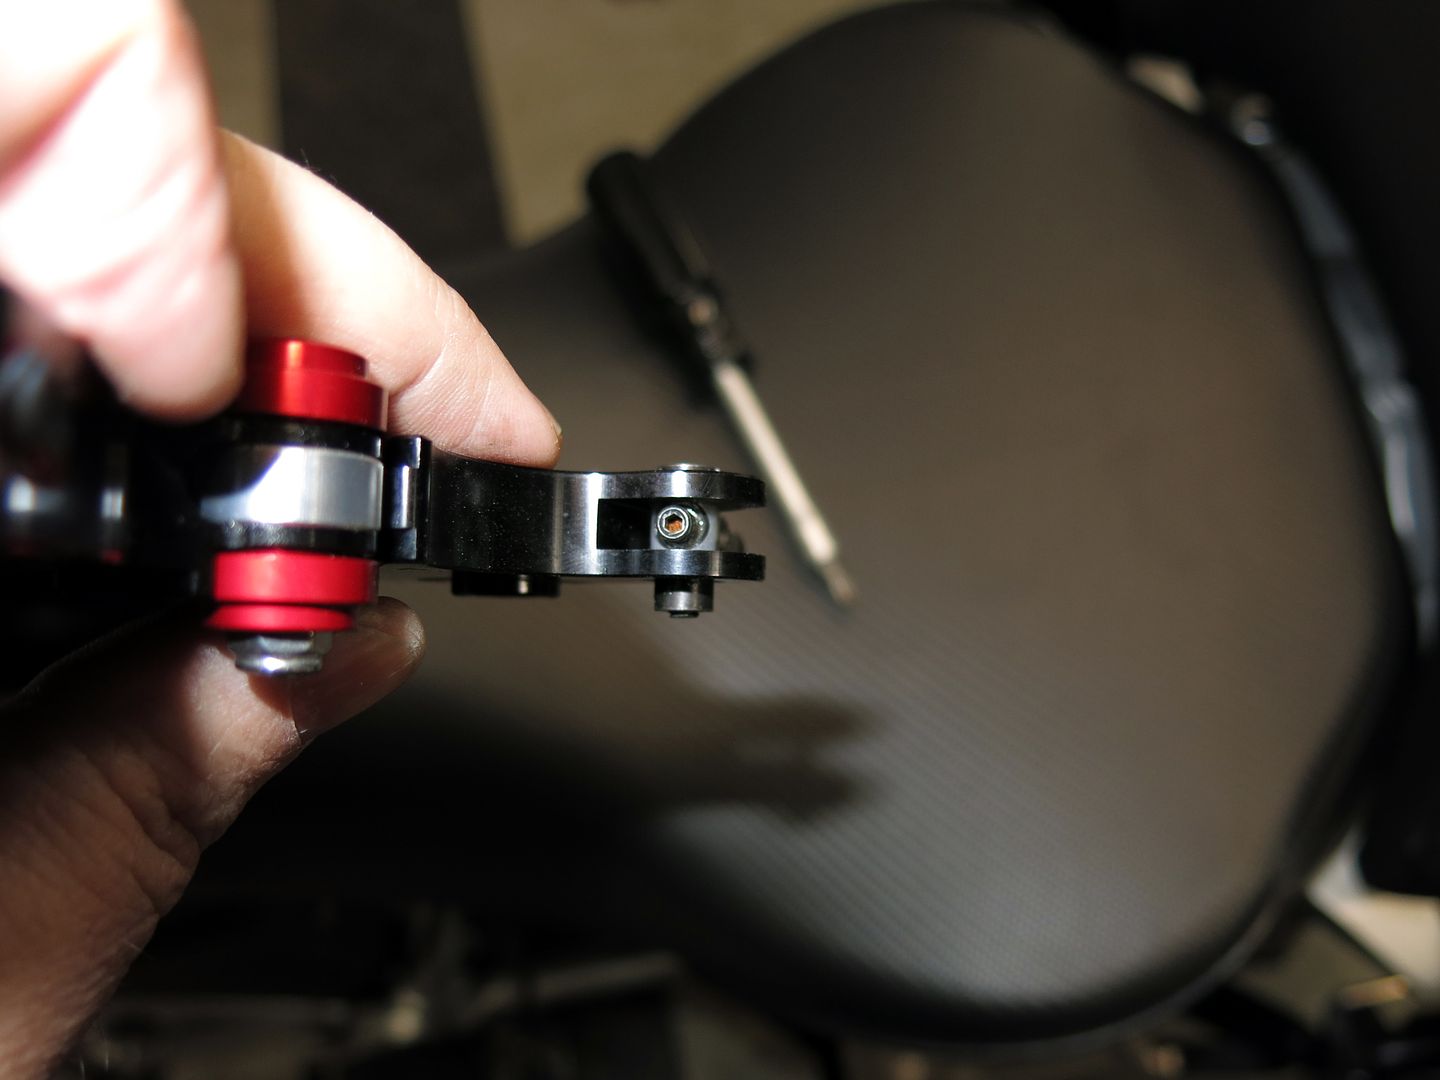
Now you can see the plunger. This is the part you adjust.
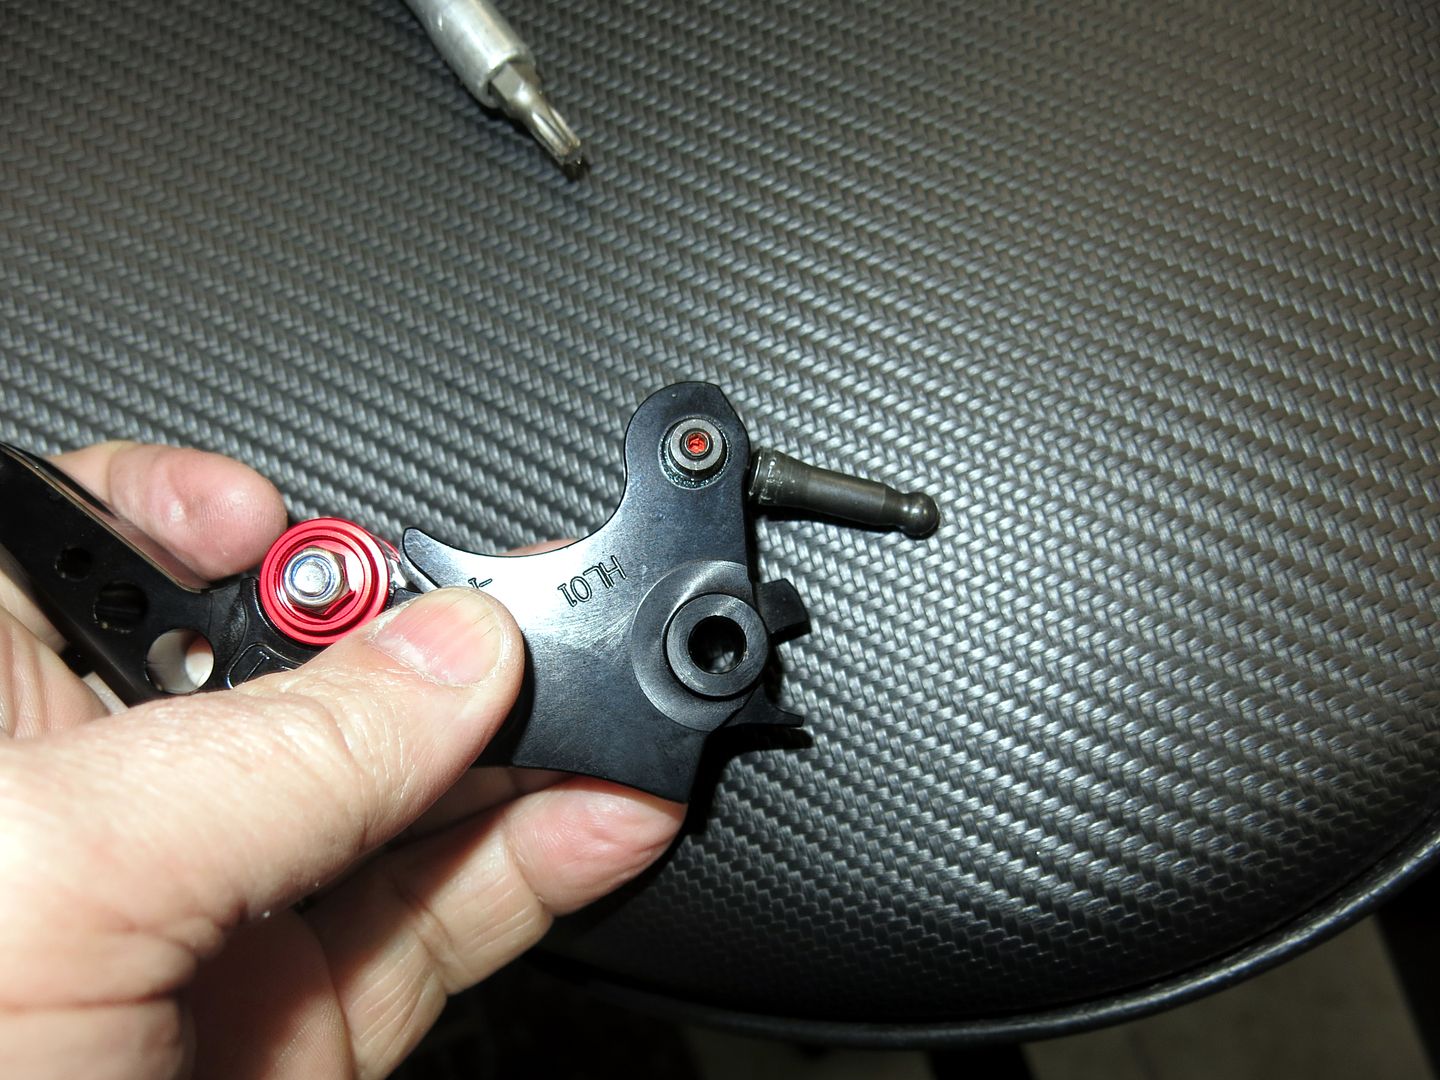
Clutch%20Lever%20Adjust%2028.jpg

Clutch%20Lever%20Adjust%2029.jpg


Before you start, not the number of exposed threads so you can bring it bact to where it was if you need to later.
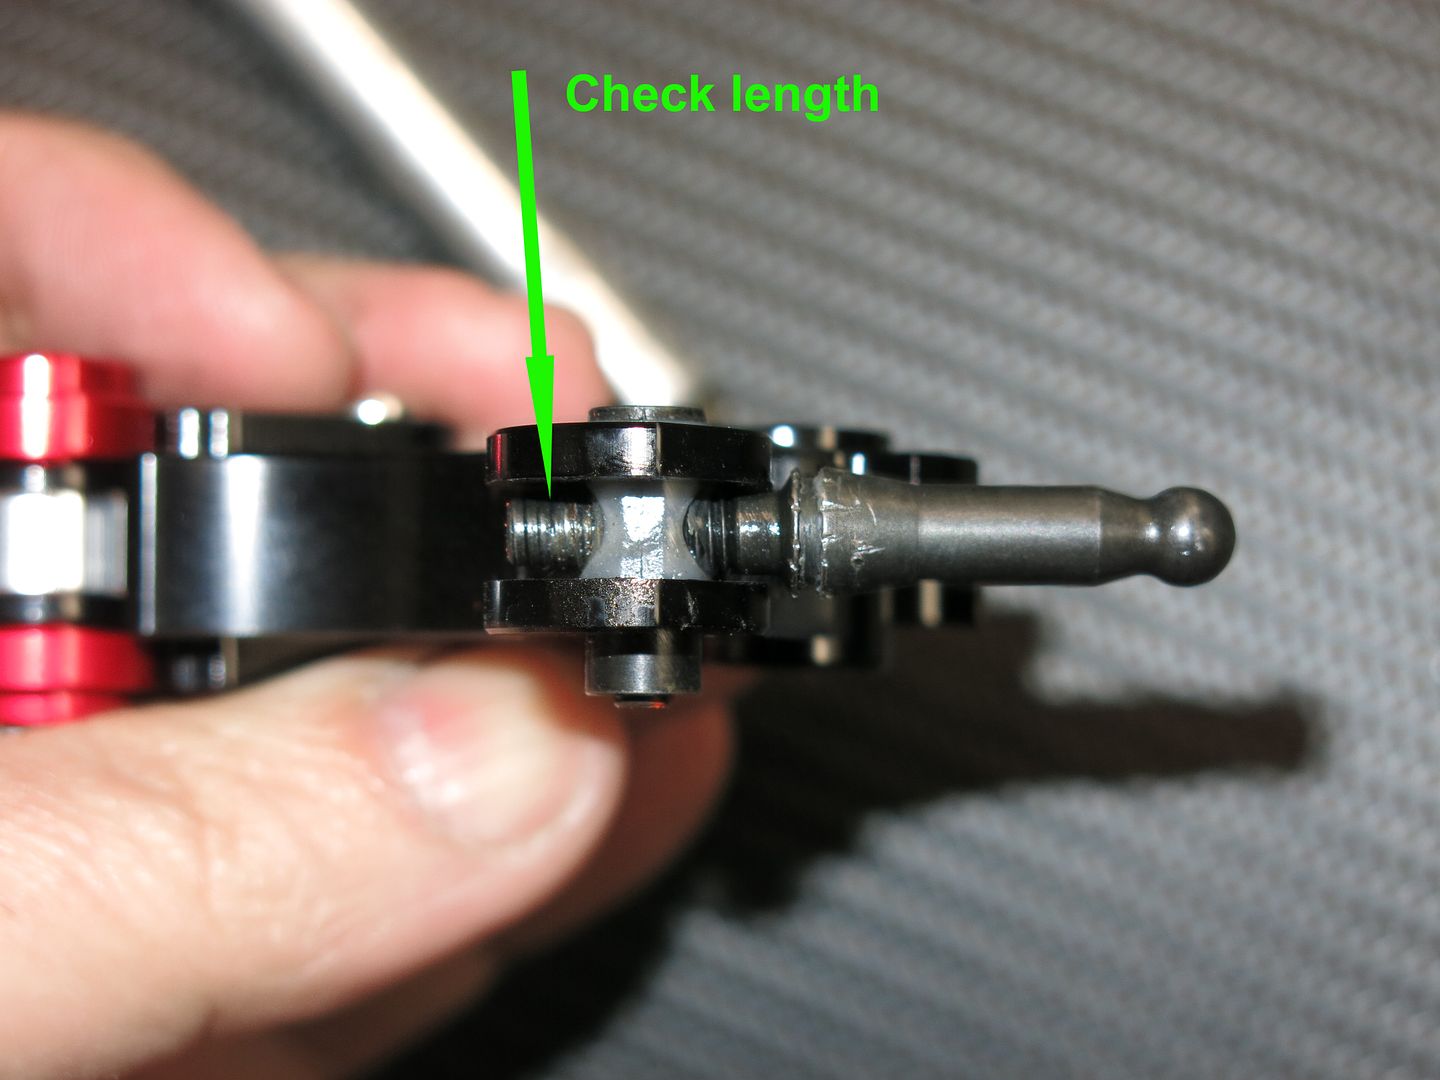
07%20Clutch%20Lever%20Adjust%2033%20copy.jpg


It takes a 2mm Allen to loosen the set screw. You will have to first clean out the pain to get the Allen to go in the hole to loosen it.
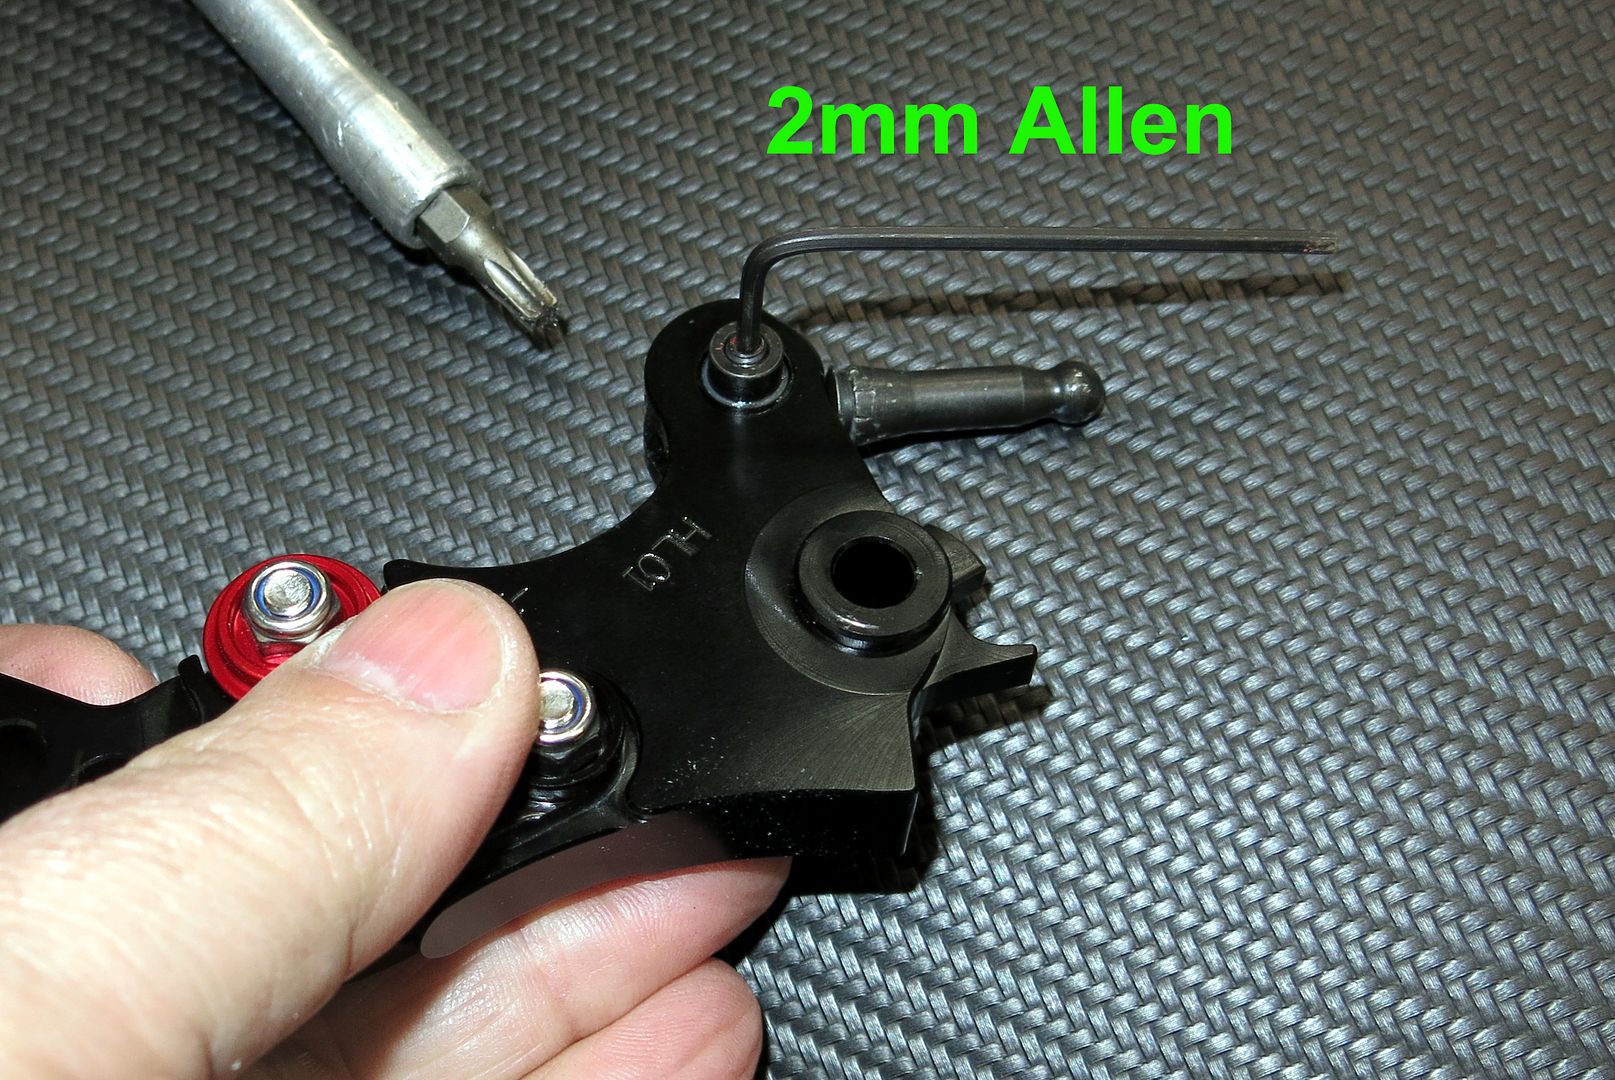
06%20Clutch%20Lever%20Adjust%2030%20copy.jpg


Once the set screw is loose, you use the 2mm Allen to adjust the distance the plunger goes into the master cylinder. The more it goes in the sooner you will get engagement. Turn it in Clockwise from the perspective of the plunger) to bring the lever closer to the grip when engagement starts, and turn it out (counterclockwise) to move engagement away from the grip. I suggest moving it only one turn at a time at most. Reinstall and test.
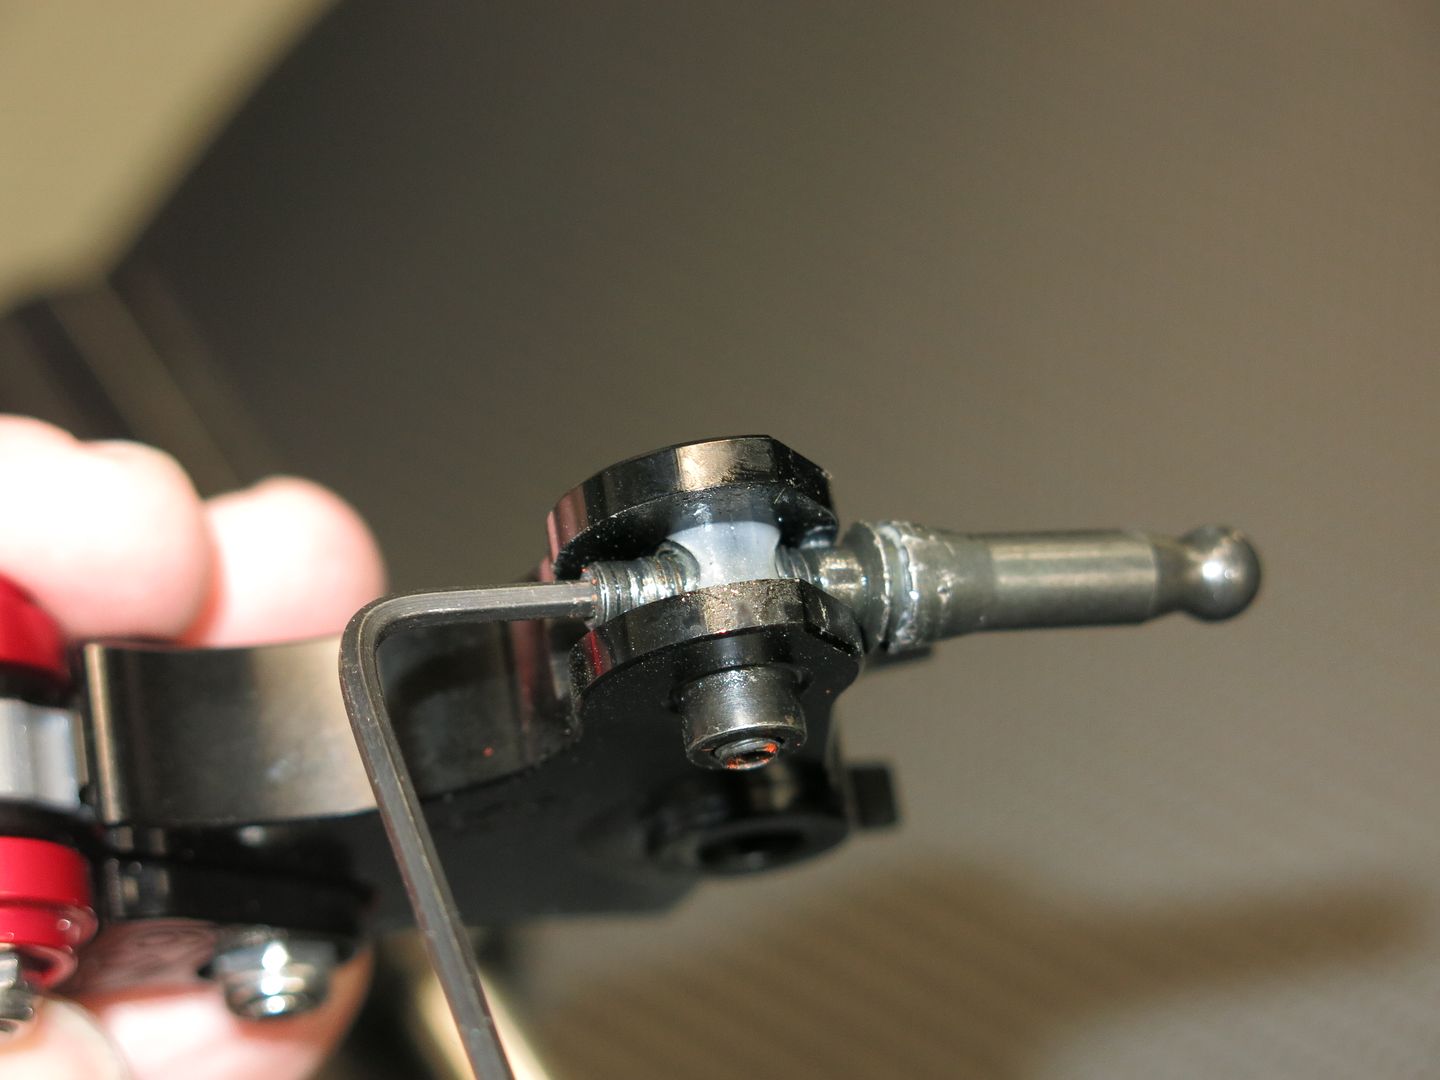
Clutch%20Lever%20Adjust%2032.jpg


Once adjusted, tighten the set screw to 4Nm, or just lightly snug.
06%20Clutch%20Lever%20Adjust%2030%20copy.jpg


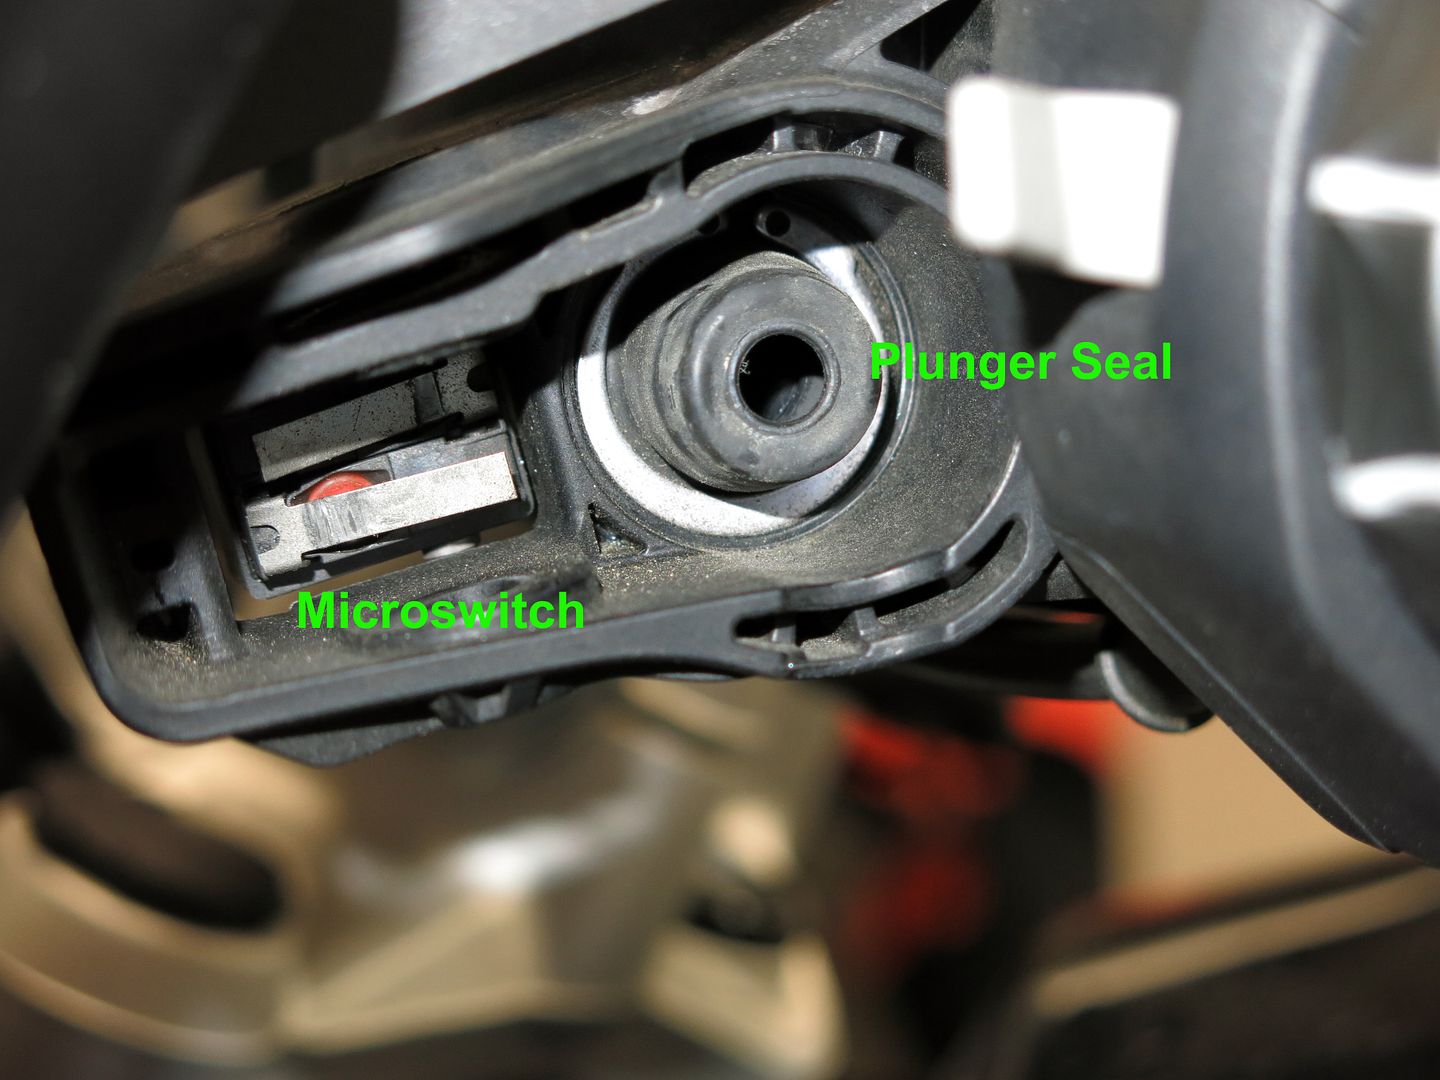
Install the lever and plunger by pushing it into the master cylinder rubber seal. Make sure you push it directly into the hole or the rubber will be pushed out of shape. You will feel it pop into place.
07%20Clutch%20Lever%20Adjust%2034%20copy.jpg

Clutch%20Lever%20Adjust%2026.jpg


Put the lever retaining bolt back in, but not the 8mm nut. This is the time to test the engagement point. On the clutch you need it running and in gear to test it.
05%20Clutch%20Lever%20Adjust%2022.jpg


If it is good, install the 8mm nut and snug down to 8Nm. It bottoms on the shoulder of the bolt, and is a locking nut, so no need to gorilla it.
05%20Clutch%20Lever%20Adjust%2020%20copy.jpg


Now put the T-25 Torx back in and you are good to go.
01%20Clutch%20Lever%20Adjust%2014%20copy.jpg


Remember, this process is the same for the brake or clutch.

Jim :brow
 
Just an added FYI. If you can get the set screw loose while the levers are in place, you can adjust without taking it apart.

Jim :brow
 
I'm wondering about the value of a small dab of silicone grease on the plunger to help it be reinserted into the plunger seal. It looks like there is some sort of grease on the adjustment screw. Any idea what this lubricant is?
 
Trouble with 2mm set screw

Today I tried to adjust my clutch lever and could not get the 2mm allen screw to loosen. I used 2 different allen wrenches with no movement. Any suggestions?
 
Warning: A Potentially Dangerous Adjustment

Today I tried to adjust my clutch lever and could not get the 2mm allen screw to loosen. I used 2 different allen wrenches with no movement. Any suggestions?

Jim, on initial assembly at the factory the set screw was slathered with thread locker and needs a bit of heat to get it loose.

This is a potentially dangerous adjustment.

I went aggressive and screwed in the threaded plunger until nine threads were showing (started at 5).

A short ride around the block, keeping the brakes dragging to create heat, and the front brakes began to bind up.

The front wheel totally locked up right at my drive way.

A rubber fluid blocker is pushed into the bottom of the master cylinder and obstructs the view of the main plunger.

The main plunger must be allowed to return to an "open" position or every time the brakes are applied the pressure in the brakes will continue to build until lock up.

Without seeing the main plunger to help determine the farthest the threaded plunger can be turned in, I guessed and backed the plunger off 2 turns.

Doing the same ride around the block, no lock up.

Looking at the BMW OEM Repair Manual for the K5x bikes, I could not find any info on the threaded plunger or the set screw.

I would expect there would be a min and max number millimeters the threaded plunger should be positioned.

Question: Where did the 4 nm on the set screw come from? Is there a Brembo guide with a diagram of the master cylinder for the new Beemers?

I find the front brakes on our RS LC model to be mushy and hard to modulate. Any improvement is appreciated.

Thank you,

Deryle Mehrten
Sierra Vista, AZ USA
 
Yes, if you go too far you will get to the point where the clutch or brake will not disengage. Caution is always a good idea.

The 4nm came from the BMW manual.

Jim :brow
 
I'm wondering about the value of a small dab of silicone grease on the plunger to help it be reinserted into the plunger seal. It looks like there is some sort of grease on the adjustment screw. Any idea what this lubricant is?

Looked like silicon grease to me. I didn't need to add any.

Jim :brow
 
Today I tried to adjust my clutch lever and could not get the 2mm allen screw to loosen. I used 2 different allen wrenches with no movement. Any suggestions?

Pull it all the way out and put the lever in a vise. Heat the set screw with a heat gun, then try again.

Jim :brow
 
Which BMW Manual?

The 4nm came from the BMW manual.

Jim :brow


Jim,

Which BMW Manual?

I purchased BMW part number 01 59 8 569 005 Repair Manual R Models K5x.

I also have BMW Repair and Service Data BMW Motorad Edition 092015 R Models K5x R1200RS K54 (copied off the web).

Neither manual shows any adjustment to the clutch or brake push rod, nor does either have an exploded view of the front master cylinder.

www.REALOem.com does not show any exploded version of the front master cylinder and does not list a repair or rebuild kit.

Again, which manual are you referring to?

Thank you,

Deryle Mehrten
Sierra Vista, AZ USA
Mehrten@cox.net
 
Please confirm...

I can't get my head around this adjustment. I'm after getting the bike going/moving after a stop, with the lever only up to an inch from the grip. With the plunger longer/going deeper wouldn't that move the lever away from the grip to get the bike to start moving? :banghead
 
Clutch Lever Replacement...then problems

Jim et al,

I put a short aftermarket clutch lever on my 2014 R1200GSW, re-using the plunger from my OEM lever. Set the plunger length from the pivot point to be about the same as OEM.

After riding for a few minutes, the clutch started slipping...a few minutes more, and no friction whatsoever. Took it apart beside the road, re-adjusted the plunger length, re-assembled and rode home. Notably, the bike had cooled down or hydraulic pressure had dissipated. Meaning?

I took it apart again and shortened the plunger to move the engagement point, thinking that it was putting hydraulic pressure on the clutch circuit. Worked fine again for a short ride, but after a mile or two the same symptoms: Initial slipping, followed a few minutes later from complete disengagement/no friction. Luckily, I could coast downhill to get home.

It seems cooling down has an effect on clutch function.

Strikes me as strange - the back wheel rotates rapidly on the center stand with the clutch disengaged (pulled in), indicating there's incomplete disengagement. But when riding the bike, the clutch loses friction in short order, indicating complete disengagement.

Any ideas what gives?

Thanks,
Mike
 
Possible Problem

Jim,

You may have the plunger rod screwed in too far.

Like the brakes, if the plunger rod doesn't allow the plunger to return all the way, it will build up pressure.

Seems that with pressure the clutch is opening/disengaging and when you stop and it cools down it loses pressure.

Go back to the last thing you did...try adjusting the plunger rod.

This is just my best guess.

Deryle Mehrten
Sierra Vista, AZ USA
 
Nice write up. At the risk of displaying ignorance, what is the reason for doing this adjustment? I thought all wetheads came stock with adjustable brake and clutch levers. I know my oilhead does. Is this procedure for a more fine-tuned adjustment? Maybe I am just fortunate and available lever positions work for me without disassembling anything.
 
Jim et al,

I put a short aftermarket clutch lever on my 2014 R1200GSW, re-using the plunger from my OEM lever. Set the plunger length from the pivot point to be about the same as OEM.

After riding for a few minutes, the clutch started slipping...a few minutes more, and no friction whatsoever. Took it apart beside the road, re-adjusted the plunger length, re-assembled and rode home. Notably, the bike had cooled down or hydraulic pressure had dissipated. Meaning?

I took it apart again and shortened the plunger to move the engagement point, thinking that it was putting hydraulic pressure on the clutch circuit. Worked fine again for a short ride, but after a mile or two the same symptoms: Initial slipping, followed a few minutes later from complete disengagement/no friction. Luckily, I could coast downhill to get home.

It seems cooling down has an effect on clutch function.

Strikes me as strange - the back wheel rotates rapidly on the center stand with the clutch disengaged (pulled in), indicating there's incomplete disengagement. But when riding the bike, the clutch loses friction in short order, indicating complete disengagement.

Any ideas what gives?

Thanks,
Mike

As you might expect, I was too indelicate with the plunger length adjustment. Obviously, it was not releasing hydraulic pressure (similar to the brake problem cited above), which built up and disengaged the clutch. Adjusted the plunger it yet again, this time to about the same spot as original, and it seems to be fine.

Thanks,
Mike
 
Nice write up. At the risk of displaying ignorance, what is the reason for doing this adjustment? I thought all wetheads came stock with adjustable brake and clutch levers. I know my oilhead does. Is this procedure for a more fine-tuned adjustment? Maybe I am just fortunate and available lever positions work for me without disassembling anything.

They quit offering that adjustable lever when the 1200's came out. Sure was a nice quick adjustment.
 
Lever Adjustment vs Plunger Rod Adjustment

Nice write up. At the risk of displaying ignorance, what is the reason for doing this adjustment? I thought all wetheads came stock with adjustable brake and clutch levers. I know my oilhead does. Is this procedure for a more fine-tuned adjustment? Maybe I am just fortunate and available lever positions work for me without disassembling anything.


The adjustment on the lever will help accommodate different hand sizes and finger reaches.

The plunger rod adjustment will change where the rod actually starts moving the plunger in the master cylinder.

I'm my case, with the lever adjustment all the way out I could squeeze the lever in so close to the throttle that my thumb couldn't rotate properly when blipping the throttle.

By adjusting the plunger rod to start actuating the plunger sooner, I now have more brake in the lever.

I still have the lever set to the farthest position because that is the reach that fits my hand.

Now the lever is farther away from the throttle when the brakes are doing their job and my thumb will rotate properly without hitting the lever.

Two different adjustments.

Deryle Mehrten
Sierra Vista, AZ USA
 
Back
Top