• Welcome, Guest! We hope you enjoy the excellent technical knowledge, event information and discussions that the BMW MOA forum provides. Some forum content will be hidden from you if you remain logged out. If you want to view all content, please click the 'Log in' button above and enter your BMW MOA username and password.

    If you are not an MOA member, why not take the time to join the club, so you can enjoy posting on the forum, the BMW Owners News magazine, and all of the discounts and benefits the BMW MOA offers?

  • Beginning April 1st, and running through April 30th, there is a new 2024 BMW MOA Election discussion area within The Club section of the forum. Within this forum area is also a sticky post that provides the ground rules for participating in the Election forum area. Also, the candidates statements are provided. Please read before joining the conversation, because the rules are very specific to maintain civility.

    The Election forum is here: Election Forum

2V - Valve Shim Thickness - Printed vs. Actual (95 K75S)

drneo66

Active member
I recently acquired about 20 valve shims for my '95 K75S and I'd like to get rid of the ones that I can no longer use.


Out of all of them, I only have one that still has the printing left on the backside. That particular one reads 2.50, but I measure it at 2.55 mm with my digital calipers. Therefore, can I assume that all of the other other valve shims are actually +0.05mm above what they would be printed at?

Hopefully that makes sense...
 
I wouldn't try to generalize. You may be measuring a manufacturing tolerance which can swing from + to -, or be in the middle. I make no assumptions and always measure.
 
Did you zero your digital calipers?

I've never found a used shim more than .02mm off the printed size. New shims are almost always within .01mm.

Your saying that you're getting .05 off. That's the next size. No way would BMW label the shims one full size off. The problem has to be with your caliper. Not reset to zero or bent.


:dance:dance:dance
 
When I did my valves recently mine were off that much, some more. That was, until the BMW tech who was guiding me along showed me how to properly zero out then how to properly measure with the $15 Harbor Freight digital caliper I had bought. Once I figured it out it was just as accurate as the $? Snap-On the Tech used. And as Lee mentioned, they were all pretty much spot on, maybe .01 variance - due perhapse more to the copious amounts of coffee I was drinking. I still measured each one at least twice before I put it in.

PSA - you can still buy the blue tin (empty) that keeps them all segregated by size, unfortunately the blue tin packed with shims is NLA.
 
Yes - 2 calipers - zero'd both - I guess that ONE shim is off??

It's the only one of the lot that still has the printing. I was maybe thinking that 0.05 was recessed into somewhere - thanks for the info!
 
I'm an old school machinist. I allways grab a micrometer, caliper, scale and double check my parts and thier dimensions.
 
Precision measuring tools and device's

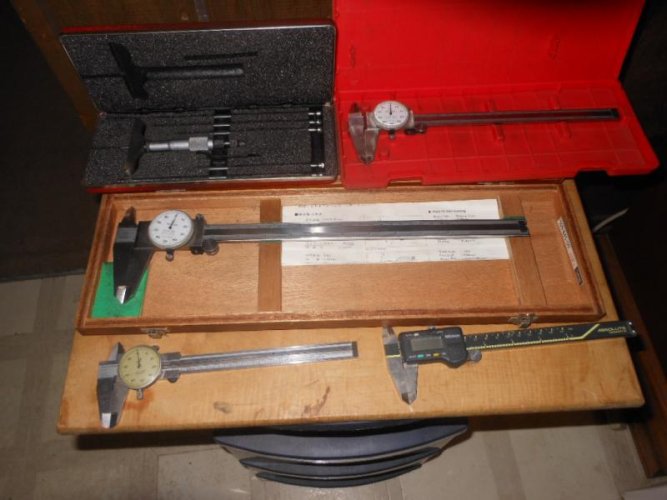
Picture 1320.jpg
These tools are used to measure accurately things like shims. 3 dial calipers, 1 digital caliper and 1 depth micrometer. I think the digital caliper is good to 0.0005 . The others are good to 0.001. There are more accurate vernier depth and standard micrometers that are accurate to 0.0001. They have another vernier on the barrel for this degree of mearure. All of these are over 20 years old.
 
Depth micrometer

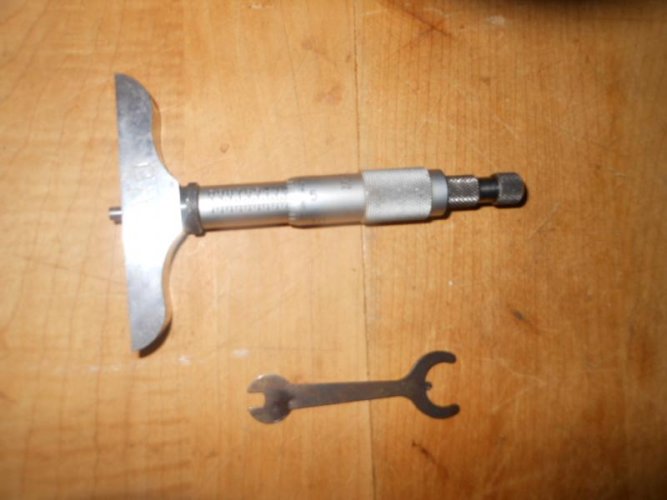
Picture 1321.jpg
Also showing the tool to adjust the micromter to 0.001. Set the tool on a special ground surface plate/ granite plate to set adjustment. I don't have access to either, so I use my precision angle plate or 1,2,3 block. Nice tool to use getting measurements in blind holes.
 
Dial indicators

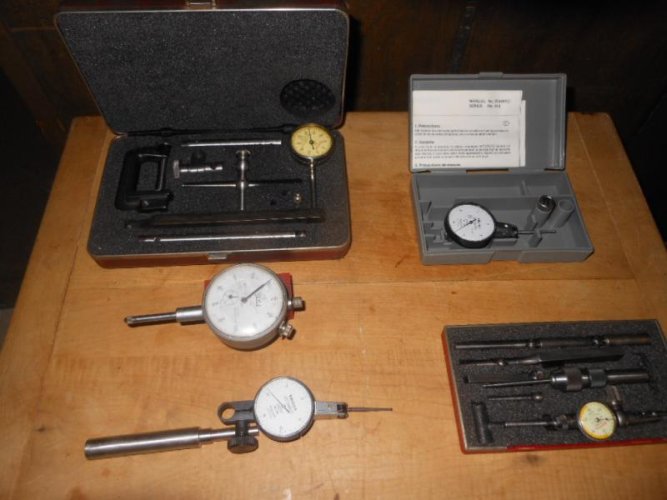
Picture 1322.jpg
Very accurate tools, used in many applications. Set up work on the bench, lathe, mills. Endless aplications in the machine shop, job shop, engine building, head work. Good tool.
 
More Accurate Measureing Devices

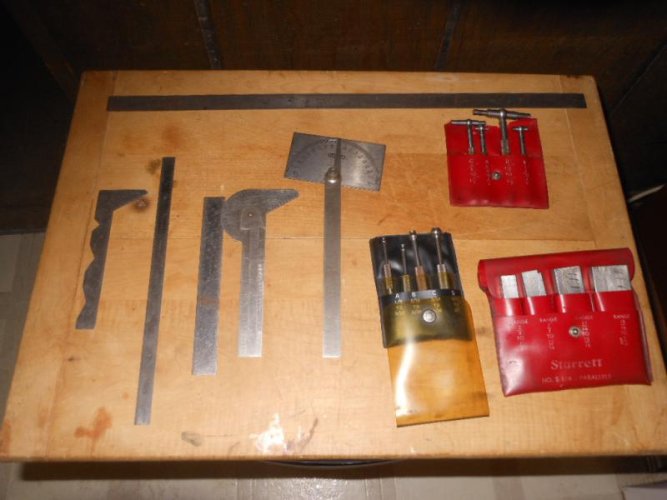
Picture 1323.jpg
Scales, angle finder, small hole gauge, telescopic hole gauge, adjustable parallels. Used all these in machine shops, tool and die shops, and automotive machine shops.
 
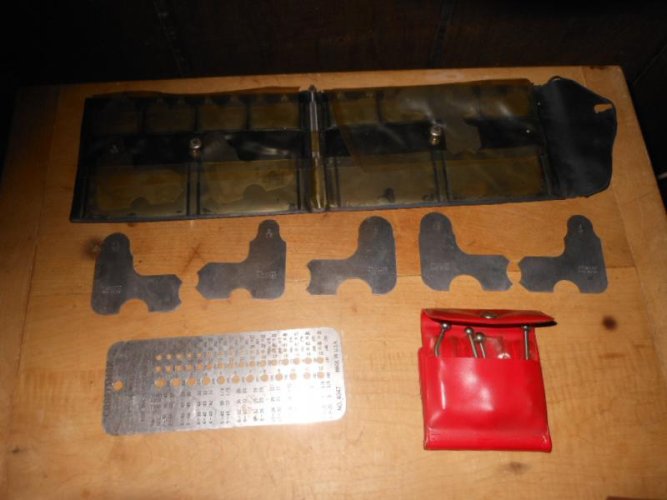
More gauges

Picture 1326.jpg
It's endless. Gauges for every thing. These are radius gauges. drill and wire gauge Radius finder
 
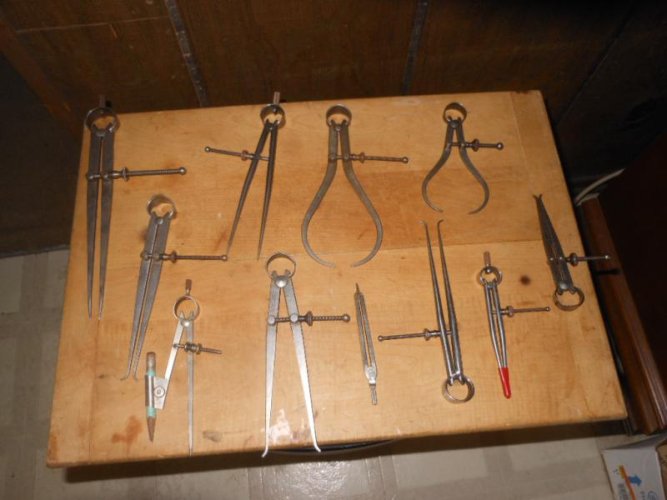
Picture 1357.jpg
Inside and outside calipers. Radius scribes Inside and outside calipers. Measuring devices. Primitive tools that are very useful in a machine shop
 
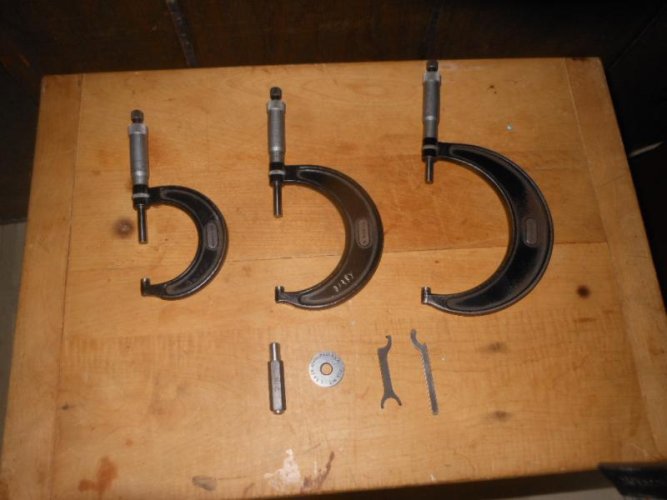
Picture 1363.jpg
Several micrometers. Also examples of standards. These are precise machined tools that are used to zero out your micrometers. A good set of micrometers will come with a standard for each size to zero out your mike's. 2 different types shown. Also shown are the wrenches that adust the micrometer to 0.000. The true name for micrometer is micrometer caliper, but I don't know anyone who uses that term.
 
Yes measuring parts can be a little frustrating. When you have the proper tools and their properly calibated. Piece a cake. :thumb
 
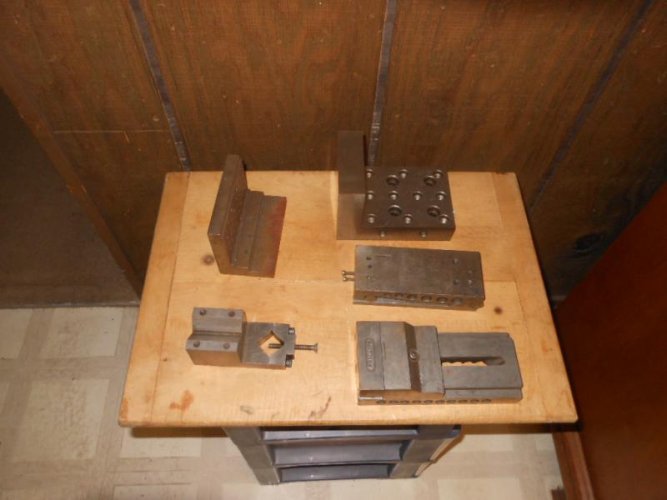
Precision Tool&Die Tools

Picture 1393.jpg
These tools are used in tool and die shops. They are also used in machine shops, engine building and automotive head shops. These tools are very precise and are used in jobs that require holding very close tolerances. Used extensively with surface grinders, lathes and mills. I did this work for over 25 years in various shops. The 6 inch sine plate and precision vise and smaller angle plate and vblock were made by my father in the early late 50's and early 60's. I used them myself. Brings back a lot of memories. There you go GTRider. Glad this come up, I got to go out and get some more out. They all need to be cleaned and oiled.
 
Hijack alert: I ordered 3 shims online and received 4. The 4th one was very thick and on inspection, it is two very solidly stuck together. I have no idea how they got stuck-rust? or why they sent it.
 
Back
Top