• Welcome, Guest! We hope you enjoy the excellent technical knowledge, event information and discussions that the BMW MOA forum provides. Some forum content will be hidden from you if you remain logged out. If you want to view all content, please click the 'Log in' button above and enter your BMW MOA username and password.

    If you are not an MOA member, why not take the time to join the club, so you can enjoy posting on the forum, the BMW Owners News magazine, and all of the discounts and benefits the BMW MOA offers?

  • Beginning April 1st, and running through April 30th, there is a new 2024 BMW MOA Election discussion area within The Club section of the forum. Within this forum area is also a sticky post that provides the ground rules for participating in the Election forum area. Also, the candidates statements are provided. Please read before joining the conversation, because the rules are very specific to maintain civility.

    The Election forum is here: Election Forum

What Homemade Accessories, Gear, Tools, Improvements, Clothing Have You Made ?

Homemade

Make your own package/luggage straps from 1" wide thin nylon strap material and inexpensive plastic ends in custom lengths to suit. One end is fixed and the other is adjustable. Minimal (hand) sewing required and these straps will cinch tight and hold tight and never loosen. Lightly secure the strap after the plastic cinch. Make them long and cut off later.
Plastic ends are 50 cents +- (get the best you can find) and strap material is cheap per foot.
Both straps and ends are available at good hiking/outdoor equipment stores and maybe good hardware stores.
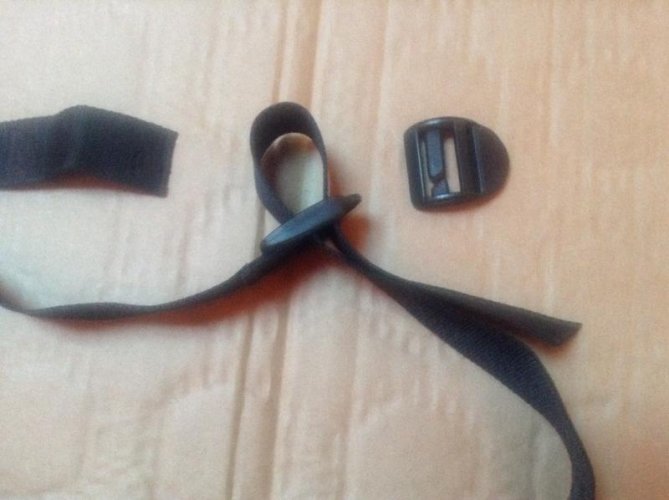
image.jpg
 
A tool for removing the front axle on a 1200GS. It's just a bolt with a 22mm head and two nuts. Use some Loctite and jam the nuts together. Cost, about $1.

That is very elegant! It is much simpler than steel hex stock welded to an old 10 mm socket that I put together.
 
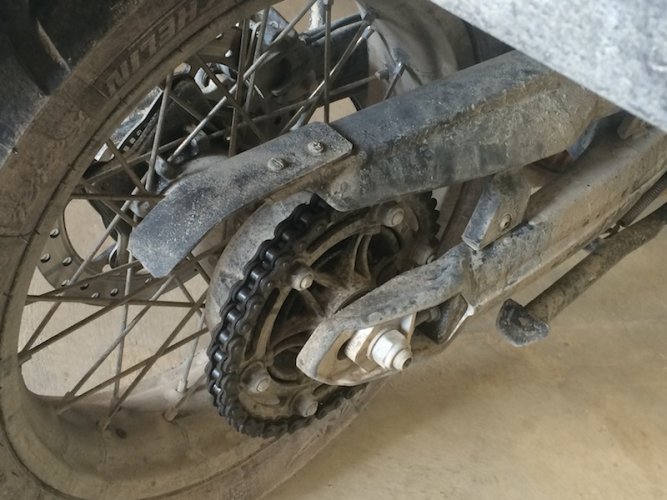
Extended the chain guard on Annie's new F800GS. I used the heavy rubber from an old aftermarket mud flap; cut it to size, and then heated it with a heat gun and rolled it on a piece of pipe to give it the curl I wanted. It greatly reduces the amount of goop that gets thrown up on the luggage and rear of the bike. Next time I might even use matching screws to afix it.
 

Attachments

  • IMG_1445.jpg
    IMG_1445.jpg
    146.2 KB · Views: 1,738
Homemade

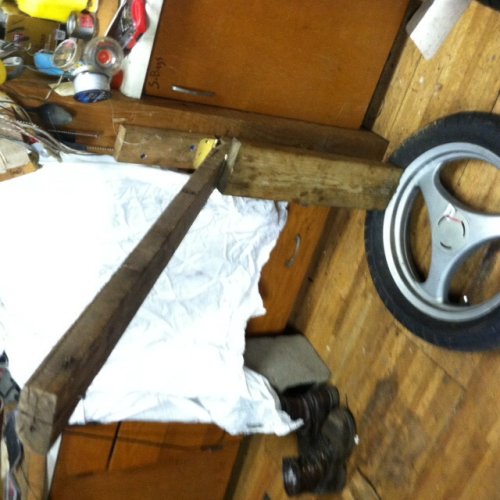
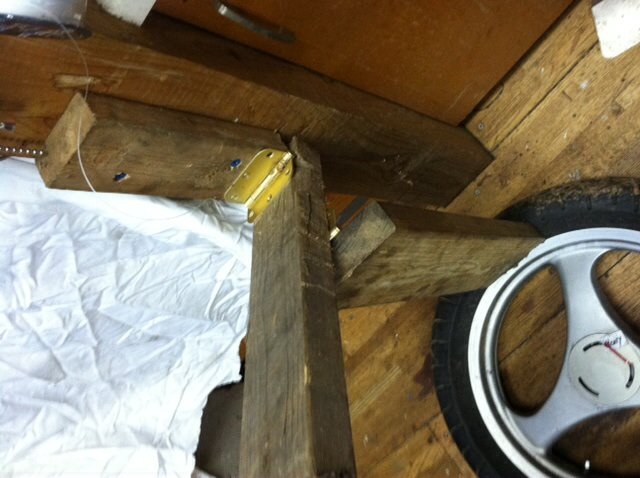
Bead breaker made out of used wood (2x4's and 2x6) and used hinges. Cut 45 degree angle on 2x6 that pushes on the bead, but the jury is still out on whether it helps. In stored position it only takes up 6"x6"x6'. This prototype works fine, but lever could be stronger than spruce as in pine or metal.
Its on "the list" to change levers one day.

image.jpg

image.jpg
 
A tool for removing the front axle on a 1200GS. It's just a bolt with a 22mm head and two nuts. Use some Loctite and jam the nuts together. Cost, about $1.


I had a friend cut down a spark plug socket to use as a front axle tool.

axle_tool_3.JPG


axle_tool_2.JPG
 
When I changed out the fuel quick disconnects I saved one of the plastic ends to make an easy and clean way to drain the tank.


IMG_0095.jpg
 
I made a sidestand plate out of a piece of 1/8" aluminum, just three bolts around the edge with the washers and nuts overlapping the original stand on top. It's been on for 20.00km, works great and didn't involve mutilating my R1200RT.:)
 
Camping rack for two up

Greeting
We like to camp. The RT top case was not designed for camp gear. The the top case alone weighs a little over 22lbs and holds just 22lbs. I replaced the top case with a camping rack made of scrap Kydex. It may not be pretty but it works better than tying everything around the side cases and top case. The rack and hardware weighs around 5lbs, the yellow bag contains all of our camp gear and weights about 40lbs. The RT weights 700lbs fully fueled with all of our gear and clothes for 2 weeks.
<a href="https://www.flickr.com/photos/126708686@N04/14939754687" title="Jet and I by benton motocamper, on Flickr"><img src="https://farm6.staticflickr.com/5580/14939754687_bfff3df6b0.jpg" width="500" height="281" alt="Jet and I"></a>
The rack with out gear. The bed is 13"x26" back rest is 12"x13" The strip in the center is a stiffener, helps when bag is not in use. The 1/4" 20 screw sticking up are for mounting. It take about one beer to mount the rack.
<a href="https://www.flickr.com/photos/126708686@N04/14939674359" title="rack 2 by benton motocamper, on Flickr"><img src="https://farm6.staticflickr.com/5574/14939674359_0375cb2e94.jpg" width="500" height="281" alt="rack 2"></a>
The underside mounting bars are 1"x1/4" AL drilled and tapped for 1/4" 20. We have about 40,000 miles on the rack and it has never loosened.<a href="https://www.flickr.com/photos/126708686@N04/15123383661" title="IMG_0002 by benton motocamper, on Flickr"><img src="https://farm6.staticflickr.com/5581/15123383661_21c0a9afeb.jpg" width="500" height="281" alt="IMG_0002"></a>
Underside mounted view.
<a href="https://www.flickr.com/photos/126708686@N04/15126380925" title="IMG_0015 by benton motocamper, on Flickr"><img src="https://farm4.staticflickr.com/3839/15126380925_063ac78d22.jpg" width="500" height="281" alt="IMG_0015"></a>
Side view the center strip is only glued on the bottom.
<a href="https://www.flickr.com/photos/126708686@N04/14939760288" title="side by benton motocamper, on Flickr"><img src="https://farm6.staticflickr.com/5579/14939760288_9b14ebbc0c.jpg" width="500" height="281" alt="side"></a>
Front view to give you an idea of the width.
<a href="https://www.flickr.com/photos/126708686@N04/14939680570" title="IMG_0029 by benton motocamper, on Flickr"><img src="https://farm4.staticflickr.com/3874/14939680570_3e9bbee745.jpg" width="281" height="500" alt="IMG_0029"></a>
Tony
 
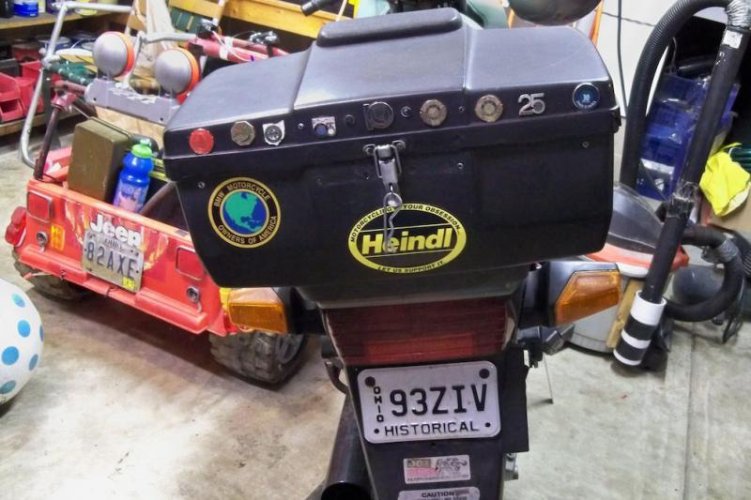
Reversed the hinges and Home Depot to the rescue for the latch on the 22L top box
 

Attachments

  • topbox.jpg
    topbox.jpg
    68 KB · Views: 1,457
My voltmeter made from components. This is one non-bling item more owners should have considering the short lived batteries we read about on forums.

014%20-%20Datel%20Meter%20-%20Mounted%201-L.jpg
 
I'll see that with my Miller 211 MIG and Bendpak 4 post lift and raise you a Kendon motorcycle lift table plus a 20 ton hydraulic press. :laugh

MIG...thats for production work. TIG is the pinnacle of welding. And you can't readily take a wheel off with a 4 post lift; they are good for storing one car over another though.

I was looking at the Miller Dynasty 200 DX TIG, but they are grossly overpriced considering they are no longer fully made in the US.

By the way, I am looking for a full size media blast cabinet, one that I can easily put a car wheel rim or motorcycle frame in. Any particular brands? I already have one hell of a compressor to run it.
 
Last edited:
MIG...thats for production work. TIG is the pinnacle of welding. And you can't readily take a wheel off with a 4 post lift; they are good for storing one car over another though.

I was looking at the Miller Dynasty 200 DX TIG, but they are grossly overpriced considering they are no longer fully made in the US.

By the way, I am looking for a full size media blast cabinet, one that I can easily put a car wheel rim or motorcycle frame in. Any particular brands? I already have one hell of a compressor to run it.

Perhaps some day I will look at getting a TIG, but for my needs, the MIG is well suited (I also have an oxy/acetylene setup that sees little use).

I always hated two post lifts (unless they were in ground columns) since the posts are always in the way to get in or out of the vehicle. I do use my lift mainly to park on so it is perfect for my needs and I seldom remove wheels from cars anyway and with in floor radiant heating, bolting down a two poster isn't in the cards. I can always invest in the jacks for the lift should I find the need. After years as a mechanic, working on cars has lost its thrill so we drive vehicles that don't require much attention, bikes on the other hand are still fun to tinker with.

Don't know what to recommend for the media cabinet, I just have a little bench top unit that I use for smaller items, for bigger stuff I just head outdoors and use my sandblaster. I too have a BA compressor as those items are air hogs.

I like the volt meter, where did you find the LCD unit? I've only been able to find LED ones which are less aesthetically pleasing.
 
Back
Top