• Welcome, Guest! We hope you enjoy the excellent technical knowledge, event information and discussions that the BMW MOA forum provides. Some forum content will be hidden from you if you remain logged out. If you want to view all content, please click the 'Log in' button above and enter your BMW MOA username and password.

    If you are not an MOA member, why not take the time to join the club, so you can enjoy posting on the forum, the BMW Owners News magazine, and all of the discounts and benefits the BMW MOA offers?

  • Beginning April 1st, and running through April 30th, there is a new 2024 BMW MOA Election discussion area within The Club section of the forum. Within this forum area is also a sticky post that provides the ground rules for participating in the Election forum area. Also, the candidates statements are provided. Please read before joining the conversation, because the rules are very specific to maintain civility.

    The Election forum is here: Election Forum

New member of BMW MOA resurrecting 85 K100RS

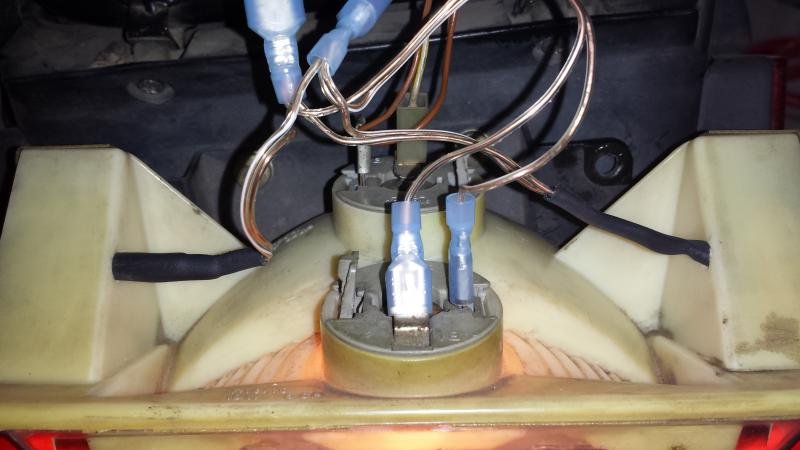
I finally got back to the K. I wired up the new running brake lights. I did this by soldering the 2 leads from the new lights together with a 3rd wire as a pig tail. I crimped a male connector to each set of 3 wires and pluged them into the wires that used to go to power the light. I crimped female connectors to the pig tail and attached them into the light bulb socket.
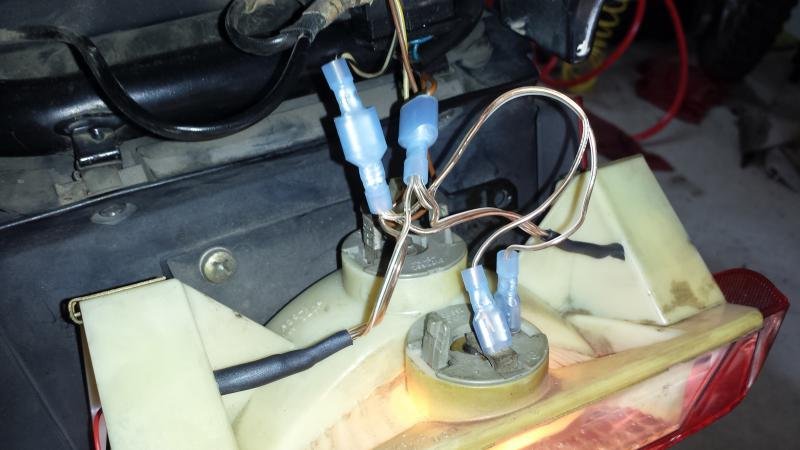
20140408_093007.jpg
20140408_093046.jpg
I really like the way they look and I think I am more visible with the light cluster like it is now. I think I will start looking for some strip lights to add to the brakeing light.
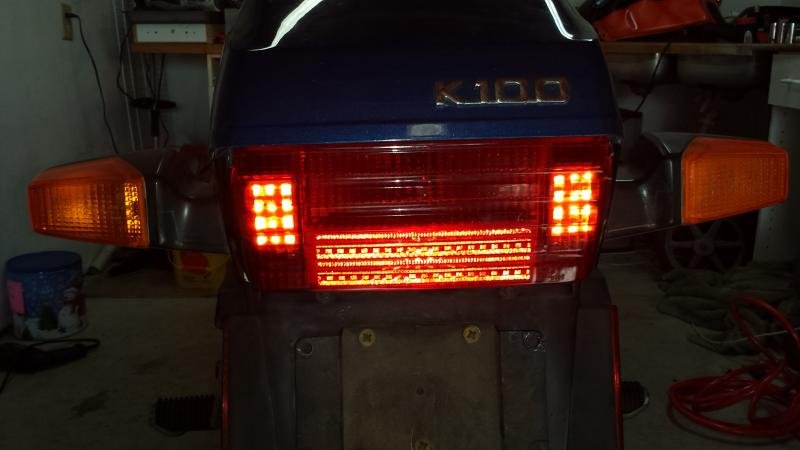
20140408_093234.jpg

I had some time so I got the rear diff oil changed and the engine oil. I still need to do the trany, maby tomorrow but it is supposed to be 70 up here in da nort so I might be riding one of my other bikes.

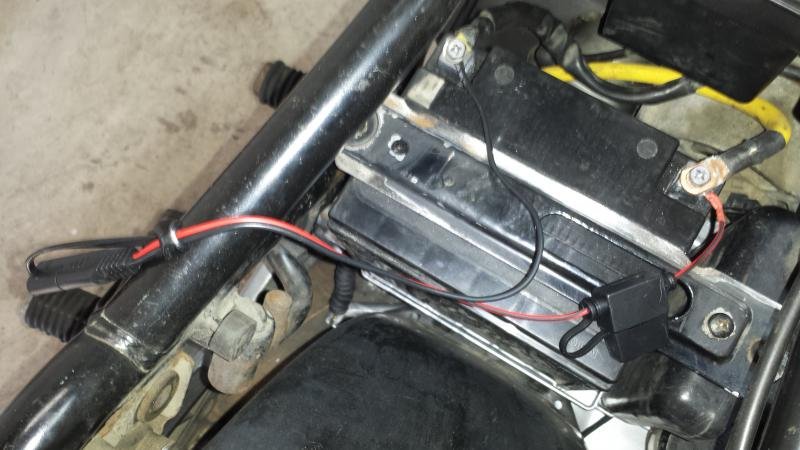
I also got the power cord for my battery tender installed and mounted. So now I wont have to pull it next winter.
 
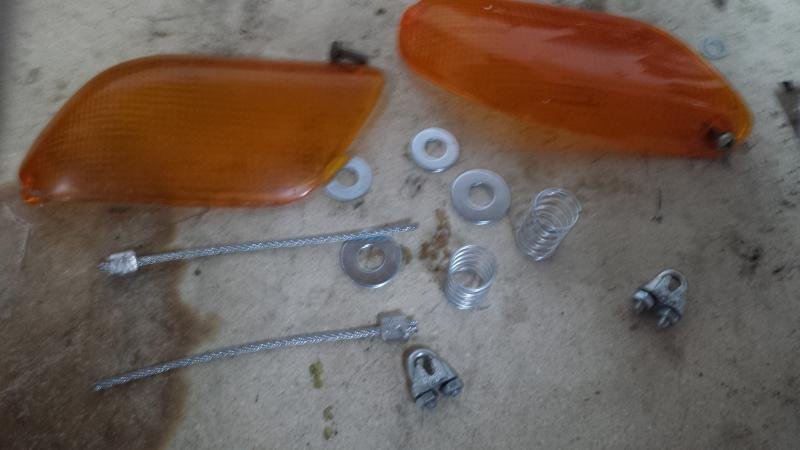
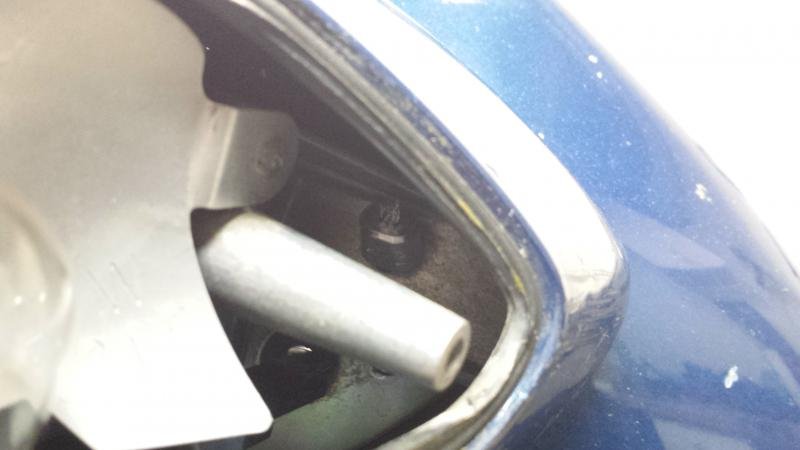
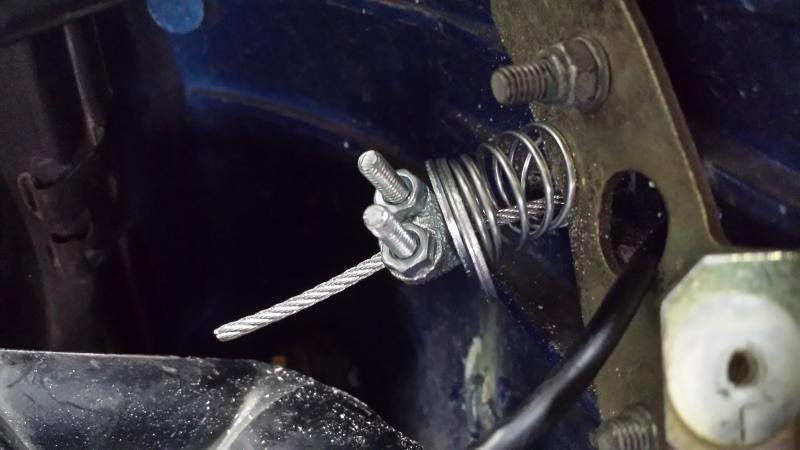
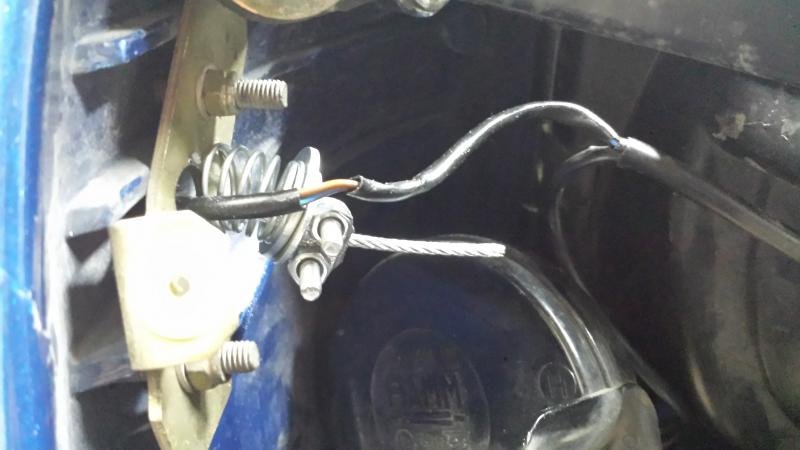
I have been away from the project for some time now and I finally got the time to get some final things done. I filled and checked all the fluids and made sure there was new lube in the diff, trany, and engine. I also filled up the anti-freeze so I know that at least that has new stuff. I have been thinking about the problem with the rear view mirror falling off with a good jolt is I have engineered what I hope will be a viable solution. On my snowmobiles they mount the rear view mirrors with a threaded rod and spring on the back side so if you hit something it lets the mirror lay back against the hood and all you have to do is snap it back upright and it goes back in place. I figure this should work on the bike as well. I drilled a hole in the thickest part of the mirror housing and I put a cable through it. I also drilled a hole through the mount. On the back side I put a spring, washer and cable clamp. Here are all the parts I used.
20140502_131525.jpg
20140502_132354.jpg
I got it all at the local hardware store and I think I spent 5 bucks in all. The end of the cable is secured with a cable crimp and you just hammer it tight then I used a screw driver to make sure it was clamping well.
20140502_132415.jpg
 
20140502_132849.jpg
I used springs that are not the stiffest so they should have some give in them and not brake the mirror if it gets hit. I think it should work great. Now I will be taking the bike out side for the first time and firing it up so keep you fingers crossed it starts. I will also be syncing the throttle bodies.
I also got the seat mounted, not so sure I like it but time will tell if I go back to the stock one of keep this corbin on the bike.
 
It lives, I just got took it outside and after a few moments of cranking it fired right to life. It sounds great and it didn't require much choke at all and no choke a few minutes after that. I synced the throttle bodies and the thing idles like a champ. I did notice that when you rev it up a little the levels are not even. Has anyone ever messed with the butterflies at higher rpm's? I usually sync my jap bikes at idle then rev them up to 5000 and resync them there since thats where They run on the highway. One thing that has changed is the bike is not charging and it did before I tore it down. Any suggestions where I should start to fix that problem? I do not have the gauges on the bike yet. My father just got home and I will be calibrating the spedo on monday. I will post the link to the youtube video of the 2nd start later tonight.
 
It needs the battery light from the cluster to charge. It is a part of the charging circuit. If you plug the cluster it will charge
 
Well you guys were correct. All I had to do was plug in the gauge cluster and since I used LED bulbs I have to rev it up to around 2500 and the charge light goes out. I am a little concerned at how it charges though, at idle it is only putting out 12.9 volts and 13.9 when the RPM's are above 2000. Do I need to put a new regulator in it or new brushes? Other than that I did find that the ignition is a little flaky. I have to turn the key just right so the lights are on brightly or the bike does not want to start. Once its in the right spot it fires right up with no problems. So I will be getting a new ignition in the near future.

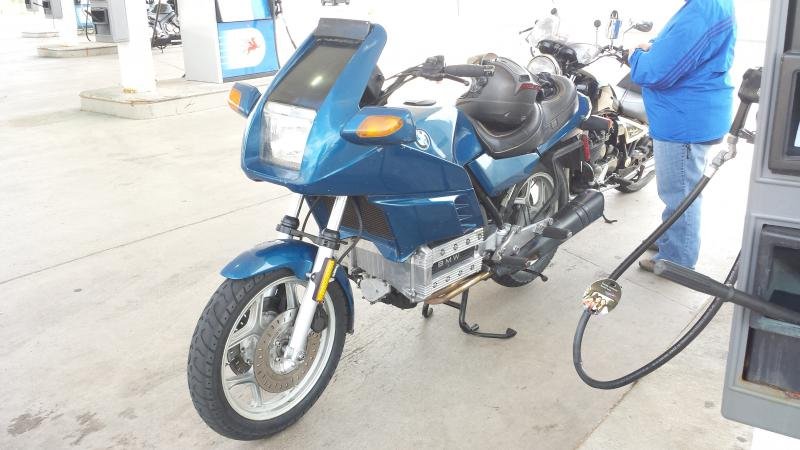
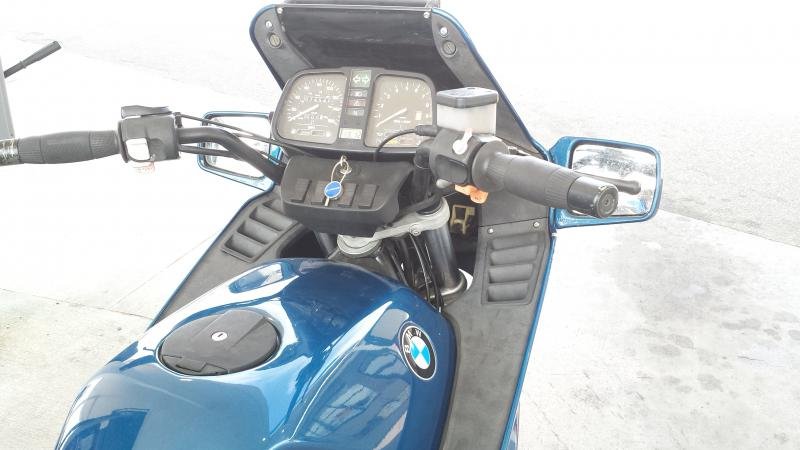
I got it all put together and took it out for it's maiden ride. I have to tell you it is very very nice ride. With the progressive springs in the front and progressive shock on the rear it rides like my friends new Harley. It holds the road very nicely and corners very well. I have also installed a fork brace so that might help it handle better than stock. I did notice that it is a little buzzy but I really think that that could be addressed if I set all those compensation screws the same and adjust the butterfly valves. When I synced the throttle bodies I did notice that they are not all even at around 5000 rpm so I am assuming that that is the cause of some of the buzz. But I will be putting some miles on the bike before I mess with it any further. I am very pleased with how the bike turned out and I do appreciate all the help I have received from members on this forum. Next will be to see how far off the spedo is and deal with a flaky LED in the cluster. So here are some pictures of the first ride. I did decide that I will definitely be looking for a different seat. I really do not like the way this one holds me put and I can't move around at all. I will also be looking for some highway pegs.

20140524_131227.jpg
20140524_131218.jpg
 
Unless you are planning on riding it a 1000rpm, the alternator is working fine.

Do NOT buy a new ignition switch. Disassemble and CLEAN it. http://www.eilenberger.net/K75S/IgnitionSwitch/index.html


All K100s are a little (or a lot) buzzy. Do NOT touch the linkage between the throttlebodies, ONLY adjust the large brass bypass screws at the base of each throttle and the one idle screw that has a hex head. Don't forget to recheck the throttle position switch after any adjustments.

Looks GREAT!!!!


:dance:dance:dance
 
Thanks and thanks for the tutorial. I will have to get right on that when I get home, I just wished I had done this before I put the tank on. Would have been much easier to take care of then. Hopefully that will be the last thing I need to take apart this year. Now I just want to ride and enjoy this bike.
 
As 98Lee says, '85's are all a little, or more likely a LOT, buzzy. Sort of the nature of the '85. Mine seemed to be one of the smoother ones and still it was quite buzzy compared to my '03 1100RS and the '00 1200RS. But I certainly rode bikes that were way more buzzy. Bar end weights help, for the passenger pegs, many of us installed after market aluminum brackets that put the passenger feet higher and farther forward. Stock position does not allow the passenger to use their legs for leverage on stops and they are REALLY buzzy. To ease the buzz for my wife, we wrapped those pegs with pipe insulation and duct tape (it actually was difficult for others to see unless stopped and we were off the bike....).

Your project bike looks great! All that work has really paid off. Sweet!:D
 
I guess I will just have to learn to live(love) the buzziness then. I didn't feel any of it in my feet. I felt it in the bars and my butt. At least the mirrors were steady and I was planning on getting some bar end weights. I can't seem to get the left bar end off though. I turn and turn while pulling and pushing and it just wont unscrew so I might just drill the head off that screw and pull it that way. I have also been looking for a mechanical cruise control to install on it. I am planning on riding it to Sturgis this year and a cruise would be great, now that I have figured out how to get them off with out breaking the handles.

This forum has been most helpful and you are a great bunch of guys. Thanks for all your help and support on this project. I hope to see some of you at the international rally this summer. It is right in my back yard.
 
Bruce,

You may want to check if those washers between the shock and nut are supposed to be there.

I have a Progressive 465 shock and it's designed to pivot a little at the mounting points. I can grab the shock with my hand in the middle and easily swivel it a few degrees in either direction. A washer would prevent that movement.

View attachment 43592
 
I have also been looking for a mechanical cruise control to install on it. I am planning on riding it to Sturgis this year and a cruise would be great,

The best mechanical "cruise control" for an early brick is the factory optional throttle screw.

It is a spring loaded, nylon tipped screw that screws into a factory drilled hole on the bottom of the throttle perch. From the factory, this hole had a plastic plug in the hole. The nylon tip puts drag on the throttle tube. Tighten it until the throttle does not return and leave it that way. No need to release it. The nylon contact allows the throttle to be used as normal with no increase in effort, yet when you let go of the throttle, it stays where it is. About once a year or two you might have to snug it up a bit to compensate for wear on the nylon tip. Works great with my carpel tunnel in my right hand.

And you can't beat the price!

32 72 1 454 414 LOCKING BOLT $9.30


:dance:dance:dance
 
Bruce,

You may want to check if those washers between the shock and nut are supposed to be there.

I have a Progressive 465 shock and it's designed to pivot a little at the mounting points. I can grab the shock with my hand in the middle and easily swivel it a few degrees in either direction. A washer would prevent that movement.

View attachment 43592

Tim,

That is a 412 shock. It has a rubber bushing in the shock end as opposed to the spherical rod end of the 465. The washer is correct for the 412.


:dance:dance:dance
 
Thanks for the information, I remember from installing the controls back on my bike that there was a screw on the bottom already so I am thinking that a criuse might already be installed. I did notice that the throttle turns but feels a little draggy. I did get a new one ordered just this morning though. No sence in
using one of questionable age when they are so inexpensive.

I did check the shock before I installed it on my bike with progressive. It is a cheaper modle but it is installed correctly with the washers. I also checked it for freedom on movement and it moves as it should. I really like the combination of progressives up front and in the rear. Nice and compliant and I do not bottom out under hard braking. I have decided to build my own stainless brake lines. Should cost me around $100 for all the parts I need. I have only put 30 miles on it to date so I have a little time to get this done.

One thing I did notice is that the tach makes some noise when it is at idle. So I guess I will have to pull the gagues apart again and make sure everything is seated properly and one of the LED's is not working unless I squeeze the gauge case together.
 
The throttle screw is adjustable. Ideally, you want to tighten it until the throttle stays wherever you put it. The drag while rolling on or off the throttle should not be noticeable.
They would take forever to wear out, but the do need tightening every year or two.

Make SURE you use TEFLON LINED stainless lines. It's not the stainless that makes the brake lines less flexible, it's the teflon lining. Neoprene lined stainless lines will not handle the pressure and will flex worse than the stock lines. But, you knew that, right?


:dance:dance:dance
 
Ha of course I did..........not. The lines I am looking at are rated for a max pressure of 3500 psi so I figured that should be sufficient. I found a supplier on another forum. I will get the name and put it here for those who are interested in building their own set and saving a bunch of cash.
 
new member resurecting 85 k100rs

welcome aboard to bmwmoa. looks like quite the project you have there. looking good
 
Ha of course I did..........not. The lines I am looking at are rated for a max pressure of 3500 psi so I figured that should be sufficient. I found a supplier on another forum. I will get the name and put it here for those who are interested in building their own set and saving a bunch of cash.

If they are rated at 3500psi, they are indeed teflon lined.:thumb


:dance:dance:dance
 
I was finally able to put some miles on the bike today. Took it for a 150 miles round trip to go have root beer floats with my girlfriend and it ran like a top. Yesterday we rode over to my house and she finally rode her new to her suzuki GS1000 home. I spent the last 9 months building that bike from the frame up for her.

I did clean the ignition switch this morning and even though it did not appear dirty, I have not had a problem with it hard starting since. I am no vacation for the next week or so so I will be riding it as much as I can.

I did see some oil drips on the bottom of the engine so I cleaned those up and I will see where it is coming from. I do not know how long the bike sat so some of the seals might be a little dry, and I need to adjust the clutch a little. I know realize the on this bike it is looking for the hazard switch which I did not install and the light on the gauges stays on for a little while. Annoying but not worth pulling the tank and hooking it up.

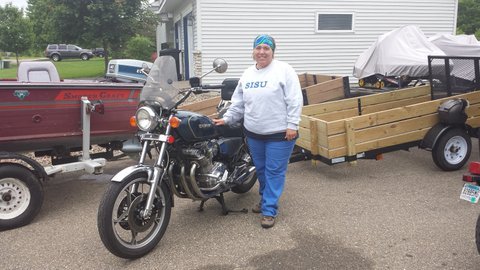
Here is the girlfriend with her new ride.
20140609_135014.JPG
 
Last edited:
Back
Top