• Welcome, Guest! We hope you enjoy the excellent technical knowledge, event information and discussions that the BMW MOA forum provides. Some forum content will be hidden from you if you remain logged out. If you want to view all content, please click the 'Log in' button above and enter your BMW MOA username and password.

    If you are not an MOA member, why not take the time to join the club, so you can enjoy posting on the forum, the BMW Owners News magazine, and all of the discounts and benefits the BMW MOA offers?

  • Beginning April 1st, and running through April 30th, there is a new 2024 BMW MOA Election discussion area within The Club section of the forum. Within this forum area is also a sticky post that provides the ground rules for participating in the Election forum area. Also, the candidates statements are provided. Please read before joining the conversation, because the rules are very specific to maintain civility.

    The Election forum is here: Election Forum

96 r1100r failed input shaft splines ?

If you don't have one of these do yourself a favour and head over to Harbour Freight and pick one up. http://www.harborfreight.com/micro-torch-60645.html
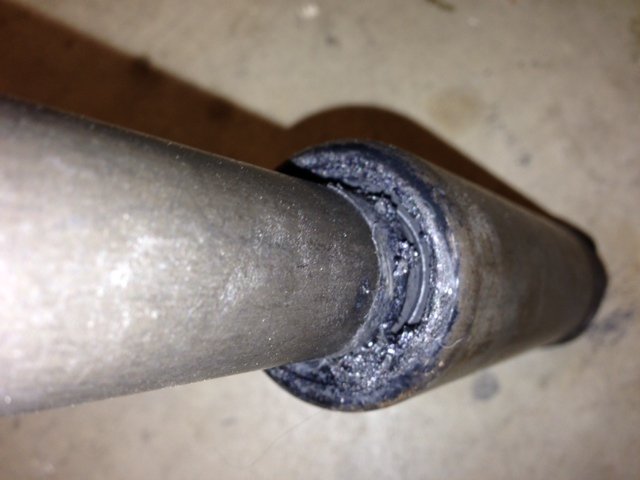
They work much better than a heat gun for pin point heating and are refillable with butane. Used to heat any bolts that have loctite on them especially when the area has painted surfaces around the bolts. Heat the center for about 2 minutes. A bit more for larger bolts. This will soften the loctite enough to get them out easily and without galling threads. Do not force the bolts to turn out. Use more heat if they don't turn easily once you get the initial torque off them.

Thanks Happy - Yes I do have one (for creme brulee !) and could try. Could I also use the heat gun with the concentrator tip ? If I do what temperature should I set the heat gun on ? Maximum ?
 
Problem with a heat gun there is the painted surface on the drive shaft tunnel all around your work area. I like the torch best. Accurate and concentrated heat from the center out. Just what you want.
 
Looking good... Need to keep going

Well the final drive is now off.:dance

FYI - I tried to use the torch but had trouble getting things hot enough. Perhaps mine is too weak. Used Ryobi $49 heat gun with concentrator tip and at full power. Still had to heat the pins much more than expected to get them loose without too much effort. Perhaps 5min at close range aiming at center of pins. Everything was real toasty.

Everything inside looks pretty good (unfortunately because it means I am not done yet). Splines look good on final drive and on the U-joint. U-joint itself is fine. Outer splines on U-joint and lower driveshaft are good.
As you can see in photos below I also have the JL paralever bronze bushings installed on this bike. Lube looked a bit messy and there was a neat pile of congealed "gunk" sitting at the bottom of the swing arm.

When I put the U-joint back on the shaft it feels fine. With some force I can still rotate the drive shaft (bike in gear) therefore the issue is further up the drive shaft. It does not make much noise when I turn it - it now does feel like a broken bond on the rubber of the upper driveshaft.
I guess I just need to keep going ! That will be for next weekend, however...

Any comments or questions based on the photos below ? Any input or comment appreciated. Thanks again for all the help. I am learning a lot !
Photo 1: General view into the swingarm after removing final drive. Notice the lube gunk.
Photo 2: Universal joint upper splines that fit into drive shaft
Photo 3: Close-up of lower driveshaft splines
 

Attachments

  • Image 1.jpg
    Image 1.jpg
    91.1 KB · Views: 140
  • Image 2.jpg
    Image 2.jpg
    80.8 KB · Views: 141
  • Image 3.jpg
    Image 3.jpg
    75.9 KB · Views: 140
Last edited:
More photos

3 more photos.
Photo 1: U-joint lower splines that mate to final drive
Photo 2: Left and right pivot pins immediately after removal (these have aftermarket JL paralever bronze bushings installed).
Photo 3: Final drive shaft splines

Any advice on how to most easily remove the drive shaft would be greatly appreciated. I will follow my Clymer manual as my main guide.

One thing that worries me is the amount of oil that I found in the lower rubber boot. About 2-3 tablespoons. Smells the same as the oil I drained from the final drive. Is that something I should worry about ? Did it come from the FD or could it have come from the transmission ? :scratch
 

Attachments

  • Image 6.jpg
    Image 6.jpg
    78.3 KB · Views: 140
  • Image 7.jpg
    Image 7.jpg
    83.6 KB · Views: 140
  • Image 8.jpg
    Image 8.jpg
    87.8 KB · Views: 140
Last edited:
Just remove the swingarm - same procedure for the pivots as for the final drive pivots. Get a bigger torch. I use the screw-on type for a 14.3 oz long skinny propane bottle with the flame directed directly into the hex sockets on the fixed and movable pivot pins.

Then pop the driveshaft off the transmission output shaft. It is spring clipped on a groove in the shaft so a little prying will be needed.
 
If the rubber bond is broken you can see it. Look of the swingarm while turning the back half of the shaft. Look at the inner tube and outer tube on the front hakf of the shaft. You will see the inner splined tube turning and probably see the outer (larger) tube not turning. Broken bond confirmed.
 
Just wondering, since I'm at a similar point with my 04 R1150RT, can you remove the swing arm without removing the final drive first? (i.e with the final drive yet attached)
 
Just wondering, since I'm at a similar point with my 04 R1150RT, can you remove the swing arm without removing the final drive first? (i.e with the final drive yet attached)

Yes, BUT you can't put it back together. You will never get the two halves of the driveshaft back together with the final drive on the swingarm. The other problem is that with the parts together off the bike, holding things in place applying enough torque to remove the pivot pins would be very difficult.

I would not recommend this approach. It will be a lot more work in the long run.

Thank you Paul. Probably best to take a look at the U-joint anyway ..right? I believe they are recommended to be replaced at 40K? and I'm at 38K
 
If the rubber bond is broken you can see it. Look of the swingarm while turning the back half of the shaft. Look at the inner tube and outer tube on the front hakf of the shaft. You will see the inner splined tube turning and probably see the outer (larger) tube not turning. Broken bond confirmed.

Thanks Paul. You mean I can do this before I remove the swing arm ? Sorry I am traveling right now so cannot take a look immediately to confirm.
 
Jackpot !

If the rubber bond is broken you can see it. Look of the swingarm while turning the back half of the shaft. Look at the inner tube and outer tube on the front hakf of the shaft. You will see the inner splined tube turning and probably see the outer (larger) tube not turning. Broken bond confirmed.

Back home. Indeed a broken shaft bond is now confirmed !! Just need to get it out. Now the question is: where should I get it rebuilt ? Any recommendations appreciated.
 
Thanks to all - done for now.

Well this thread is done for now - Mystery officially solved. Photo below shows drive shaft removed with broken bond. I can rotate the two shaft by hand with some effort, and it makes the same sound first heard after the failure. :thumb

Thanks to all for the great encouragement and help - I would not and could not have done it without you - and now I kinda like it ! :)

I will now be looking for a good used part - or perhaps buy new if needed.
Will start a new thread if I need help putting things back together - I'm sure I will.

In the meantime I will clean the bike really well since I can now get into every nook and cranny...

Thanks !! :wave
 

Attachments

  • shaft.JPG
    shaft.JPG
    81.1 KB · Views: 88
Final update - All done !

Just wanted to thank everyone again for helping me with this. Just took the bike around the block after finally reinstalling the muffler with new hardware - the last step in my driveshaft replacement :dance - bike felt like its old self again - awesome !
Ended up buying a used driveshaft in great shape from the PartsHaus in LA.
All in all learned tons about my bike and how to do these repairs - it took me a long time but was really worth it. You were all correct - a great DYI opportunity. Thanks again for the encouragements and input !!!!
 
Back
Top