• Welcome, Guest! We hope you enjoy the excellent technical knowledge, event information and discussions that the BMW MOA forum provides. Some forum content will be hidden from you if you remain logged out. If you want to view all content, please click the 'Log in' button above and enter your BMW MOA username and password.

    If you are not an MOA member, why not take the time to join the club, so you can enjoy posting on the forum, the BMW Owners News magazine, and all of the discounts and benefits the BMW MOA offers?

  • Beginning April 1st, and running through April 30th, there is a new 2024 BMW MOA Election discussion area within The Club section of the forum. Within this forum area is also a sticky post that provides the ground rules for participating in the Election forum area. Also, the candidates statements are provided. Please read before joining the conversation, because the rules are very specific to maintain civility.

    The Election forum is here: Election Forum

Front brake caliper rebuild 1978 R100RS

georgej

Member
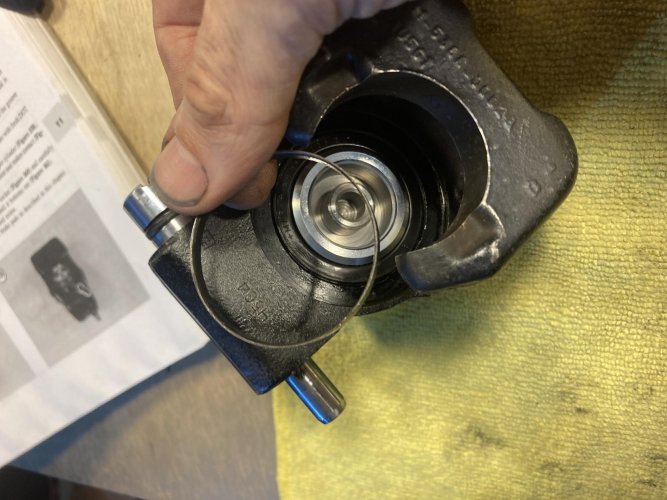
The parts fiches shows two different kits for these. One is $119 per side ,the other $26.95.The lower priced one is for 1980 on,even though the fiches is for 1977-84.Does anyone know why oneis so much more than the other?Was 1980 the year they went to Brembo?I had some brake fluid on the floor in the garage,sdoes the piston usually need. to be replaced with the new seals?
If this id the case I can't believe that little piston and a couple of gaskets can be so expensive.
 
I believe one is with a new piston and one is without. Ted Porter has two kits, broken down this way, also at about the same prices you're suggesting.
 
George,

Believe it...

34 11 2 301 709, ATE 40mm Brake Front Caliper Repair Kit;
1 piston, 1 piston seal, 1 dust seal (Kit).
??$120

Chances are your piston is fine, you'll have to disassemble and inspect. Expect to "possibly" see some pitting on the outer edges of the piston but if any pitting is outside the surface area of the square o-ring you should be able to reuse it. It's possible the leak is coming from the square o-ring which can be obtained in a caliper kit without the piston for much less money.
 
Thanks,
What do I have to do to get at that piston to check it out before I order any parts?I've never changed brake pads on one of these. The extent of my experience with the brakes is bleeding and adjusting the pads so they make even contact with the rotor.I wonder if this job is over my head.
 
George -

Overhauling an ATE brake is probably a 3 wrench out of 5 wrench job. Having one of the manuals such as Haynes or Clymer would probably be a good idea. It's mostly just big parts, and not too many of them. The key things are getting the eccentric pin out to release the caliper and then working the piston out of the bore. Sometimes they come out easy, sometimes you have to use hydraulic pressure or even air to push it out. Need to be careful if using compressed air to ensure that the piston doesn't eject and hurt you or damage something. Beyond that, it's just being clean about it and reverse the disassembly process.

There are a number of rebuild sites that have been archived in the Airheads forum. I quickly found a few that at least have pictures of some of the internal parts of the brakes...no real step-by-step instructions that I could find...maybe there are other sites.

http://forums.bmwmoa.org/showthread.php?t=45498&page=14

http://forums.bmwmoa.org/showthread.php?t=29336&page=9

Post pictures here if you run into trouble will let others provide some additional guidance. Maybe there are other Airheads in the area that could lend a hand?
 
George,

The most difficult part will be getting the piston out and back into the caliper housing bore. To remove the piston you will most likely have to to use compressed air - carefully. Find a small slat of wood to insert into the caliper body in place of the brake pads with some air space. Block the bleeder port and use a compressed air nozzle into the intake port of the caliper. Start with a small amount of pressure to force the piston out. Careful, the piston will have a lot of force and velocity. The wood is to cussion the piston as it is forced out of the caliper bore. Clean everything very well. At this point inspect the piston for any pitting or damage. Remember a small amount of pitting outside the square o-ring contact points might be normal.

Assemble using fresh clean brake fluid. Be sure the interior shoulder that holds the square o-ring is clean with no buildup. Insert the square o-ring lubricated with brake fluid. Carefully insert the lubricated piston by lining it up as parallel as possible inside the square o-ring and caliper bore. Don't force it or use a hammer! It should either fall in or find it's home with moderate thumb pressure. This can be a little frustrating but be patient. You don't want to roll, cut or damage the new square o-ring while inserting the piston. After the piston is in place insert the dust cover carfully on the piston and caliper body. That's basically it for the assembly. The eccentric pin and spring should be well lubricated with brake grease normally included with the kit.

Here's some pictures on my 78 R100/7 caliper. kurt's links may be more helpful.

http://tinyurl.com/7nf7re7
 
One thing that I've learned about the ATE regards the square o-ring that's inserted on the inside diameter of the caliper. I had always wondered what pulled the piston back after you've released the hand lever. I had figured it was the slight imperfection in the running disk that would lightly push the piston back after a few revolutions. Since the brake fluid pressure is off, seems like that would help reduce or remove the drag of the disk on the pads.

Apparently, the real factor is that square o-ring. When the piston is pushed out for braking, the o-ring distorts. Once the hand lever is released, the tendency for the o-ring to undistort itself brings the piston back with it.

Whodda thunk it!!
 
some manufaturers even amke a disc brake assembly lube. This is not that stuff for putting on the pin, or the pads. It is made to lubricate the rubber parts on assembly. girling used to make it, still have a tube of it. Not as messy as using the "wet" fluid and dissolves with brake fluid.
but the key is , to not assemble dry and take your time
anoterh point is , when using copmpressed air, your not just trying to protect yourself, but the piston, if it flies out adn gets a big nick in it, its done
 
Well I got the rebuild kit without the pistons. One piston was good, the other had some pitting. Cleaned it up with some scotchbrite and it looks pretty good.Now the new problem is the bleeding the air out of the lines.Over an hour and nothing. My friend brought his vacuum bleeder over and still can't it. I'm going to order a rebuild kit for the master cylinder.Thanks for all the replies. I will post as the job progresses.
 
Bleed tips

I have had issues with some bikes when using my Mityvac where it was pulling air from around the bleed nipple instead of through the system. I had some very thick grease (seem to recall is was some milspec GRG...) and I put a bead around the base of the nipple and it was thick enough to stop the airleak but not thin enough to get sucked into the system. Have also wrapped a little Teflon tape around the base of the nipple, OUTSIDE the caliper body, NOT on the part of the threads that are engaging the caliper body. Just a thought.
Jim
 
1975 R90/6 front brake caliper "clamping sleeve"?

Hello,

I recently bought a R90/6 and am working through the repair list. What a fun bike to work on (so far).

I am rebuilding the front brake caliper and just installed a new piston ring, dust seal and piston on the 38mm ATE front brake caliper. But there's an extra undocumented part, a metal clamping sleeve that I think is supposed to hold the dust seal in place. This is not shown in the Haynes manual or on the amazing video series produced by Boxer 2Valve.

The new piston + seals are snug. Applying air (carefully!) pushes the piston out, and the seal pulls it back in when the pressure is removed. I'm worried about pressing in the metal sleeve for fear of damaging the new dust seal.

Have any of you encountered this part? Were you able to reseat it in the caliper cylinder, and if so, how? Thanks for your advice.

Scott
 

Attachments

  • IMG_0835.jpg
    IMG_0835.jpg
    272.3 KB · Views: 58
Figured it out

Hello,

The new piston + seals are snug. Applying air (carefully!) pushes the piston out, and the seal pulls it back in when the pressure is removed. I'm worried about pressing in the metal sleeve for fear of damaging the new dust seal.

Have any of you encountered this part? Were you able to reseat it in the caliper cylinder, and if so, how? Thanks for your advice.

Scott

Uh, the sleeve is actually part of the dust seal. :-/ All’s well now…
 
Back
Top