• Welcome, Guest! We hope you enjoy the excellent technical knowledge, event information and discussions that the BMW MOA forum provides. Some forum content will be hidden from you if you remain logged out. If you want to view all content, please click the 'Log in' button above and enter your BMW MOA username and password.

    If you are not an MOA member, why not take the time to join the club, so you can enjoy posting on the forum, the BMW Owners News magazine, and all of the discounts and benefits the BMW MOA offers?

  • Beginning April 1st, and running through April 30th, there is a new 2024 BMW MOA Election discussion area within The Club section of the forum. Within this forum area is also a sticky post that provides the ground rules for participating in the Election forum area. Also, the candidates statements are provided. Please read before joining the conversation, because the rules are very specific to maintain civility.

    The Election forum is here: Election Forum

pushrod seal replacement

dmcbmw356mcn

New member
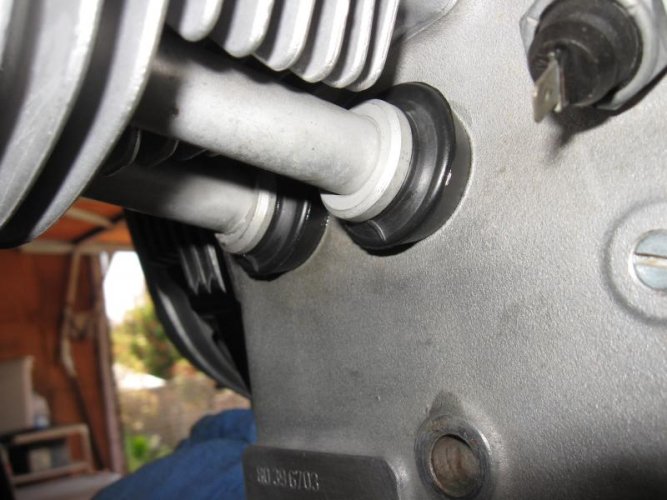
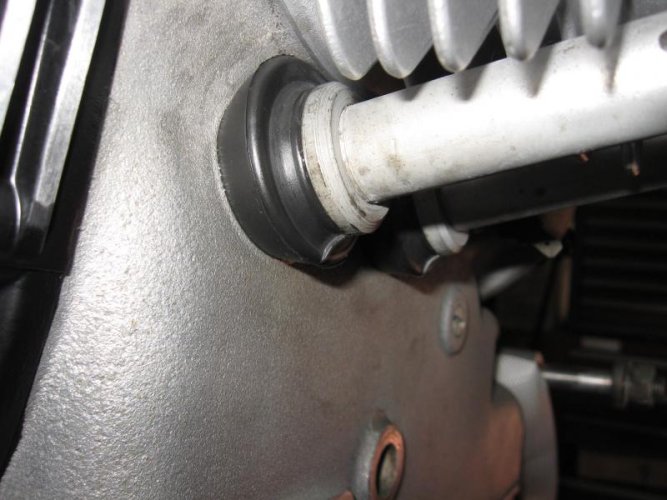
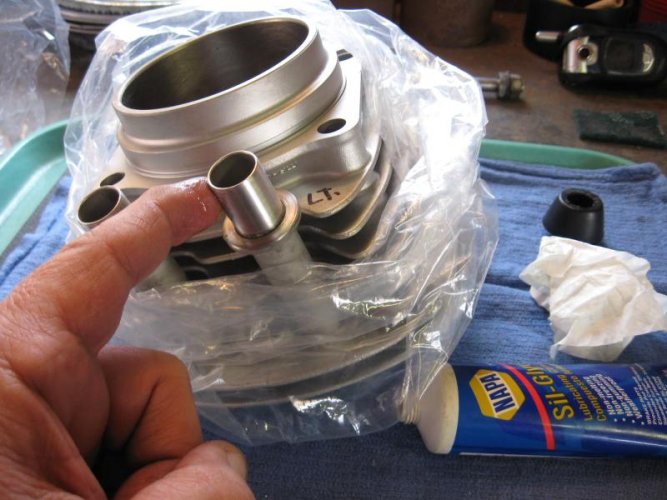
I just purchase a 1972 R50/5, it is in desperate need of pushrod seals, Is there a serious step by step procedure posted on the web anywhere, as well as a list of replacement components needed? I was looking thru BobBMW web site and they call out a pushrod seal installation tool. Is it needed? My Clymer manual is in the mail to me. Any help would be greatly appreciated,
thanks
dan
 
I think the best $25 you can spend would be to buy a real step-by-step manual from Oak Okleshen. He can be reached via email at askoak at aol dot com.

The /5s have a bit of a nuance when it comes to aligning the rocker arms...not sure if it's covered in the other recommended locations. Oak goes over the issue.

I see where the pbase link above recommends Oak's manual at the end.
 
Hi
Thanks so much for the replies, I have emailed Oaks for the top end tech manual. Does the manual give the dimensions for the H frame Jig?
thanks
dan
 
where do you live? Check to see if there's an Airhead Tech day scheduled soon. This is something typically done in a setting where you learn and see how it's done.
 
Unless you want to have a look at your top end and maybe de-carbon heads, pistons, etc.
There is a way you can "cheat" and save a bunch of time. First you must make sure the side you are working on is on the compression stroke and you can see "OT" in the flywheel inspection window (it's the little black rubber button on the left side). Then...

1. Remove valve cover.
2. Remove rocker assemblies (loosen a little at a time in a criss-cross pattern). Keep the assembled and remember what goes where.
3. Leave the 12 and 6 o'clock nuts in place (the hold the heads to the cylinder).
4. Pull both the cylinder and head together toward you just enough to get the seals out of the case.
5. Remove old seals (you will need strong hands or you can also use a strap wrench to give them a little twist).
6. Replace seals.
7. Clean and dress mating surfaces with your favorite gasket seal (too many opinions on which one to use).
8. Push the head and cylinder back in. Replace rockers, torque heads and set vlaves.
9. Repeat for other side and you're done.

Seems like a lot of work but it really isn't. FYI, this is the quick and dirty method if you just want to take care of the leak. You don't have to mess with the pistons and this is a big time saver. My guess is most people will tell you "while you're in there..."


Also, +1 on Oak's manual. The guy is a class-act and the manual is invaluable. He's also very good at answering questions and is widely regarded as an authority on our classic little airheads.


Enjoy your new ride, Dan!
 
Does the manual give the dimensions for the H frame Jig?

Scot Lydiard (see BMWScotter link above) says this about the jig: "BMW made a factory tool for aligning the cylinder head studs in the shape of an H. Don't use it. It doesn't work." His procedure for aligning the rockers without it is described in detail in the link.
 
8. Push the head and cylinder back in. Replace rockers, torque heads and set vlaves.!

To this step I would add: begin to torque the two nuts on the lower studs first, to seat the pushrod seals into the block.
 
Easy, if you've done it before...

Pushrod seal replacement is one of those Airhead jobs that are easy to repeat, but not easy if it's the first time you've done it, or if it is the first time for an old Airhead. There are some likely problems that will be present:

-- removing the exhaust pipes, particularly getting the finned collars off the head without damage
-- pulling the cylinders back without damaging the gaskets and two stud 0 rings at the base
--retorquing the cylinder studs with the all - too - common threat of pulling a stud right out of the block.

Certainly it is a job you can do yourself, but I'd strongly recommend you find an Airhead buddy to walk you through the process -- and don't expect it will be done in one evening. The exhaust collars can stop you cold; right away you will be faced with the choice between patience and dollars.

Unless there is some imperative to do the job quickly, I'd really be tempted to pull the cylinders and heads completely, decarbonize, clean and lap the valves gently, measure ring gaps, and replace all the gaskets.

I envy you the job! Good luck(<:
 
I think the best $25 you can spend would be to buy a real step-by-step manual from Oak Okleshen. He can be reached via email at askoak at aol dot com.

The /5s have a bit of a nuance when it comes to aligning the rocker arms...not sure if it's covered in the other recommended locations. Oak goes over the issue.

I see where the pbase link above recommends Oak's manual at the end.

+1 on Oak's top end manual. That and all the experience here will make it a straight-forward satisfying job.
 
Heads can be removed with headers attached. I did top end years ago and exhaust nuts were installed at factory. The wouldn't moved in '78 and probably won't now! They ain't broke yet so I'm not touchin' em!
 
thanks again to all, now I am between the rider in me says, take the fast way and the engineer in me says, take it all apart and measure and polish all the casting dimples!
dan
 
Scot Lydiard (see BMWScotter link above) says this about the jig: "BMW made a factory tool for aligning the cylinder head studs in the shape of an H. Don't use it. It doesn't work." His procedure for aligning the rockers without it is described in detail in the link.

Continually amazed at how many 'merikun motorcyclists are smarter than factory engineers.
 
does anyone have a good clear picture of the proper placement of the pushrod seal into the engine. Mine look pushed in too far, I can see the edge of the machined hole at the lower side of the hole in the engine. This may be why the ones the PO changed split on my bike
thanks
dan
 
Dan,
Here you go. Be sure to use a light coat of oil on the new seals, I use a light coat of silicone grease on the inside of the seal and always be sure to have the nub pointing down. This picture shows the seals before head torque. The depth should not change much from the picture.

Ref: 81 R65
 

Attachments

  • 04-25-10 Top End Assy Lt 028.jpg
    04-25-10 Top End Assy Lt 028.jpg
    63.2 KB · Views: 138
Here's another close-up.

Ref: 81 R65
 

Attachments

  • 04-25-10 Top End Assy Lt 032.jpg
    04-25-10 Top End Assy Lt 032.jpg
    63.1 KB · Views: 137
Just enough to allow for some movement and thermal expansion.

Ref: 81 R65
 

Attachments

  • 04-25-10 Top End Assy Lt 010.jpg
    04-25-10 Top End Assy Lt 010.jpg
    68.6 KB · Views: 136
Back
Top