• Welcome, Guest! We hope you enjoy the excellent technical knowledge, event information and discussions that the BMW MOA forum provides. Some forum content will be hidden from you if you remain logged out. If you want to view all content, please click the 'Log in' button above and enter your BMW MOA username and password.

    If you are not an MOA member, why not take the time to join the club, so you can enjoy posting on the forum, the BMW Owners News magazine, and all of the discounts and benefits the BMW MOA offers?

  • Beginning April 1st, and running through April 30th, there is a new 2024 BMW MOA Election discussion area within The Club section of the forum. Within this forum area is also a sticky post that provides the ground rules for participating in the Election forum area. Also, the candidates statements are provided. Please read before joining the conversation, because the rules are very specific to maintain civility.

    The Election forum is here: Election Forum

OK, I bought a barn bike today

Questions and answers

Rbleau,

I have a few questions, that may help you, help us, to help you (if that makes sense):

1. How much do you want to learn?

I mean, if you learn the shade tree stuff some of us suggested and it works, you will learn that and very little of the more complex complete overhaul stuff.

If you really want to learn how to take it apart and put it back together again, and dive right in, you may never learn how to do the shade tree stuff; in danger of being the guy who can overhaul, but can't diagnose.

You could gamble on the first option as a learning experience, and then proceed with the second regardless, (or have it forced upon you anyway) if you really want an education.

2. How much are you willing to commit?

If this was an unbudgeted impulse buy, you could be throwing a LOT of money and time into it. It's easy to run out of, or reach the limit of your willingness to spend any more of, one, the other, or both.
Will it be a few hundred, or several thousand $?
A few evenings and weekends, or all of them?

3. What do you want out of this bike?

It's obvious you already aren't lacking for airheads, including another RS. When the finished product is something you already have, finishing it can be somewhat anti-climactic. So is it the bike, or the experience?
If it's the bike, do you want a totally overhauled and restored airhead, or just to see an old bike brought back to life, as close to original as possible?
If it's the experience, how much of it do you want; a taste, or the whole enchilada?

Personally, I'd suggest answering question #3, then #2, before question #1.

3. What do you want out of this bike ?

This one: just to see an old bike brought back to life, as close to original as possible

2. How much are you willing to commit ?

Time is plentiful. Money - $2000. Excluding cosmetics.

1. How much do you want to learn ?

Using Snowbum's guide, I would like to strive to emerge from Beginner Group, and ease into Low-Middle group. "Maybe" get to Middle group in a few years.
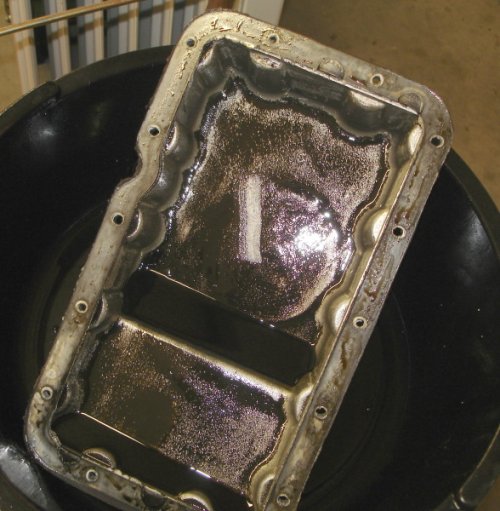
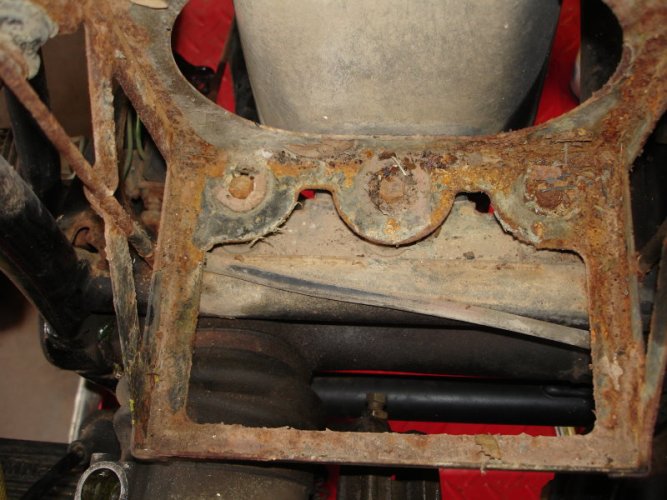
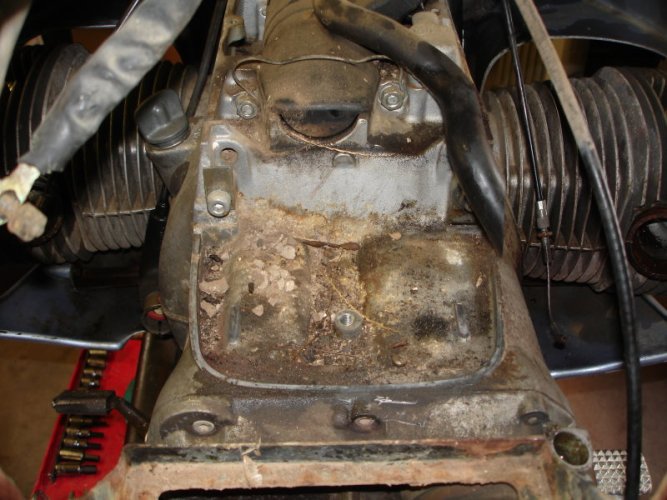
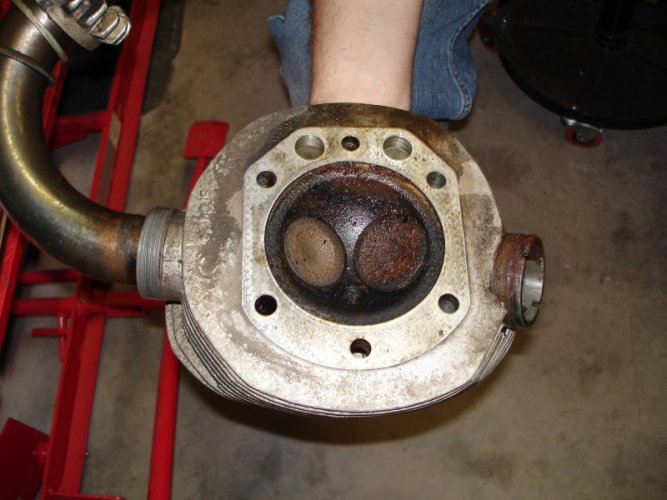
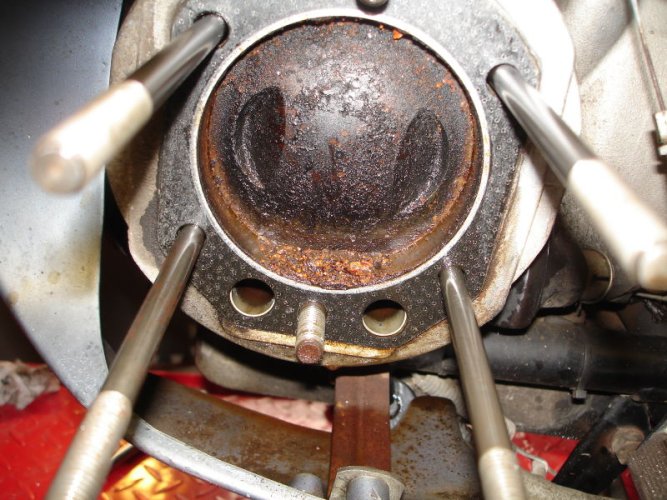
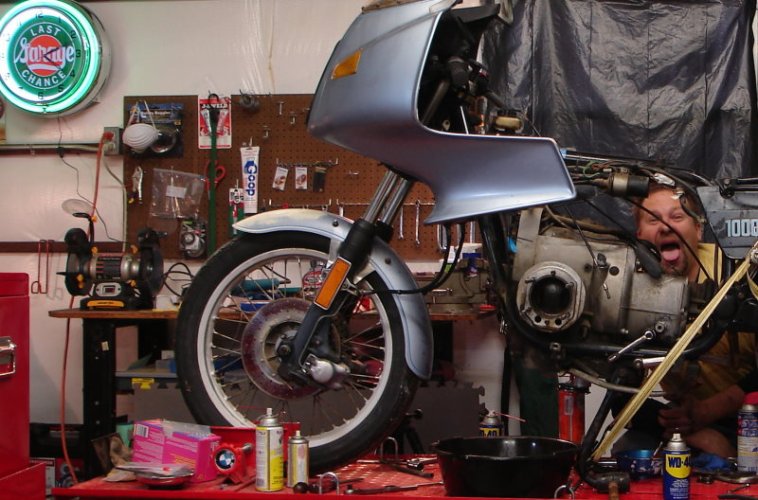
Special tools, machine work et al I will leave to people who are NOT doing it the first time. The old learning curve thing. The virtue of this machine is that I did not pay a huge amount much for it, and if it is a disaster - ruined bottom end or what not - or if I just get overhwhelmed - I can turn it over to a better home.

General maintenance & light repair - I would like to be fully competent.

Repair work & overhaul: probably still what folks might call light.

Minor correction to above: I do NOT have another RS. I do have a R100/7 and two R100S models, all are year 1977.

Cheers / RB:thumb
 
Oil Pan Inspection

Removed oil pan - sparkly stuff on the bottom but no chunks of metal. Sparkly stuff did not respond to a magnet, so prob aluminum. Underside of motor looked clean and good, no rust. Thoughts ? Notice where I wiped my finger in the pan - not a heavy sludge, fairly light.
 

Attachments

  • Oil pan.JPG
    Oil pan.JPG
    141.8 KB · Views: 354
rbleau,

I don't see anything scarey in that photo. There would be even less smudge in there if the oil had been up to operating temps when drained. You're on the right track. Continue onward nice and slow. Now, clean up that oil pan, go over it with some nice metal polish and put it on the shelf until you're ready to reinstall.You being a retired Aerospace Engineer, believe me, you will NOT get in over your head.

Mike B
 
Under side of motor photo

Here is a foto of the underside of the engine just after dropping the pan.
 

Attachments

  • Under block.JPG
    Under block.JPG
    135.6 KB · Views: 329
Status 3-13-09

Nathan - nope, heads not off yet - probably tomorrow, as an airhead friend is coming over.

The sparkle in the oil pan is not a good sign - turns out the rod beaings are not magnetic, and there should be no sparkle.

We shall see where this takes us - there is no way of finding out why the bike was parked. / RB
 
Update 14 March 09

Carbs off. Very cruddy. Here is the left intake port.
 

Attachments

  • 14Mar09_1_left intake.JPG
    14Mar09_1_left intake.JPG
    140.9 KB · Views: 281
Update 14 March 09

right intake port
 

Attachments

  • 14Mar09_2_right inake.JPG
    14Mar09_2_right inake.JPG
    126 KB · Views: 283
Update 14 March 09

1. Unhook carbs
2. Airbox / filter
3. Starter cover
4. Battery & tray out
5. Right muffler
6. Left Rocker assembly
7. Right Rocker assembly
8. Left head
9. Right head
10. Tire bumps
a. Note: Left jug & piston moved together; near TDC, right piston moved freely within cylinder
b. Went past TDC, retracting left piston & jug to case wall
c. Last tire bump freed left piston
11. Fairing lowers
12. Fairing grill
13. Alternator cover
14. Final drive drain bolt stuck ÔÇô 19mm - applied Kroil & left
15. Drained driveshaft
a. White paste in drive shaft fluid
 

Attachments

  • 14Mar09_3_battery tray.JPG
    14Mar09_3_battery tray.JPG
    124.8 KB · Views: 279
Update 14 March 09

Air box
 

Attachments

  • 14Mar09_4_air cover.JPG
    14Mar09_4_air cover.JPG
    127.5 KB · Views: 279
Update 14 March 09

left head - note stuck pipe
 

Attachments

  • 14Mar09_5_left head.JPG
    14Mar09_5_left head.JPG
    125.6 KB · Views: 320
Update 14 March 09 Left piston

here's a job - left piston
 

Attachments

  • 14Mar09_6_left piston.JPG
    14Mar09_6_left piston.JPG
    139.5 KB · Views: 318
Update 14 March 09 - right head

Here is Pete assisting with identification
 

Attachments

  • 14Mar09_7_right head.JPG
    14Mar09_7_right head.JPG
    122.1 KB · Views: 318
Update 14 March 09 - right piston

Better than the left. I think bike was stored on the sidestand !
 

Attachments

  • 14Mar09_8_right piston.JPG
    14Mar09_8_right piston.JPG
    111.7 KB · Views: 319
Update 14 March 09 - Alternator

Not too cruddy
 

Attachments

  • 14Mar09_9_alternatorJPG.jpg
    14Mar09_9_alternatorJPG.jpg
    123.1 KB · Views: 317
Update 14 March 09 - Points

Nice surprise -
 

Attachments

  • 14Mar09_10_points.JPG
    14Mar09_10_points.JPG
    109.9 KB · Views: 317
Update 14 March 09 Finale

Last Chance Garage finale for today - no, that is not me making a face, that is Pete. All this work was done today WITHOUT BEER, - BUT ! - with good Texas BBQ.

:dance
 

Attachments

  • 14Mar09_11_finale.JPG
    14Mar09_11_finale.JPG
    128.3 KB · Views: 315
Wow, I thought that the picture of the left piston was scary and then I saw Pete!!
 
The final finale

Yup - did it again - went out in my jammies to pursue an idea on the stuck 19mm drain bolt for the rear drive - got out my squeeze bulb suck-o-matic and extracted much nasty stuff from the rear drive from the fill hole; shot Kroil in; repeated; applied some torque to drain plug and she broke free ! Yay ! A fitting final finale to a productive day.

The RS sits proudly on the Last Chance Garage lift, drips pans surrounding her.

Marilyn approves.
:dance
 

Attachments

  • Last Change Garage_MOA.JPG
    Last Change Garage_MOA.JPG
    136.8 KB · Views: 310
The aluminum bits will clean up quite well with a soda blaster.

If you are replacing your cylinders, pistons, and rings with good used items then there is little need to clean up the old stuff.

I 'spect that you'll be needing new valve guides when you drive that rusty valve out. May as well get the valve seats for unleaded gas while you are at it.

I'll be eagerly awaiting subsequent posts and photos of your progress. I did not replace the valve guides or seats on my RS heads. I did remove the valves and soak the heads for a while (several days) in Gunk's HydroSeal II. That removed the carbon. I lapped the valve seats.

I discovered upon reassembly and running for a bit that the left cylinder head had gotten a bit warped (from a previous owner). This warpage didn't affect running of the bike, but did allow a wee bit of oil to pass through the hole for the top head stud - there is not direct pathway for oil to get to this point.

I pulled the left head and checked the surface using a piece of plate glass with some fine grit sandpaper. It was easy to see the high spots (that had a shine) and the low spots (that were dull). After about an hour of back and forth and round and round (and about six pieces of sandpaper) the surface of the head had an even shine.

Re-assembly revealed that the warpage was gone as was the oil leak through the top stud.
 
Back
Top