jimvonbaden
Kool Aid Dispenser!
Following on the excellent work here (click here), I found a couple missing parts, and thought I would supplement this with a few important notes and pictures of my own.
Tina has an R1200ST with system cases, but with non-ignition keyed tumblers. It was a pain for her, so I thought I would earn a few points and fix her up.
I had a very hard time trying to get the bent paperclip to unlock the tumbler. I just couldnÔÇÖt get enough control over the paperclip, and couldnÔÇÖt find the release. So I decided to take the case apart before my frustration made it happen in a less than controlled way!
The following are my supplemental instructions.
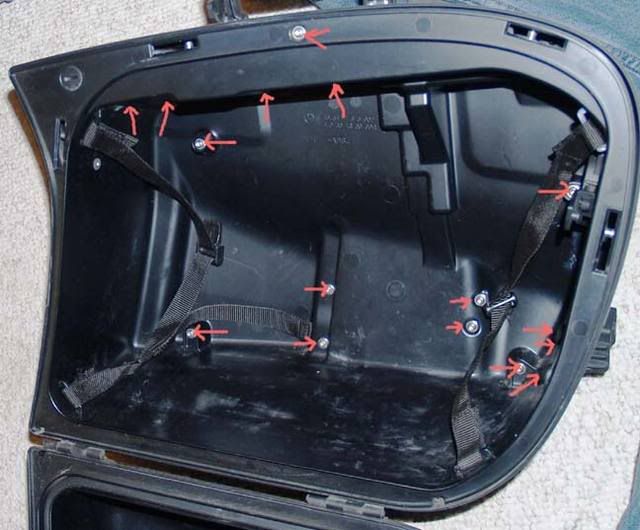
First remove the lid with the 4 Torx T25 screws.
Remove all the screws indicated by the arrows. These are Torx T-20 and T-25 screws. Make a note of their positions as it is easy to forget which is which.
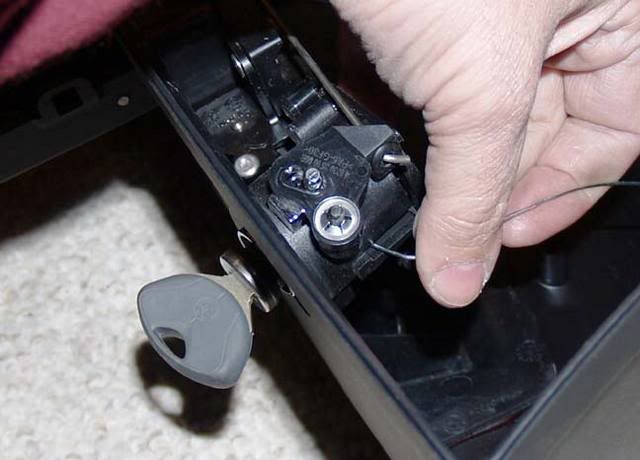
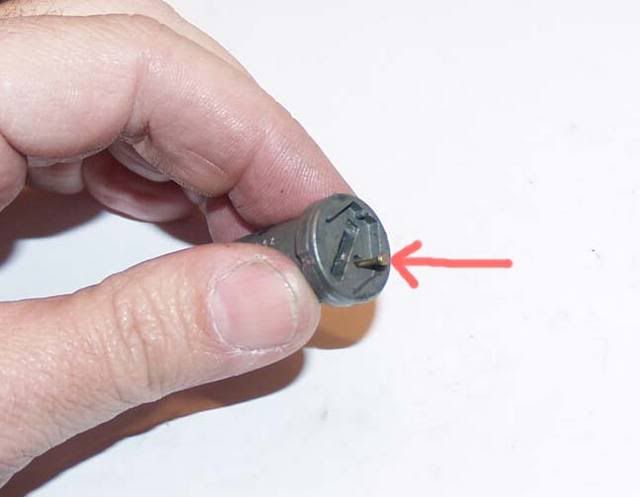
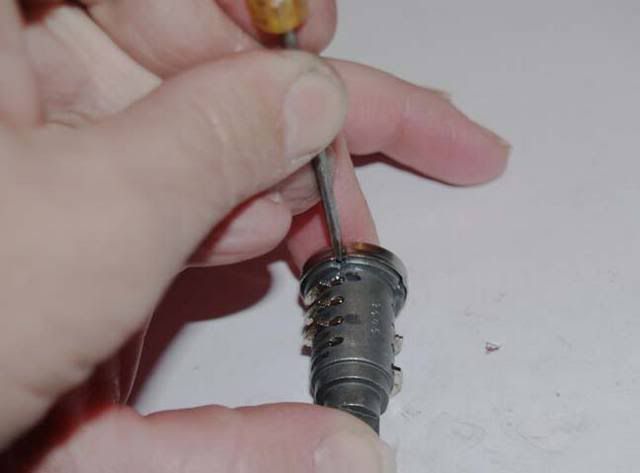
Using the dreaded paperclip, I easily found the hole and pushed the release. You must have the working key in place to do this. Simply turn the key part way while pushing the release, and pull the key and tumbler out together.
Note how they come out as one piece.
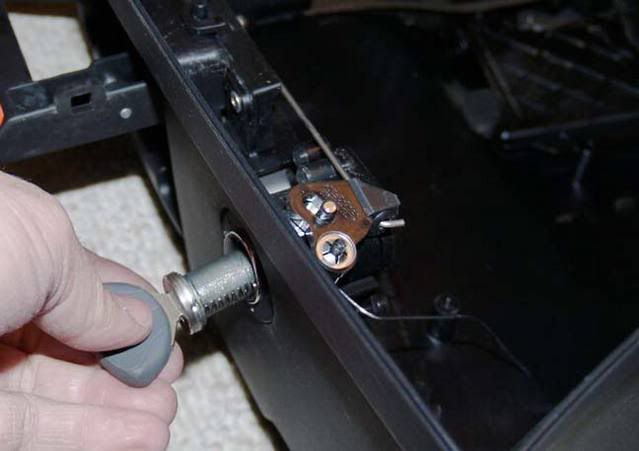
Be careful not to let the locking mechanism come out of place, and make sure the control rods are securely in place as well. I found that just simply holding in position until I removed the tumbler was enough. Then just let it rest as is.
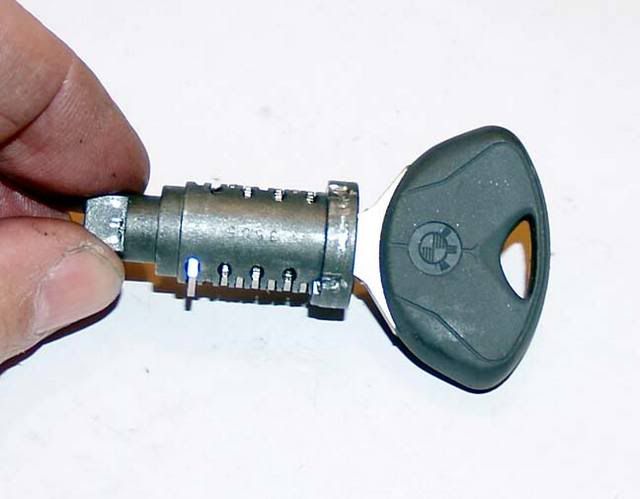
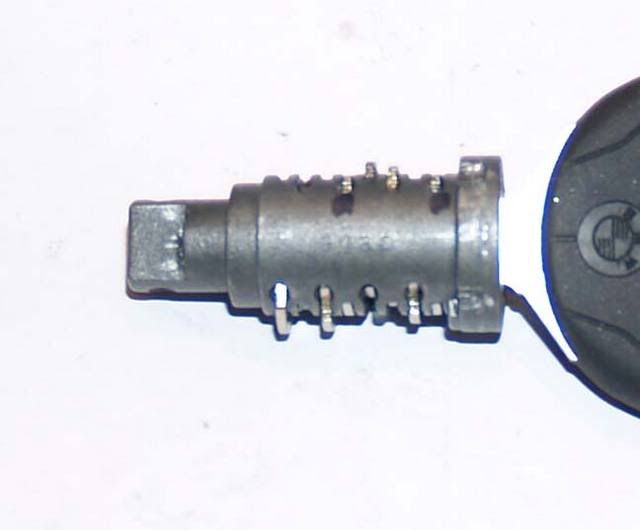
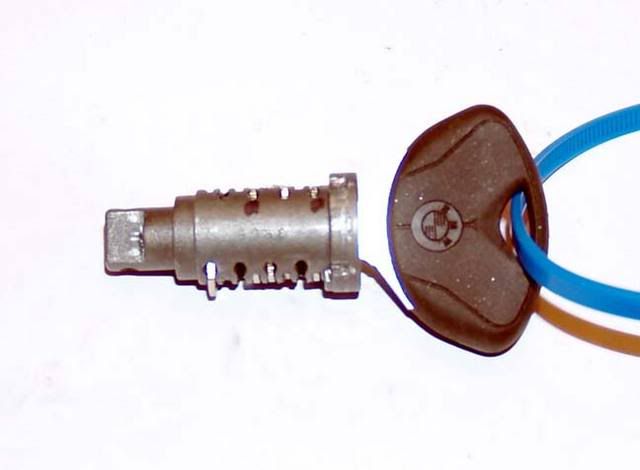
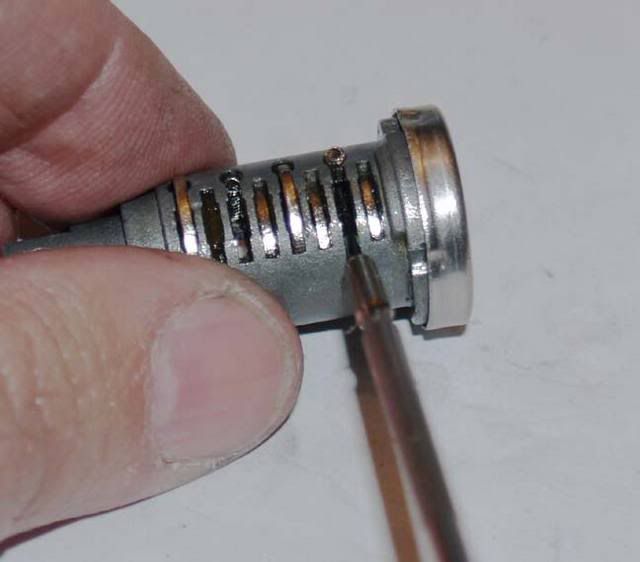
Here is the tumbler with the original key. Not that all the tumbler blades are flush without pushing on them.
Here is the new/ignition key. Notice how many of the tumbler plates are not flush. Also notice how some are? Mark the ones that are flush. You do not want to remove them.
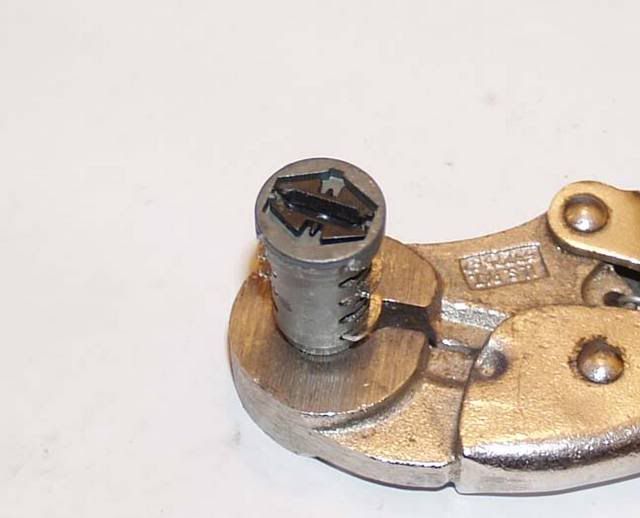
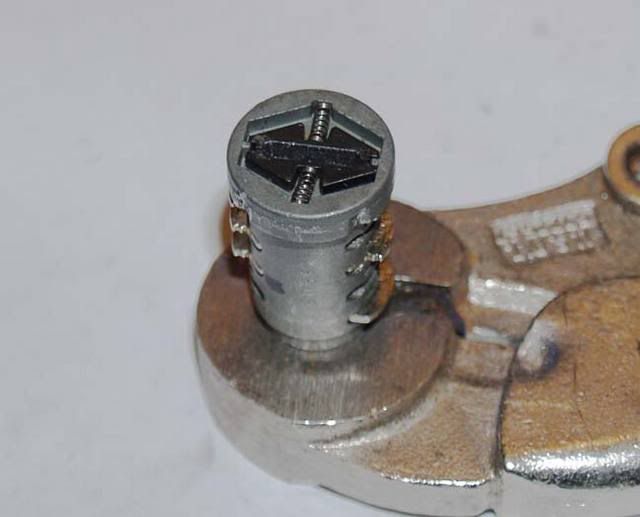
I found the hardest part was removing the chrome cap that is on the top of the tumbler. It is very sturdy stainless steel, and will resist removal.
Place a bladed punch or screwdriver in the dimpled edge and tap firmly with a hammer. You will have to do this repeatedly until the dimples are nearly smooth.
Then take a punch to the edge while holding the tumbler at an angle and tap it firmly to remove it. It takes a bit of patience, but isnÔÇÖt really hard.
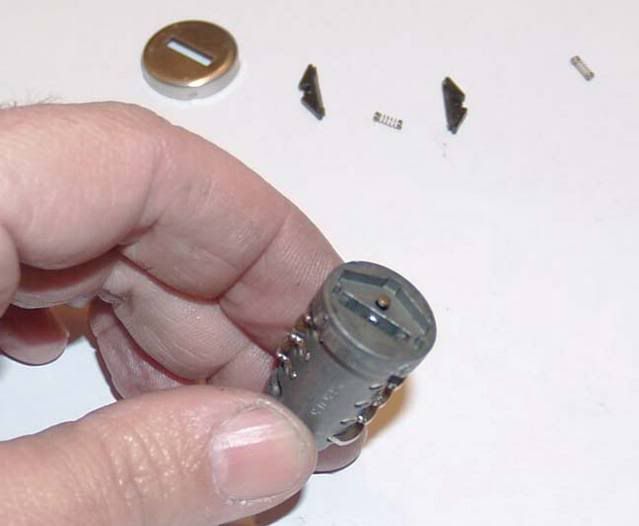
Beware that under the stainless cap are two small blocks for keeping out rain and dirt, and two very small springs. Do not lose them, they are hard to replace, and necessary.
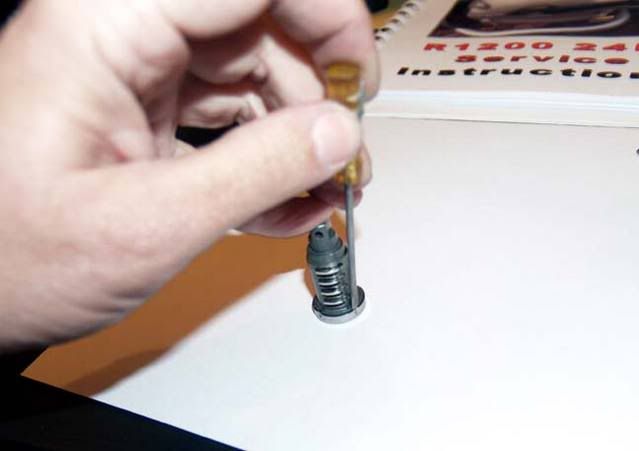
Once the cap is off you will find a locking rod made of brass. This rod keeps the tumbler plates in place.
Note the rod held in place.
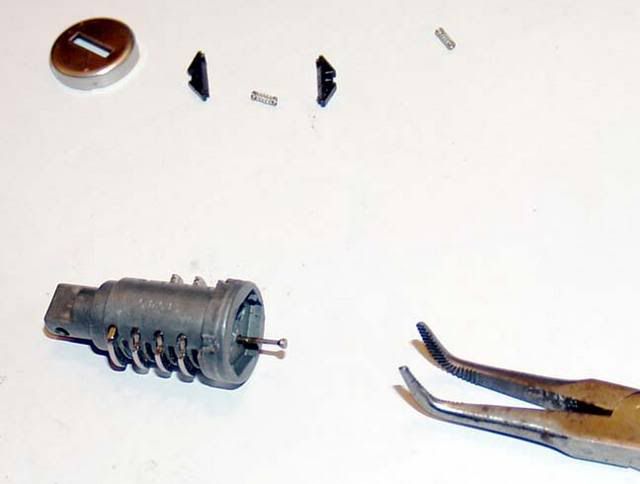
Pull it out with a pair of small pliers. It is not in firmly, but the grease in the tumbler will keep it from just falling out.
Once the rod is out the tumbler plates can be easily remove by simply pulling them out. Be a bit gentle as not to disturb the small springs. Only pull the non-marked ones. Use the pulled ones to rearrange them and find the combination that gives you the most number of flush plates with the ignition key in place.
Here is what I ended up with using only rearranged plates. I had four good slots, and two I could not use. That is fine. Four of them should be easily sufficient to discourage the casual thief.
When you get them maximum number of plates in place, you are ready to reassemble the lock tumbler.
Put the rod back in place. It just slips in.
Then install the rain guards carefully. Beveled side up, and towards the center aligned with the key slot.
Install the springs. These go in easily, but will pop out of the tumbler is roughly handled.
Once you get the springs in, place the stainless steel cap in place and lined up with the key slot, tap the cap in place with a firm tap of a light hammer or other tool.
Place the lock on its side and remove the little springs from the unused plate slots.
Using a punch, or small screwdriver, tap the dimples back into the cap to hold it in place.
Note: The cap may not be really snug, and that is fine.
Test the key one more time for smooth action, and to ensure the tumbler plates are still flush.

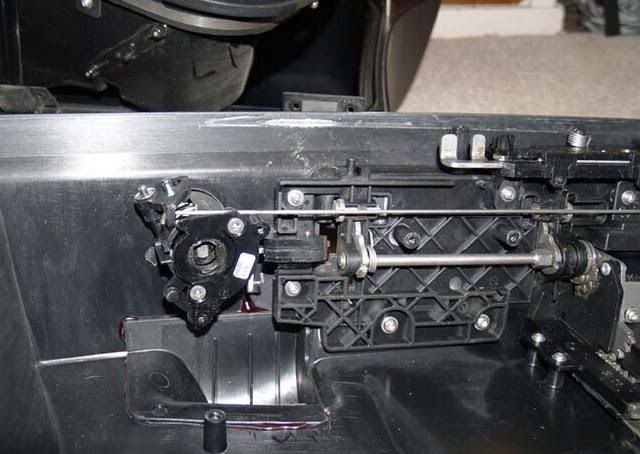
Install the barrel with the flat positioned as in the picture. Turn the lock gently and pull the key.

Carefully reinstall the liner and replace all the screws.
Test the locking mechanism for functionality, and make sure it will allow you to lock and unlock the hold-down mechanism that latches the case to the bike.
Get congrats and gratitude from your SO!
Jim
Tina has an R1200ST with system cases, but with non-ignition keyed tumblers. It was a pain for her, so I thought I would earn a few points and fix her up.
I had a very hard time trying to get the bent paperclip to unlock the tumbler. I just couldnÔÇÖt get enough control over the paperclip, and couldnÔÇÖt find the release. So I decided to take the case apart before my frustration made it happen in a less than controlled way!
The following are my supplemental instructions.
First remove the lid with the 4 Torx T25 screws.
Remove all the screws indicated by the arrows. These are Torx T-20 and T-25 screws. Make a note of their positions as it is easy to forget which is which.
Using the dreaded paperclip, I easily found the hole and pushed the release. You must have the working key in place to do this. Simply turn the key part way while pushing the release, and pull the key and tumbler out together.
Note how they come out as one piece.
Be careful not to let the locking mechanism come out of place, and make sure the control rods are securely in place as well. I found that just simply holding in position until I removed the tumbler was enough. Then just let it rest as is.
Here is the tumbler with the original key. Not that all the tumbler blades are flush without pushing on them.
Here is the new/ignition key. Notice how many of the tumbler plates are not flush. Also notice how some are? Mark the ones that are flush. You do not want to remove them.
I found the hardest part was removing the chrome cap that is on the top of the tumbler. It is very sturdy stainless steel, and will resist removal.
Place a bladed punch or screwdriver in the dimpled edge and tap firmly with a hammer. You will have to do this repeatedly until the dimples are nearly smooth.
Then take a punch to the edge while holding the tumbler at an angle and tap it firmly to remove it. It takes a bit of patience, but isnÔÇÖt really hard.
Beware that under the stainless cap are two small blocks for keeping out rain and dirt, and two very small springs. Do not lose them, they are hard to replace, and necessary.
Once the cap is off you will find a locking rod made of brass. This rod keeps the tumbler plates in place.
Note the rod held in place.
Pull it out with a pair of small pliers. It is not in firmly, but the grease in the tumbler will keep it from just falling out.
Once the rod is out the tumbler plates can be easily remove by simply pulling them out. Be a bit gentle as not to disturb the small springs. Only pull the non-marked ones. Use the pulled ones to rearrange them and find the combination that gives you the most number of flush plates with the ignition key in place.
Here is what I ended up with using only rearranged plates. I had four good slots, and two I could not use. That is fine. Four of them should be easily sufficient to discourage the casual thief.
When you get them maximum number of plates in place, you are ready to reassemble the lock tumbler.
Put the rod back in place. It just slips in.
Then install the rain guards carefully. Beveled side up, and towards the center aligned with the key slot.
Install the springs. These go in easily, but will pop out of the tumbler is roughly handled.
Once you get the springs in, place the stainless steel cap in place and lined up with the key slot, tap the cap in place with a firm tap of a light hammer or other tool.
Place the lock on its side and remove the little springs from the unused plate slots.
Using a punch, or small screwdriver, tap the dimples back into the cap to hold it in place.
Note: The cap may not be really snug, and that is fine.
Test the key one more time for smooth action, and to ensure the tumbler plates are still flush.
Install the barrel with the flat positioned as in the picture. Turn the lock gently and pull the key.
Carefully reinstall the liner and replace all the screws.
Test the locking mechanism for functionality, and make sure it will allow you to lock and unlock the hold-down mechanism that latches the case to the bike.
Get congrats and gratitude from your SO!
Jim