• Welcome, Guest! We hope you enjoy the excellent technical knowledge, event information and discussions that the BMW MOA forum provides. Some forum content will be hidden from you if you remain logged out. If you want to view all content, please click the 'Log in' button above and enter your BMW MOA username and password.

    If you are not an MOA member, why not take the time to join the club, so you can enjoy posting on the forum, the BMW Owners News magazine, and all of the discounts and benefits the BMW MOA offers?

  • Beginning April 1st, and running through April 30th, there is a new 2024 BMW MOA Election discussion area within The Club section of the forum. Within this forum area is also a sticky post that provides the ground rules for participating in the Election forum area. Also, the candidates statements are provided. Please read before joining the conversation, because the rules are very specific to maintain civility.

    The Election forum is here: Election Forum

Vetter Windjammer fairing Uninstall (1973 R75/5)

SGTBILL

The Big Red One
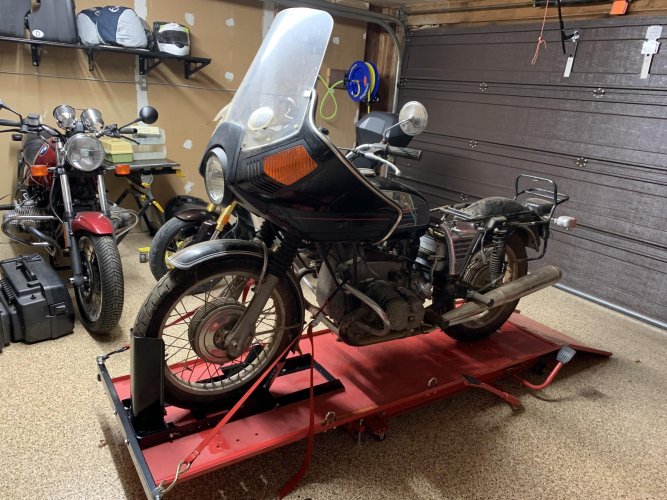
Hello all. I recently bought a 1973 R75/5 that had a Vetter Windjammer fairing installed. My plan is to go through it over the winter and get it back on the road. I have taken the fairing off the bike. Is the wiring from the fairing going to be useful in putting the original headlight and turn signals back into service? I am not familiar with the Windjammer fairing so I don't know if they used the existing wiring from the headlight in the fairing set up.
 
I think they used the whole headlight reflector assembly and covered the original bucket. I know they did on later models but am not sure on the /5.
 
I think they used the whole headlight reflector assembly and covered the original bucket. I know they did on later models but am not sure on the /5.

There is a cover on the original bucket that I haven't yet taken off. The actual headlight in the fairing has the bulb built in rather than the reflector with a bulb inside I expected. I am not sure when the fairing was installed.
 
There is a cover on the original bucket that I haven't yet taken off. The actual headlight in the fairing has the bulb built in rather than the reflector with a bulb inside I expected. I am not sure when the fairing was installed.

I hope the reflector. lens and ring come off the fairing and into the /5 bucket. You may need an H4 socket and some wires. Remove the cover and see what is there I expect a 3 pole H4 socket and some bootleg wires. Report back.
 
Turn signals

There is a fair chance the wiring may be alright to wire the turn signals back to original. Same goes with the headlight. It all depends upon how or if the PO cut wires off to install the fairing lights.

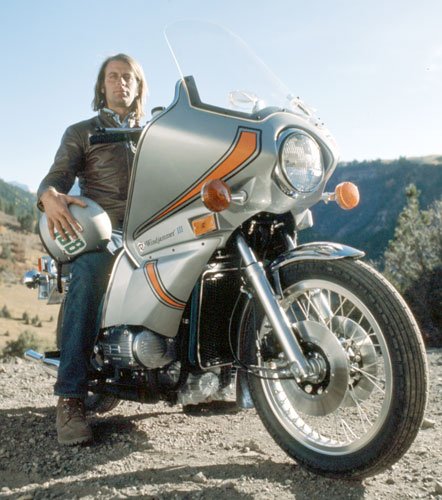
It has been a long time since I have seen a Vetter, fairing so I can't remember if the turn signals are in the fairing or separate on their own mounts? If they are separate, that is easy. If they are in the fairing, it will be a bit of a pain as you may have to get the hardware for the signals. All of it is available from various sources online.

I just helped a fellow install factory turn signals on his bike after he removed a fairing. He needed the new housings, reflectors, lenses, mounts and extra wire. To do the job, some disassembly of the forks is needed to install the mounts and route the wires.

As for the headlight, sorry I don't remember if the Vetter used the OM headlight shell reflector and lens only mounting it on the fairing instead of the headlight bucket. Again, if you need the parts they are available online.


Sorry I can't be more help, Good luck. St.
 
The Vetter fairing I removed has the turn signals built into the fairing like Lee's upper photos. I'll go out and remove the cover and see what I can see.IMG_5055.jpg
 
I hope the reflector. lens and ring come off the fairing and into the /5 bucket. You may need an H4 socket and some wires. Remove the cover and see what is there I expect a 3 pole H4 socket and some bootleg wires. Report back.

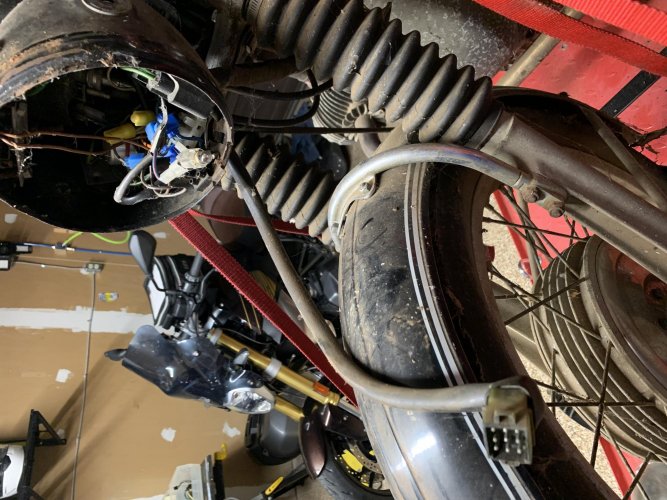
OK, I removed the cover and aside from the cob webs. and spider crcasses there are still lots of wires and connectors and such in the headlight. Additionally, there is a single bundle of wires that exit the bucket and terminate in a plug which was plugged into a receptor on the fairing. It would appear all the lights and signals are in that bundle.
IMG_5069.jpg
 
I'm sorry about all those blue things. That's how the fairing installer tapped into the harness to make the fairing harness work. They tend to cut the wire where they are snapped on.

Remove them gently and you may be best cutting and splicing the original wires where the blue things were with crimped butt connectors.
 
Are those the scotchlok connectors?

Yes, I think that's what they are called. The favorite thing for the hacks at the trailer hitch shops.

I have a Luftmeister that's nicely integrated to the junction board in my /7 (even the wires are mostly DIN colors) but then the PO used those damn things to wire in a headlight modulator in the fairing itself.
 
Your set-up is simple but may be somewhat costly to return to stock.
All those blue connectors need to come off so you can remove the fairing harness. The fairing headlight is a sealed beam unit adapted from a car and should not be used.
Your options are to go back to original by buying new or used parts using the parts diagram from any one of the internet parts suppliers as a guide. An alternative is to use an aftermarket halogen conversion to install a brighter light. There are a few out there but personnaly I don't trust them.
Finally, you can go to the R65 twin shock (84 and back) diagram and order the halogen light parts or buy used. The advantage here is the chrome ring has a screw down clamp to keep it in place. The original /5 ring was just a more or less friction fit that, with age, will loosen up to the point that if you hit a pot hole, the whole assembly will pop off and may either fall away or smash itself into the front fender brace and break the lens!
There is also the question of what you have left over in the turn signal department. If you're lucky (and cheap) the front turn signal stalks are just bent up to vertical and the wires are just stuffed into the ends. You can bend the stalks down to level and use the existing wires. Often they were just cut off at the ends to clear the fairing in which case you'll have to replace them. Plenty of how to stuff on you-tube. Of course you'll probably have to get a pair of turn signal pods (aluminum is original) if you want to keep it stock looking.
There are plenty of places to get a wiring diagram and the color codes are pretty much the same for all years.
Then again, you can ignore everything I've written and cob together all of this stull from other parts from other motorcycles.
 
Yes, I think that's what they are called. The favorite thing for the hacks at the trailer hitch shops.

Hacks? If a person knows how to use them, they work fine. Look how long they worked in this application.

If you want to disassemble a 3-M Scotchlock connector, the push plate can be retracted with needle-nose pliers.

BTW, most people use a T-One connector on vehicles not equipped with factory trailer connector connections.

OM
 
There is also the question of what you have left over in the turn signal department. If you're lucky (and cheap) the front turn signal stalks are just bent up to vertical and the wires are just stuffed into the ends. You can bend the stalks down to level and use the existing wires. Often they were just cut off at the ends to clear the fairing in which case you'll have to replace them. Plenty of how to stuff on you-tube. Of course you'll probably have to get a pair of turn signal pods (aluminum is original) if you want to keep it stock looking.

The turn signal stalks were removed completely so I have to buy new or used ones. The PO still had the original aluminum signal pods so I am good for those.

I will have to give the headlight some thought. I may try to upgrade to a newer system (LED or the R65 option which is interesting). I am also thinking of a KatDash set up for the various small lamps in the instruments. Should be a good winter project.
 
Patience

There are many ways you can proceed with your return to OM. All the parts needed are available either new or used so you are good there.

As for wiring, I am NOT a fan of the scotch lock connectors and agree with the posts that they have no business being used in a proper wiring system. Over the years, I have spent a good amount of time repairing screwed up wiring resulting from their use and more to the point the dingbats who don't know how to use them or shouldn't do wiring at all. Some people get lucky, use them and have no problems, sadly, my experience is the opposite. There really is no excuse for sloppy wiring in any job. Oh, if I were in a life or death situation where they were all I had on hand, that would be different. Doing things neat and proper takes so little extra time as far as I am concerned. Solder, proper terminals/connectors are far better.

Anyway, I suppose like always I rubbed someone the wrong way but, depending upon how much your OM wiring was hacked up, you will either have an easy time or hard. There is a possibility harnesses are available to make things easier.

Installing the mounting brackets for the turn signals means taking the top of the fork assembly apart the wires themselves pass into and out of the boots via holes, and as such are out of sight and protected. It will be a day job at the most.

Good luck, St.
 
Know from recent experience the wiring harness for front turn signals is still available. Wires color coded to the terminal plate of course.
 
No love for Scotch-loks but the yellow wirenuts don't get a mention?? :D

Congrats on the /5! Great bikes.

I had a similar setup on my 71 when I bought it. This is very fixable but first you need to decide if you want to make it 100% OEM stock, or do you just want it to work (and work well)? My bike needed paint and pretty much everything else so I decided to do a good job on refurbishing it, but I didn't necessarily need to make it look factory installed, nor would I ever enter it into a Concours competition where originality counts. If I wanted that I would have bought a cleaner example for a LOT more Money, which is what I spent anyway. :D

Some thoughts based on my refurb - -

The shell looks basically good. You should probably pull it off and take it 100% apart. You may want to consider new paint or powder coat (like I did). The potential problem is how out of round the shell can get which makes putting the trim ring on dicey. But that just takes patience. And a nylon hammer sometimes.

As far as wiring - it all starts with that switch. And that switch is a pita. I replaced mine with a Rocky Point unit which greatly simplifies things. There are some tricks to this so ask if you are going to do this. Annealing the tabs that hold the switch in is recommended.

Replace any suspect wiring. Many will tell you to source German color coded wiring. I couldn't find any so I used trailer wiring and shrink wrapped the color onto it. You'll need a good wiring diagram to refer to and the knowledge to read it. Or someone to decipher.

Turn signal stalks are becoming hard to source. Avoid the chrome ones on Ebay. They are too long and the diameter of the mounting part is too big. Used ones can be sourced and zinc coated or do what I did - more powder coat in zinc color.

Headlight trim rings are available through EME. Not cheap, but nothing about making an old bike look good is. I opted for the /5 trim ring and I use zip ties to keep it from falling completely off, although it has stayed put on some pretty harsh roads so far.

Many of us use terminal strips like the white one already on your bike. If you buy the Rocky Point kit it comes with them.


One could write a book on this topic alone. If you would like help feel free to PM me as I have this still fresh in my mind. Also, joining the Airheads group is a great way to meet like minded and knowledgeable people who are enthusiastic about helping you get your bike on the road. We will literally come to your home and wrench on your bike. I highly recommend joining.
 
. This is very fixable but first you need to decide if you want to make it 100% OEM stock, or do you just want it to work (and work well)?

I don't plan on restoring this bike to Concours condition. I will send anything that is suspect out for repair or rebuild. I do expect to install a few select upgrades that I have found useful in my other Airheads. What I won't be doing is turning it into a bobber, racer, or a franken-bike. I want this one to be one I'd ride daily.

. As far as wiring - it all starts with that switch. And that switch is a pita. I replaced mine with a Rocky Point unit which greatly simplifies things. There are some tricks to this so ask if you are going to do this. Annealing the tabs that hold the switch in is recommended.

I am heartened to hear the wiring harness is still available. My shell also has some kind of an addition to the key switch mechanism. There are 4 small bolts around the switch. I'll try to get a photo posted.

Also, joining the Airheads group is a great way to meet like minded and knowledgeable people who are enthusiastic about helping you get your bike on the road. We will literally come to your home and wrench on your bike. I highly recommend joining.
I am a member of the Airhead Club and there are a few Airhead folks nearby. I won't hesitate to ask for advice and help.
 
I am heartened to hear the wiring harness is still available. My shell also has some kind of an addition to the key switch mechanism. There are 4 small bolts around the switch. I'll try to get a photo posted.


Sounds like you have the right tools to get the job done. Keep us posted!

Oh.....and point of order - I didn't speak to the wiring harness. Main harnesses are available and I'm sure one could source other wiring assemblies for the /5. That said, the front blinkers are just a wire (blu/red and blu/blk) that run down the fork from the shell to the blinker. I believe the factory didn't install a ground (I could be wrong). I did when I ran new wires just to be sure they stayed functional.
 
Back
Top