senseamidmadness
Neglected Bike Adopter
My right side System Case had a very floppy lid, and I fixed it using a method I hadn't seen elsewhere before. I figured I'd document it and share with you folks just in case anybody else has this problem.
So as you might know, the lid for the standard width Oilhead System Cases is made of two independent molded shell pieces, one inner and one outer. I'm not 100 percent on this as I can only see what I have, but it looks to me like the outer shell, when it was made, had a set of 4 or 5 pins sticking out of it that went into holes in the inner shell, and these then were melted flat from the inside of the inner shell to fuse the two together.
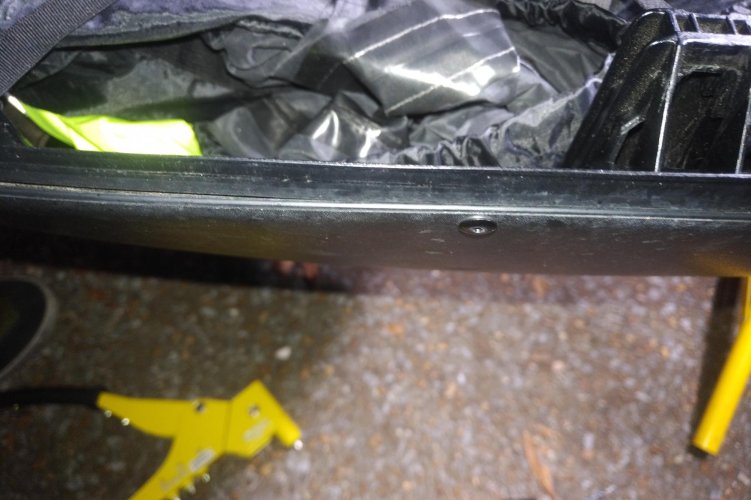
In my particular case, nearly all of these plastic pins broke, which allowed the outer lid of my right system case to flop around in the wind and I was very worried about it potentially flying off while riding. When examining my left saddle bag I discovered that a couple of these pins were already broken so I proactively fixed it too. This is the process you see in the pictures. I could only access 4 out of the 5 pins per saddlebag but that seemed to be plenty good enough. The lids are very firmly mounted now.
I apologize for the pictures being so dark; the repair was done outside at night, but everything important seems to be fairly visible. I was able to do this repair with the cases mounted on the bike!
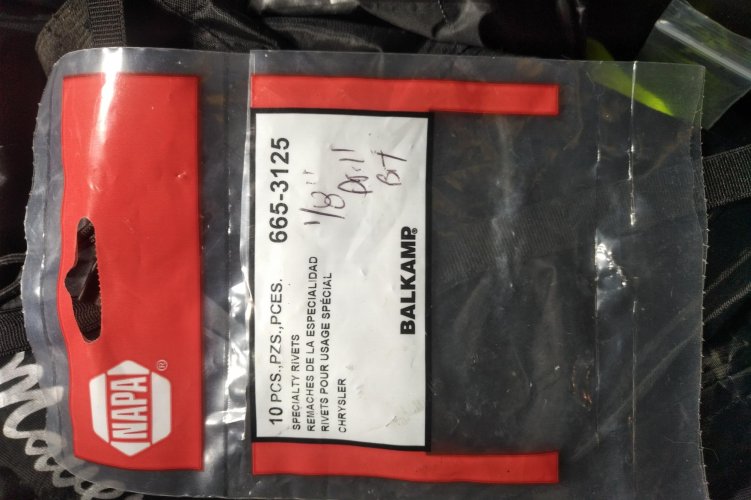
Napa Auto Parts stores sell these small rivets with plastic heads and aluminum shanks: the part number is 665-3125 for a 10-pack. They are perfect for this purpose and I paid less than $5 for them.
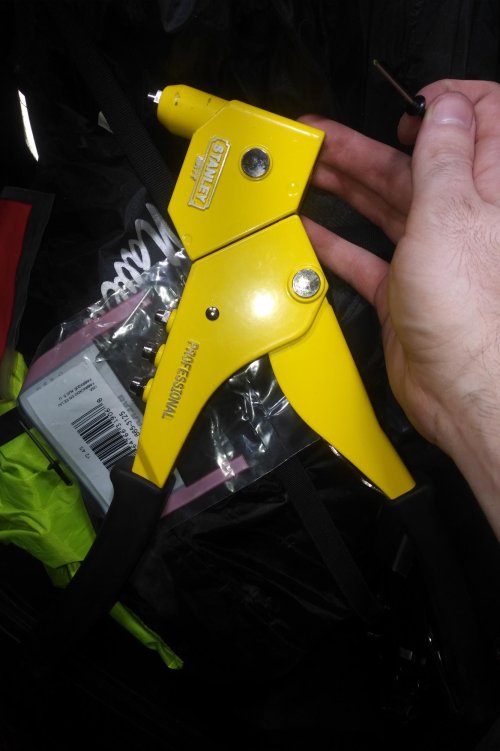
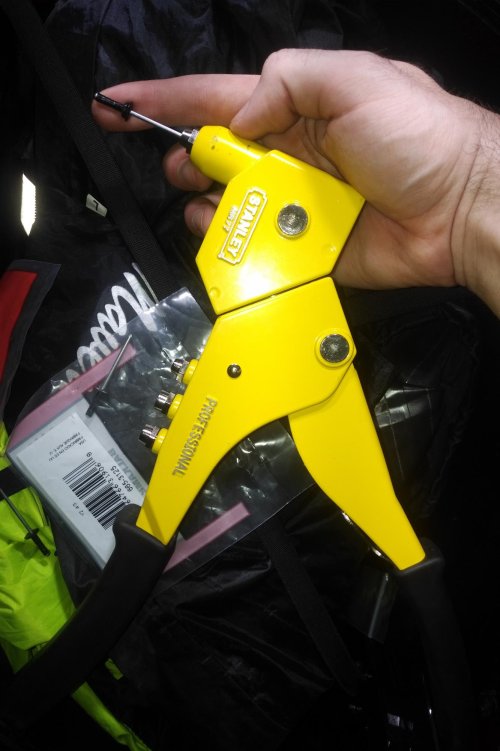
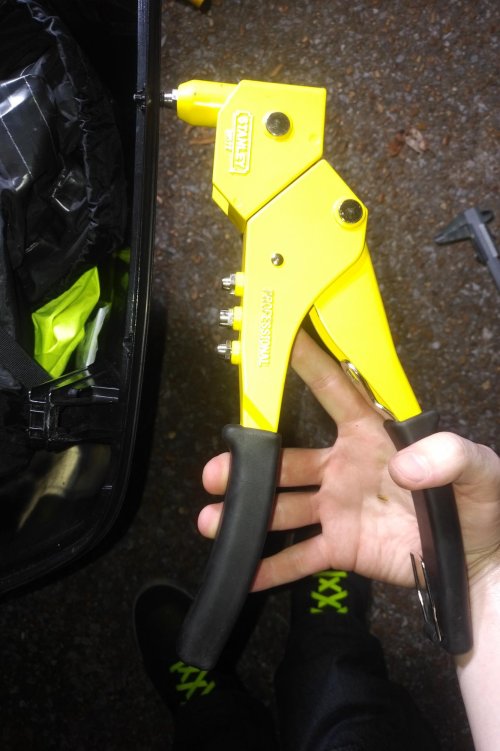
For this repair you need, at minimum, your System Cases with floppy lids, a 10-pack of these plastic rivets, a rivet pulling tool, a drill, and a 1/8 inch drill bit. Borrowing a rivet puller is best if you're doing just this repair. It occurs to me that this repair could actually be done on the road if one of your side cases got floppy, and you were able to borrow the simple tools and find a Napa store.
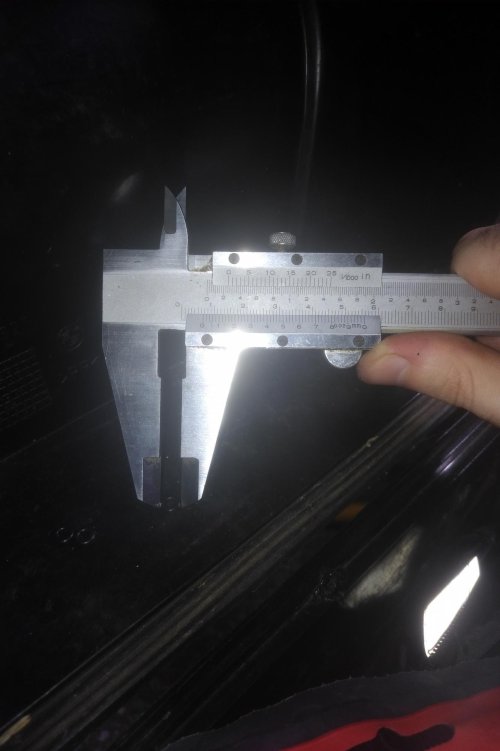
An optional addition that I used is a set of waterproof (EPDM) O-rings to make sure the rivet holes are as waterproof as I can get them without using sealants. I don't know the exact size as they came unlabeled out of a big kit of O-rings I had access to, so I took a picture with my calipers. They are about .225 inches in their outside diameter. You can see I mounted them just under the rivet heads so that they get squeezed into the outside of the saddlebag lid. You could do something different to waterproof the rivets, like using black RTV silicone underneath the heads, or you could likely do nothing at all and not get any water intrusion as they close up really tight already.
Here's the process:
1. Find the remnants of the old broken pins. They look like a semi-melted donut if the center piece is broken off like on my bags. If the pin is already broken you have a perfect guide for drilling your holes; if not, you can knock the old pin out of the center of the donut using various methods, like needlenose pliers, or just proceed to the next step and be careful not to let the drill wander.
2. Using your drill and 1/8 inch drill bit, drill a hole through the center of the old pin clean through the outer lid. Clean up any stray pieces of plastic on the outside and inside so that the hole is clean; the plastic is soft enough that I used my fingernails for this and I was able to just blow out the plastic shavings inside.
3. Apply your waterproofing method to the outside hole, if you're using one. In my case I slid the O-rings onto the rivets just under their heads.
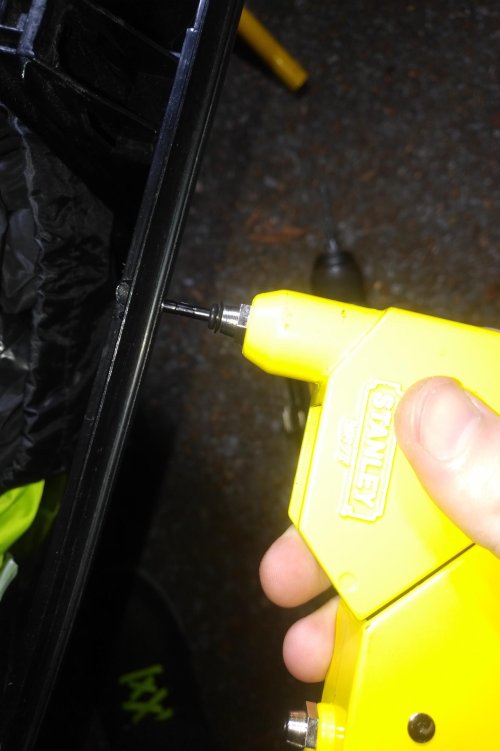
4. Insert the rivet from the outside hole, pushing it through until the head is flush with the outside of the case lid. This may require a little wiggling to align the hole correctly. You can put the shank of the rivet into your rivet puller to give you more control over this step.
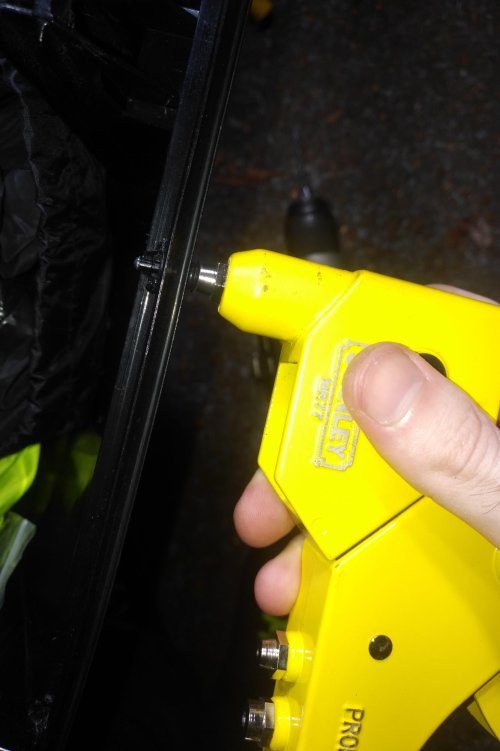
5. Pull the rivet. With a ratcheting hand riveter like I used it takes one full pull, letting go to reset, and one full pull again until the rivet shank snaps off with a loud POP. That means it's done.
6. Repeat these steps for the other broken pins, noting that the hole on the underside of the lid is slightly more difficult to reach with the case mounted on the bike. It took some bending and maneuvering for me.
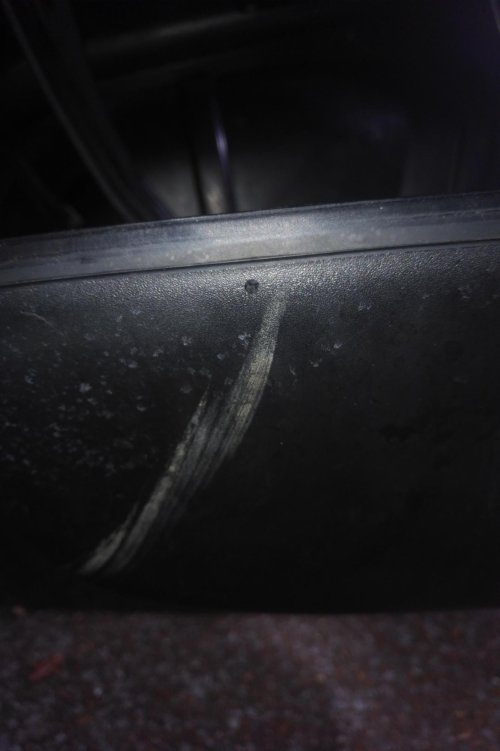
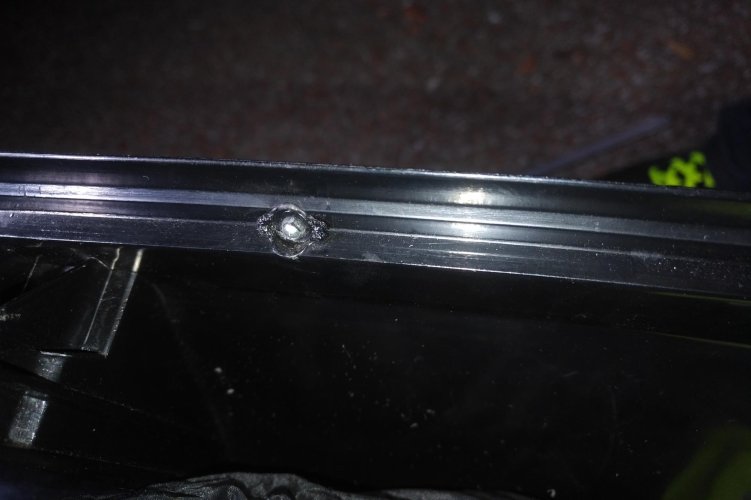
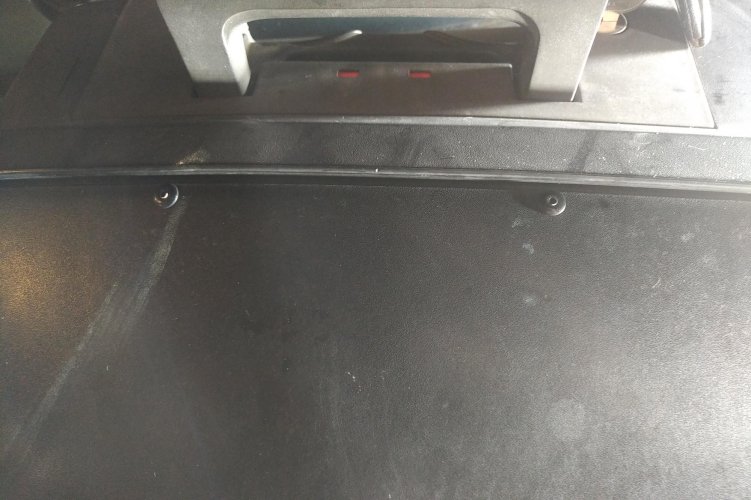
That's it! It took me maybe 15 minutes to install 8 rivets on both saddlebags. I've included a picture of what the rivet heads look like afterwards; they're visible, but not intrusive, and I think they look much better than the black tape I was using. The lids now feel as sturdy and secure as they're supposed to and if they ever break they are easily replaceable and cheap. In my particular case I do not care about the visible rivets as my cases are already pretty scraped and scratched from abuse by previous owners.
So as you might know, the lid for the standard width Oilhead System Cases is made of two independent molded shell pieces, one inner and one outer. I'm not 100 percent on this as I can only see what I have, but it looks to me like the outer shell, when it was made, had a set of 4 or 5 pins sticking out of it that went into holes in the inner shell, and these then were melted flat from the inside of the inner shell to fuse the two together.
In my particular case, nearly all of these plastic pins broke, which allowed the outer lid of my right system case to flop around in the wind and I was very worried about it potentially flying off while riding. When examining my left saddle bag I discovered that a couple of these pins were already broken so I proactively fixed it too. This is the process you see in the pictures. I could only access 4 out of the 5 pins per saddlebag but that seemed to be plenty good enough. The lids are very firmly mounted now.
I apologize for the pictures being so dark; the repair was done outside at night, but everything important seems to be fairly visible. I was able to do this repair with the cases mounted on the bike!
Napa Auto Parts stores sell these small rivets with plastic heads and aluminum shanks: the part number is 665-3125 for a 10-pack. They are perfect for this purpose and I paid less than $5 for them.
For this repair you need, at minimum, your System Cases with floppy lids, a 10-pack of these plastic rivets, a rivet pulling tool, a drill, and a 1/8 inch drill bit. Borrowing a rivet puller is best if you're doing just this repair. It occurs to me that this repair could actually be done on the road if one of your side cases got floppy, and you were able to borrow the simple tools and find a Napa store.
An optional addition that I used is a set of waterproof (EPDM) O-rings to make sure the rivet holes are as waterproof as I can get them without using sealants. I don't know the exact size as they came unlabeled out of a big kit of O-rings I had access to, so I took a picture with my calipers. They are about .225 inches in their outside diameter. You can see I mounted them just under the rivet heads so that they get squeezed into the outside of the saddlebag lid. You could do something different to waterproof the rivets, like using black RTV silicone underneath the heads, or you could likely do nothing at all and not get any water intrusion as they close up really tight already.
Here's the process:
1. Find the remnants of the old broken pins. They look like a semi-melted donut if the center piece is broken off like on my bags. If the pin is already broken you have a perfect guide for drilling your holes; if not, you can knock the old pin out of the center of the donut using various methods, like needlenose pliers, or just proceed to the next step and be careful not to let the drill wander.
2. Using your drill and 1/8 inch drill bit, drill a hole through the center of the old pin clean through the outer lid. Clean up any stray pieces of plastic on the outside and inside so that the hole is clean; the plastic is soft enough that I used my fingernails for this and I was able to just blow out the plastic shavings inside.
3. Apply your waterproofing method to the outside hole, if you're using one. In my case I slid the O-rings onto the rivets just under their heads.
4. Insert the rivet from the outside hole, pushing it through until the head is flush with the outside of the case lid. This may require a little wiggling to align the hole correctly. You can put the shank of the rivet into your rivet puller to give you more control over this step.
5. Pull the rivet. With a ratcheting hand riveter like I used it takes one full pull, letting go to reset, and one full pull again until the rivet shank snaps off with a loud POP. That means it's done.
6. Repeat these steps for the other broken pins, noting that the hole on the underside of the lid is slightly more difficult to reach with the case mounted on the bike. It took some bending and maneuvering for me.
That's it! It took me maybe 15 minutes to install 8 rivets on both saddlebags. I've included a picture of what the rivet heads look like afterwards; they're visible, but not intrusive, and I think they look much better than the black tape I was using. The lids now feel as sturdy and secure as they're supposed to and if they ever break they are easily replaceable and cheap. In my particular case I do not care about the visible rivets as my cases are already pretty scraped and scratched from abuse by previous owners.
Attachments
-
 IMG_20210812_2224352.jpg137.6 KB · Views: 112
 -
 IMG_20210812_2224480.jpg238.4 KB · Views: 109
 -
 IMG_20210812_2224547.jpg370 KB · Views: 107
 -
 IMG_20210812_2225041.jpg382.7 KB · Views: 107
 -
 IMG_20210812_2225198.jpg134.6 KB · Views: 107
 -
 IMG_20210812_2225401.jpg175.1 KB · Views: 108
 -
 IMG_20210812_2225476.jpg204.3 KB · Views: 109
 -
 IMG_20210812_2225555.jpg140.4 KB · Views: 107
 -
 IMG_20210812_2226061.jpg141.2 KB · Views: 109
 -
 IMG_20210812_2226145.jpg202.7 KB · Views: 108
 -
 IMG_20210812_2226330.jpg245.8 KB · Views: 108
 -
 IMG_20210812_2226381.jpg157.3 KB · Views: 111
 -
 IMG_20210812_2227090.jpg260.8 KB · Views: 106
 -
 IMG_20210812_2229462.jpg358.7 KB · Views: 106
