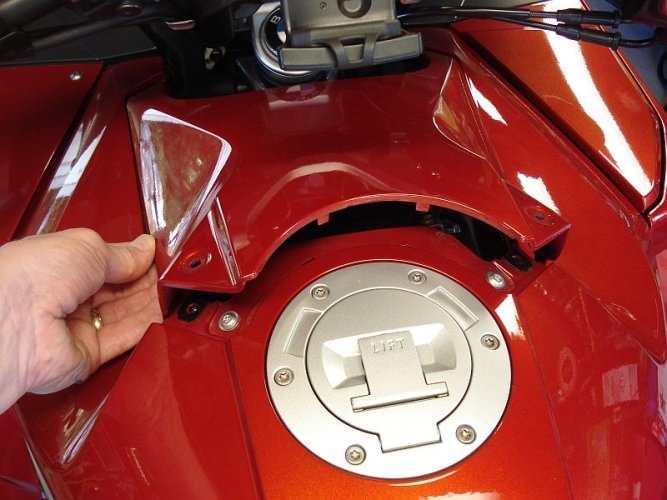
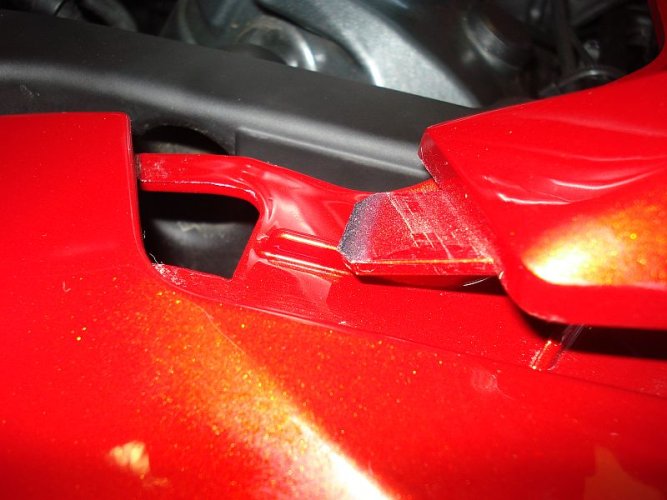
• Welcome Guest! If you are already a member of the BMW MOA, please log in to the forum in the upper right hand corner of this page. Check "Remember Me?" if you wish to stay logged in.

    We hope you enjoy the excellent technical knowledge, event information and discussions that the BMWMOA forum provides. Why not take the time to join the club, so you can enjoy posting on the forum, the club magazine, and all of the discounts and benefits the BMWMOA offers?

    Want to read the MOA monthly magazine for free? Take a 3-month test ride of the magazine; check here for details.

  • NOTE. Some content will be hidden from you. If you want to view all content, you must register for the forum if you are not a member, or if a member, you must be logged in.

Plastic Cover Removal on a 2009 KGT 1300

Semper_Fi

Honey Badger
The articles, posts and comments in this tech section are posted by individual members and reflect their personal thoughts and experiences with repairing, maintaining, and generally working on motorcycles. This information may require specific knowledge and skills, may or may not be correct or current to model.

The authors of information found here and the BMW MOA take no responsibility for ensuring the accuracy of any information (including procedures, techniques, parts numbers, torque values, tool usage, etc.), or further for any damage of any kind or injuries incurred or caused by anyone following the instructions or information found here.

It is the duty of the individual to either assume the liability himself for responsibly using the information found here, or to take the bike or accessory to a Dealer or other qualified professional service.


Lastly, please ensure you dispose of your used chemicals, oils and fuels in an environmentally responsible manner. Most Auto Parts stores and service stations will accept used oil and lubricants, tires and batteries, please check for your local availability.


This article, text and photos are Copyright of the individual authors and the BMW MOA, any copying or redistributing is permitted only by prior written authorization.
 
Last edited:
Introduction and Sequence

The following DIY is comprised of several sections documented was the process to remove all the major panels for accessing the engine and other peripherals.

That being said the details follow this order:

1 - Pillion (Rear) Seat

2 - Driver's Seat

3 - Battery Cover

4 - Left (Clutch Side) Panel

5 - Right (Throttle) Panel

6 - Tank Sides (L and R)

7 - Tank Cover

8 - Bottom (Skirt) Panels (L and R)

9 - Assembly Hints

*************************************************************

Tools Required:

T-25 Torx of all the screws

**************************************************************

IMPORTANT NOTICE:

There are various length Torx screws found on the same panel.

The length differences will be called out in the information below.

As a reminder reference the opening Disclaimer Message

**************************************************************

SECOND IMPORTANT NOTICE:

The plastic pieces are large, especially the side panels - ensure you have an adequately sized area to store them while you work on the bike as it would be a shame to scratch and damage the pieces, plus they are expensive to repair/purchase
 
Last edited:
Bike Specifics

2009 KGT

Factory Options Include:

Heated Seats

Heated Grips

Cruise Control
 
Last edited:
Rear Seat

UNHEATED REAR SEAT:

Unlock Rear Seat as per Owner's Manual and set aside

HEATED REAR SEAT

Unlock Rear Seat as per Owner's Manual and Remove Heated Seat Connector highlighted below
 

Attachments

  • Rear Seat Web.jpg
    Rear Seat Web.jpg
    136 KB · Views: 988
Detail of rear connector - press down and pull off.

Set connector cable aside

Put seat aside, proceed to the Front Seat
 

Attachments

  • Rear Seat Plu Web.jpg
    Rear Seat Plu Web.jpg
    80.4 KB · Views: 973
Front seat

UNHEATED FRONT SEAT:

Pull off Front Seat as per Owner's Manual and set aside

HEATED FRONT SEAT

Pull off Front Seat as per Owner's Manual and Remove Heated Seat Connector highlighted below
 

Attachments

  • Front Seat Web.jpg
    Front Seat Web.jpg
    110.7 KB · Views: 970
Detail of the front seat heat connector - press down as shown and pull off - same as what was done with the rear.
 

Attachments

  • Front Seat Plug Web.jpg
    Front Seat Plug Web.jpg
    86.1 KB · Views: 978
Battery Cover

Remove the two T-25 Screws Highlighted Below
 

Attachments

  • Battery Cover_Web.jpg
    Battery Cover_Web.jpg
    99.4 KB · Views: 977
As you remove the cover - Pull up and out as there is a tab that fits into a slot on each end - important alignment requirement when re-assembling
 

Attachments

  • Battery Cover_Removal _Web.jpg
    Battery Cover_Removal _Web.jpg
    105.8 KB · Views: 967
Last edited:
Detail for the tab and slot combo of the battery cover to the tank cover.
 

Attachments

  • Battery Cover Detail.jpg
    Battery Cover Detail.jpg
    87.6 KB · Views: 970
Left Side Panel

The left side panel is secured in 4 different areas:

1 - the front inside by the radiator

2 - the lower bottom (above the lower skirt)

3 - along the tank

4 - by the instrument panel area

The following steps follow the order above

NOTE INTEREST - the screws are different lengths and have been duly called out.
 
Inside Panel - there are four screws securing the portion of the panel.

The top most (by the oil cooler plastic housing) is 16mm long, the rest are all 20mm long

Due to the viewing angle there will be two images shown:

- the first covers the top 3 screws

- the second covers the bottom most screw
 

Attachments

  • Inner Side Panel 1 of 2.jpg
    Inner Side Panel 1 of 2.jpg
    82.1 KB · Views: 990
Inner cover screws removed - so their lengths can be noted
 

Attachments

  • Inner Panel Screws.jpg
    Inner Panel Screws.jpg
    50.6 KB · Views: 972
Lower Bottom Screws

Again different lengths as noted
 

Attachments

  • Bottom Clutch Panel.jpg
    Bottom Clutch Panel.jpg
    97.5 KB · Views: 972
Point of interest when removing the side panel.

It has a couple of tongue and grove locations and also there is a securing post on the panel which fits into a hole.

you will note there will be some slight resistance as you pull the panel off - just don't yank it off to prevent from breaking the post.
 

Attachments

  • Dismount Point.jpg
    Dismount Point.jpg
    80.7 KB · Views: 660
Right Side Panel

The process as was done to the left is done to the right with one additional item.

The ambient air temperature sensor is mounted on the inside of the right panel, you will need to disconnect it to remove the panel.

The next 4 pictures covers the removal of the screws of the inner panel and the disconnection of the temp sensor.

The first shown below is 16mm Long and the rest are 20mm long
 

Attachments

  • Top screw with air snorkle.jpg
    Top screw with air snorkle.jpg
    98.9 KB · Views: 657
Back
Top