• Welcome, Guest! We hope you enjoy the excellent technical knowledge, event information and discussions that the BMW MOA forum provides. Some forum content will be hidden from you if you remain logged out. If you want to view all content, please click the 'Log in' button above and enter your BMW MOA username and password.

    If you are not an MOA member, why not take the time to join the club, so you can enjoy posting on the forum, the BMW Owners News magazine, and all of the discounts and benefits the BMW MOA offers?

  • Beginning April 1st, and running through April 30th, there is a new 2024 BMW MOA Election discussion area within The Club section of the forum. Within this forum area is also a sticky post that provides the ground rules for participating in the Election forum area. Also, the candidates statements are provided. Please read before joining the conversation, because the rules are very specific to maintain civility.

    The Election forum is here: Election Forum

Crankcase Breather

bigrider

Living the Legend
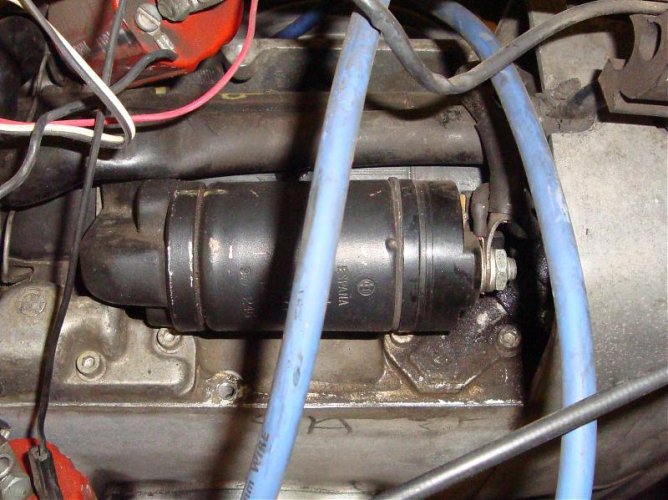
I've read in several articles that the old style crankcase breather valve (R90/6)can be (should be) replaced with the newer style reed valve. I have not read anywhere how this is done. I can see where would have to remove the post (it's pressed in), but since the new reed valve sits higher, will the cover have to be replaced also, or does the three hole orifice pop out someway and the reed valve sits in the old location. Thanks

Dave H
Colorado Springs, Co
 
I don't know about "should be". Unless there's some reason to believe the current breather is sticking open, letting oil mist by, or generally making a turkey gobbler sound, it could be left alone.

However, there should be a housing over the breather valve. If I'm not mistaken, the vertical profile of the new reed type is actually lower...there's no middle post sticking up. Once you pull the old valve out (I used a make shift slide hammer affair), the new one just presses into the same place as the old valve. Be careful in orientation of the opening of the reed valve and/or the screw that holds the fixed end to the base. On my /7, I had to put the screw in the 5 o'clock position or nearest to the right footpeg. Otherwise, there was going to be clearance issues with the cover.

HTH...Kurt in S.A.
 
breather valve

I'ts been over 10 years years since I changed out the old breather to the "newer" design. I believe I heated the area around the post with a heat gun, then pulled the post with a homemade puller. I can't remember having any problems.
 
The post was no problem, it popped out with a pull of the pliers. The original valve disk is about 1/32 thick. The reed valve is probably around 1/4 in thick. Although the new valve "fits" in the old location (same diameter), the housing cover does not fit flush over the new valve. Sounds like a need for a new cover.

Dave H
Colorado Springs, Co
 
When I removed my old breather, it was not only the post but an entire assembly. The center post was connected to a round flange via three spokes...it's difficult to describe and I'm trying to remember things. The disc was connected to the post and was held down to the top of the case/flange with a spring. I first removed the circlip so the spring could be released and then the disc could be slid off. I then used the slide hammer to remove the remainder of the and a big hole was left. The new breather just tapped down into the hole and ended up being essentially flush with the top of the case. The old cover fit just fine. Maybe things are different on a /6...but the parts CD seems to show basically what I'm talking about. There should be nothing left in the hole once you pull out the old breather. Do I have that all wrong??

Kurt in S.A.
 
breather

Kurt, I couldn't have writen that any better than u just did. I think u covered the subject quite well. The parts microfiche shows this on p.11/5 & 11/18.
 
I changed mine on my 75 R90/6 to the newer type, the new type reduce the amount of oil that would come out. Did not have to change cover.

Don
 
20774 said:
... The center post was connected to a round flange via three spokes... I then used the slide hammer to remove the remainder of the and a big hole was left. The new breather just tapped down into the hole and ended up being essentially flush with the top of the case. The old cover fit just fine....
Kurt in S.A.

We are talking the same thing. There is a three hole item (plug) that the post sits in. My question was does this three hole plug come out to facilitate the new reed valve. From your discription, it does. I just need pull the three hole plug out. Thanks

Dave H
Colorado Springs, Co
 
breather valve

The reed valve sets on it's on round aluminum housing(plug) . The part # 11 11 1 335 712 shows that being 3 parts. The round aluminum housing, the reed valve, and the screw to hold the reed. So the old housing comes out and the new one is pressed in. The reed is screwed down to the new housing and the breather housing cover is bolted down over that. Hope that helps. Go to one of those dealers that have the parts fiche on the net and look at those pages I gave in a previous post. That might make it clearer.
 
barryg said:
The reed valve sets on it's on round aluminum housing(plug) . The part # 11 11 1 335 712 shows that being 3 parts. The round aluminum housing, the reed valve, and the screw to hold the reed. So the old housing comes out and the new one is pressed in.
The part we are talking about is the three part piece you refer to. My problem was that I didn't know you could take out the old three hole plug to fit the new reed valve assembly. I'm not messing with the reed valve, it came as an assembled piece. Thanks

Dave H
 
Suggestion...put the new breather in the freezer for a few hours before you press it into the top of the case. It should make the job go a little easier and minimize any damage. Both items are aluminum IIRC. Just make sure you tap in the new breather fairly square.

Kurt in S.A.
 
Success

The old plug popped out rather easily (with light use of the hammer slide) and the new reed valve tapped in just as easily. Mission complete. I wish I had known about the old plug removal procedure earlier, didn't have to remove and ruin the post. Thanks to all for your advice. :thumb

Dave H

Coloradoo Springs, Co
 
Thank you all - info and advice helped a lot.

I read I shud replace the old breather valve with the new reed type. Didn't have a clue until I read the forum threads.

I just rented a dent remover slide hammer - $10 per day. And then I went to Home Depot to buy a J-hook bolt, 1/4 inch and 20 coarse threads. This screwed onto the end of the removable nut which then screwed onto the end of the slide hammer. Old valve popped out just like everyone said. Also froze the new reed valve and it just tapped right in.

Ok - now one thought. Last year my right side exhaust valve burned up. My left side exhause valve was ok. I replaced both anyway.

However, on replacing the breather valve, I noticed its feeder tube fed into the right cylinder and only the right cylinder.

Is it possible that the right side burned hotter because the fuel mixture had some oil in it from/via the old crankcase breather valve?? I was wondering where and why I used about a pint of oil every 1000 miles.

Hope the new reed valve answers the question.
 
Is it possible that the right side burned hotter because the fuel mixture had some oil in it from/via the old crankcase breather valve?? I was wondering where and why I used about a pint of oil every 1000 miles.

I doubt it...until I believe 1981, they ran the breather output to the right carb only. With hundreds, possibly thousands of bikes of the '70s still on the road with that setup, there must be other reasons why you had a right side problem and all the others didn't...or haven't reported it.

Actually, a pint every 1000 miles is not too awful. Are you filling the oil to the very top mark on the dipstick each time you find the level down? Lots of anecdotal information that says you should fill to around 1/2 on the dipstick...less oil volume, more air volume, less foaming and thus less oil mist. Also, some oils tend to burn off their additive package quicker than others. Use a quality oil and this tendency might reduce.

Have you done a compression test or leakdown test either before or after the valve replacement? You may have excessive blowby on the rings, increasing the crankcase pressure thus resulting in more oil being pushed out.

What year bike do you have? There was a run of bikes (my /7 has it) where the oil mist that comes out of the breather is funneled forward and down into a cavity in the block. Just forward of the breather is a depression which has a small hole in the bottom of it. This cavity/hole was designed to allow the oil mist to settle and condense out, dripping back into the crankcase. If this hole is plugged on your bike, this could be a source of excess oil to the right carb.

I would look for other things to have cause the right valve to burn up. Probably carburation, valve settings...maybe just luck of the draw - the left side of the bike was built on Monday and the right side was built on the previous Friday?? :dunno
 
Ok, so I was planning to do this during the weekend. I pulled the seat, tank and top cover off. After looking at all the other posts and other sites, none discuss the starter/solenoid. Only one of the breather cover 4mm allen bolts is accessible, the other is blocked by the solenoid. Do I need to pull the solenoid off?? IÔÇÖm hope I havenÔÇÖt bitten off more than I can do. The bike is a 1978 R100S. Any info would be appreciated. Thanks..
 

Attachments

  • DSC01951.jpg
    DSC01951.jpg
    88.2 KB · Views: 115
Only one of the breather cover 4mm allen bolts is accessible, the other is blocked by the solenoid. Do I need to pull the solenoid off?? I’m hope I haven’t bitten off more than I can do. The bike is a 1978 R100S.

I had the same problem on my '78 R100/7. I ended up just loosening the mounting bolts for the starter so I could lift it up a bit. With enough lift, I could get the bolt out. Be careful of the nose cover on the back side of the starter. I hear they break easily.

Once you get things all cleaned up and before you put the cover back on, be sure the small hole that will be just forward of the breather is open. You'll see it once you get that cover off. Find a thin piece of stiff wire and poke into the hole. DON'T LET THE WIRE DROP INTO THE HOLE! You can probably understand why...
 
Regarding the breather,....
I had occasion to be under the starter cover last year on my R75/5. While I was in there I took my breather apart. It was making the wooting sound. After that operation, the wooting sound went away. It makes no sense that you could fix something just by taking it apart and looking at it, but...
 
OK, so i loosen up the starter, or can i loosen the solenoid?

I'm not sure I looked close enough at my situation...I went straight for the starter bolts. If you can get at the solenoid attachments and moving it relative to the starter body doesn't cause any problems, then go for it.
 
Back
Top