• Welcome, Guest! We hope you enjoy the excellent technical knowledge, event information and discussions that the BMW MOA forum provides. Some forum content will be hidden from you if you remain logged out. If you want to view all content, please click the 'Log in' button above and enter your BMW MOA username and password.

    If you are not an MOA member, why not take the time to join the club, so you can enjoy posting on the forum, the BMW Owners News magazine, and all of the discounts and benefits the BMW MOA offers?

  • Beginning April 1st, and running through April 30th, there is a new 2024 BMW MOA Election discussion area within The Club section of the forum. Within this forum area is also a sticky post that provides the ground rules for participating in the Election forum area. Also, the candidates statements are provided. Please read before joining the conversation, because the rules are very specific to maintain civility.

    The Election forum is here: Election Forum

Quick question on fork tube disassembly on a 700 GS (2013)

weschmann

Kawa Afterthought
I'm getting ready to disassemble my F700GS fork tubes to install Hyperpro fork springs. Looking at all the videos available on Youtube for other types of bikes on the process, it would appear that at the top of the fork tube there should be a cap, other than the little plastic cap that pops out on top that should be loosened before removing the entire fork tube from the bike. When I look at the top with the plastic cap removed, I don't see any type of nut head or torx bit access to get a bite on loosening the top cap. Is there a cap that needs to be loosened before removing from the bike? Just a bit confused and would like to have an idea of how to progress past this first step.
 
I'm getting ready to disassemble my F700GS fork tubes to install Hyperpro fork springs. Looking at all the videos available on Youtube for other types of bikes on the process, it would appear that at the top of the fork tube there should be a cap, other than the little plastic cap that pops out on top that should be loosened before removing the entire fork tube from the bike. When I look at the top with the plastic cap removed, I don't see any type of nut head or torx bit access to get a bite on loosening the top cap. Is there a cap that needs to be loosened before removing from the bike? Just a bit confused and would like to have an idea of how to progress past this first step.

When you look closely you will see that there is a wire ring in a groove in the top of the fork tube that prevents the top plug from coming out. To remove the springs requires that the top plug be pushed down and the ring be removed from the groove. Once the ring is extracted the plug will come out past the groove, followed by a spacer, and then the spring.

The top plug is under spring pressure. Be careful not to get popped in the face by the plug and spacer shooting skyward. It has been my experience that this is a two person job. One person uses a large punch or similar tool to hold the plug downward while the second person messes around to remove the wire ring.

Assembly is the reverse. The new springs will be harder to compress (probably) but the ring is easier to install than to remove.

Great, thanks Paul. I have a volunteer dropping in to the house from the Upper Peninsula,(Beemer UP club) next week on the way to the Kansas City BMW Club dinner, so I'll press him into helping in exchange for housing....:) It's an added benefit to meeting new friends at the MC rallies and opening your home to them as they pass through your area, eh! I think I have everything else figured out for the upgrade, along with some new fork gaiters for the final product, so looking forward to learning something new again about motorcycle maintenance. Never was much of a mechanic other than changing oil and air filters on cars, so this is a new challenge that has taken me much too long to step up to..... Never too old to learn something new.....
 
I did some looking for a picture of the top of the F700 tubes to see if they were the same as the F800- nope. I was hoping I could let you in on a few tips on "cracking the tubes" on you machine.
Maybe you could take some pictures as you go so we can have a peek :thumb
Gary
 
I did some looking for a picture of the top of the F700 tubes to see if they were the same as the F800- nope. I was hoping I could let you in on a few tips on "cracking the tubes" on you machine.
Maybe you could take some pictures as you go so we can have a peek :thumb
Gary

I did look at the parts fishe (Real OEM) to verify the plug and ring construction at the top of the fork tubes.

http://www.realoem.com/bmw/enUS/sho...2-K70-BMW-F_700_GS_0B01,_0B11_&diagId=31_1010

See items #12 and #13
 
I did some looking for a picture of the top of the F700 tubes to see if they were the same as the F800- nope. I was hoping I could let you in on a few tips on "cracking the tubes" on you machine.
Maybe you could take some pictures as you go so we can have a peek :thumb
Gary

I'll do my best with some photos of the disassembly process. Not all that great with a camera, but will give it a try as there is very little out there on the 700 GS for review......
 
Fork Seal and Spring Upgrade 1

This will be one of several attempts to provide feedback on the F700 GS fork disassembly, seal replacement and spring (Hyperpro progressive) on my 2013 GS. With my attempt to upgrade my springs, I decided to change my fork seals while everything was apart, but found it hard to find any information on the 700, which is not the same as the 800 GS. Lots of info. out there on the 800, but kind of sparse for the 700. So here goes...
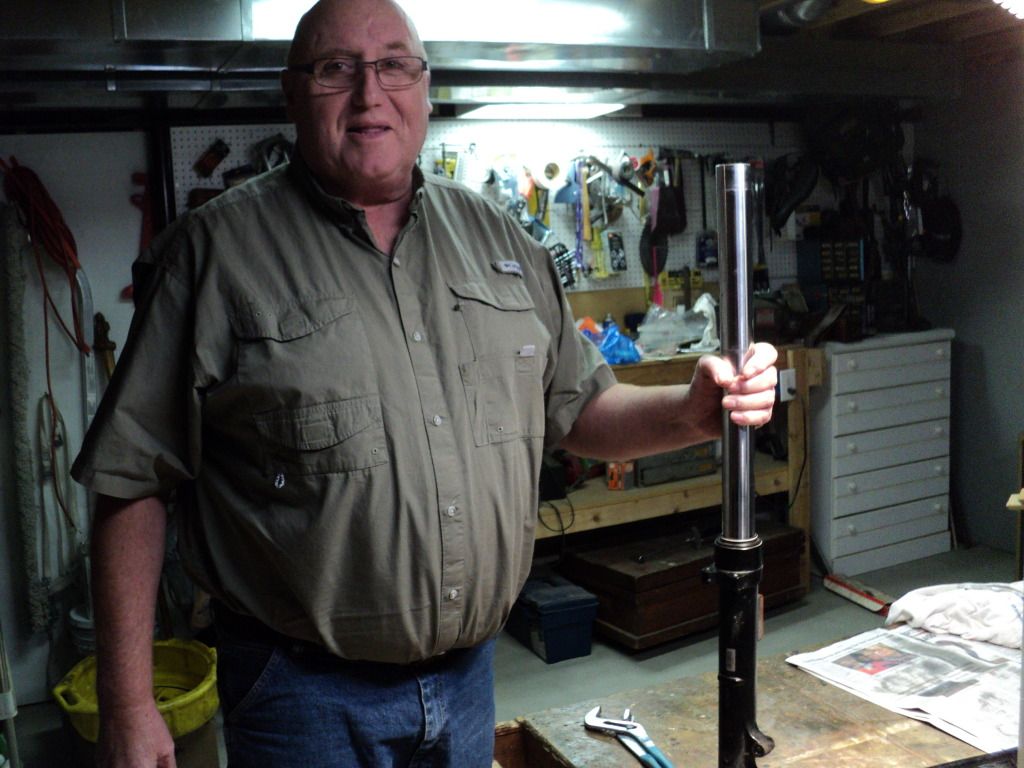
First of all, a big shout out to Bob Robertson from the Upper Peninsula (Marquette) who graciously contributed to my confidence that I would be able to reassembly my dissected bike during the process...

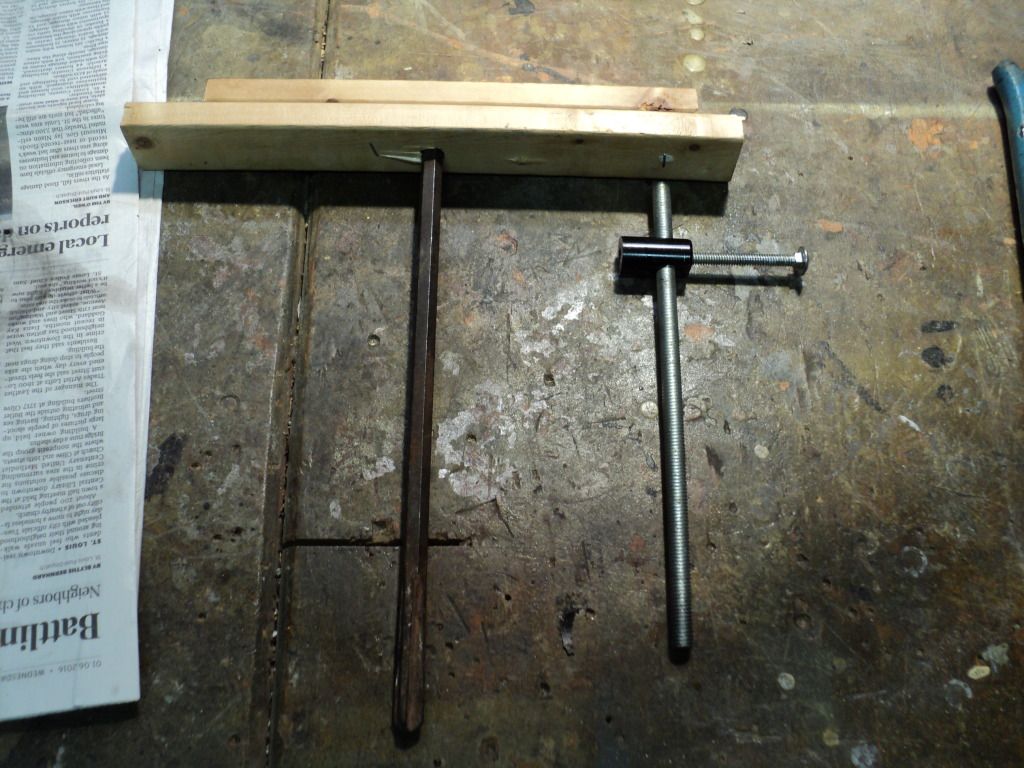
To help with the disassembly of the circlip from the tube I made a tool out of an old concrete star drill driven through a piece of wood to act as a handle for compressing the fork spring. I also made a measuring tool for fork oil install to get the right amount in each fork.

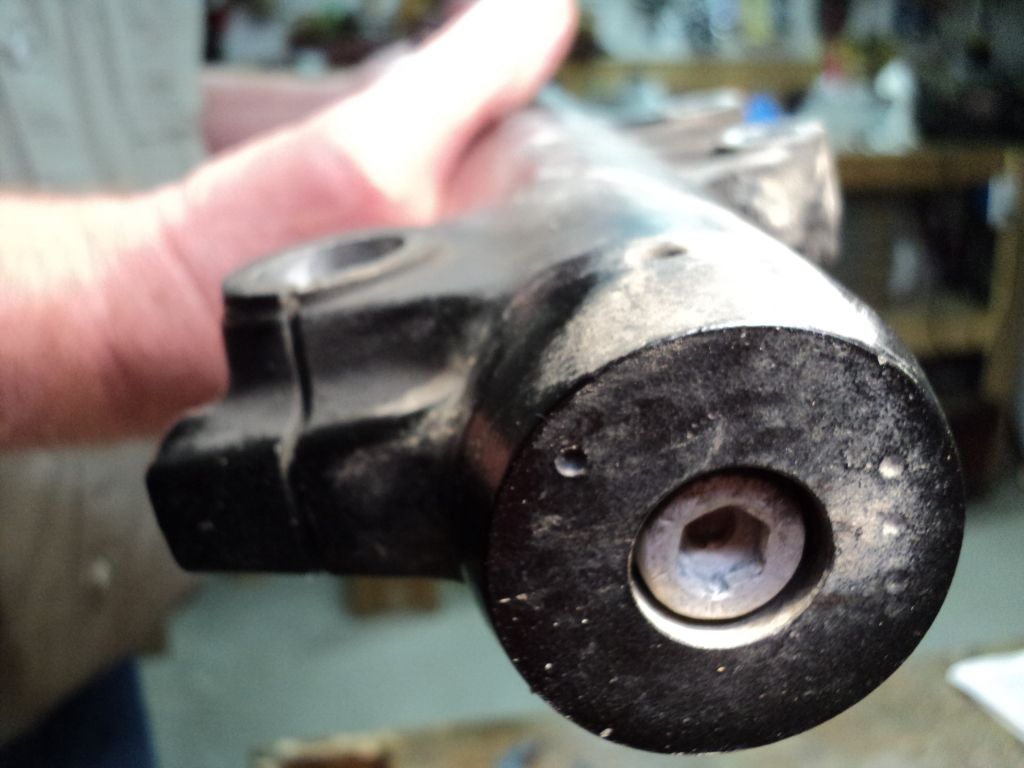
So to start, make sure to loosen the oil drain bolts at the bottom of the fork before removing the weight of the wheel from the fork. The weight holds the dampener tube tight so it won't turn while loosening the bolt. Once the bold is loose, remove the fork tube and take to your bench for further disassembly.
 
Second Installment for Fork Seal and Spring Upgrade

Fork Tube Disassembly
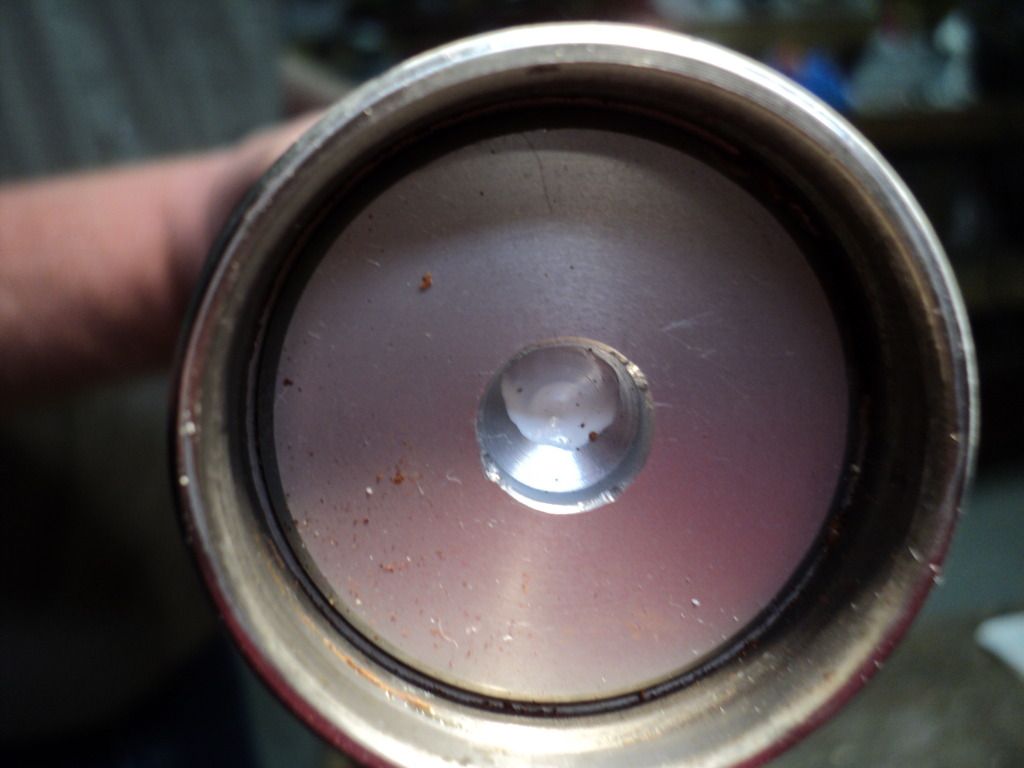
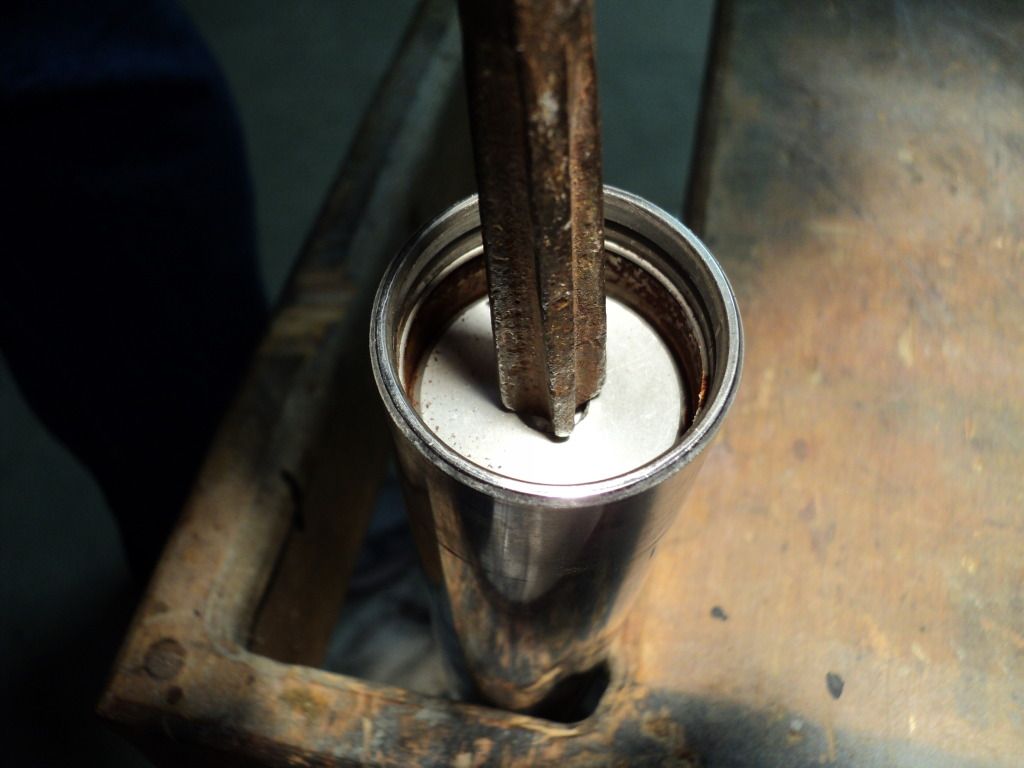
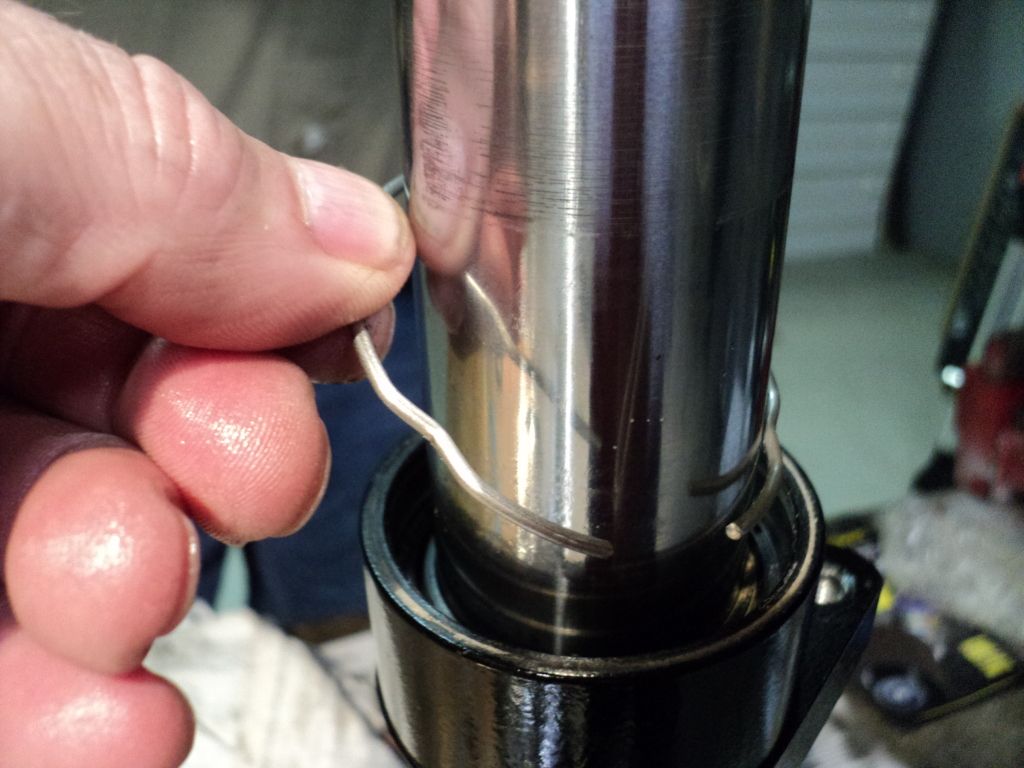
Once you have the fork out of the bike, look at the top of the fork. You'll notice that where you would normally see a nut to unscrew, there is nothing but a cap with a round depression in the middle. The depression is for using a dowel pin or some other type of pin to depress the fork spring in order to get to the really thin circlip holding the cap in.

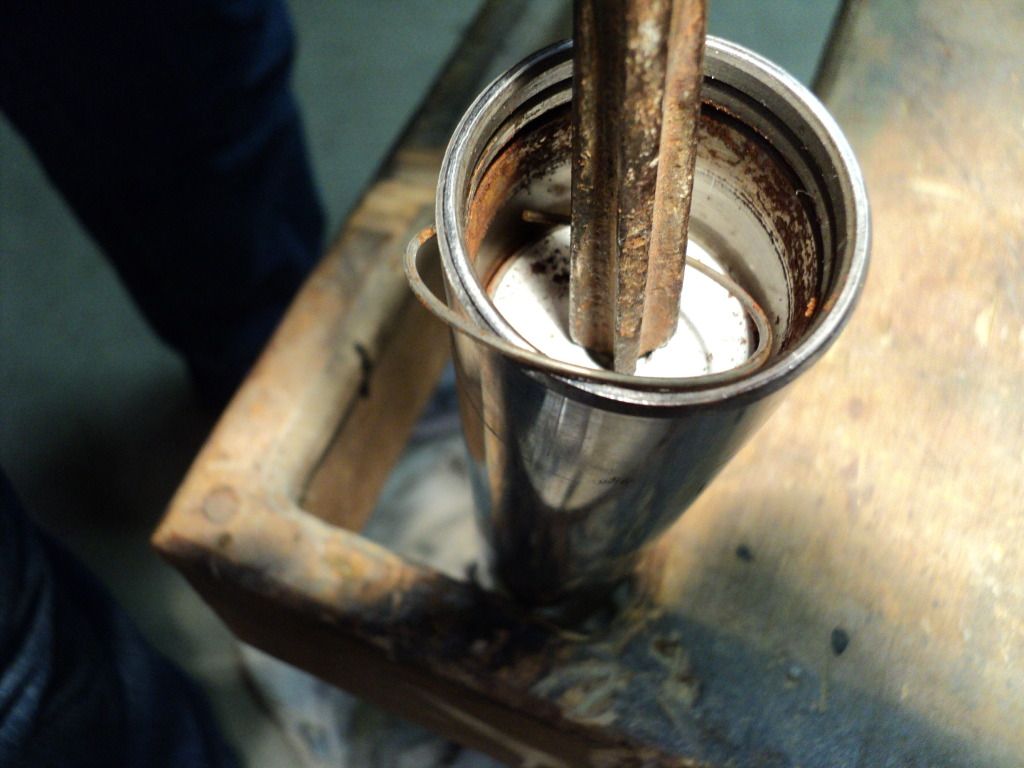
Depressing the cap will result in something like this...
and result in removing this thin circlip.
Push the circlip down with a small screwdriver or I used a small nut pick to press it down. By doing so, it dislodges from it's keeper and is very easy to pick out without any risk of it flying out and getting lost on the floor. Then finish removing the lower fork oil bold from the bottom of the fork and drain the oil.
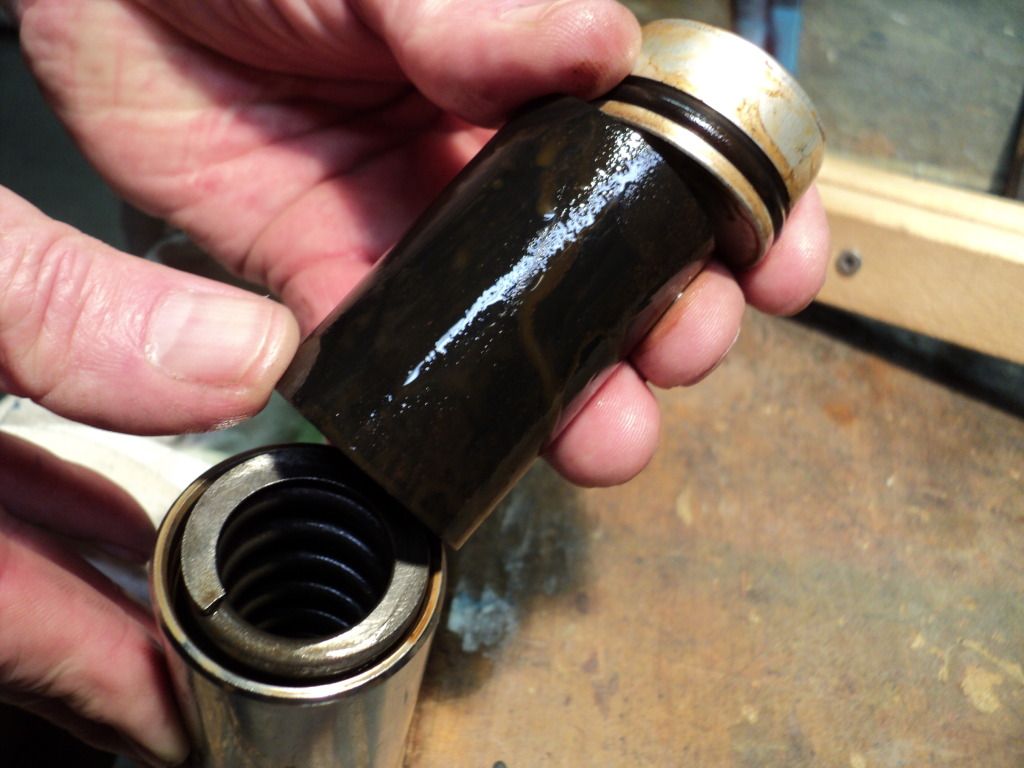
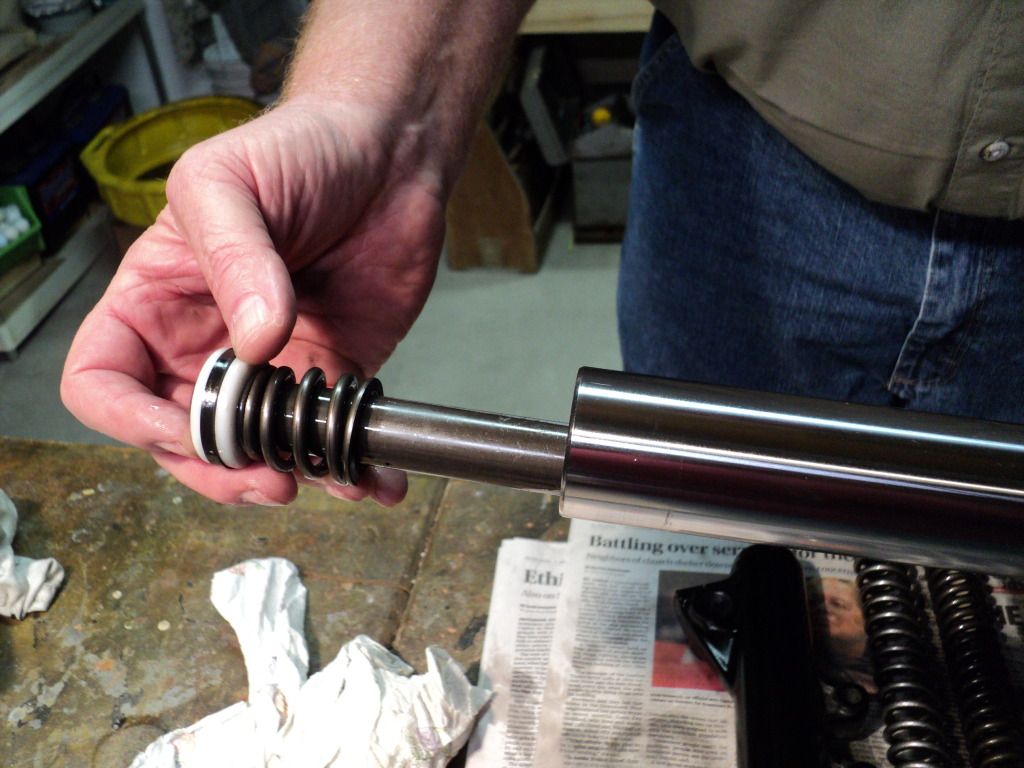
Once this is removed, it's time to take out the guts, (spacer, various washer, spring etc.) Note the sequence they come out so reassembly isn't a guess.
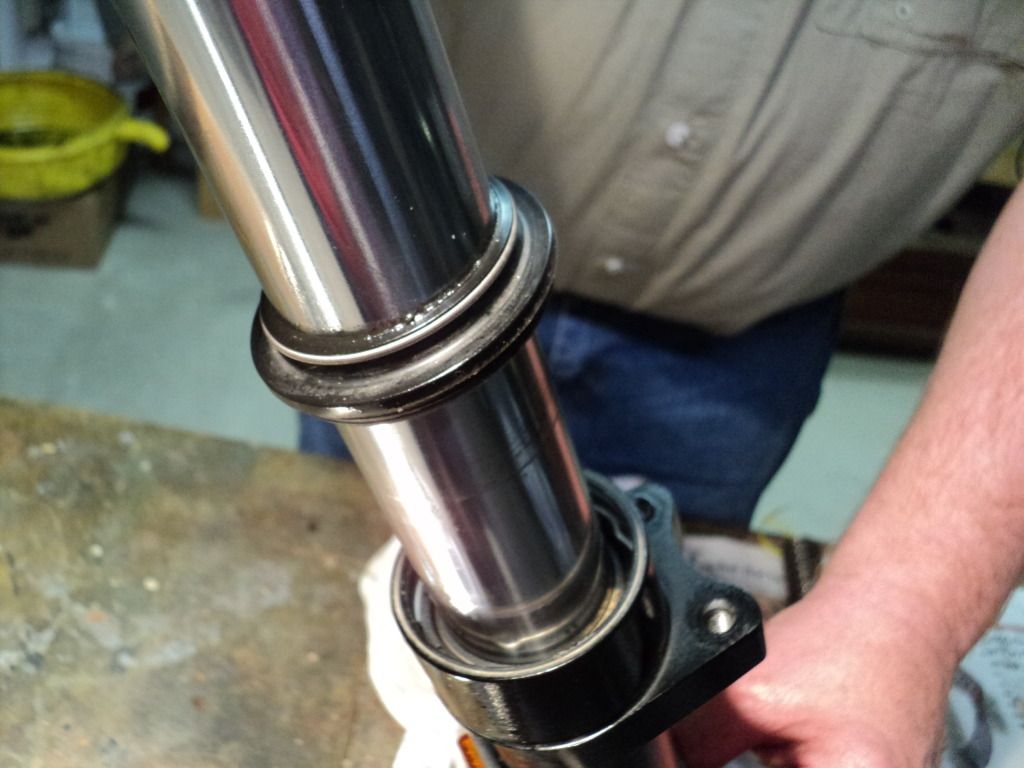
Mext, remove the dust cover from the lower fork by prying out with a small pick or screw driver.
You can see the retainer circlip in this photo, which is the next to come out.

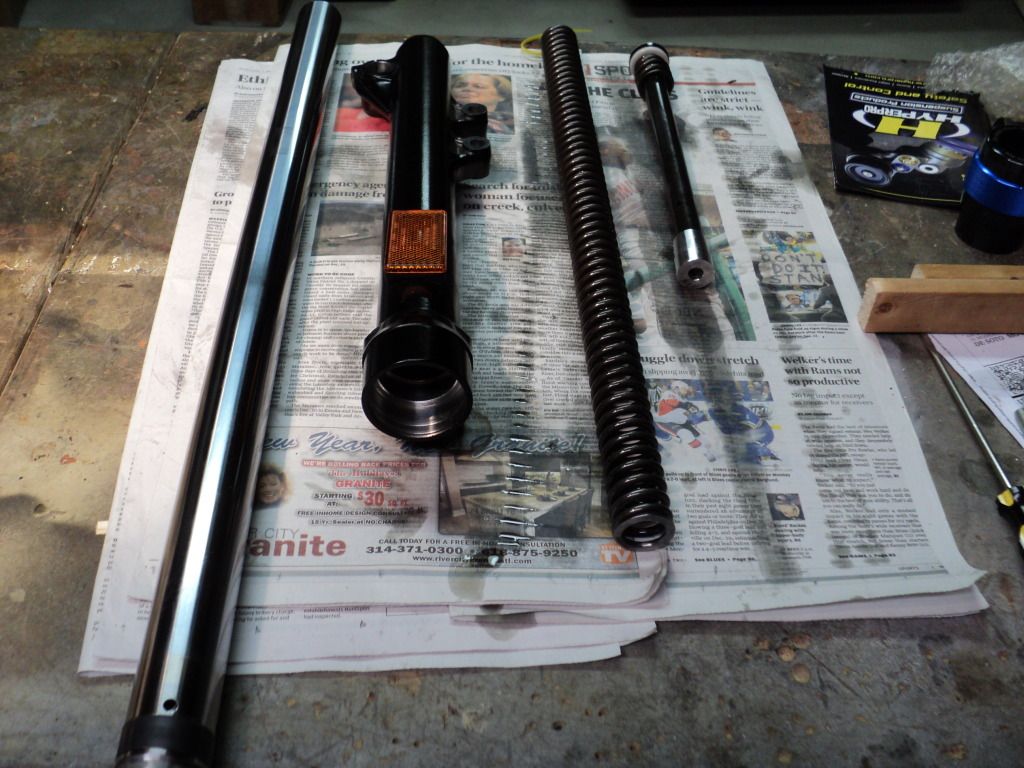
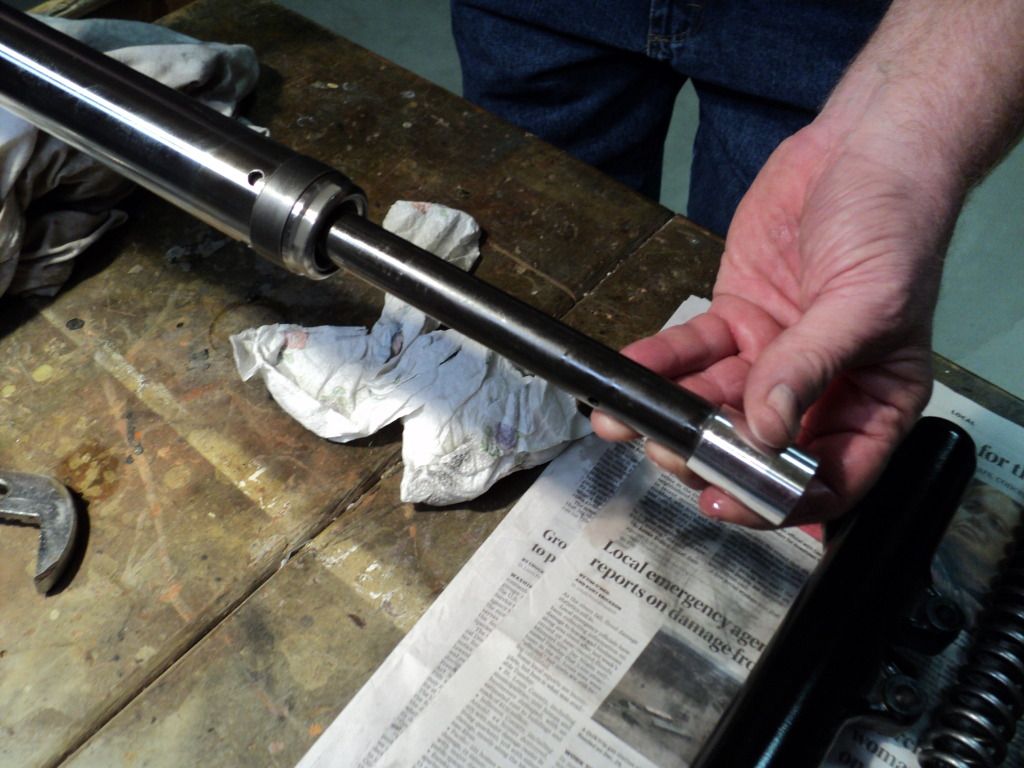
Once your retainer clip is out, you simply have to snap the inner fork out until it pops out the fork seal. Then remove the dampener rod, clean everything up and get ready to reassembly. Don't forget to look in the bottom of the stationary part of the fork for a stop bushing that the drain bolt screws into. It will still be in the fork after removing the dampening rod.

Here's a pic of the tube disassembled.
 
Third Installment for Fork Seal and Spring Upgrade

Time to reassemble!
Once you've checked the lower bushing for any damage, your ready to put everything back together. Start the reassemble in reverse order that you took her apart. When installing the dampening rod in the lower fork assembly, don't forget to install the stop onto the dampening rod once it goes through hole in the upper fork tube.
Now is the time to hand start the bolt at the bottom of the fork (with a new sealing washer) and hand tighten to keep your fork oil from coming out when you refill your fork. We found that if you insert the fork spring into the fork temporarily, it will give you just enough torque to keep the fork dampener from turning while trying to tighten.
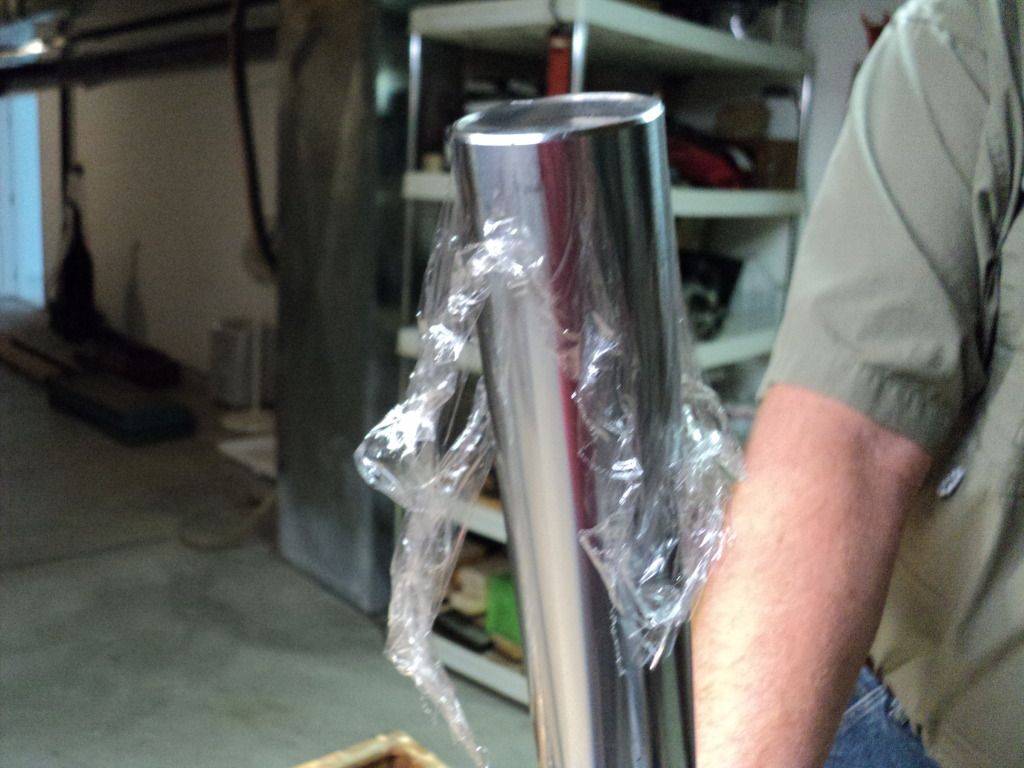
Now your ready to install the slide bushing, intermediate ring, sealing ring etc, in the order in which they came apart. The slide bushing was a bit hard to get started, but once pinched together, it slid in quite nicely. The intermediate ring easily slides on and the your ready for the sealing ring. Place a piece of Saran Rap over the top of the fork and slide the ring on.

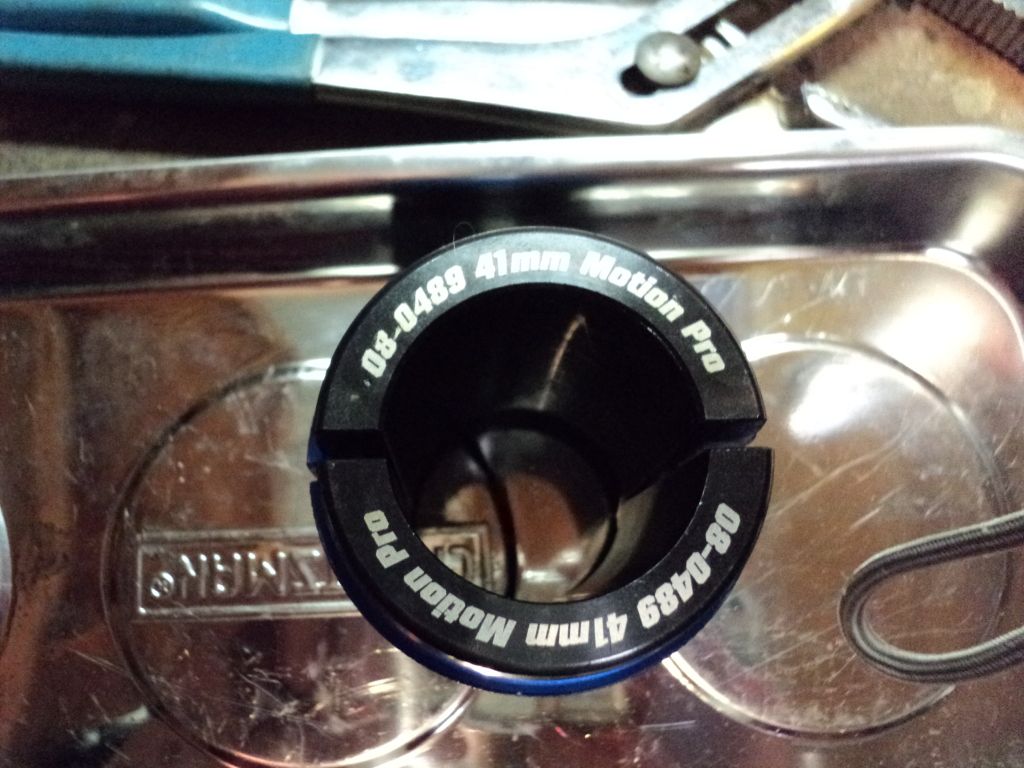
I purchased a Motion Pro 41 mm, (the 800 is a 43 mm) seal driver but found that it was not thin enough at the bottom of the tool to fit into the space between the inner and outer fork tube, so I couldn't drive the seal down with it.
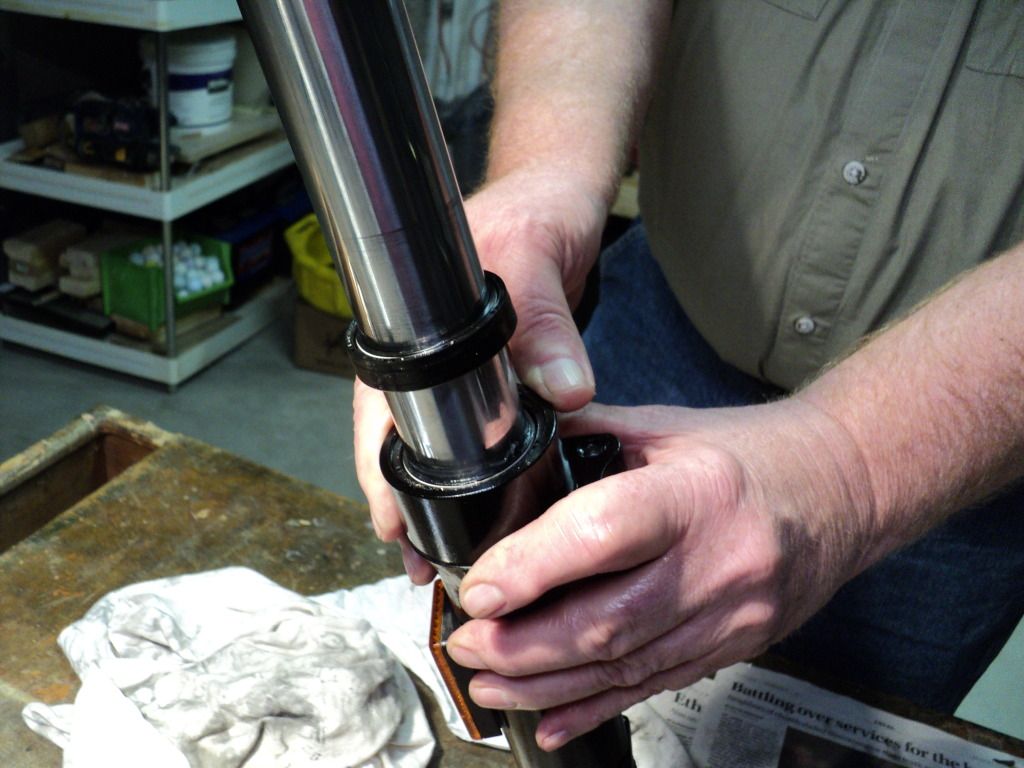
So I would suggest a different driver or make one up yourself. I ended up placing the old fork seal on top of the new seal, and then using the Motion Pro driver to push the seal in. I had to drive almost fully in, then pick out the old seal, place the keeper circlip ring on and drive the old seal once again to get it deep enough for the circlip to engage. No big deal, but would have been better if the driver would have had a thinner shoulder at the bottom. Here's a pic. of using the old fork seal on top of the new seal to drive it down.
Once the seal and clip was installed the rest is easy pesie. Push the upper fork all the way down to it's stop, fill with the required level of fluid ( using something like the tool I made to get the right level, and the reassemble the spring and miscellaneous parts that came out of the tube during disassembly. With my progressive forks, I ended up placing the tighter wound portion of the fork towards the bottom, even though Hyperpro instructions stated to have them at the top. My BMW CD stated to have them towards the bottom, and in talking to the service manager at Gateway BMW, it seems that it really doesn't matter which way they are installed. So we will see how they work out in the next couple of months, eh?
Once you've reassembled the forks to the bike and installed the wheel, tighten the top fork retaining bolts, leaving everything just snugged up, point the front wheel forward and vigorously pump the forks up and down three or four time, and then without moving anything, torque all remaining bolts down. As a very last check, don't forget to reinstall the ABS line into your wheel, before test riding, as it can be a bit expensive, ($104.00) to replace. (Don't ask me how I came about this knowledgeable information...:-(...)


Anyway, that's about all there is to it, and for me, another mystery unveiled about how to care for my trusty steed! Hope this helps someone else to tackle this task, as it really was a simple operation once I got into her and gained some confidence....
Ride well!

The reason that the tighter wound part of the spring is to be at the top is because that is less unsprung weight. The bottom part of the spring has the most motion going over bumps.
 
Time to reassemble!
Once you've checked the lower bushing for any damage, your ready to put everything back together. Start the reassemble in reverse order that you took her apart. When installing the dampening rod in the lower fork assembly, don't forget to install the stop onto the dampening rod once it goes through hole in the upper fork tube.
Now is the time to hand start the bolt at the bottom of the fork (with a new sealing washer) and hand tighten to keep your fork oil from coming out when you refill your fork. We found that if you insert the fork spring into the fork temporarily, it will give you just enough torque to keep the fork dampener from turning while trying to tighten.
Now your ready to install the slide bushing, intermediate ring, sealing ring etc, in the order in which they came apart. The slide bushing was a bit hard to get started, but once pinched together, it slid in quite nicely. The intermediate ring easily slides on and the your ready for the sealing ring. Place a piece of Saran Rap over the top of the fork and slide the ring on.

I purchased a Motion Pro 41 mm, (the 800 is a 43 mm) seal driver but found that it was not thin enough at the bottom of the tool to fit into the space between the inner and outer fork tube, so I couldn't drive the seal down with it.
So I would suggest a different driver or make one up yourself. I ended up placing the old fork seal on top of the new seal, and then using the Motion Pro driver to push the seal in. I had to drive almost fully in, then pick out the old seal, place the keeper circlip ring on and drive the old seal once again to get it deep enough for the circlip to engage. No big deal, but would have been better if the driver would have had a thinner shoulder at the bottom. Here's a pic. of using the old fork seal on top of the new seal to drive it down.
Once the seal and clip was installed the rest is easy pesie. Push the upper fork all the way down to it's stop, fill with the required level of fluid ( using something like the tool I made to get the right level, and the reassemble the spring and miscellaneous parts that came out of the tube during disassembly. With my progressive forks, I ended up placing the tighter wound portion of the fork towards the bottom, even though Hyperpro instructions stated to have them at the top. My BMW CD stated to have them towards the bottom, and in talking to the service manager at Gateway BMW, it seems that it really doesn't matter which way they are installed. So we will see how they work out in the next couple of months, eh?
Once you've reassembled the forks to the bike and installed the wheel, tighten the top fork retaining bolts, leaving everything just snugged up, point the front wheel forward and vigorously pump the forks up and down three or four time, and then without moving anything, torque all remaining bolts down. As a very last check, don't forget to reinstall the ABS line into your wheel, before test riding, as it can be a bit expensive, ($104.00) to replace. (Don't ask me how I came about this knowledgeable information...:-(...)


Anyway, that's about all there is to it, and for me, another mystery unveiled about how to care for my trusty steed! Hope this helps someone else to tackle this task, as it really was a simple operation once I got into her and gained some confidence....
Ride well!

Install the lightest part of the spring at the bottom, as it reduces the unsprung weight.
 
Question about leak at the wiper seal on front shock tube for 2012 F800R wi low miles

This is a great thread and shows all the innards of a similar looking shock system. Thanks for posting.

I recently noticed a small leak of shock oil from my left shock tube. Maybe a few milliliters of oil leaked out the top of the lower leg, and flowed down the lower leg of the shock tube. I luckily noticed it before it got onto the brakes. Bike is stored inside and has only 3,000 miles, is driven infrequently. There is no sign that more oil than this has leaked from the shock (I can see where it flowed in the dust! Shocks have no boots on this model).

Question: Can I repair this leak by simply replacing the top wiper seal, draining and refilling the shock oil?.

See my answer in you other post.
 
Great, thanks Paul. I have a volunteer dropping in to the house from the Upper Peninsula,(Beemer UP club) next week on the way to the Kansas City BMW Club dinner, so I'll press him into helping in exchange for housing....:) It's an added benefit to meeting new friends at the MC rallies and opening your home to them as they pass through your area, eh! I think I have everything else figured out for the upgrade, along with some new fork gaiters for the final product, so looking forward to learning something new again about motorcycle maintenance. Never was much of a mechanic other than changing oil and air filters on cars, so this is a new challenge that has taken me much too long to step up to..... Never too old to learn something new.....

Any chance you could share information (possibly including a picture of them installed) on said gaiters? When I had my F650GS's forks out 3 or 4 years ago, I couldn't find any gaiters that would work well. The only ones I could find binded and crimped in use. I removed them and used some Triumph deflectors instead but I'd really prefer gaiters. I assume the 700's forks are similar enough to the 650's. Someone please correct me if I'm wrong.

JP
 
This is a great thread and shows all the innards of a similar looking shock system. Thanks for posting.

I recently noticed a small leak of shock oil from my left shock tube. Maybe a few milliliters of oil leaked out the top of the lower leg, and flowed down the lower leg of the shock tube. I luckily noticed it before it got onto the brakes. Bike is stored inside and has only 3,000 miles, is driven infrequently. There is no sign that more oil than this has leaked from the shock (I can see where it flowed in the dust! Shocks have no boots on this model).

Question: Can I repair this leak by simply replacing the top wiper seal, draining and refilling the shock oil?.

Find some very thin and stiff plastic and slide it down the tube into the lower seal, and it may dislodge what ever is causing the leak. After complet and cleaned up, treat the tube with RainX original, and it will help keep the bugs from sticking so hard. Wipe and clean forks often. I have 160,xxx miles and still on original seals. F650gs. 2009
 
Any chance you could share information (possibly including a picture of them installed) on said gaiters? When I had my F650GS's forks out 3 or 4 years ago, I couldn't find any gaiters that would work well. The only ones I could find binded and crimped in use. I removed them and used some Triumph deflectors instead but I'd really prefer gaiters. I assume the 700's forks are similar enough to the 650's. Someone please correct me if I'm wrong.

JP

Fork gaiters are specific to the F700 from Wunderlich. Tried some cheapie a at first but didn't fit very well. They have some great clamps too, however, I didn't know auto them at that time and have made do with tie straps.
 
Back
Top