Navigation
Install the app
How to install the app on iOS
Follow along with the video below to see how to install our site as a web app on your home screen.
Note: This feature may not be available in some browsers.
More options
-
Welcome, Guest! We hope you enjoy the excellent technical knowledge, event information and discussions that the BMW MOA forum provides. Some forum content will be hidden from you if you remain logged out. If you want to view all content, please click the 'Log in' button above and enter your BMW MOA username and password. If you are not an MOA member, why not take the time to join the club, so you can enjoy posting on the forum, the BMW Owners News magazine, and all of the discounts and benefits the BMW MOA offers?
-
Beginning April 1st, and running through April 30th, there is a new 2024 BMW MOA Election discussion area within The Club section of the forum. Within this forum area is also a sticky post that provides the ground rules for participating in the Election forum area. Also, the candidates statements are provided. Please read before joining the conversation, because the rules are very specific to maintain civility.
The Election forum is here: Election Forum
You are using an out of date browser. It may not display this or other websites correctly.
You should upgrade or use an alternative browser.
You should upgrade or use an alternative browser.
Another one of those rebuild stories R50/5
- Thread starter barrettnjones
- Start date
-
- Tags
- rebuild
barrettnjones
New member
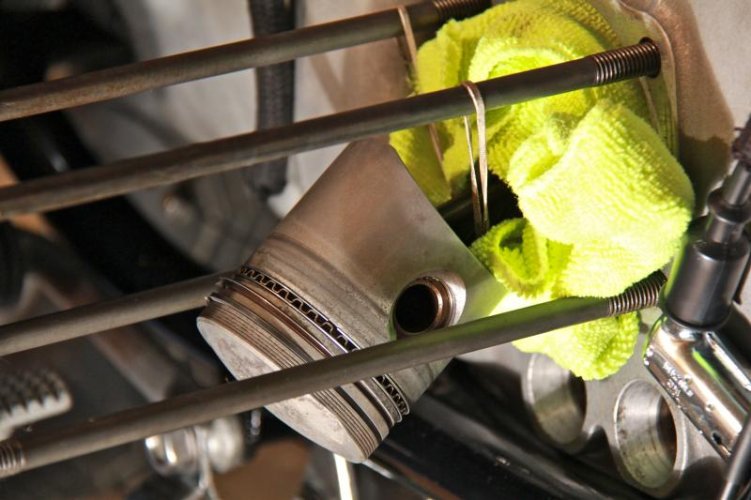
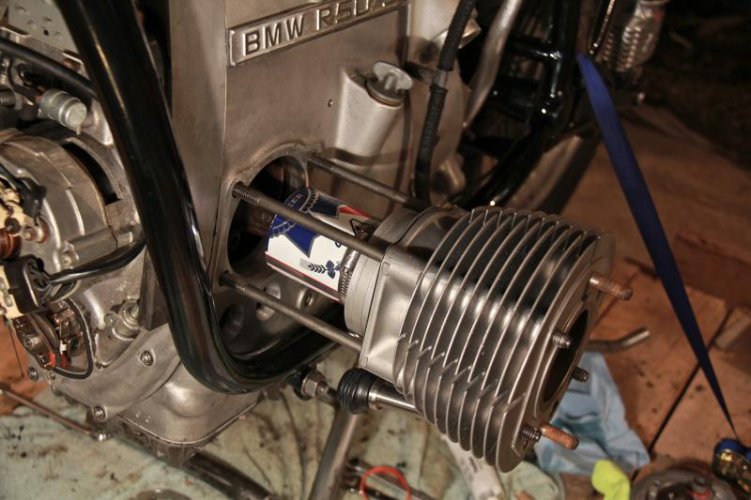
I'm having trouble getting that last ring compressed enough to slide the piston back in the jug. I've read on the interwebs that some have used the metal straps that hold the driveshaft boot on to compress the ring enough. My pistons are too small for that strap.
??????
Suggests would be helpful oh wise MOA community.
??????
Suggests would be helpful oh wise MOA community.
Attachments
I'm sure they make a large enough garden variety hose clamp that will do the same job. I recall reading that Duane Ausherman talked about a technique for using the fingers to squeeze the rings in while using the knee to slide the piston on. It's just necessary to get the ring to a minimum diameter so that the chamfer of the cylinder takes care of sliding it home.
Any base sealant on that? I think it's customary to use some even if you have the earlier type shims.
Any base sealant on that? I think it's customary to use some even if you have the earlier type shims.
barrettnjones
New member
Any base sealant on that? I think it's customary to use some even if you have the earlier type shims.
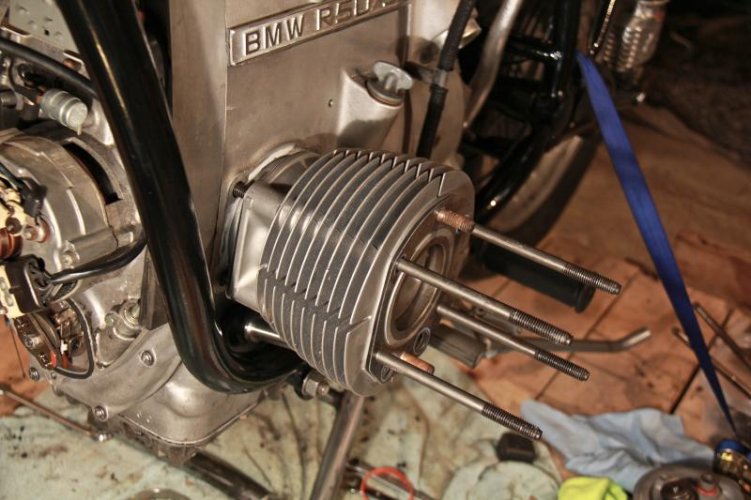
Thanks for the tip. My fingers just rant doing it for that last ring. My Clymer manual suggests a 'ring compression clamp.' Well isn't that nice, another special tool. I'll just have to check out the old hardware store for the garden variety clamp.
As for sealant I've got some Threebond to lightly smear in the engine casing.
Because of the year model of my /5 ('72) am I correct in thinking that not only was there not a big O-ring at the base of the jug but also an absence of the two top rubber gaskets that go at the base of the two top studs?
Any other suggestion about how to compress that final ring would be welcomed.
Attachments
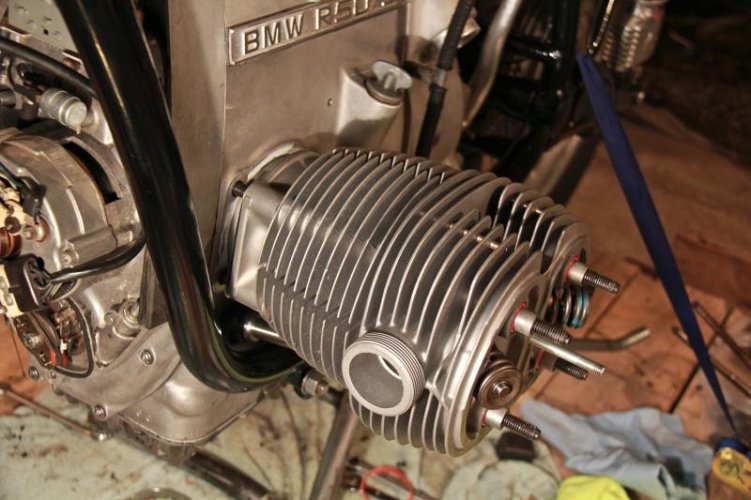
Here's a pic of tapered ring compressor. Looks like you've got the gapless 2nd ring and the three piece oil ring. Hard to finger those into the cylinder. Possible to jury rig something similar, but considering time and material, it's usually cheaper to buy or borrow. You're doing a great job.
Attachments
typ181r90
Superkraut
I used my fingers to get that last ring through, it's a pain in the ass, but you can do it. I've heard of people using popsickle sticks to do the work in place of your fingers, but I've never had to go that route.
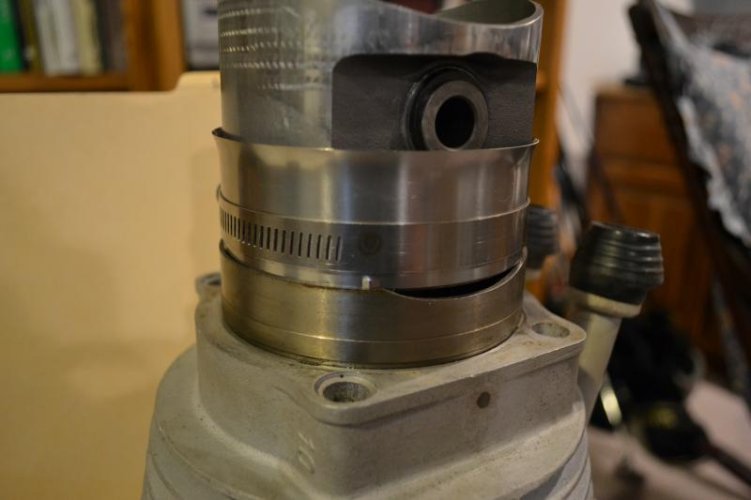
If you're feeling up to it, cut open a soda can and turn it into a sheet, take that sheet and wrap it around the piston, then take a large hose clamp (or you can even just use a wire tie to tighten the aluminum if it's all you have around) and compress that sheet over the piston rings- cheap, homemade ring compressor
If you want to buy a ring compressor they're not that much more complicated and are still fairly cheap
By the way I love this thread. This is what owning a vintage bike is all about - wrenching on it yourself, learning, and backyard engineering. I've told people that I've been inside my R90 so often it's now romantic. If anything ever happens to the bike on a ride, you'll know where to look and how to fix it on the side of the road, can't say that about a guy who just pays someone else to build him a clone bike
barrettnjones
New member
How quickly can you get it in the mail?it's usually cheaper to buy or borrow.
barrettnjones
New member
Thanks for the tips and the praise!I've told people that I've been inside my R90 so often it's now romantic.
I know the feeling. My girlfriend has named my bike, "mistress"!
barron_williams
Monza Blue 1974 R90/6
Try using the pointy ends of two chopsticks (one in each hand) to push the ring gap closed and push the cylinder in with your stomach.
Barron
Barron
barrettnjones
New member
barrettnjones
New member
barrettnjones
New member
barrettnjones
New member
BimmerCrab
New member
About the rockers...
The various shop books describe using an alignment jig. I don't have an alignment jig, and don't even see any around.
Is it needed, or does one just line those things up and bolt 'em on?
The various shop books describe using an alignment jig. I don't have an alignment jig, and don't even see any around.
Is it needed, or does one just line those things up and bolt 'em on?
I've seen pictures of the jig...like a fancy "H". I would think that taking care and getting them aligned well should be sufficient. An important aspect is that the pushrod needs to move in and out such that it doesn't come close the walls of the tube. I believe it moves back and forth across the tube...you should be able to see the motion as you rotate the engine. Another aspect is that you have three parts with flat sides on them...the upper and lower pillow blocks and the rocker itself. So, it would seem important that these flat sides should be aligned parallel to each other as well as aligned in the same plane as the opposite rocker arm. Otherwise, you'll get binding and/or noise during operation.
barrettnjones
New member
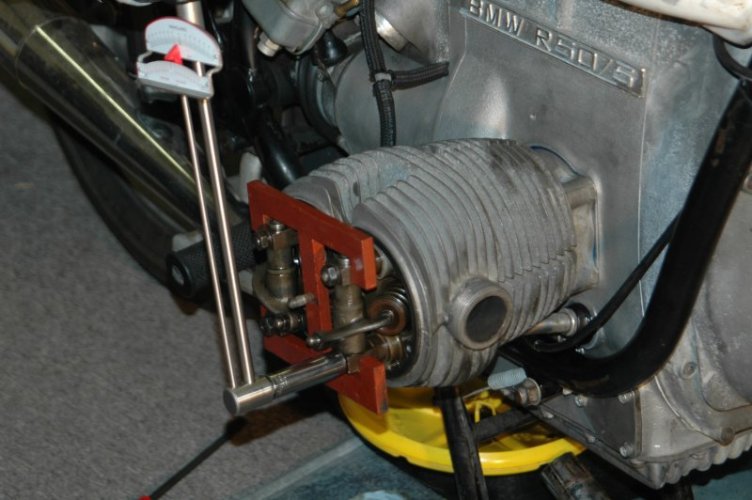
Good call on that alignment. I found a page on-line that explains this process with the intent of changing the Push Rod Seals. Here's an image of that special H tool, that I don't own.
Is it possible for the layman to eyeball alignment keeping the push rods clear of the tubes without the special tool?
http://www.pbase.com/dqmohan/prtseals
Is it possible for the layman to eyeball alignment keeping the push rods clear of the tubes without the special tool?
http://www.pbase.com/dqmohan/prtseals
Attachments
88bmwjeff
SF Bay Area
I have no experience doing this, but Duane Ausherman has a procedure for using a large pair of channel lock pliers instead of the jig. It appears so at least.
http://w6rec.com/duane/bmw/valve/index.htm
http://w6rec.com/duane/bmw/valve/index.htm
I have no experience doing this, but Duane Ausherman has a procedure for using a large pair of channel lock pliers instead of the jig. It appears so at least.
IIRC, Duane's info is how to squeeze the pillow blocks together while tightening the rocker nuts...this minimizes the up-down movement of the rocker arm during operation. The red jig shown in the diagram is used for alignment in several directions to keep the rocker arms parallel and square to the head.
88bmwjeff
SF Bay Area
IIRC, Duane's info is how to squeeze the pillow blocks together while tightening the rocker nuts...this minimizes the up-down movement of the rocker arm during operation. The red jig shown in the diagram is used for alignment in several directions to keep the rocker arms parallel and square to the head.
FWIW, Duane has this to say about BMW's rocker alignment tool, which looks identical to the red jig shown previously.
The factory supplied rocker arm alignment tool. It came in another version and both are completely worthless
barrettnjones
New member
Valve adjustment isn't too bad once you wrap your head around it.
It appeared the flywheel would make one complete revolution while one piston would complete three cycles. And when the OT mark would come back around again you had to pay attention to which piston is at TCD on the compression stroke.
These were my observations based only on the logic my brain came up with and I don't claim them to be scientific at all. If there is a better way of explaining it with more accuracy and/or clarity please post below.
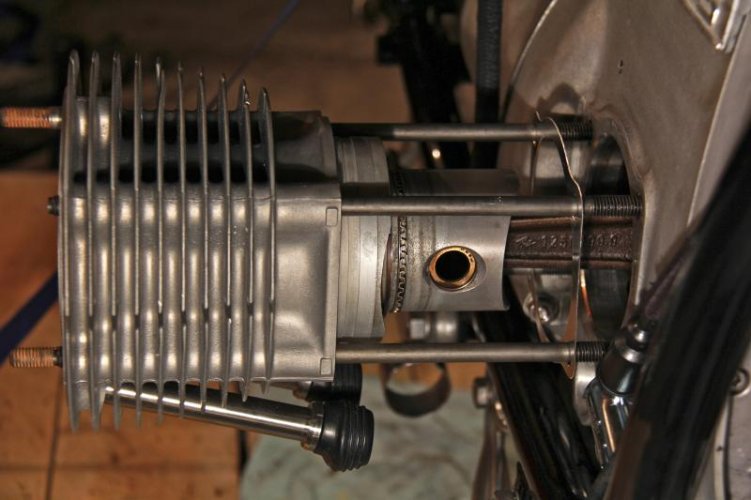
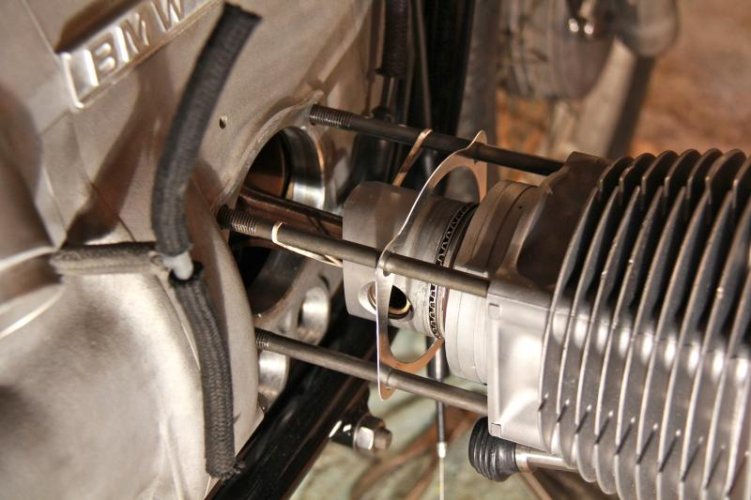
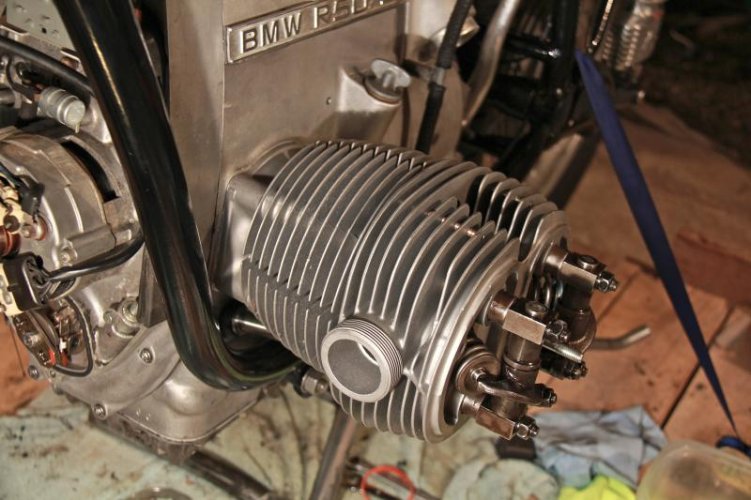
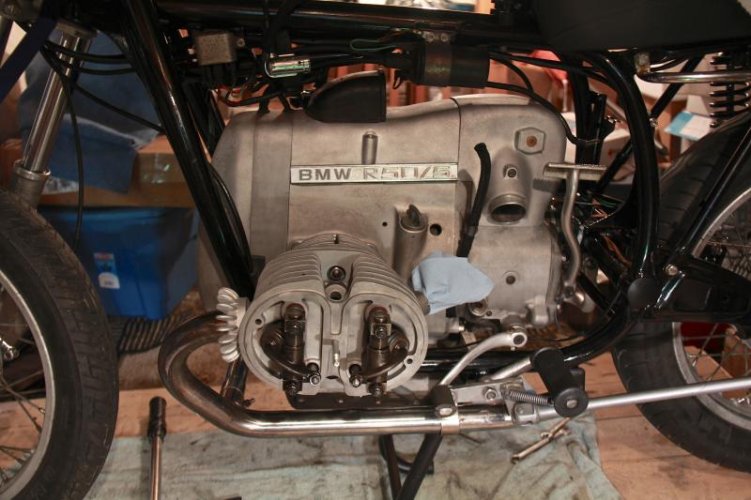
So as you can see the headers are on. I bought them off eBay about three months ago. They are used but in vastly better condition than the originals. I've also installed a factory center stand. Also purchased months ago from one of you, fellow MOA members, along with a Brown's side stand. I don't like the look of the ride off center stand so it will be featured in the lot of all the other parts I'll be selling.
Question: Which way does the battery install? Positive on the left or right. Of all the things to not notice when pulling it apart......
It appeared the flywheel would make one complete revolution while one piston would complete three cycles. And when the OT mark would come back around again you had to pay attention to which piston is at TCD on the compression stroke.
These were my observations based only on the logic my brain came up with and I don't claim them to be scientific at all. If there is a better way of explaining it with more accuracy and/or clarity please post below.
So as you can see the headers are on. I bought them off eBay about three months ago. They are used but in vastly better condition than the originals. I've also installed a factory center stand. Also purchased months ago from one of you, fellow MOA members, along with a Brown's side stand. I don't like the look of the ride off center stand so it will be featured in the lot of all the other parts I'll be selling.
Question: Which way does the battery install? Positive on the left or right. Of all the things to not notice when pulling it apart......
Attachments
Similar threads
- Replies
- 3
- Views
- 299